Building a Hackintosh on ROG STRIX Z490-G GAMING using OpenCore.
| Name | Version |
|---|---|
| macOS | 13.2.1 |
| OpenCore | 0.8.9 |
| AppleALC | 1.8.0 |
| Lilu | 1.6.4 |
| NVMeFix | 1.1.1 |
| VirtualSMC | 1.3.1 |
| WhateverGreen | 1.6.5 |
| Part | Model | Comments |
|---|---|---|
| CPU | Intel Core i9-10850K | Remove power limit, OC to 5.0 GHz |
| MOBO | ASUS ROG Z490G | Non Wi-Fi Version |
| RAM | G.Skill Trident Z Royal 16G*2 4000 MHz C18 | OC to 4400 MHz C18-24-24-44 |
| GPU | AMD RX 6800 | Support from macOS 11.4 onwards |
| Storage 1 | Sandisk Ultra 2TB | Used for OS installation and dualboot |
| Storage 2 | Hikvision C2000 Pro 1TB | Used for Time Machine |
| PSU | Corsair SF750 Platinum | |
| Wi-Fi Card | Fenvi T919 | Fenvi card, no kexts needed |
| Function | Status | Comments |
|---|---|---|
| USB | ✅ | See USB mapping section |
| Ethernet | ✅ | Using Apple's I225LM driver |
| Wi-Fi | ✅ | Need to add Wi-Fi card |
| Bluetooth | ✅ | Need to add Wi-Fi card |
| AirDrop, Handoff, Universal Clipboard | ✅ | Need to add Wi-Fi card |
| Hardware Acceleration | ✅ | Using AMD Hardware Acceleration, see Hardware Acceleration section |
| DRM | ✅ | Using AMD Hardware Acceleration |
| Sleep | ✅ | Need to use mouse to wake up |
| USB-C on dGPU | ✅ | For data transmission, XHCI-AMD6800.kext is needed, see USB-C section |
| Universal Control | ✅ | Tested with MacBook Pro 14-inch |
Although this mobo has a version with the built-in Wi-Fi card, it's CNVi based which means we cannot swap it. Since it's a MATX board, we can add one PCIe Wi-Fi card.
There are quite limiting choices for a fully-support PCIe Wi-Fi card:
| Chipset | Model |
|---|---|
| BCM94360CD | Fenvi FV T919 (Bluetooth 4.0) Fenvi AC1900 (No Bluetooth, EOL) TP-LINK Archer T9E AC1900 (No Bluetooth, EOL) TP-LINK Archer T8E (No Bluetooth) RNX-AC1900PCE (No Bluetooth) ASUS PCE-AC66 (No Bluetooth) ASUS PCE-AC68 (No Bluetooth) |
| BCM94360CS2 | Fenvi FV-HB1200 (Bluetooth 4.0) AWD Wireless LAN Card (No Bluetooth) |
| BCM94352 | TP-LINK Archer T6 (No Bluetooth) Rosewill RNX-AC1300PCE (No Bluetooth) ASUS PCE-AC56 (No Bluetooth) |
Fenvi T919 is the best card among the bunch since it has 3 antennas for Wi-Fi and one for Bluetooth.
Although lack of 802.11ax (Wi-Fi 6) support, 3 streams MIMO together with 80MHz and 400ns GI make its maximum speed to 1.3 Gbps, above 2 streams MIMO 80MHz Wi-Fi 6's 1.2 Gbps speed found on the new Apple Silicon MacBook Pros.
If you're not using a Fenvi card, then you'll need two more kexts for it to work:
- BrcmBluetoothInjector
- BrcmFirmwareData
- BrcmPatchRAM3 for 10.14+, paired with BrcmBluetoothInjector
You need to put the required kexts in OC/Kexts. After that, run File -> OC Snapshot in ProperTree and choose your OC folder so the new kexts will be loaded.
Note that some of the legacy cards may need patch in macOS 12, try to avoid them if you can.
By default macOS will load AppleEthernetE1000 (Apple's DEXT driver) for I255-V, however, this kext will cause kernel panic on my board once the ethernet cable is plugged (Maybe works for you) . Therefore, we have to force loading AppleIntelI210Ethernet.kext in OpenCore using bootarg e1000=0. macOS Ventura dropped AppleIntelI210Ethernet.kext, so we will add it as well.
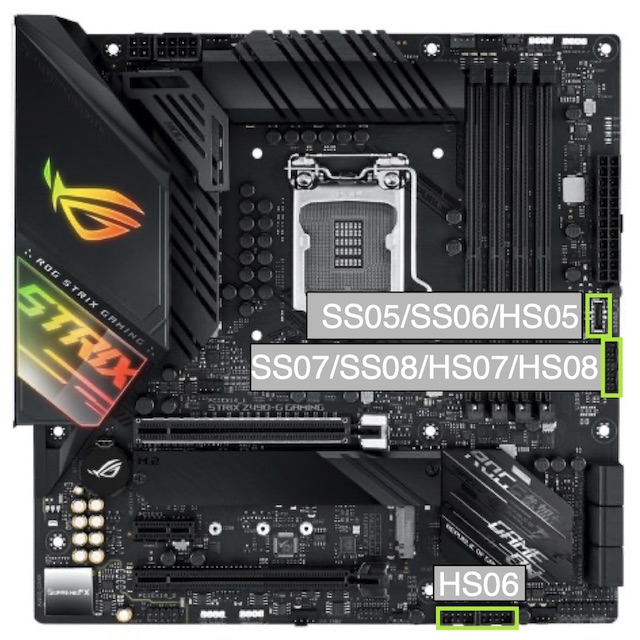
This motherboard has several USB ports and they're defined as the following:
For my personal use, I mapped SS03-04, SS07-08, SS09-10, HS11-12, and HS06 for Bluetooth due to the 15 ports limitation in macOS.
If you want to change the mapping, make your own USBMap.kext and replace the one in the OC/Kexts folder.
Few things need to be taken care of in the BIOS.
| Setting | Value |
|---|---|
| Fast Boot | Disable |
| Secure Boot | Disable |
| VT-d | Disable |
| CSM | Disable |
| Intel SGX | Disable |
| VT-x | Enable |
| Above 4G decoding | Enable |
| Hyper-Threading | Enable |
| XHCI Hand-off | Enable |
| DVMT Pre-Allocated | 64MB |
| SATA Mode | AHCI |
| iGPU Multi-Monitor | Enable |
Note: In the newer version of BIOS, when enabling Above 4G decoding, you may enable Re-size BAR Support if your hardware supports it. However, you need to make some changes to the config.plist, check out the Re-size BAR section. Make sure you connect the monitor to the dGPU.
If you do not set hardware acceleration correctly, DRM-related content will not play. Since we're using a discrete AMD GPU here, we can make use of AMD's own hardware acceleration coder.
In the terminal, type the following commands one by one.
defaults write com.apple.AppleGVA gvaForceAMDKE -bool YES
defaults write com.apple.AppleGVA gvaForceAMDAVCEncode -bool YES
defaults write com.apple.AppleGVA gvaForceAMDAVCDecode -bool YES
defaults write com.apple.AppleGVA gvaForceAMDHEVCDecode -bool YES
These should make hardware acceleration work correctly and have no problem playing back DRM content.
With the supported hardware, you may be able to enable re-size BAR in your BIOS under the PCI subsystem configuration tab in the BIOS.
macOS has no support for re-size BAR but starting from OpenCore 0.7.5, two quirks can be used to config it so that you can enjoy re-size BAR in Windows while not breaking macOS.
Booter >> Quirks >> ResizeAppleGpuBars: reduces GPU PCI BAR size to be compatible with macOS.
UEFI >> Quirks >> ResizeGpuBars: configure the GPU PCI BAR size for systems other than macOS.
For ResizeAppleGpuBars, you want to set it to 0 if you enable re-size BAR and -1 if disable it. Other values may break macOS as discussed here.
For ResizeGpuBars, it depends on your GPU's memory. Set it to n where n is the minimal integer that makes 2^n MB greater than or equal to the video memory you have.
For example, if I have 16GB video memory, then I should set it to 14 since 2^14 = 16384MB which is basically 16GB.
By default, the USB-C port on RX 6800 only has the functionality of video output and power delivery due to the fact that macOS loads a wrong kext called AppleAMDUSBXHCIPCI.kext.
We'll use a custom kext based on XCHI-unsupported.kext called XHCI-AMD6800.kext to force macOS loads the correct kext AppleUSBXHCIPCI.kext.
This repository contains EFI based on OpenCore 0.8.9. If you're using the same mobo, then this EFI is likely working for you. But if you have different parts other than mobo, please read the following content and modify it accrodingly.
You need ProperTree to open and edit config.plist.
Since I have both iGPU and dGPU, I set it as output by dGPU and iGPU is only used for hardware accleration.
If you wish to use the iGPU as output, you'll need to change AAPL,ig-platform-id from 0300C89B to 00009B3E.
PciRoot(0x0)/Pci(0x1C,0x4)/Pci(0x0,0x0) is used for tricking Apple's I225LM driver into supporting our I225-V network controller. If this does not work on your mobo, try PciRoot(0x0)/Pci(0x1C,0x1)/Pci(0x0,0x0).
For Navi users(RX 5000/6000 series), you need to add agdpmod=pikera.
If you hate all the debug info when booting, you can also remove -v parameter but I suggest you remove it only when your hacking is up and running fine.
I left this part blank intentionally because you really need your own serial number.
To create a new serial number, you can use GenSMBIOS
As for SMBIOS, it depends on your CPU:
| SMBIOS | CPU |
|---|---|
| iMac20,1 | i7-10700K and lower (8 core and lower) |
| iMac20,2 | i9-10850K and higher (10 core) |
Using GenSMBIOS, you'll get Type , Serial , Board Serial and SmUUID
Type goes to Generic -> SystemProductName
Serial goes to Generic -> SystemSerialNumber
Board Serial goes to Generic -> MLB
SmUUID goes to Generic -> SystemUUID
TL;DR You need your own serial number and if you have a different CPU or want to use iGPU as output, you need to change a few things in config.plist
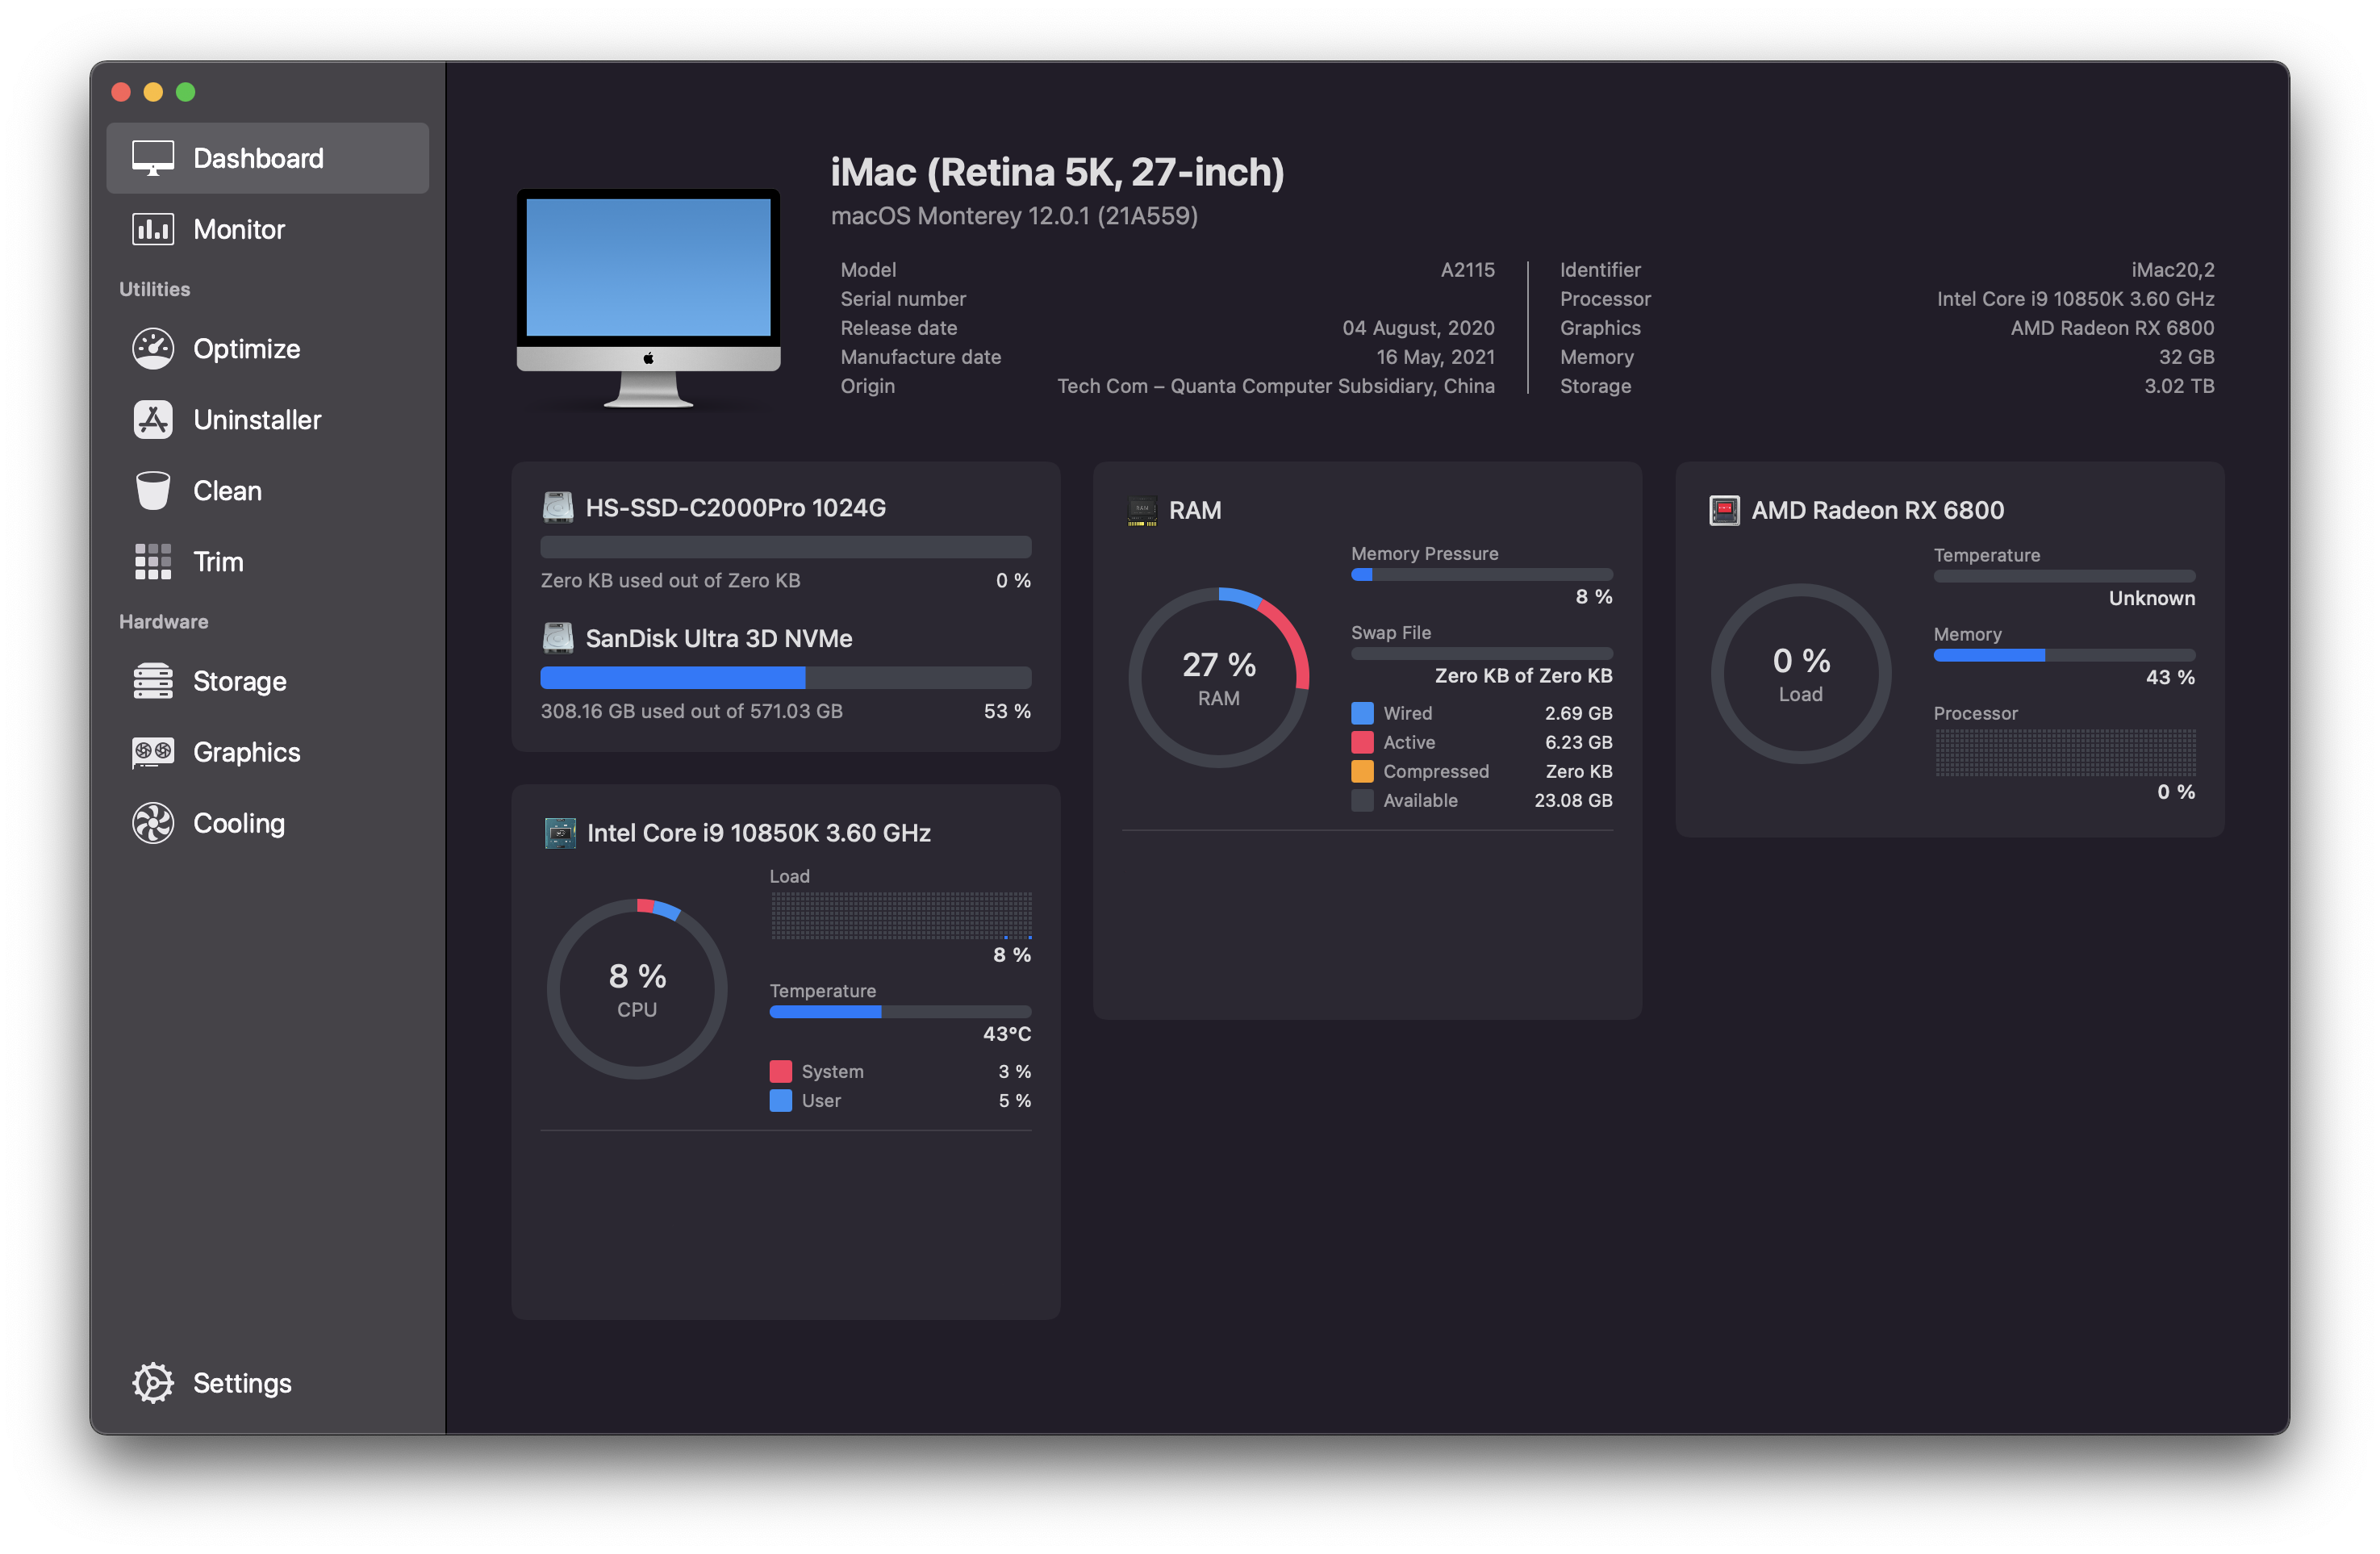
Hardware Info
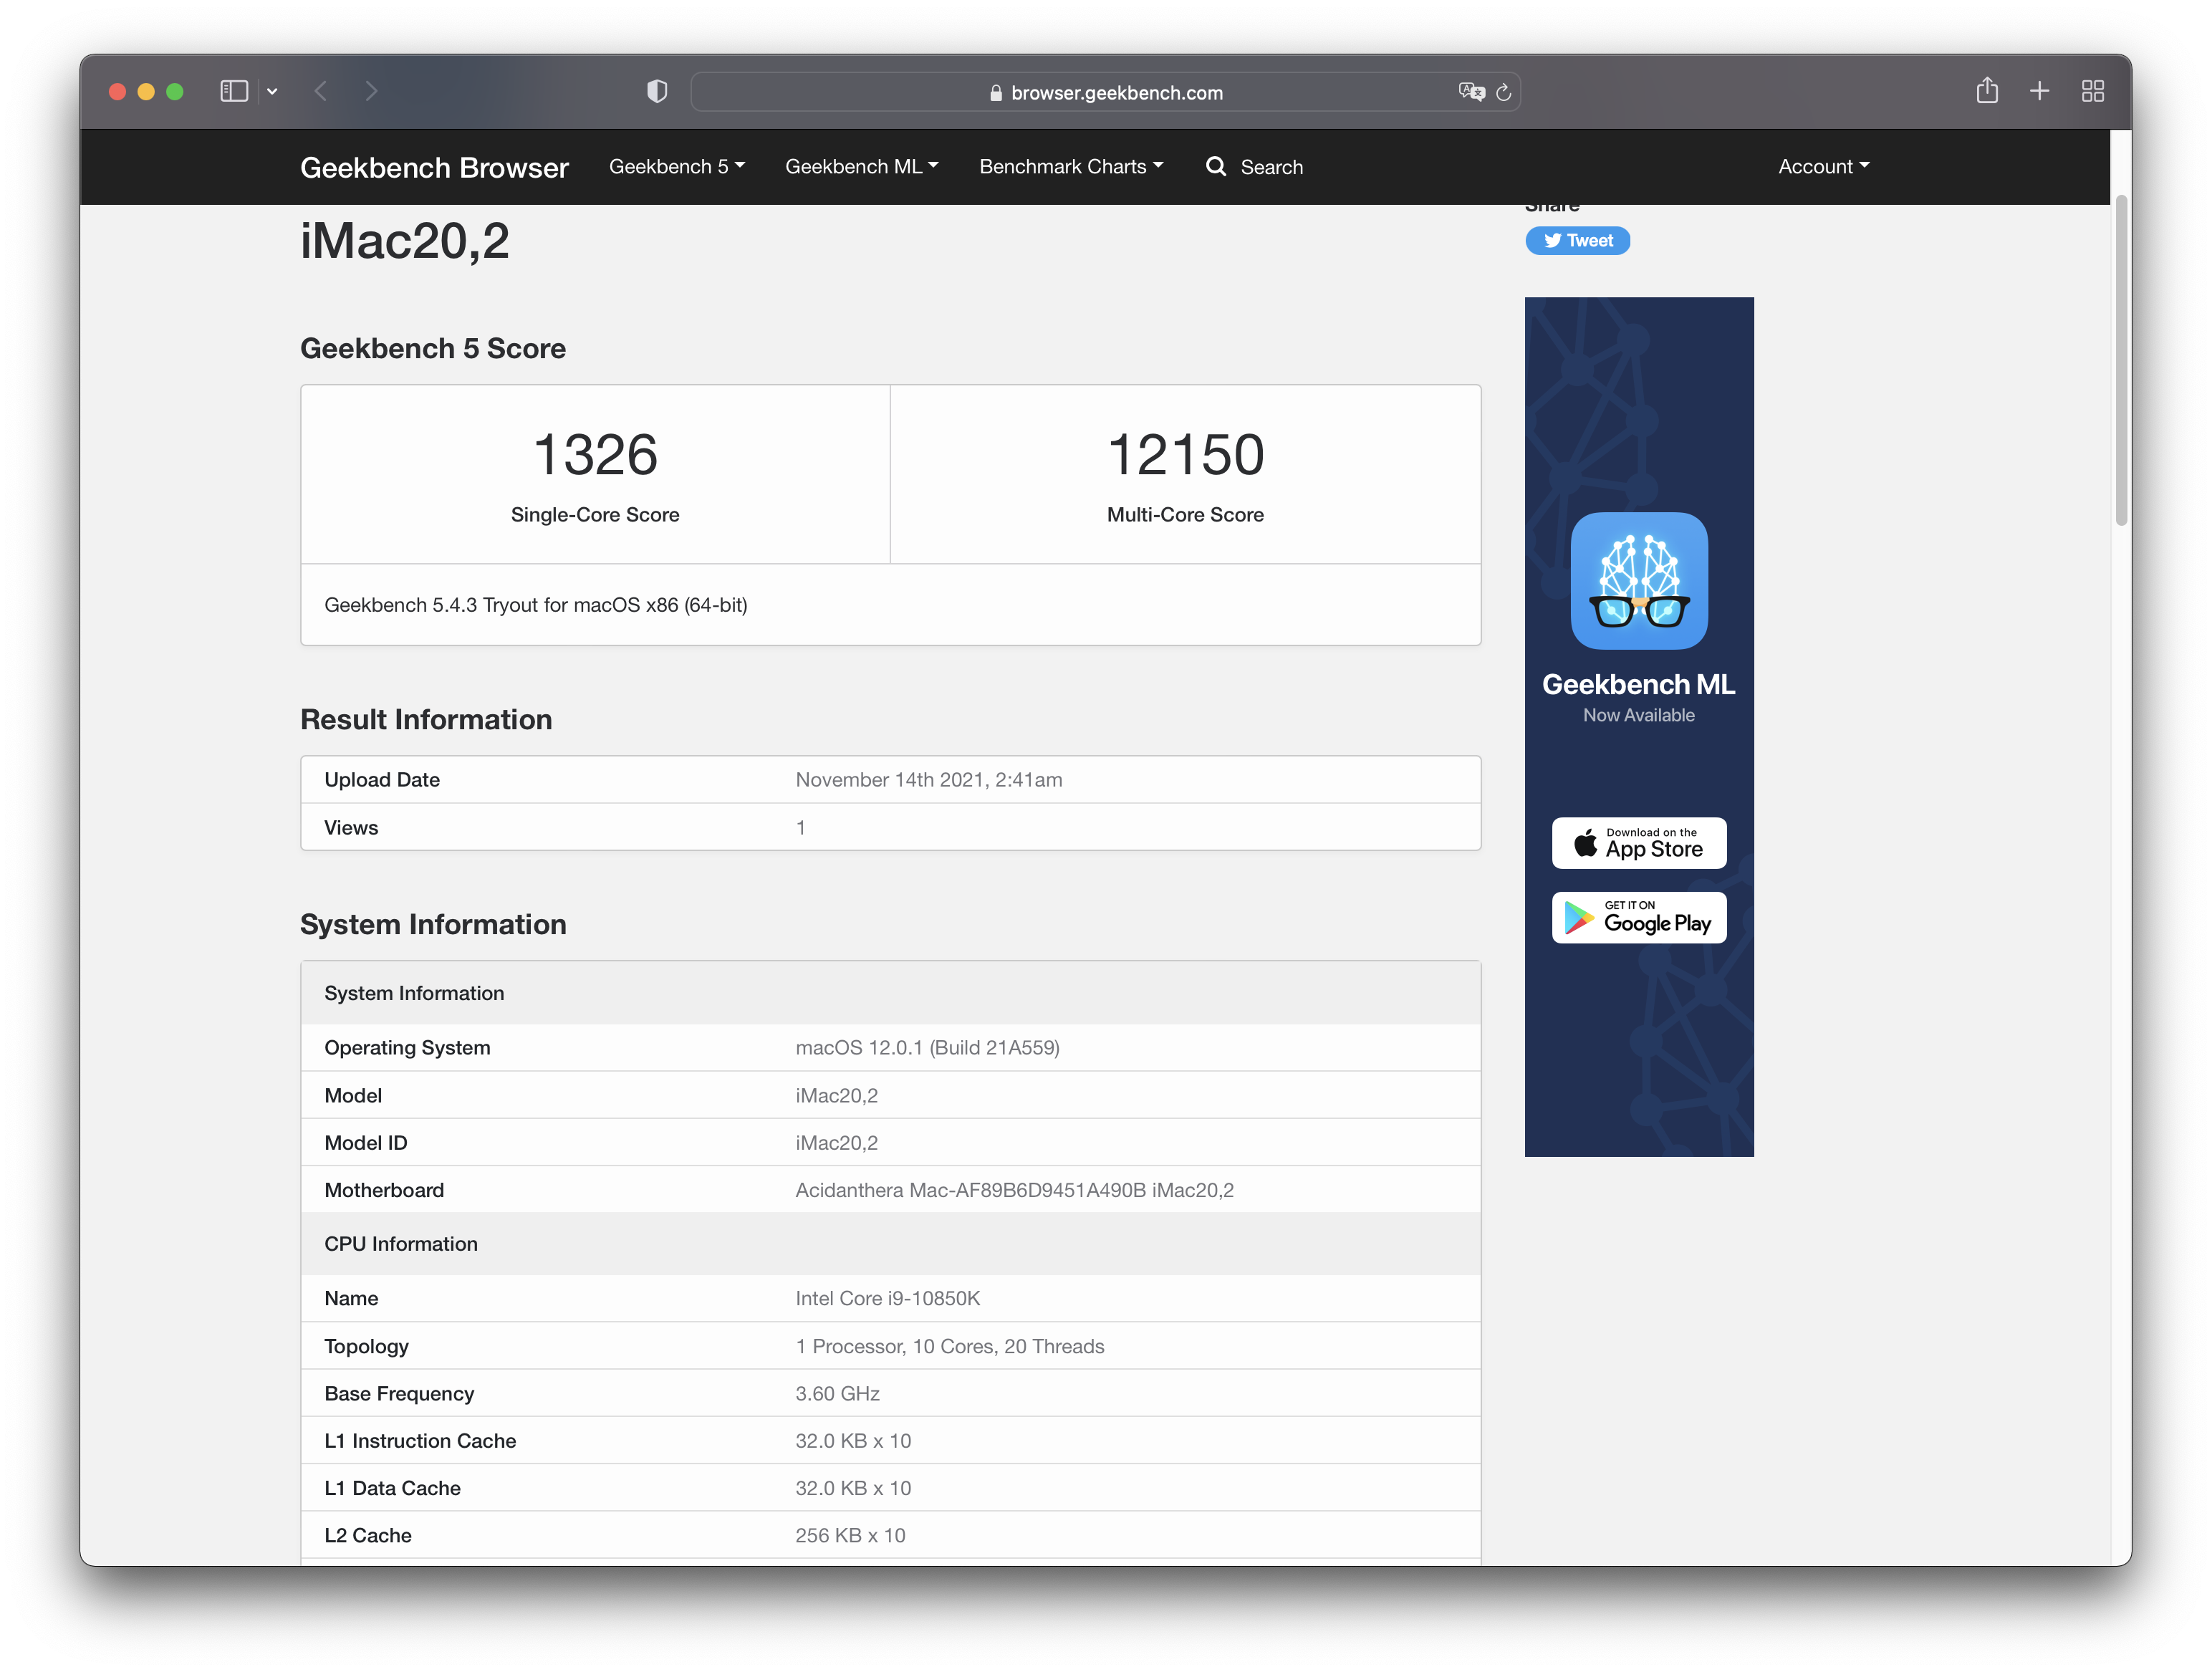
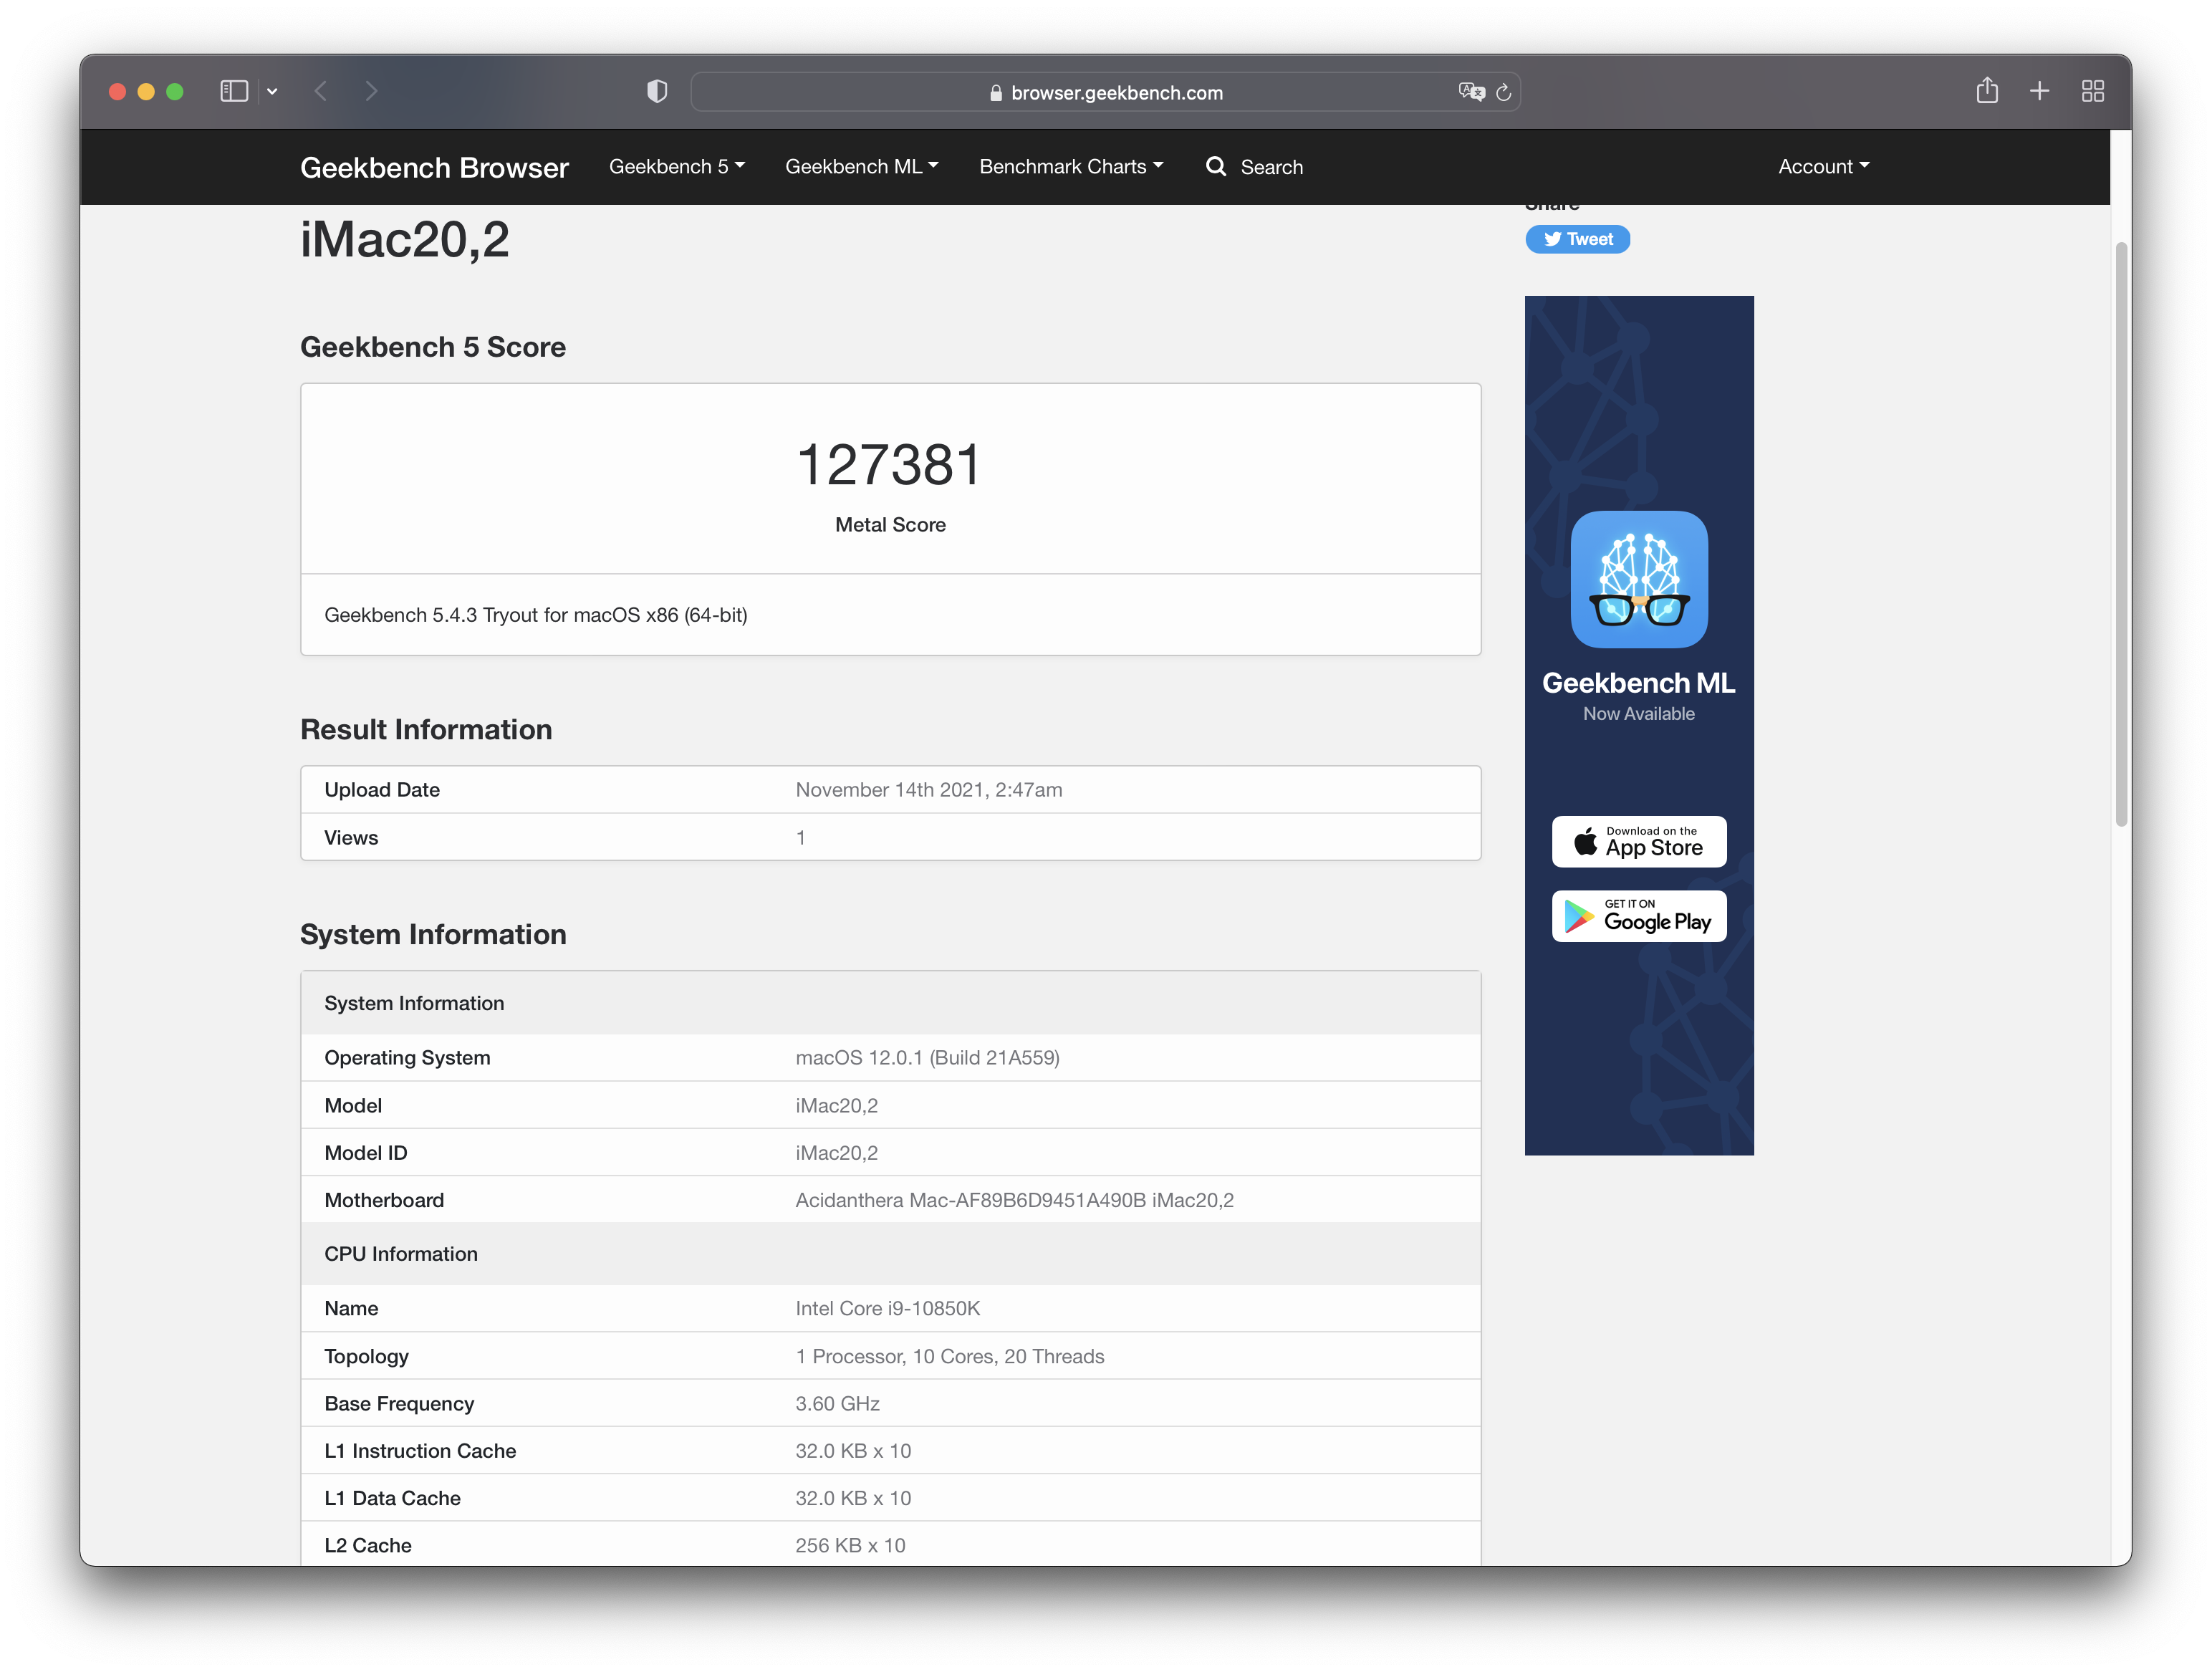
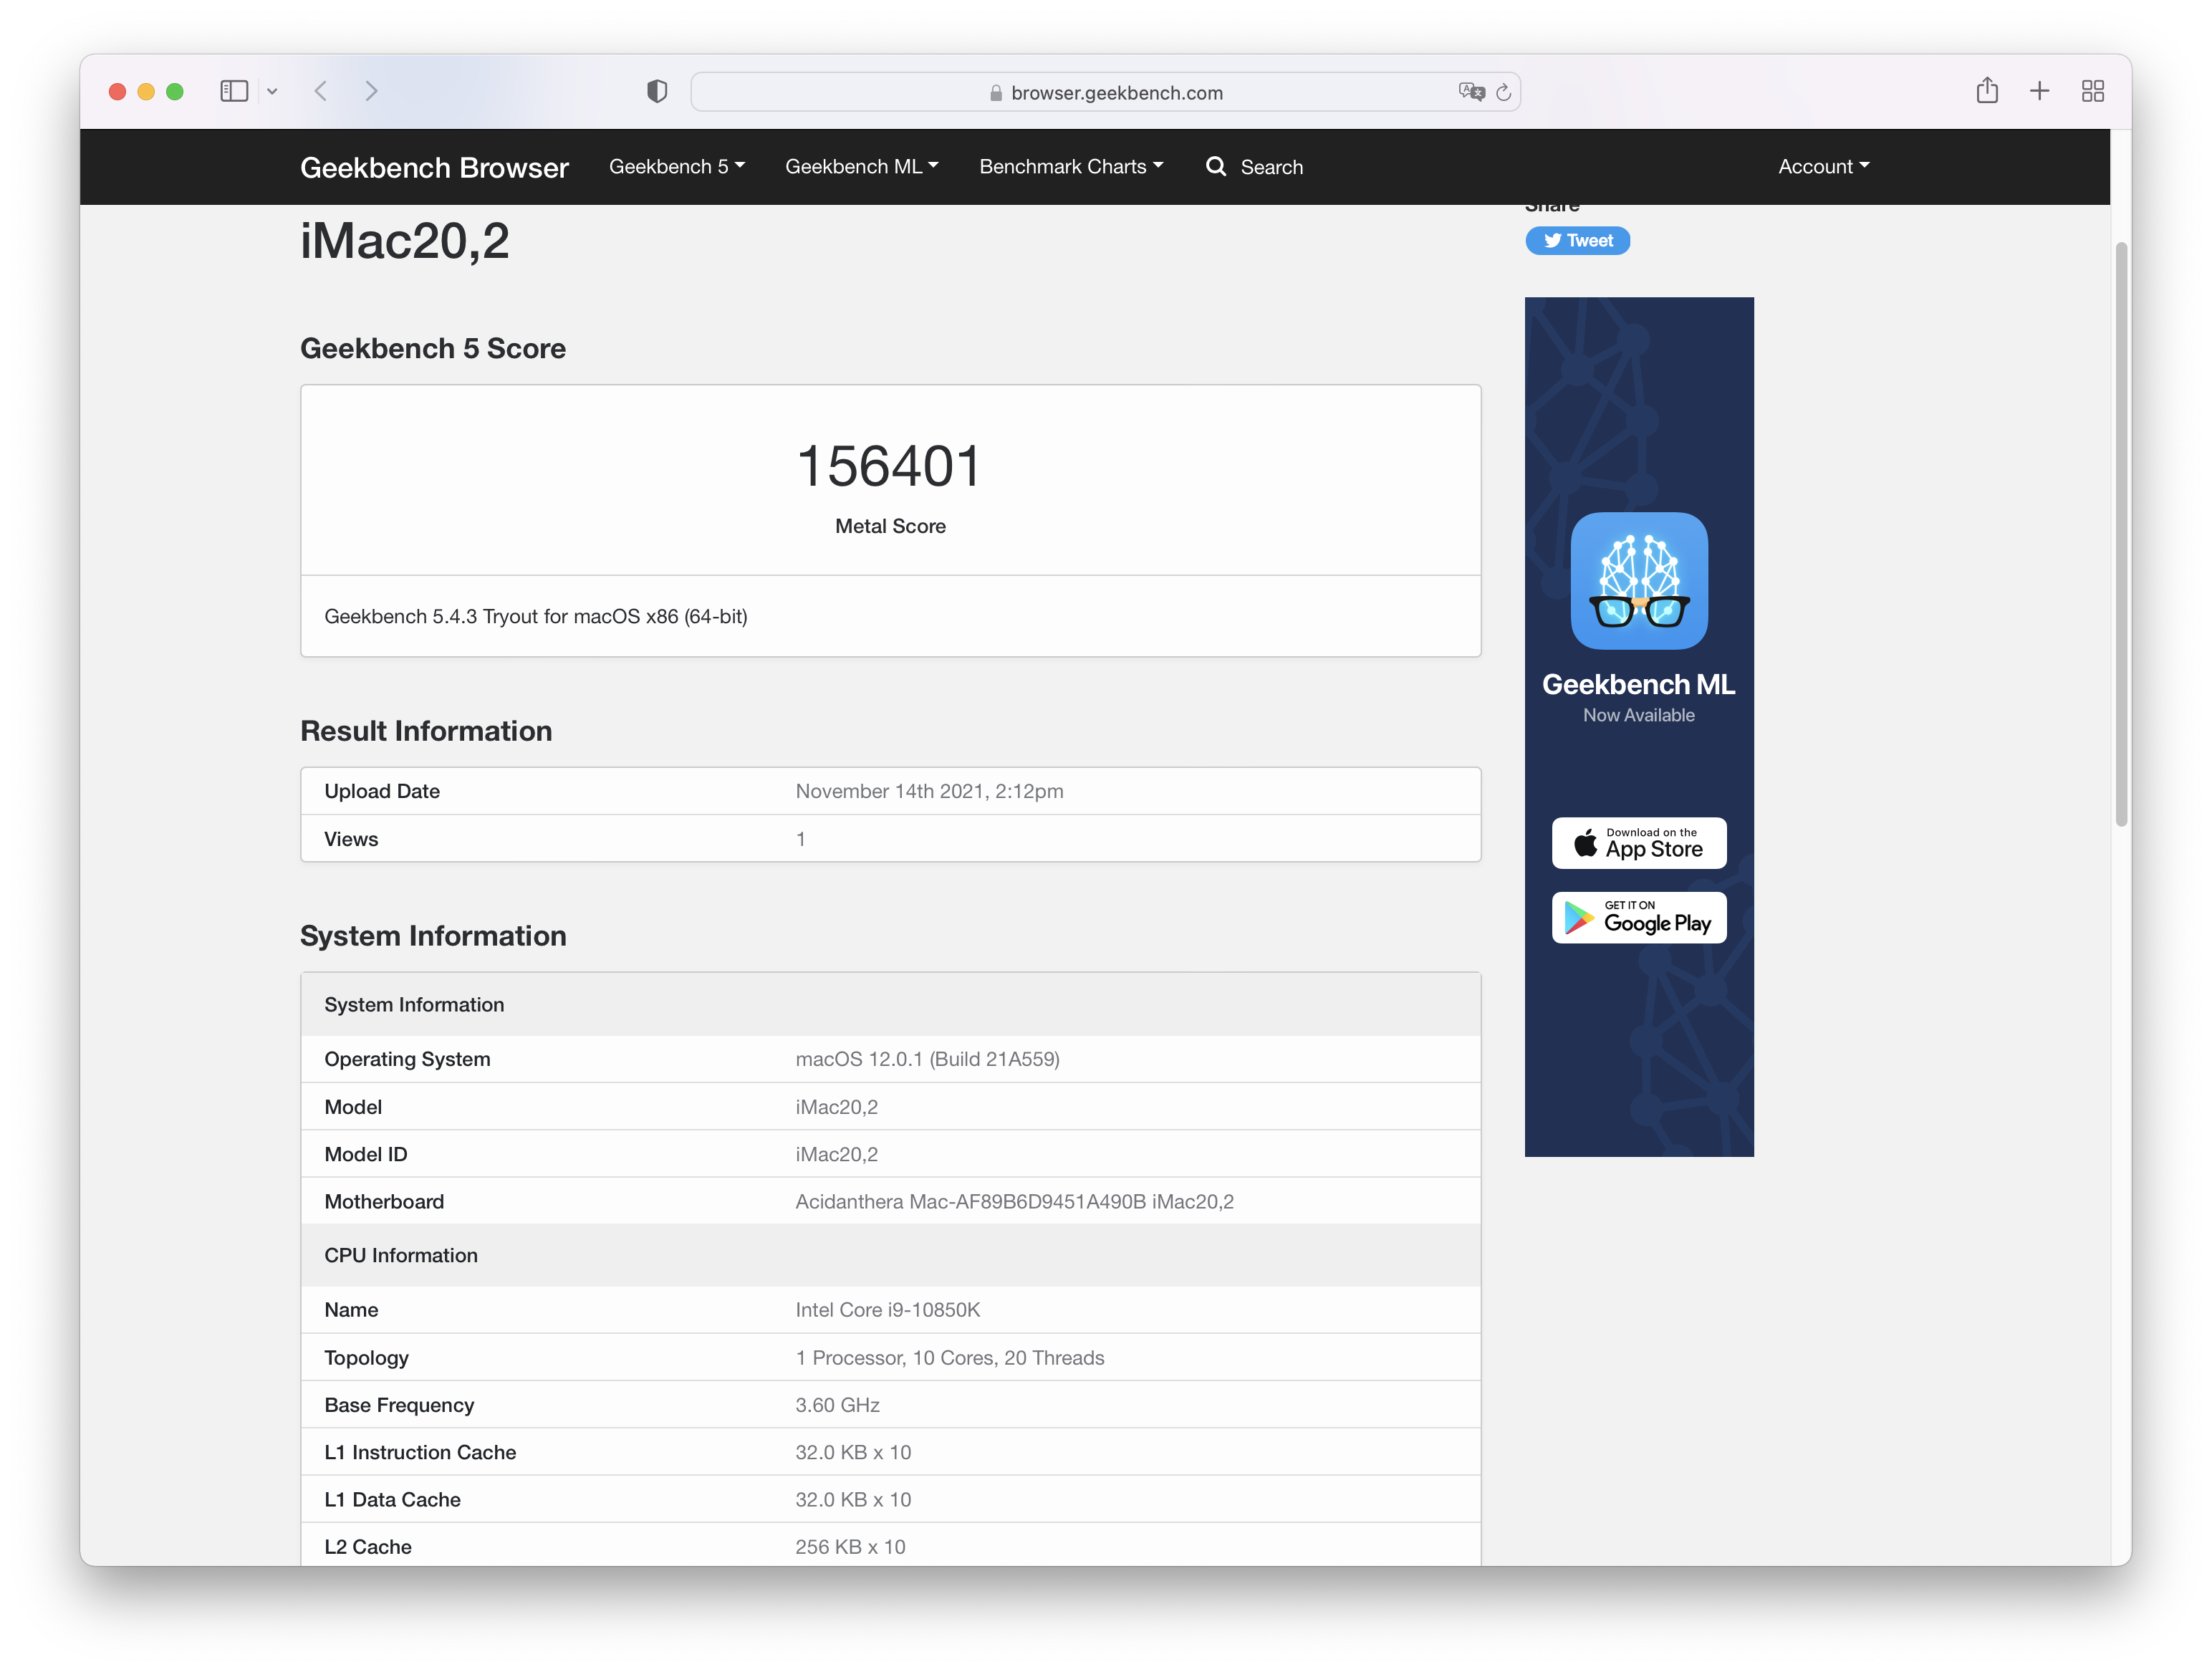
Geekbench 5
CPU Scores (M1 Max is around 1770 single and 12600 multi)
GPU Scores (Unstable due to the short benchmark period, can change from time to time)
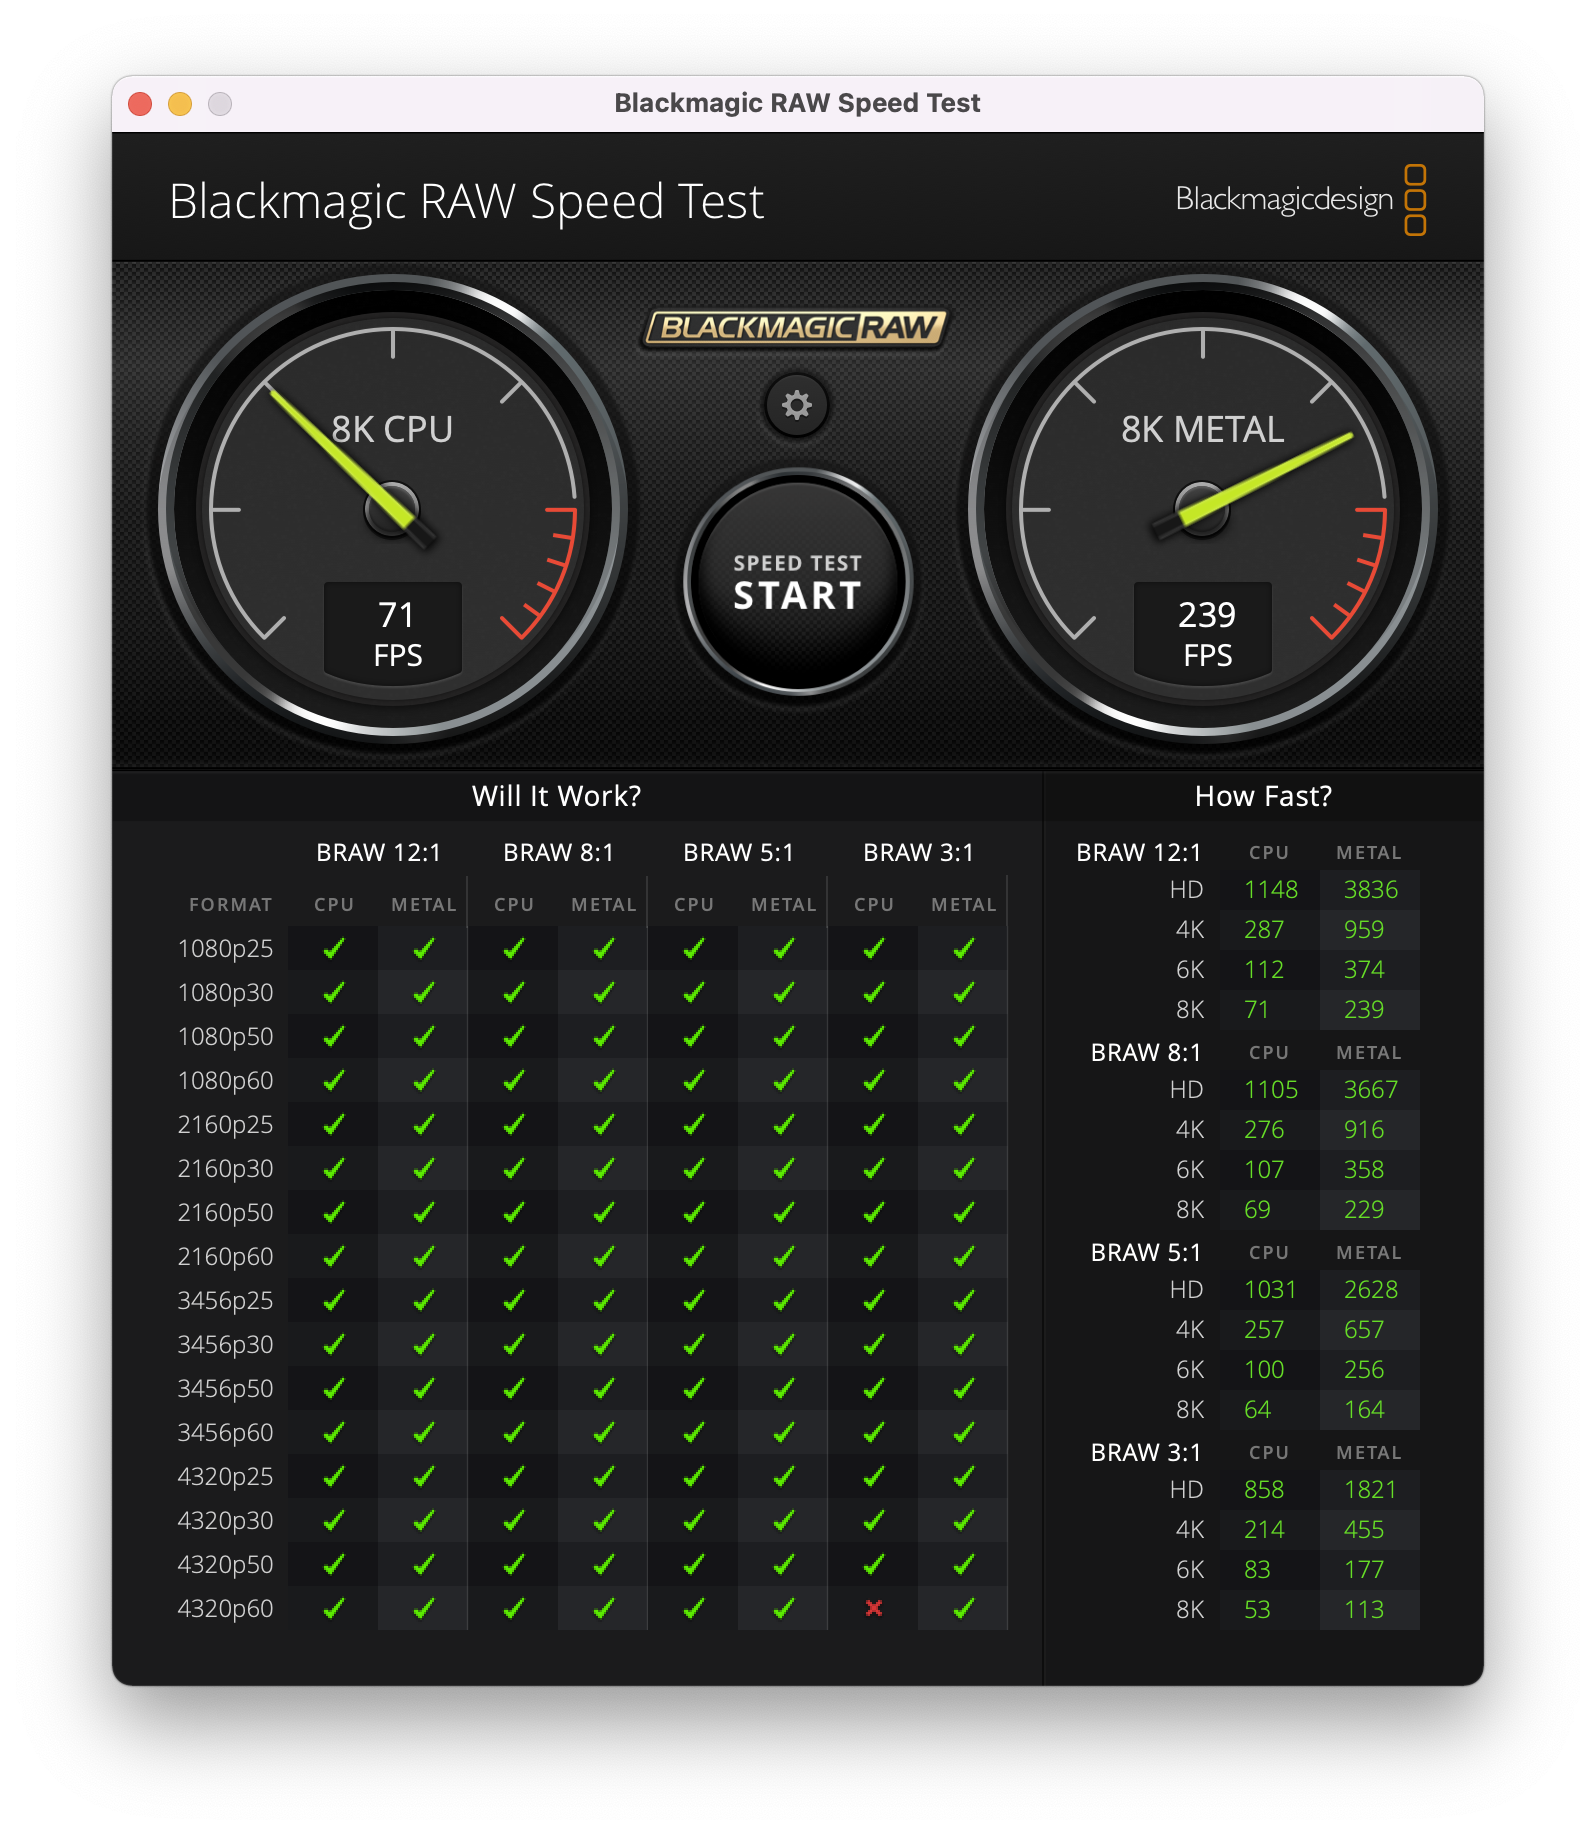
Blackmagic Raw Speed Test
