-
This is a repositry containing ansible theory and exercises
-
See the below instructions for a basic ansible set up.
-
Beyond this the ADVANCED_SETUP.md for more information about
- This includess setting up a web app and further theory such as ansible modules
-
For the theory behind see see ANSIBLE_THEORY.md
Git Bash
- This is used to access and manipulate the machines
- Download it here (alongside other git software): https://git-scm.com/downloads
Python
- This is auto installed with Git Bash and Linx often however
- This shows the simplicity of Ansible as there is minimal dependencies
- As per GitHub commands, fork then download.
vagrant up
- This may take a while on the first go
vagrant status
vagrant ssh web/aws/db
sudo apt-get update
- Run the update command for each machine
A. Install ansible (within the AWS server)
sudo apt-get install software-properties-common -y
sudo apt-add-repository --yes --update ppa:ansible/ansible
sudo apt-get update
sudo apt-get install ansible
B. Check installation
ansible --version
C. Install tree
- This is a package manager
sudo apt-get install tree
D. Examine tree
cd /etc/ansible
tree
- This will display files in user friendly way
ping 192.168.33.10
ping 192.168.33.11
- This should show bytes coming from the IPs
- However you do not have access to the servers yet
- Press ctrl + c to cancel the ping
sudo nano hosts
- Add the below text into the file
- This creates hosts for connections to other servers
[web]
192.168.33.10 ansible_connection=ssh ansible_ssh_user=vagrant ansible_ssh_pass=vagrant

[db]
192.168.33.11 ansible_connection=ssh ansible_ssh_user=vagrant ansible_ssh_pass=vagrant

# [aws]
# 192.168.33.12 ansible_connection=ssh ansible_ssh_user=vagrant ansible_ssh_pass=vagrant
ssh vagrant@192.168.33.10
-
Enter password as "vagrant".
- You will not be able to see the password entered
-
This should give you access to the machine
-
Repeat for the DB machine
ssh vagrant@192.168.33.11
ansible all -m ping
- This will ping connection to web and db
- If succesful it will display a green message saying success
- Run commands from the Anisble Controller server
ansible web -a "date"
ansible db -a "uname -a"
- Gets date and time of the web server
- Then current operating system of machine
- "-a" gets all information
ansible all -m shell -a "ls -a"
- Goes into all servers and runs command in shell (bash) format
- Returns result of command being run in each server
sudo su
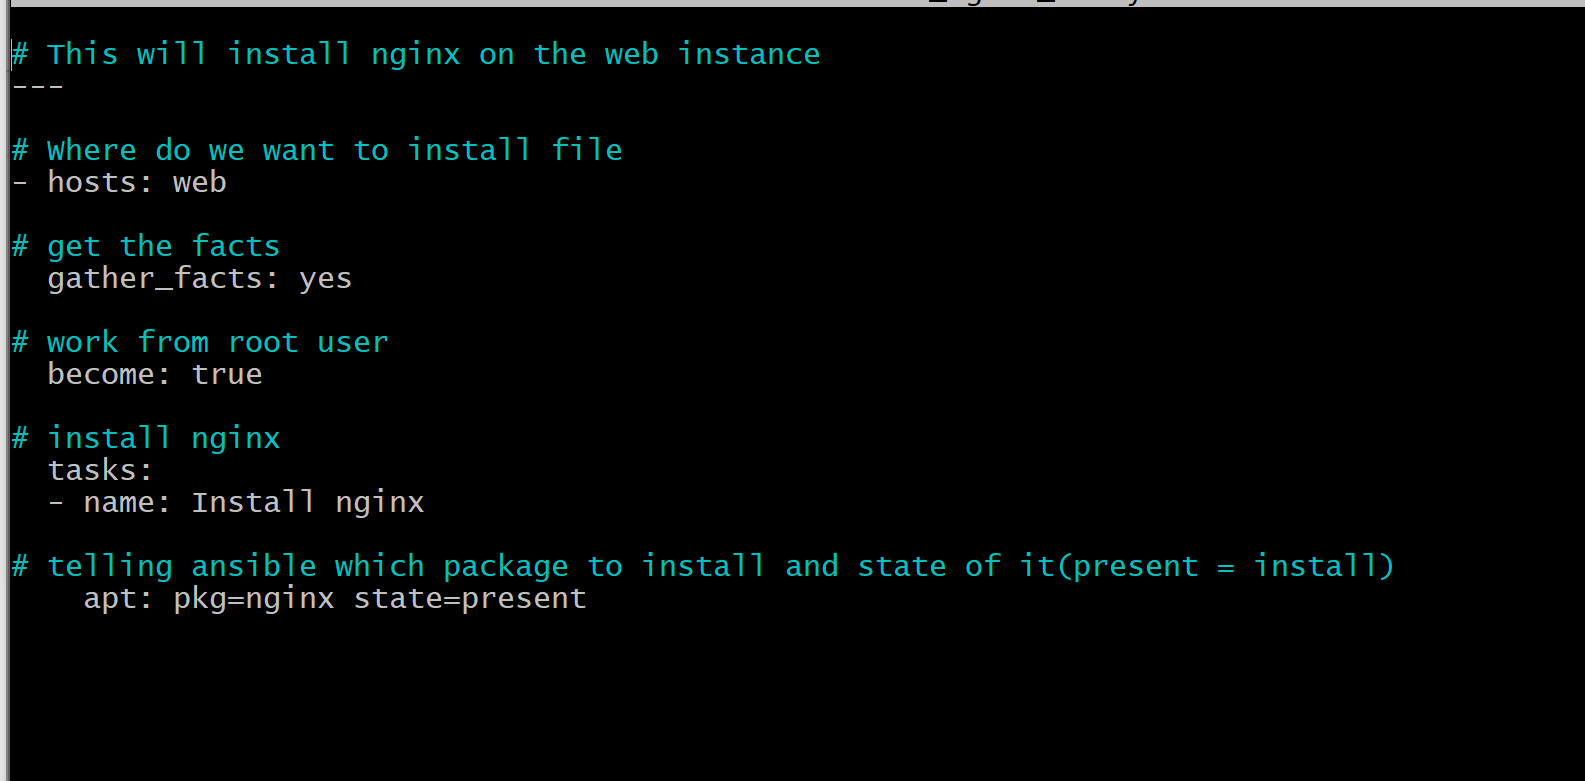
nano filename.yml
- Start file with comment, then ---
- Identation very important
- Follow example of install_nginx_web.yml
- You have to exit root mode
exit
ansible-playbook install_nginx_web.yml
- You have now install nginx on your web server and can access the nginx test page
- Use your web IP, in this case
192.168.33.10 - Input into into a browser and the nginx test page should appear
- Use your web IP, in this case

