Sophisticated online survey software
About
Limesurvey is the number one open-source survey software.
Advanced features like branching and multiple question types make it a valuable partner for survey-creation.
How to install
Repository
You may want to use the plain repository, which is also possible.
Please be advised, that we sometimes push development versions into the repository, which may not be working correctly.
Requirements
Minimal
The absolute minimal requirements are:
- Apache >= 2.4 | nginx >= 1.1 | any other php-ready webserver
- php >= 5.4
- with mbstring and pdo-database drivers
- mysql >= 5.5.3 | pgsql >= 9 | mariadb >= 5.5 | mssql >= 2005
Recommended
We recommend the following setup
- nginx 1.4.6
- php 5.6.x
- with php-fpm, mbstring, gd2 with freetype, imap, ldap, zip, zlib and database drivers
- mysql 5.5.50
Manual
for more information please refer to our homepage, or have a look at the Limesurvey manual
Licence
LimeSurvey software is licenced under the GPL 2.0.
Pictures and the LimeSurvey Logo are registered trademarks of LimeSurvey GmbH, Hamburg, Germany.
Send SMS Invitations
This plugin allows Limesurvey users to send surveys via SMS text message.
Table of Contents
- Setup
- Plugin Activation
- Go to survey
- Adding participant attributes
- Adding participants manually
- Adding participants via CSV
- Sending out surveys
- Troubleshooting
- Anonymizing Responses
Setup
This plugin allows you to send surveys via text message. In order to do this, you must download the plugin and put it in the correct directory, create a Twilio account, and activate the TextMenu plugin. Follow the following instructions to do so.
Download plugin via git clone
It is highly recommended to clone the plugin directly into the {limesurvey-instance-directory}/plugins subdirectory.
Click on the clone or download button on the public github repository (this page) and copy the github-repo-link shown under Clone with HTTPS and git clone into a directory of choice by typing
git clone {github-repo-link}
and the plugin folder SendSMSInvitations should be shown in the directory
If not cloned directly into the {limesurvey-instance-directory}/plugins/ subdirectory, this plugin folder needs to be moved to the plugins subdirectory of your Limesurvey server. This can be done via linux:
mv SendSMSInvitations {limesurvey-instance-directory}/plugins/
Download the plugin via zip
If you have cloned the repository, please feel free to skip this part.
You can also download the .zip file of the plugin from the github repo by clicking Clone or download and clicking the Download ZIP button. Afterwards, you can extract the contents of the zip folder into the plugins folder of your LimeSurvey installation.
First, download the file. Extract it into the plugins folder of your LimeSurvey installation.
Move TextMenu plugin to plugins subdirectory
In order for the plugin to work, the TextMenu subdirectory inside this repository needs to be moved to the plugins subdirectory of the Limesurvey instance. In linux, you could do this by typing
mv TextMenu {limesurvey-instance-directory}/plugins/ from inside this repository.
Verify
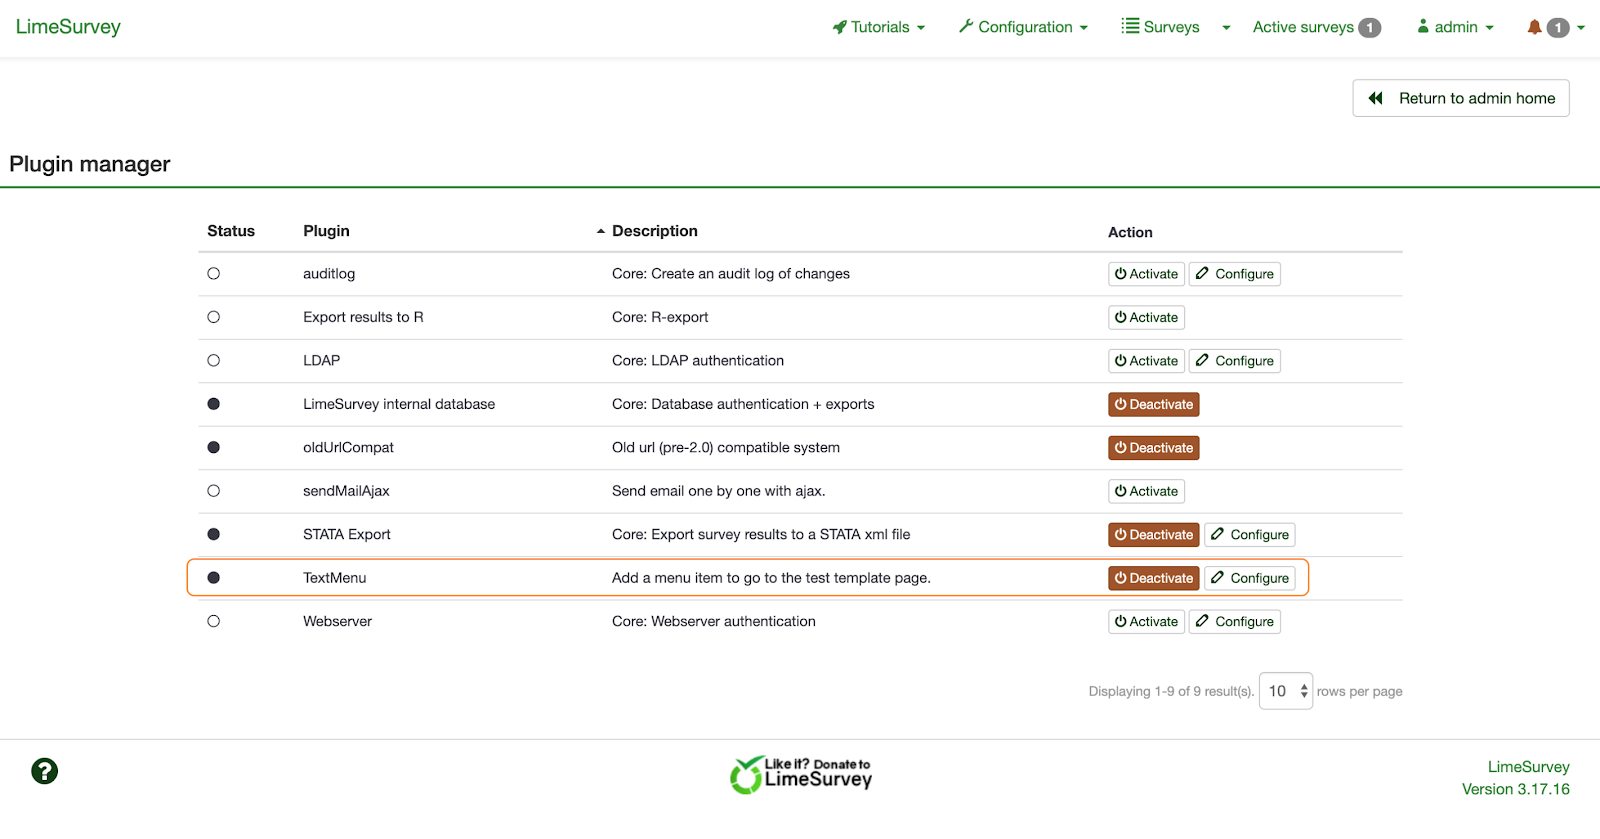
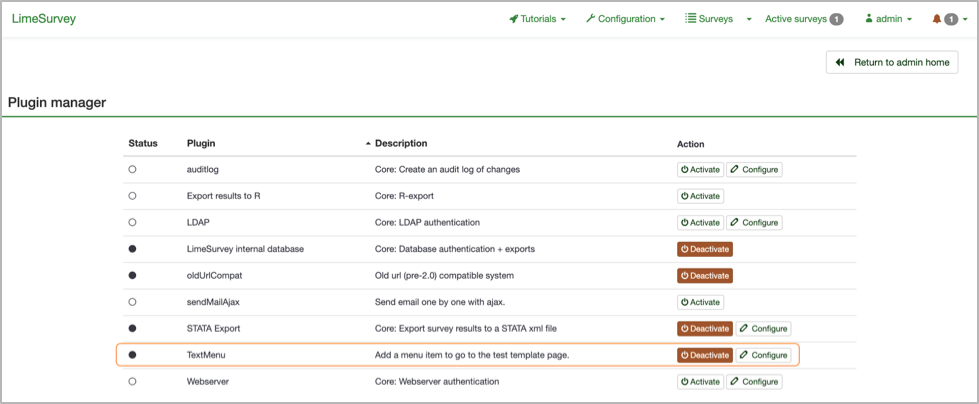
Once the plugin has been successfully exported to the plugins subdirectory, verify that the plugin is displayed in the Plugin Manager panel by:
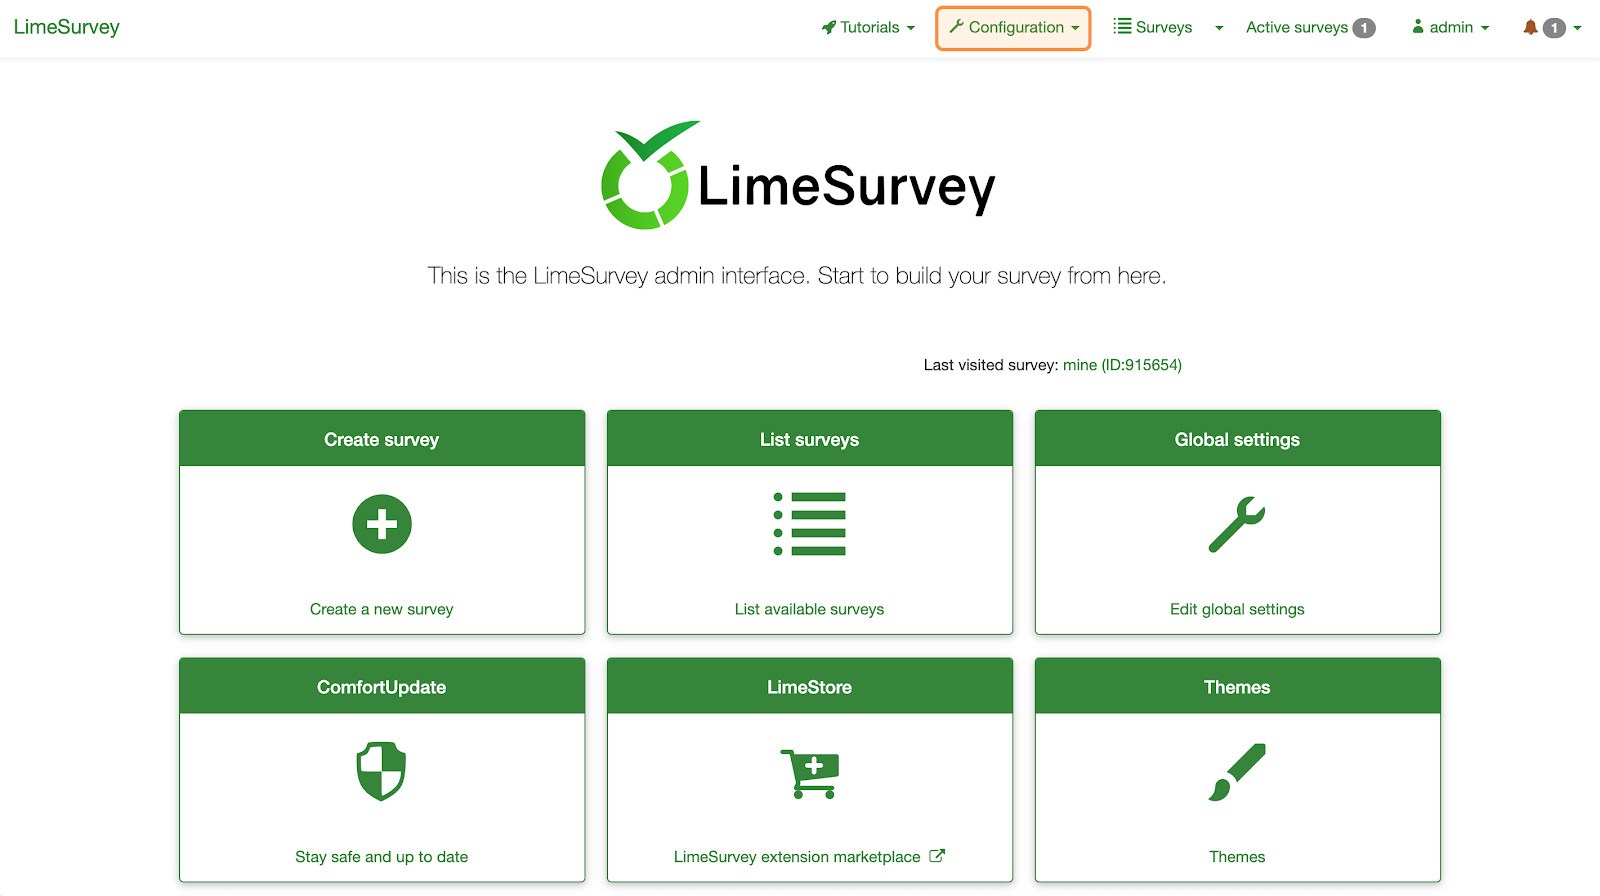
Step 1: From the home screen, click on the Configuration button in the top navigation bar.
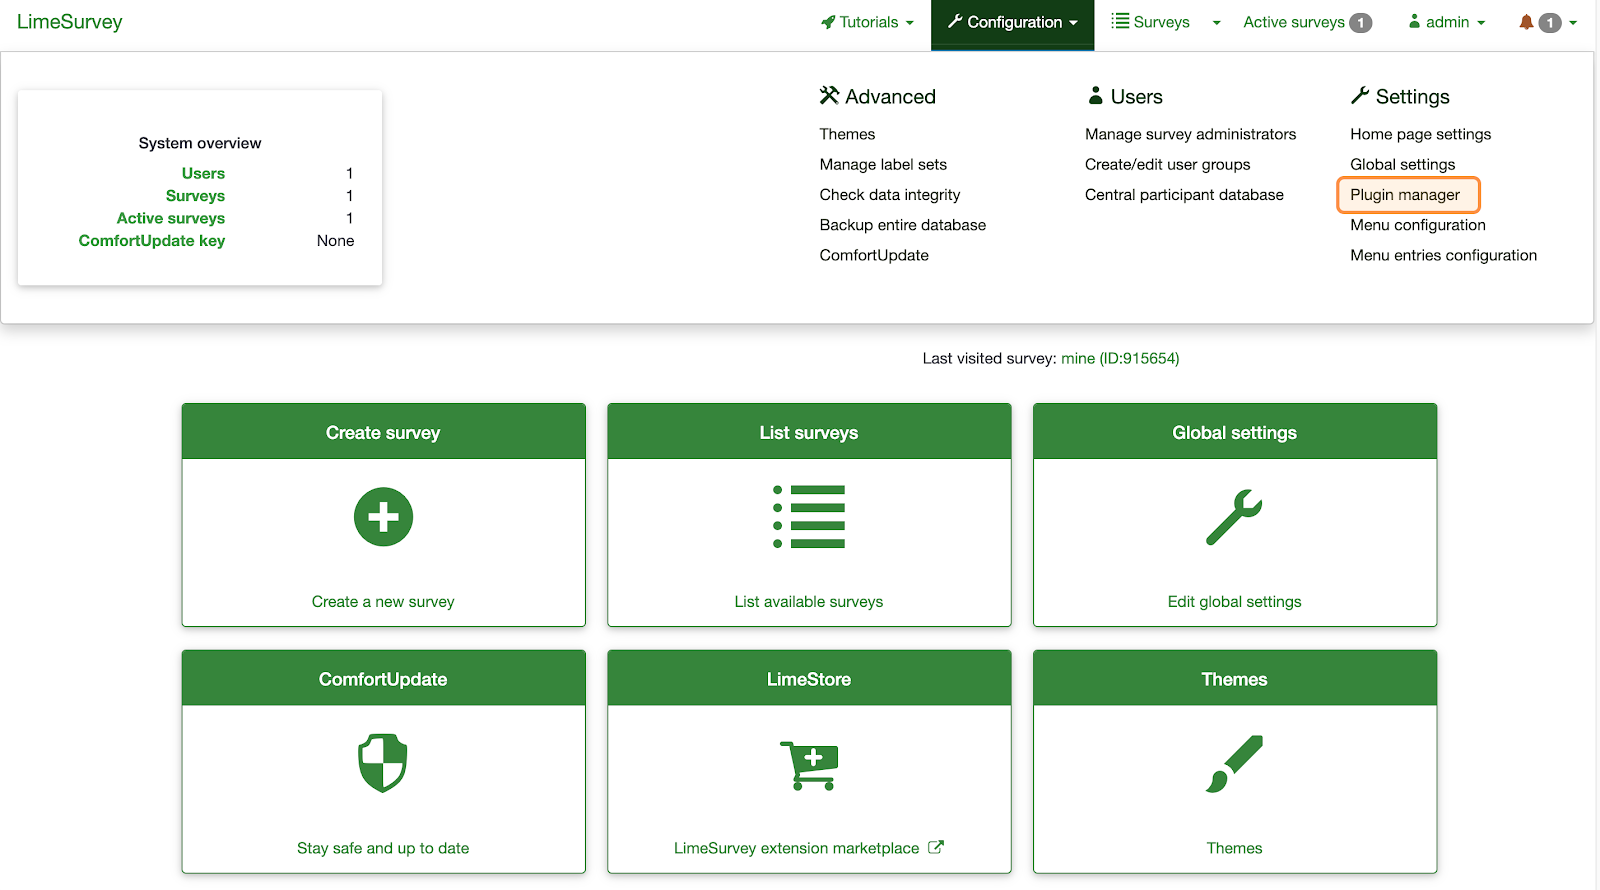
Step 2: Under Settings, click on Plugin manager.
Step 3: Make sure that the plugin called TextMenu exists in this page.
Twilio Setup
You will need to copy 3 numbers from Twilio into Limesurvey, so you might want to have a blank document or notepad open.
Step 1: Make a Twilio account. Visit https://www.twilio.com/ to begin this process.
Step 2: After creating your Twilio account, click on the Get A Trial Number button. If you don’t like the number generated, you can click Search for a different number. Otherwise, click Choose this number.
Step 3: Copy the number that was generated, save it somewhere, and click Done.
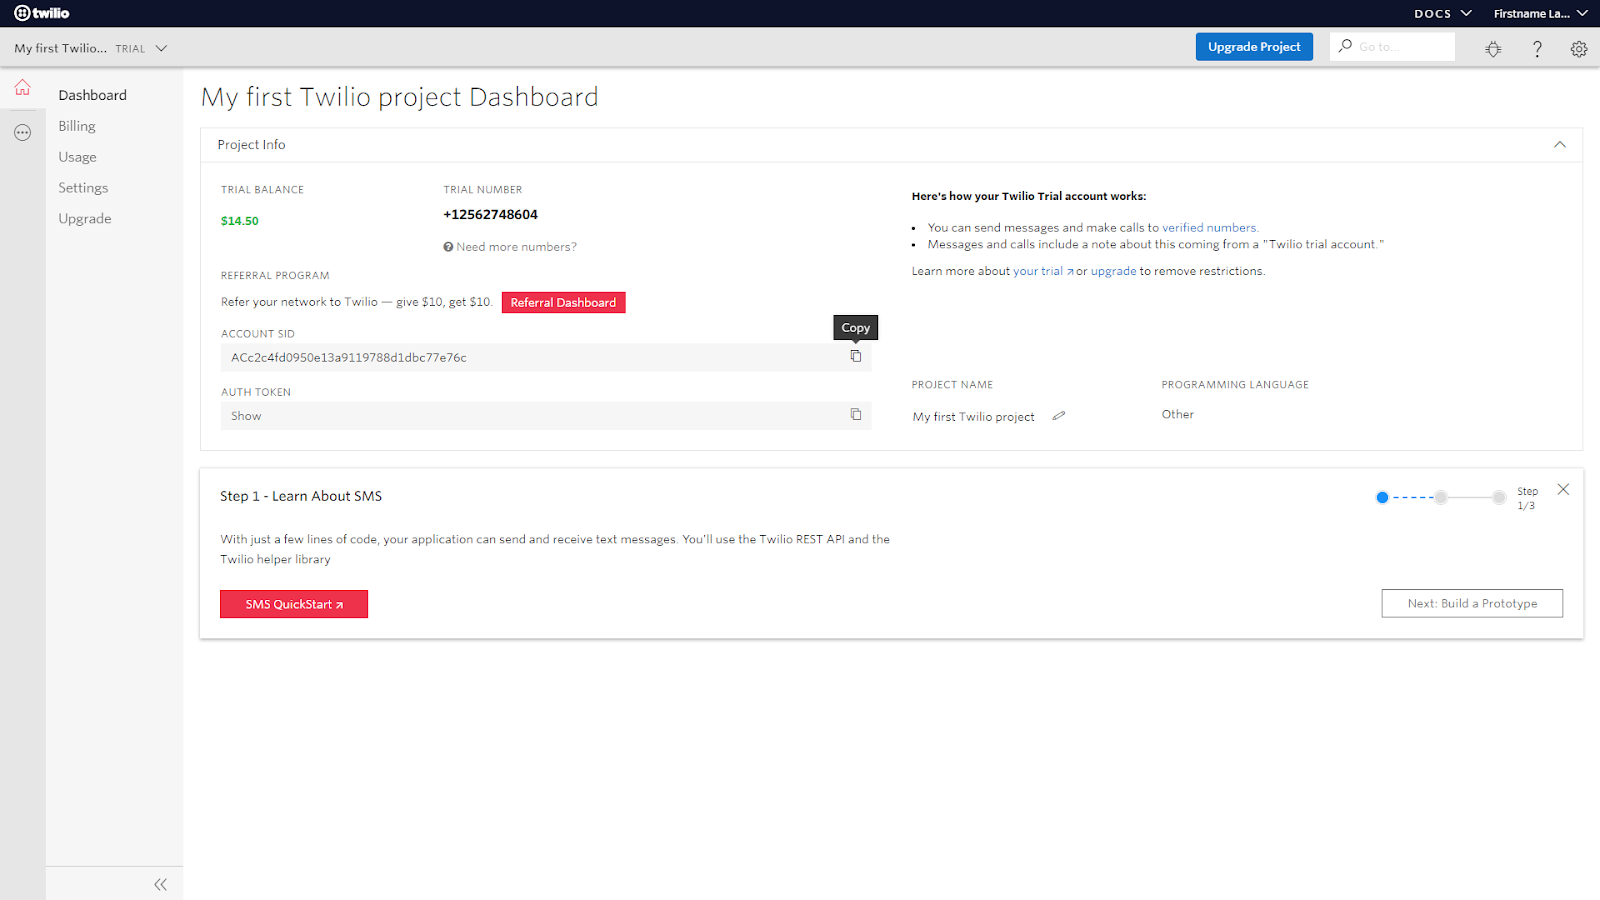
Step 4: From the Twilio project dashboard screen, navigate to the field that is called ACCOUNT SID. Click on the Copy icon on the right side of the field and save this in your note.
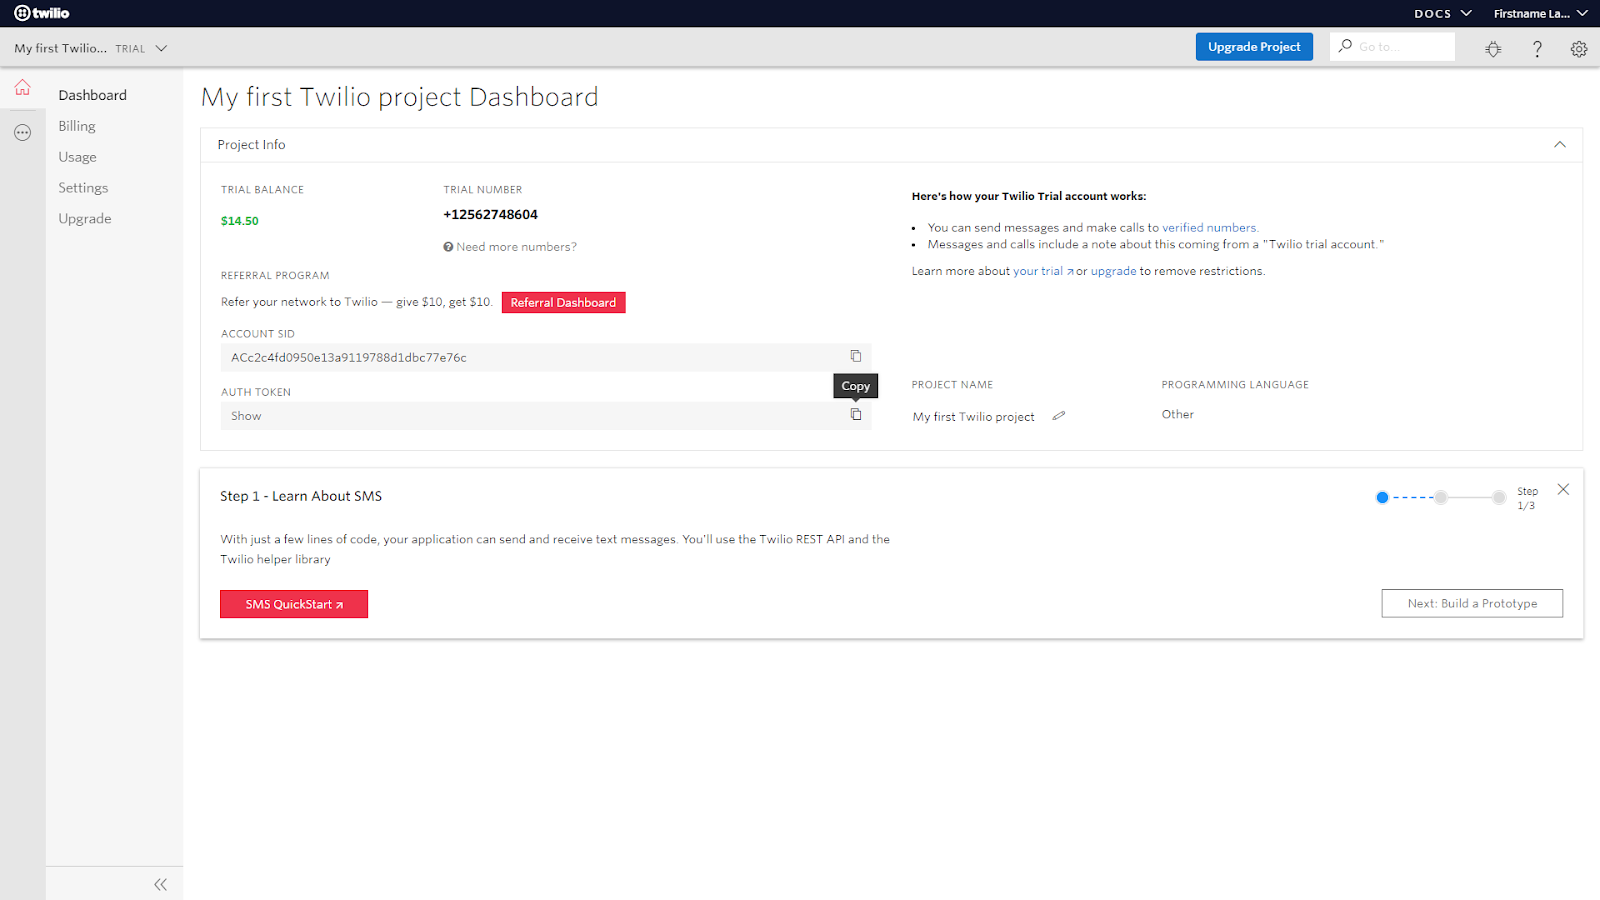
Step 5: Navigate to the field that is called AUTH TOKEN. Click on the Copy icon on the right side of the field and save this in your note.
This completes the section on Twilio! If there are other settings you would like to change on Twilio, refer to Twilio’s documentation to do so. Keep those 3 numbers you saved for the next section.
Plugin Activation
Now we need to activate the plugin.Step 1: From the home screen, click on the Configuration button in the top navigation bar.

Step 2: Under Settings, click on Plugin manager.

Step 3: The plugin is called TextMenu. After you find it in the list, click on Configure.

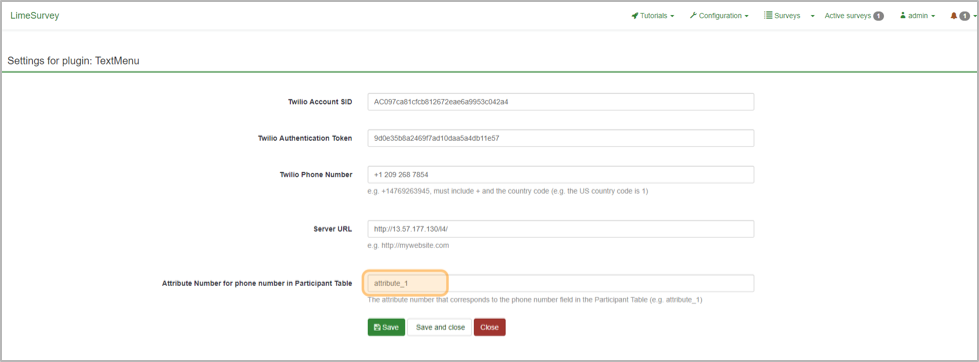
Step 4: On the Settings screen, you will see 3 fields: Twilio Account SID, Twilio Authentication Token, and Twilio Phone Number. Put in the 3 corresponding numbers you copied earlier. For the Server URL field, copy the URL from your address bar from the beginning up to and including /index.php. Click “Save and Close”.
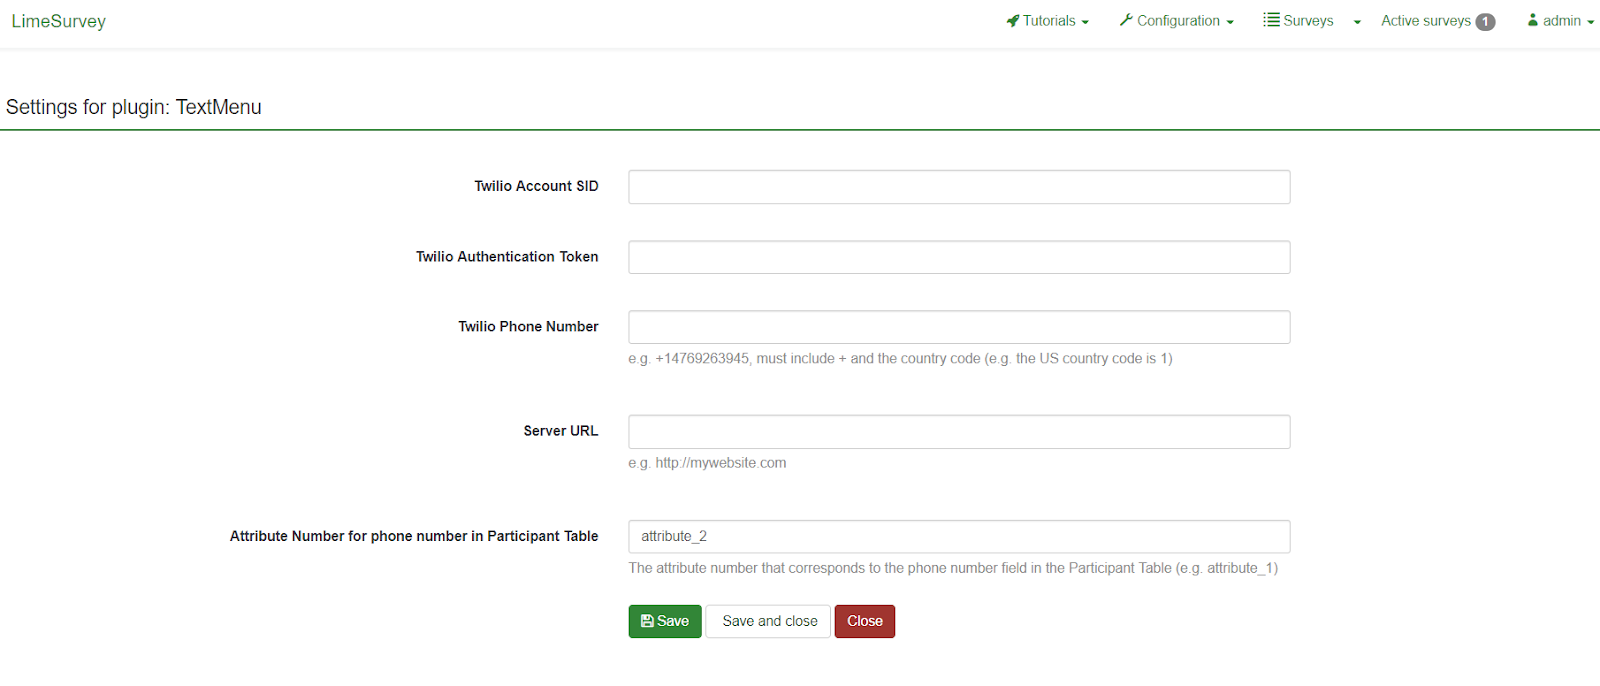
Step 5: Upon returning to the Plugin Manager screen, locate the TextMenu plugin again and click “Activate”.
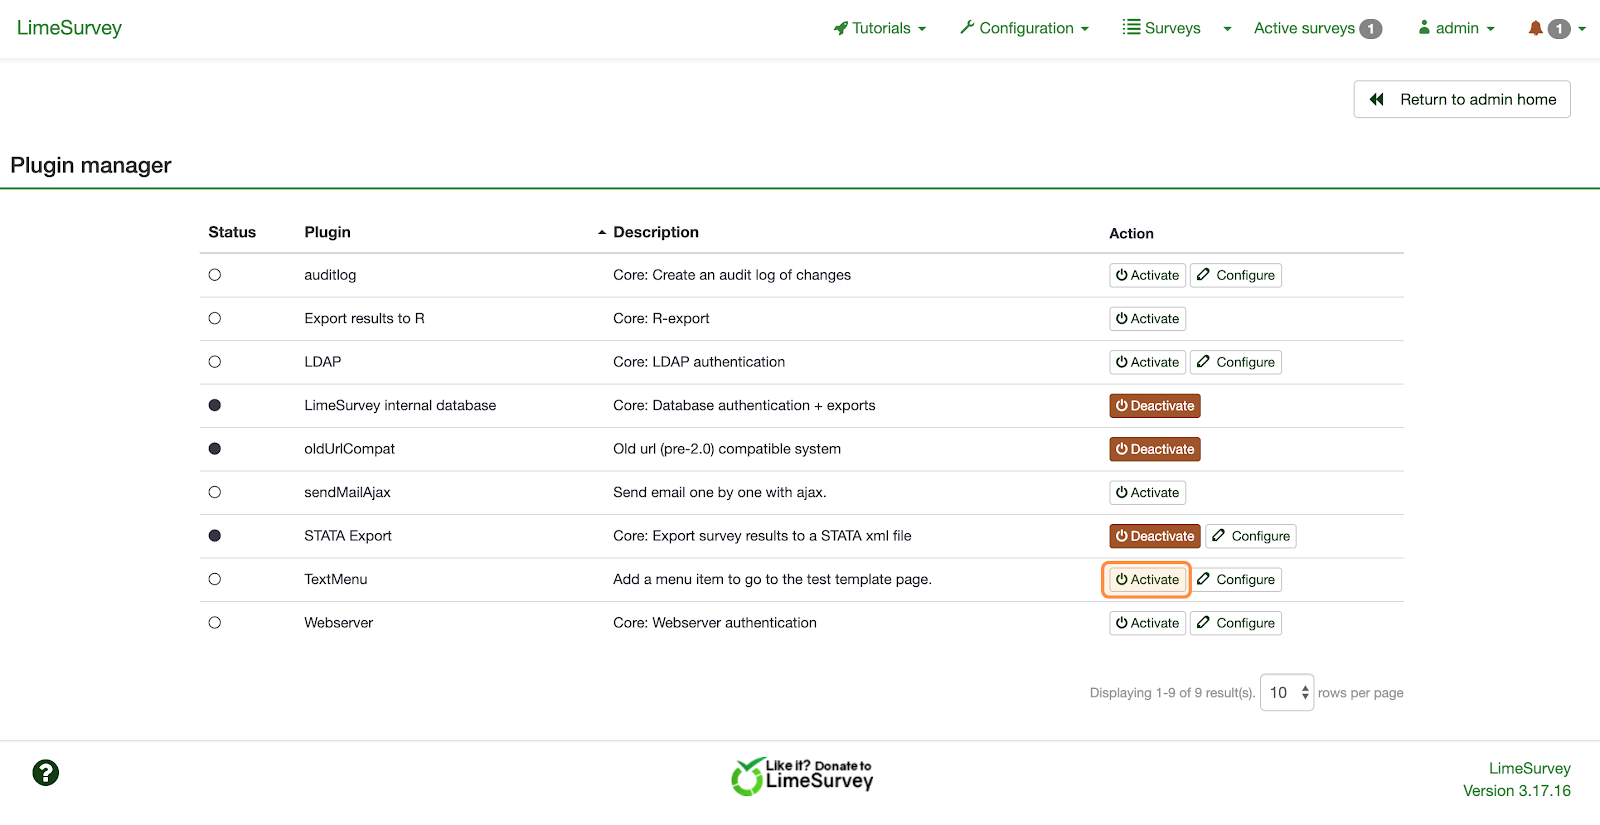
Congratulations! The plugin is now activated.
Go to survey
To get started, click the Surveys button in the top navigation bar or the List surveys button in the main center menu.
From this page, choose your survey.

Adding participant attributes
The TextMenu plugin requires a special attribute in Limesurvey in order to send text messages. This attribute is where we will enter participants’ phone numbers.Step 1: Click on Survey participants in the side bar or in the top bar.

Step 2: Click on the Manage attributes button at the top.

Step 3: Under “Add/delete survey participant attributes,” add 1 attribute by verifying the “Number of attribute fields to add” is 1 and by clicking on the Add fields button.

Step 4: You will see a notification that “1 field(s) were successfully added,” and you will see a field “attribute_1” in the list of attribute fields. Under “Field description, type in “phone_number”.

Step 5: Click the toggle button under “Mandatory” so that it reads “On”.

Step 6: Under “Field caption”, type in “Phone Number”. Click the Save button when complete.

Congratulations! You have successfully set up the required attribute to be able to send surveys via SMS text message. You can see this phone number attribute under Survey Participants.

Adding participants manually
There are 2 ways to add participants: manually or via a CSV file. We’ll go over adding participants manually first.Step 1: Navigate to the Survey participants screen.

Step 2: Click on Create on the top. Click on Add participant in the drop-down menu.

Step 3: On the “Add survey participant” screen, fill in the relevant fields. Once complete, click on the Additional attributes tab at the top.

Step 4: In the “phone_number” field, enter in your participant’s phone number. It must begin with a +, followed by the country code, followed by the phone number, with no symbols or spaces. (The country code for the US is 1). Once complete, click the green Save button in the top right.

Step 5: After you see the Success message, navigate back to the Survey participants page.

Step 6: As a final step, we need to generate tokens so that Limesurvey can identify each participant. From the Survey participants page, click the Generate tokens button in the top. Click Yes when prompted to create tokens.

Congratulations! You have just added your first participant manually.
Adding participants via CSV
If you want to avoid adding participants one-by-one, you can upload a CSV with participant information instead.Step 1: Navigate to the Survey participants screen.

Step 2: Click on the Create button on the top. In the drop-down menu, click on Import participants from: “CSV file”.

Step 3: Click the Choose File button to choose a CSV file to upload. (Make sure that the requirements listed at the bottom of the page are met before uploading. Phone numbers need to begin with a +, the country code, followed by the number with no symbols or spaces).

Step 4: Click the Upload button at the bottom of the page.
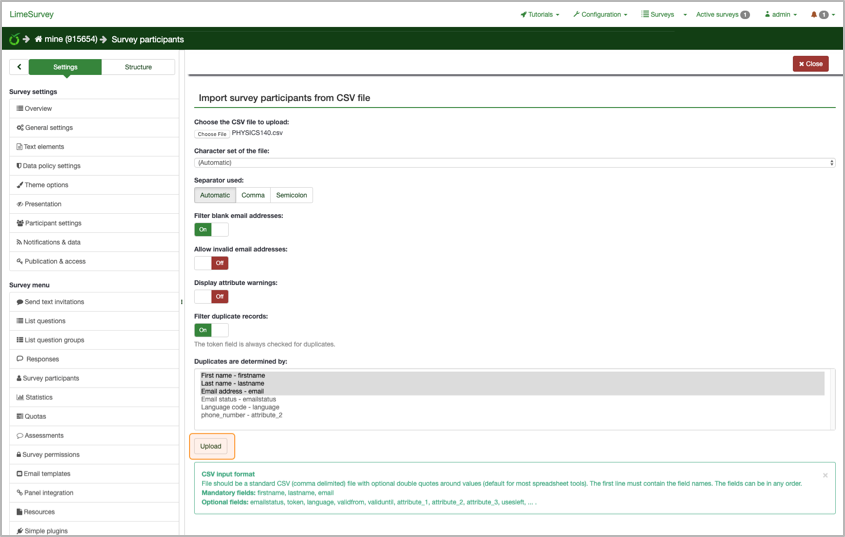
Step 5: As a final step, we need to generate tokens so that Limesurvey can identify each participant. From the Survey participants page, click the Generate tokens button in the top. Click Yes when prompted to create tokens.
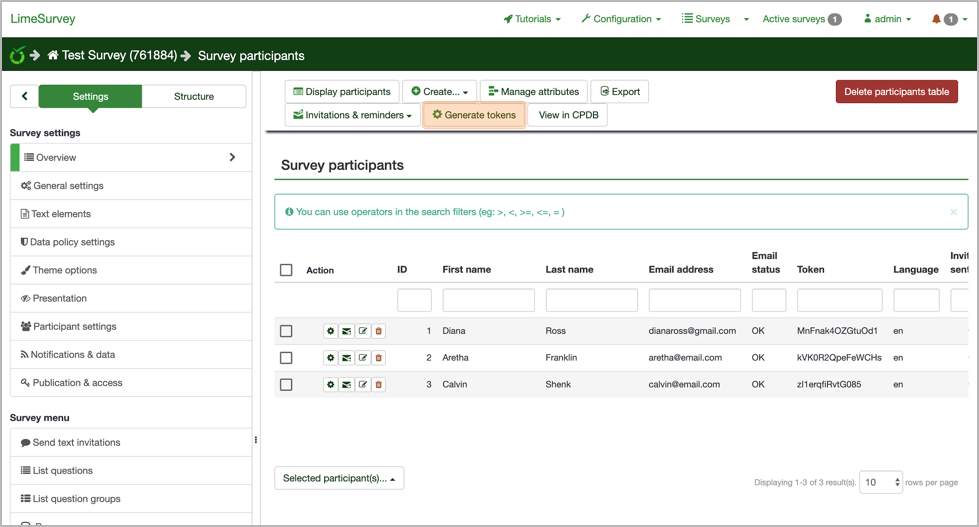
Congratulations! You have just added participants via a CSV file.
Sending out surveys
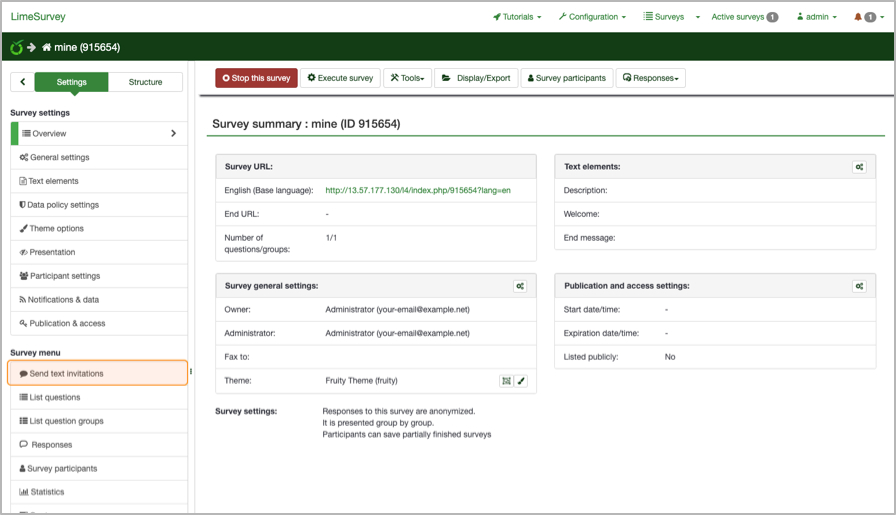
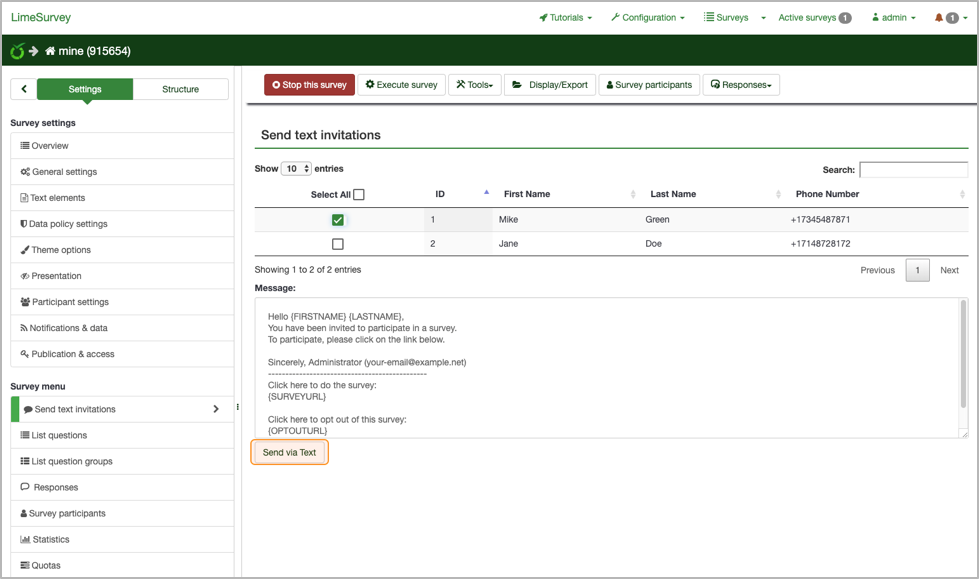
Now we can finally send out surveys via text message!Step 1: Click on the Send text invitations in the side navigation bar.
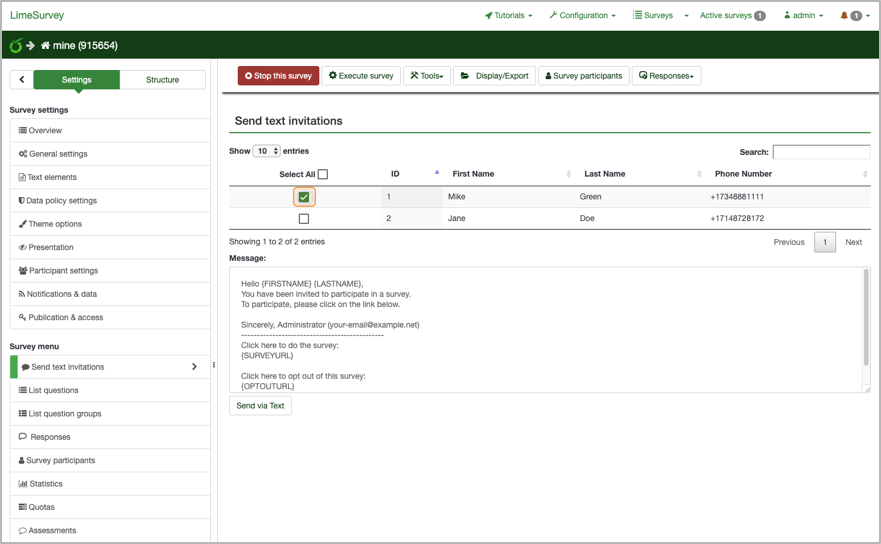
Step 2: On the “Send text invitations” page, you should see the participants you have created or uploaded. Check the participants you would like to send surveys to via text message.
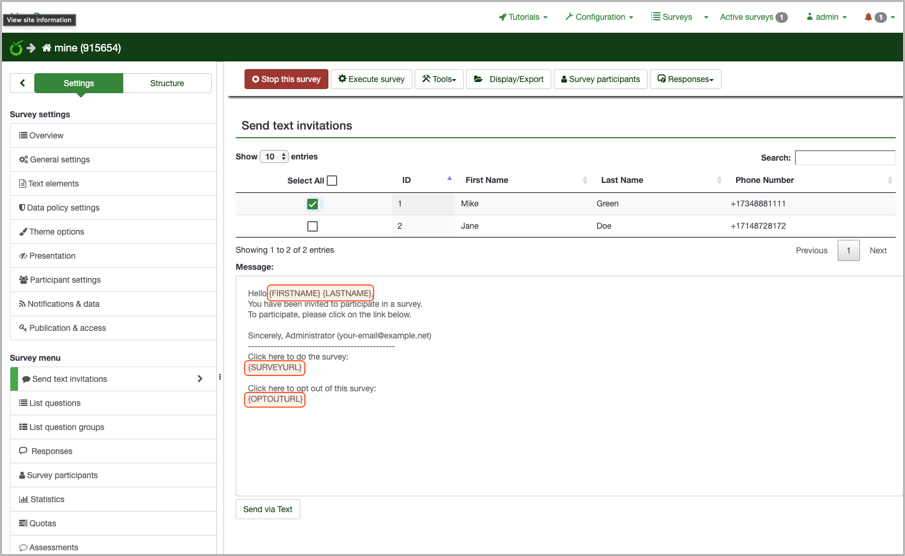
Step 3: You can now customize the message that participants will see. Remember, this is the text message that your participants will receive to complete your survey. Do not alter any text inside the curly brackets { }.
Step 4: Once you are satisfied with your outgoing text message, click on the Send via Text button to send your survey to your selected participants via text message.
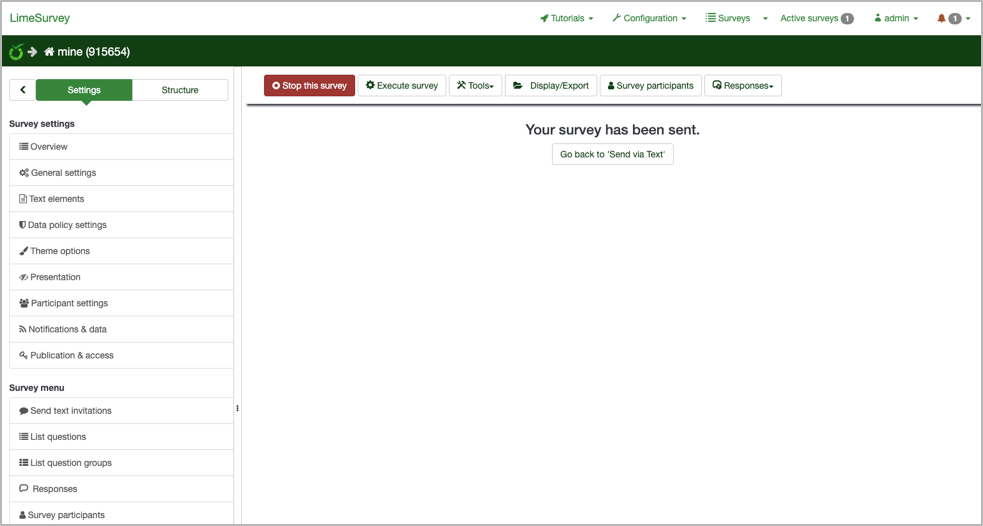
Congratulations! You have now sent your survey via text message.
Troubleshooting
If any errors occur, complete the following steps:Step 1: Check to make sure all phone numbers of participants begin with a +, followed by the country code, followed by the rest of the phone number with no other symbols or spaces.
Step 2: Check in Configuration and make sure that the attribute number is correct.

Anonymizing Responses
In order to anonymize survey responses, you must adjust the settings upon survey activation. You may NOT anonymize survey responses after the survey activation. After clicking the Activate this survey button, the following screen pops up:
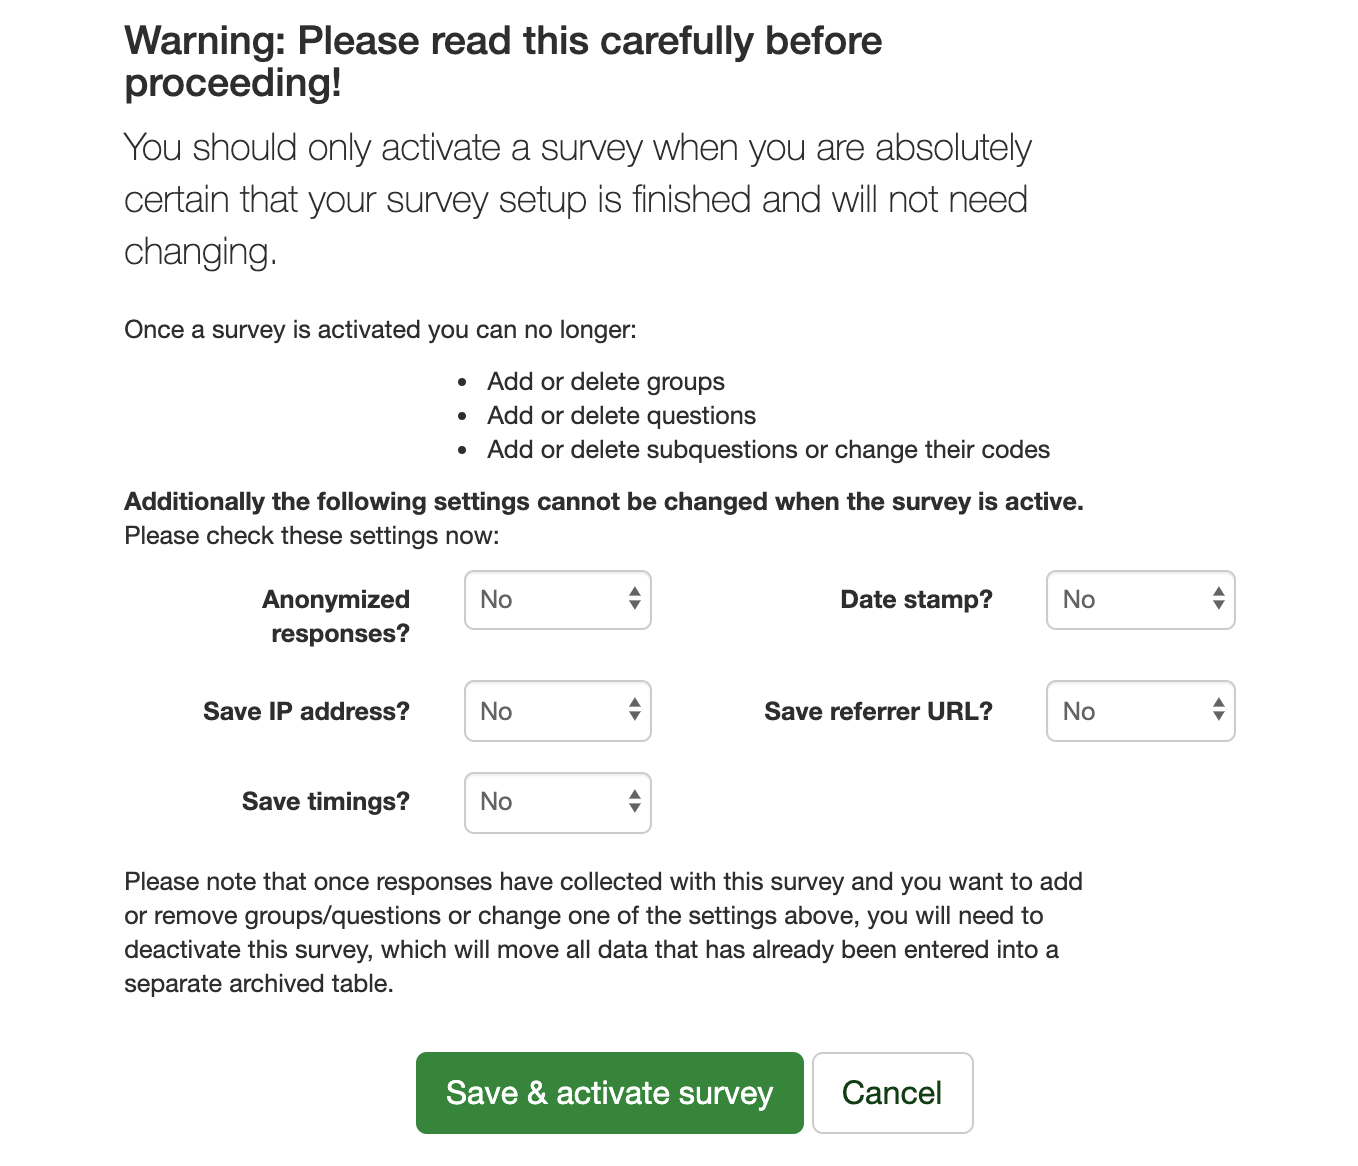 In order to anonymize the responses for the survey, you must change the status of
 Anonymized responses? to Yes. You may then save and activate the survey as normal.


