High-Dimensional Latent Space Visualization

Environment (Recommended)
- Frontend
- d3.js
- canvas-free-drawing.js (Link)
- Backend
- Python == 3.6.10
- torch == 1.5.0
- torchvision == 0.6.0
- Pillow == 7.1.2
- numpy == 1.18.5
- sklearn == 0.23.1
- argparse
git submodule update --init --recursive
git clone --recursive https://github.com/MKRoughdiamond/InfoVis20202.git
pip install -r backend/model/requirements.txt
python3 server.py -host (HOST_IP) -port (PORT)
- Fix config.js to connect backend
cp config_example.js config.js
vi config.js
const host = '(BACKEND_IP)';
const port = '(BACKEND_PORT)';
python3 -m http.server (FRONTEND_PORT)
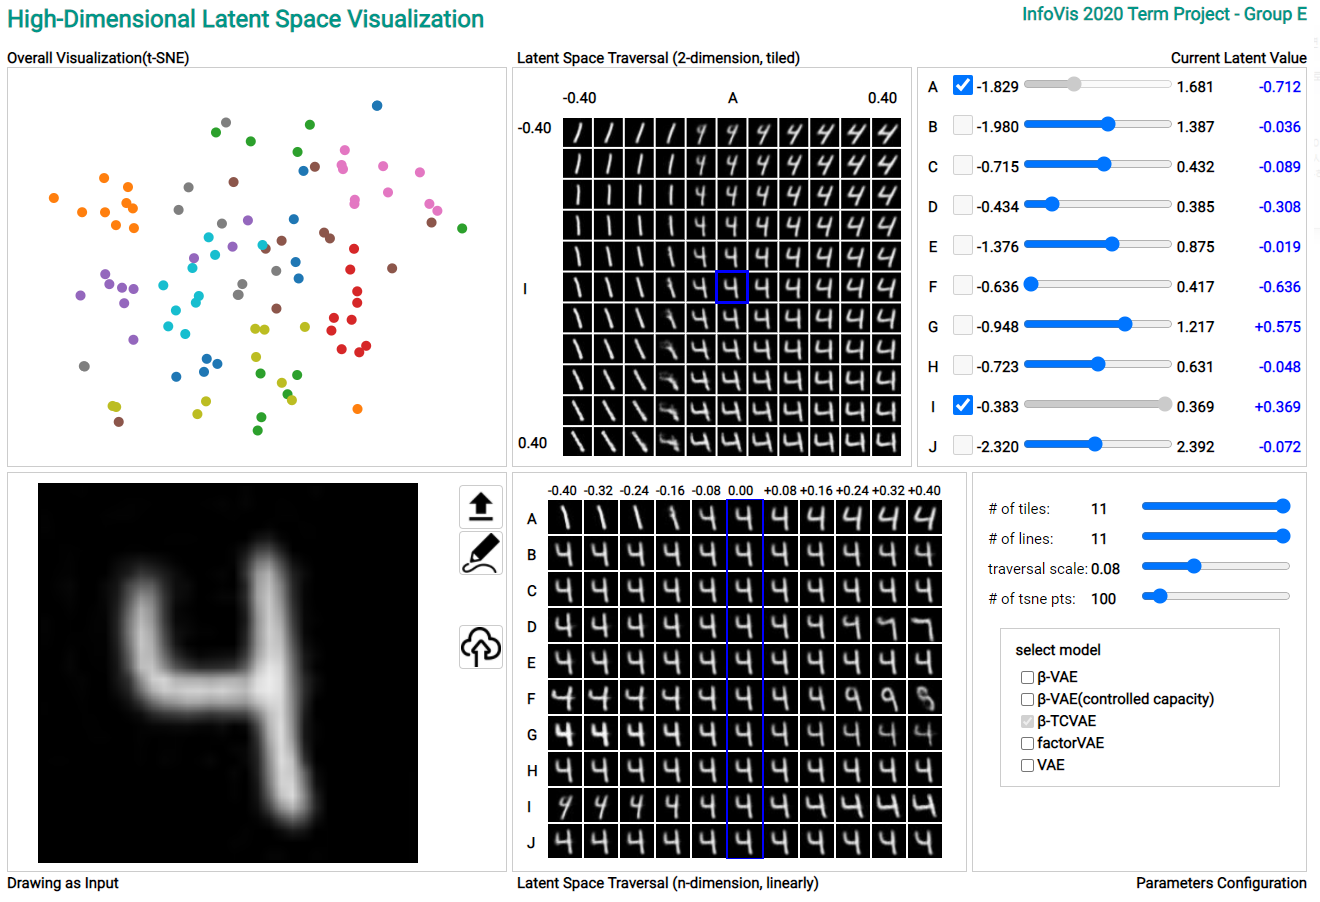
- TSNE results with given number of data
- Hover : shows reconstructed image
- Click : get latent vector of selected point, update all

- 2D latent traversal on two selected dimensions
- Can choose a dimension pair, can modify values of other dimensions
- Click on image : get latent vector of selected image, update all

- Shows current reconstructed image and user can upload new data
- Data upload : user can upload a new image
- Drawing : use can draw a new image
- Send to backend : get latent vector of a new image, update all

- 1D latent traversal on each dimension
- Click on image : get latent vector of selected image, update all

- Can modify several parameters
- Number of tiles : change numbers of rows and columns of tiled traversal
- Number of lines : change number of columns of linear traversal
- Traversal scale : change the difference between adjacent images
- Select model : change the target model
