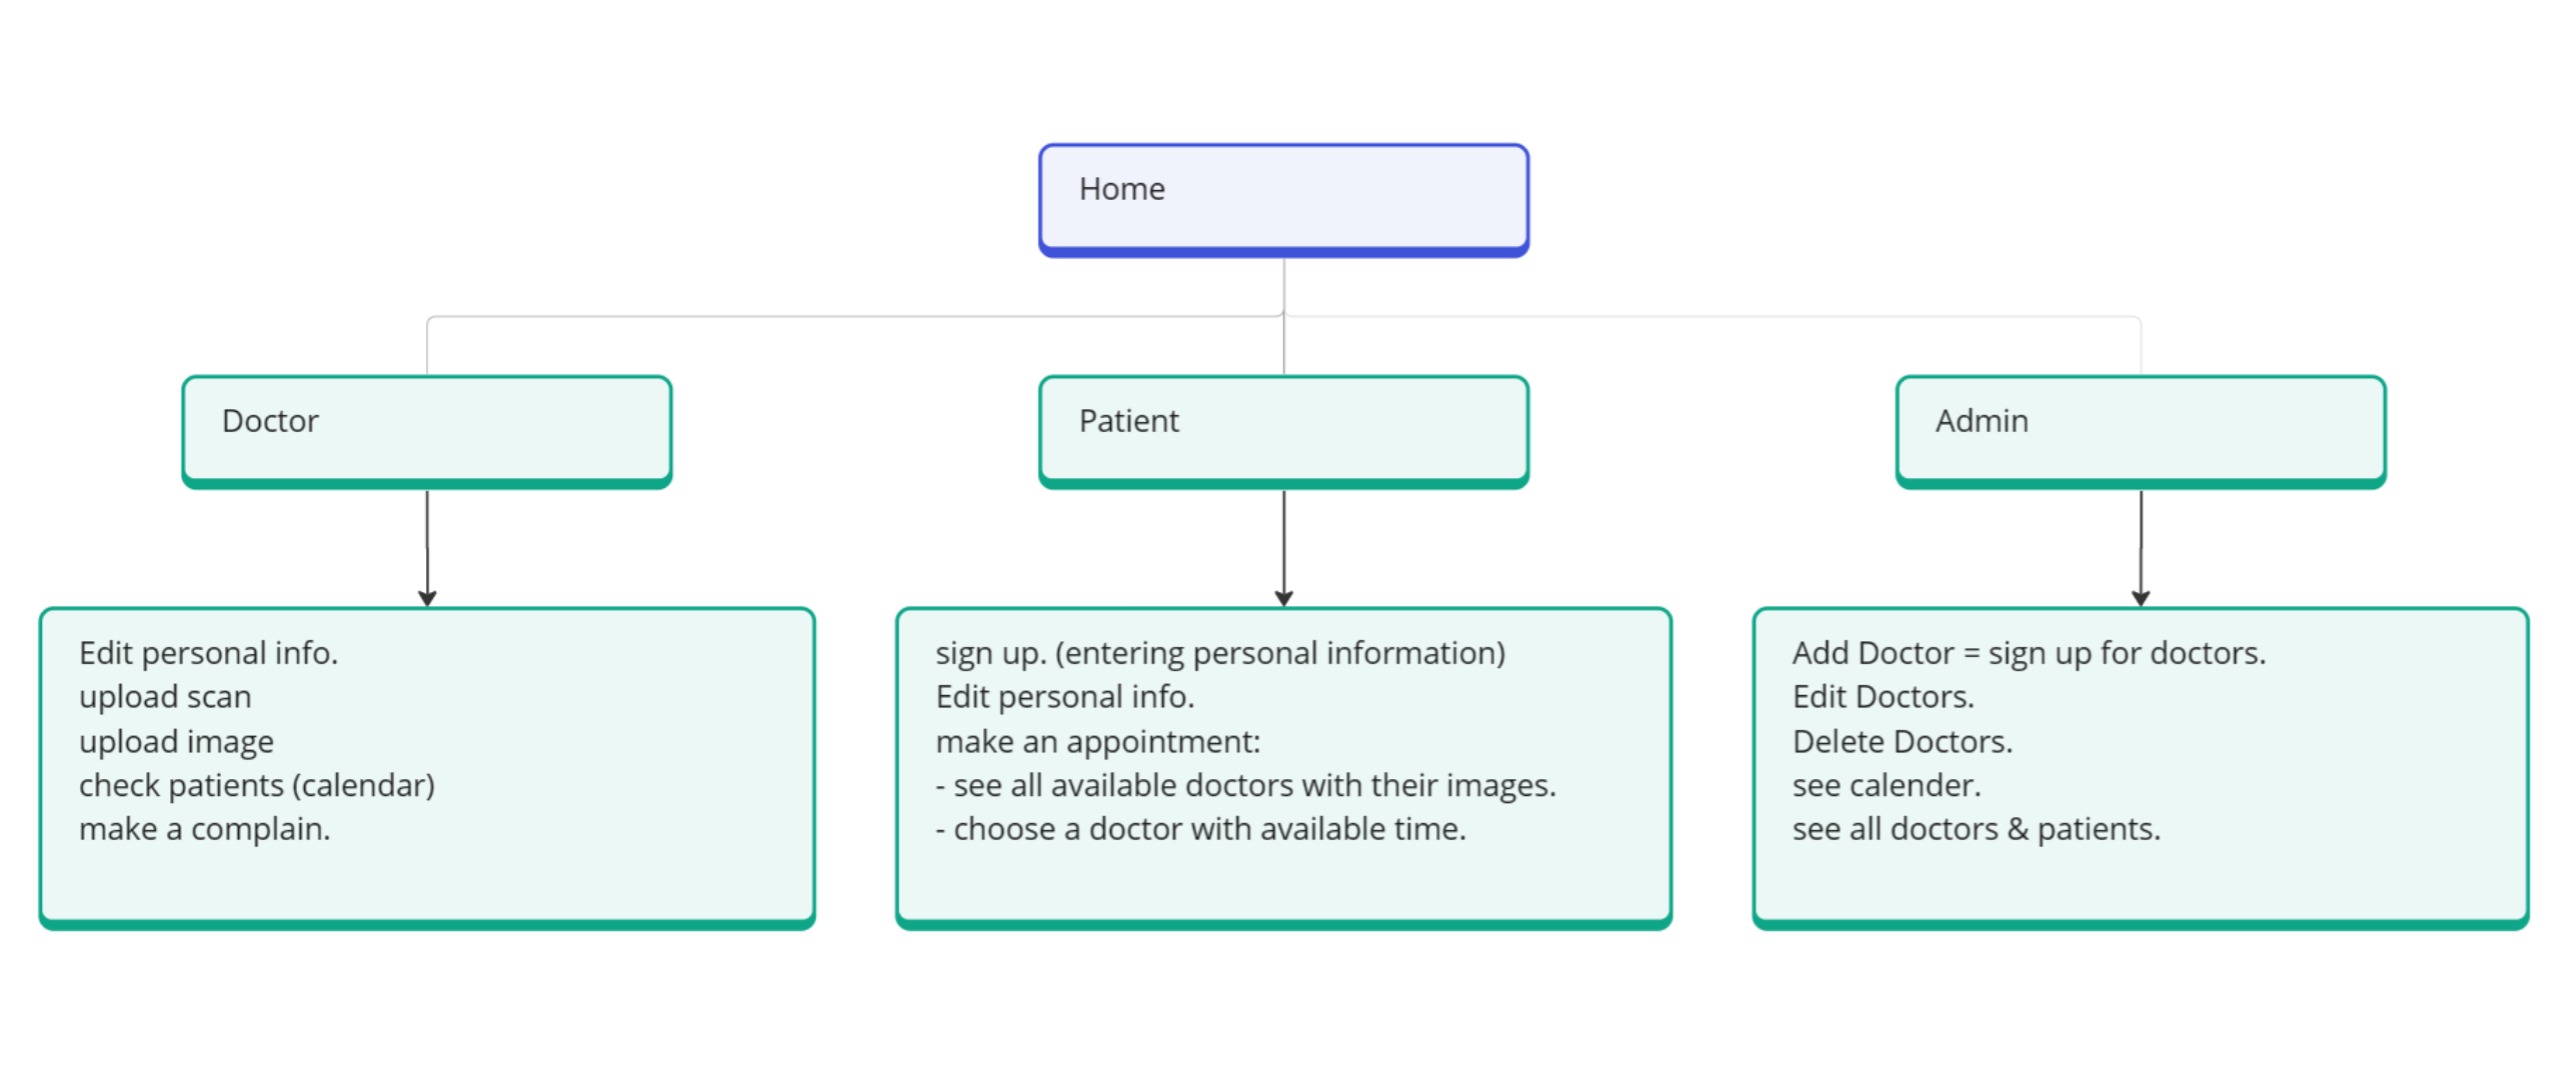
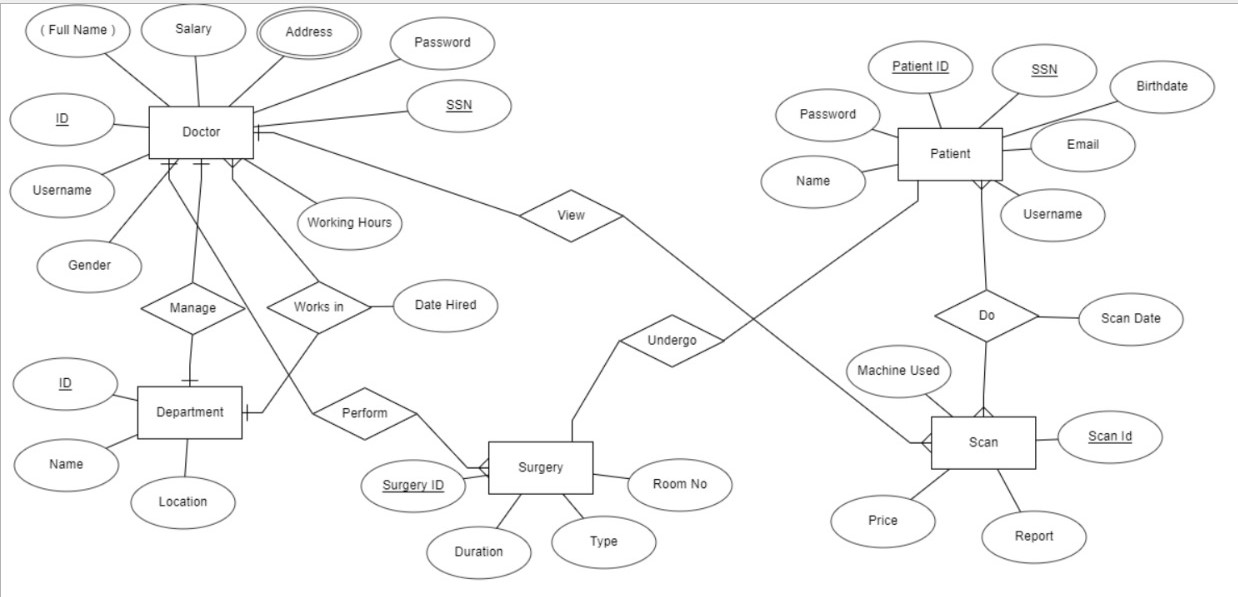
MedScanSurg Connect streamlines and empowers patients, providing a user-friendly portal for scheduling scans, radiology & surgery appointments, and surgeries, fostering efficient healthcare access and choices. This project is a Flask-based web application for managing a Radiology & Surgery Department database. It allows users to login as patients, doctors, or administrators, schedule appointments, and manage user profiles.
- Project Overview
- Project Structure
- Routes and Functions
- Additional Functions
- Running the Flask App
- How to Contribute
- Contact
MedScanSurg Connect is a comprehensive full-stack web application designed to cater to the unique needs of the Radiology & Surgery Department. Developed using front-end technologies such as HTML, CSS, and JS, coupled with the Python Flask web micro framework, this project aims to provide a dynamic and responsive system. The application seamlessly integrates essential features of a Hospital Information System (HIS), specifically tailored for the Radiology & Surgery Department.
-
website: Contains the main Flask application.__init__.py: Initializes the Flask app.models.py: Defines the database models.views.py: Contains the main views and routes.
-
static: Contains static files (CSS, JS, images).profile_pics: Stores user profile pictures (for patients and Doctors).scans: Stores scans uploaded by doctors.- ...
-
templates: Contains HTML templates for rendering pages.admin.html: Admin dashboard.appointments.html: Appointments page.doctor.html: Doctor dashboard.index.html: Home page.login.html: Login and registration page.patient.html: Patient dashboard.- ...
-
instance: Contains instance-specific configuration files. -
database.db: SQLite database file.
-
🏠 Home Page:
- Route:
/ - Function:
index
- Route:
-
🔐 Login:
- Route:
/login - Function:
login
- Route:
-
👨⚕️ Doctor Profile:
- Route:
/doctor/<int:doctor_id> - Function:
doctor
- Route:
-
📄 Scan Details:
- Route:
/scan_detail/<int:scan_id> - Function:
scan_detail
- Route:
-
👀 View Patient Information:
- Route:
/view_patient_info/<int:patient_id> - Function:
view_patient_info
- Route:
-
👩⚕️ Patient Dashboard:
- Route:
/patient/<int:patient_id> - Function:
patient
- Route:
-
🔄 Get Doctors (AJAX):
- Route:
/get_doctors - Function:
get_doctors
- Route:
-
📊 Admin Dashboard:
- Route:
/admin - Function:
admin
- Route:
-
✏️ Edit Doctor's Profile:
- Route:
/edit_doctor/<int:doctor_id> - Function:
edit_doctor
- Route:
-
🗑️ Delete Doctor:
- Route:
/delete_doctor/<int:doctor_id> - Function:
delete_doctor_route
- Route:
To edit a doctor's profile, visit the /edit_doctor/<doctor_id> route. The admin can manage doctors' information, including their profile pictures.
To add a new doctor, go to the /admin route and fill in the required information in the form.
Patients can schedule appointments by visiting the /appointments/<patient_id> route. Doctors and administrators can view and manage appointments.
To add a new scan, visit the /add_scan route. Doctors can upload scans for further analysis.
To view detailed information about a patient, go to the /view_patient_info/<patient_id> route. Access patient records and history.
Patients can choose a surgery doctor by visiting the /choose_surgery_doctor route. Select a doctor and schedule surgery appointments.
-
Open a terminal and navigate to the project directory:
cd C:\your_path\MedScanSurg-Connect
-
If you don't have a virtual environment, create one:
virtualenv venv
-
Activate the virtual environment:
venv\Scripts\activate
-
Install the required packages:
pip install -r requirements.txt
-
Run the Flask app:
python app.py
- Fork the repository.
- Clone the forked repository to your local machine.
- Create a new branch for your feature or bug fix:
git checkout -b feature/your-feature-nameorgit checkout -b bugfix/your-bugfix-name. - Make changes and commit them:
git commit -m "Your message here". - Push the changes to your fork:
git push origin feature/your-feature-nameorgit push origin bugfix/your-bugfix-name. - Create a pull request in the original repository.
Happy coding!


