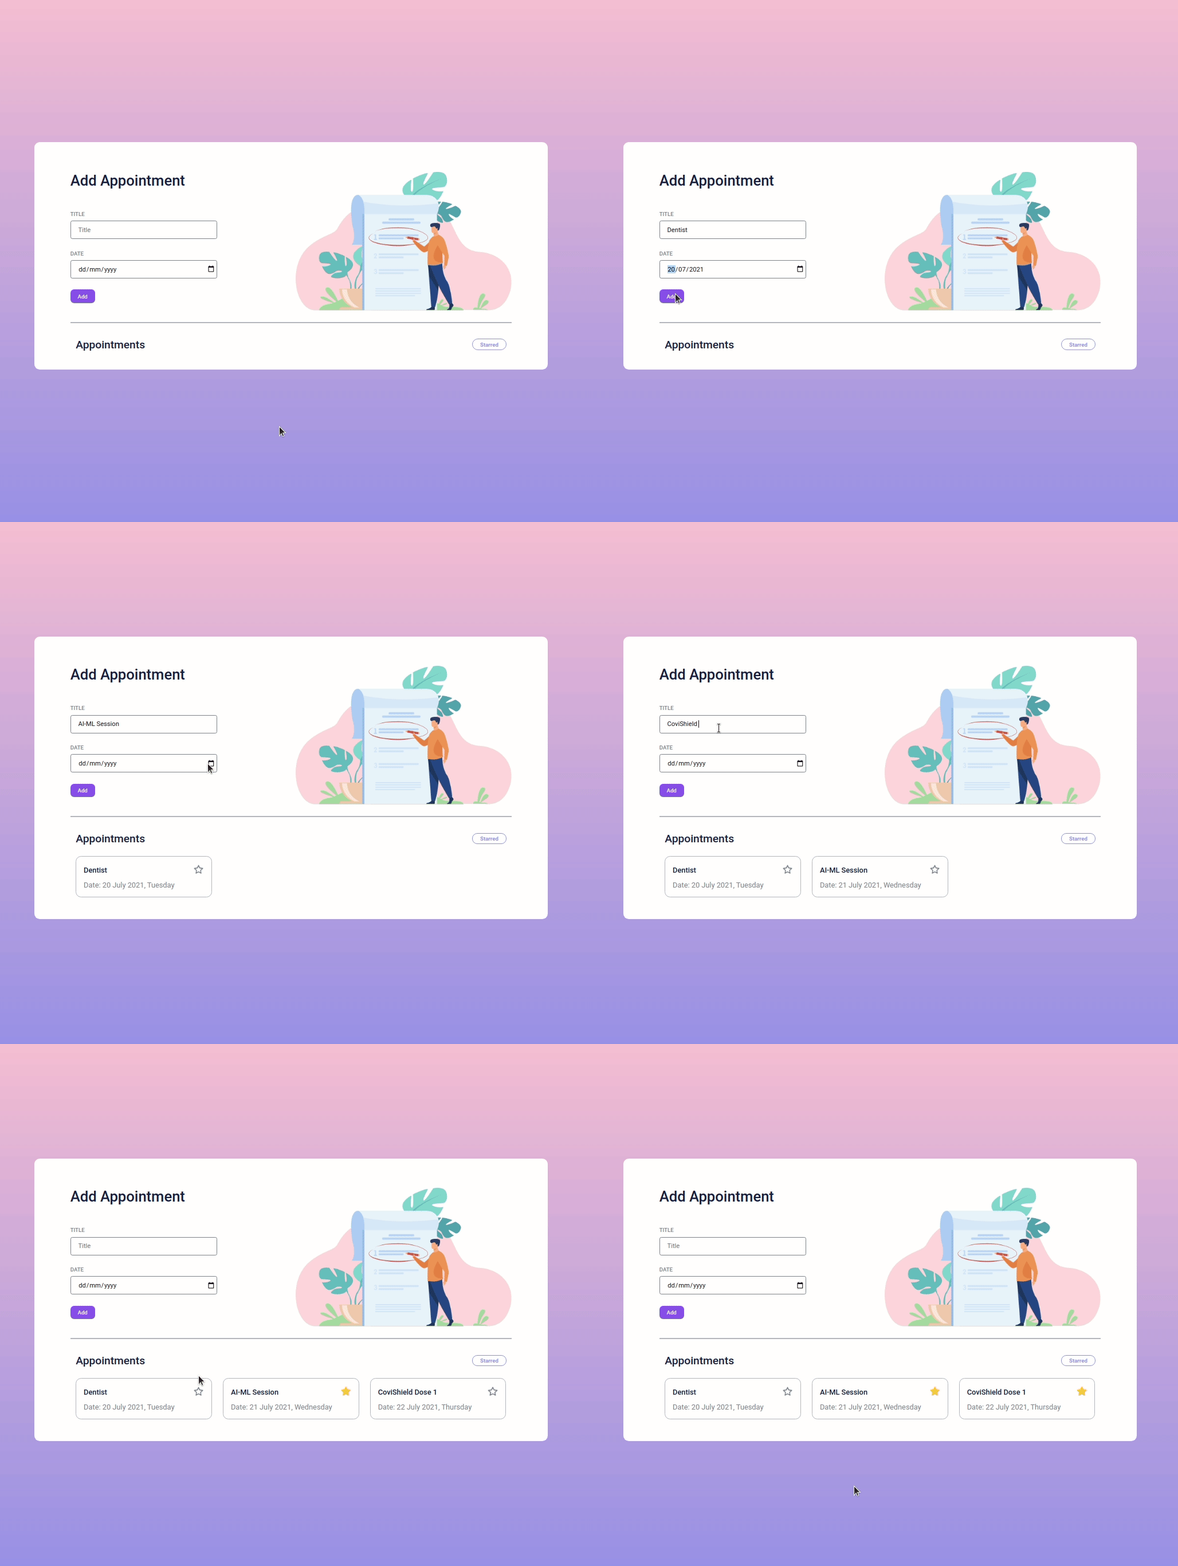
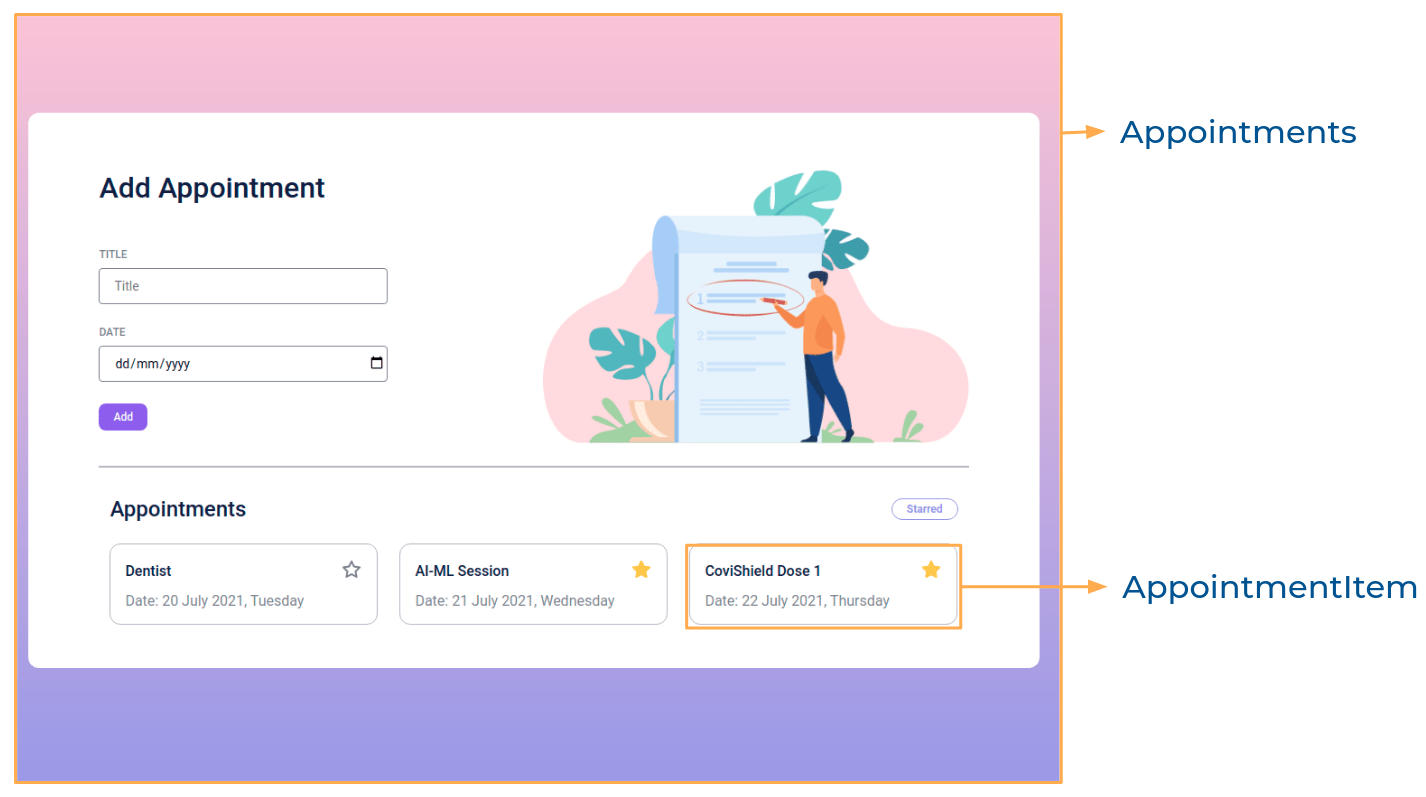
In this project, let's build an Appointments App by applying the concepts we have learned till now.
Click to view
Click to view
- Download dependencies by running
npm install - Start up the app using
npm start
Functionality to be added
The app must have the following functionalities
- Initially, the list of appointments should be empty and the title input and date input should be empty
- When non-empty values are provided for title and date and the Add button is clicked,
- A new appointment should be added to the list of appointments
- The value inside the input elements for title and date should be updated to their initial values
- When the Star on an appointment is clicked, the appointment should be starred
- The status of the Starred filter is updated by clicking on it
- When the Starred filter is active, all the starred appointments should be filtered and displayed
- When the Starred filter is inactive, the list of all appointments should be displayed
Implementation Files
Use these files to complete the implementation:
src/components/Appointments/index.jssrc/components/Appointments/index.csssrc/components/AppointmentItem/index.jssrc/components/AppointmentItem/index.css
Click to view
-
The HTML input element with the type
dateis designed for the user to select the date from a date picker<input type="date" />
-
The
formatfunction in the date-fns package can be used to get the formatted date string in the given formatimport {format} from 'date-fns' console.log(format(new Date(2021, 19, 07), 'dd MMMM yyyy, EEEE')) // 19 July 2021, Monday
Click to view
The following instructions are required for the tests to pass
- For the
formatfunction, pass the format stringdd MMMM yyyy, EEEEas the second argument - The star button in each appointment should have the data-testid as star
- The star image in each appointment should have alt as star
Image URLs
Colors
Hex: #9796f0
Hex: #fbc7d4
Hex: #ffffff
Hex: #171f46
Hex: #8b5cf6
Hex: #b5b7c4
Hex: #9897f0
Font-families
- Roboto
- All components you implement should go in the
src/componentsdirectory.- Don't change the component folder names as those are the files being imported into the tests.
- Do not remove the pre-filled code
- Want to quickly review some of the concepts you’ve been learning? Take a look at the Cheat Sheets.

