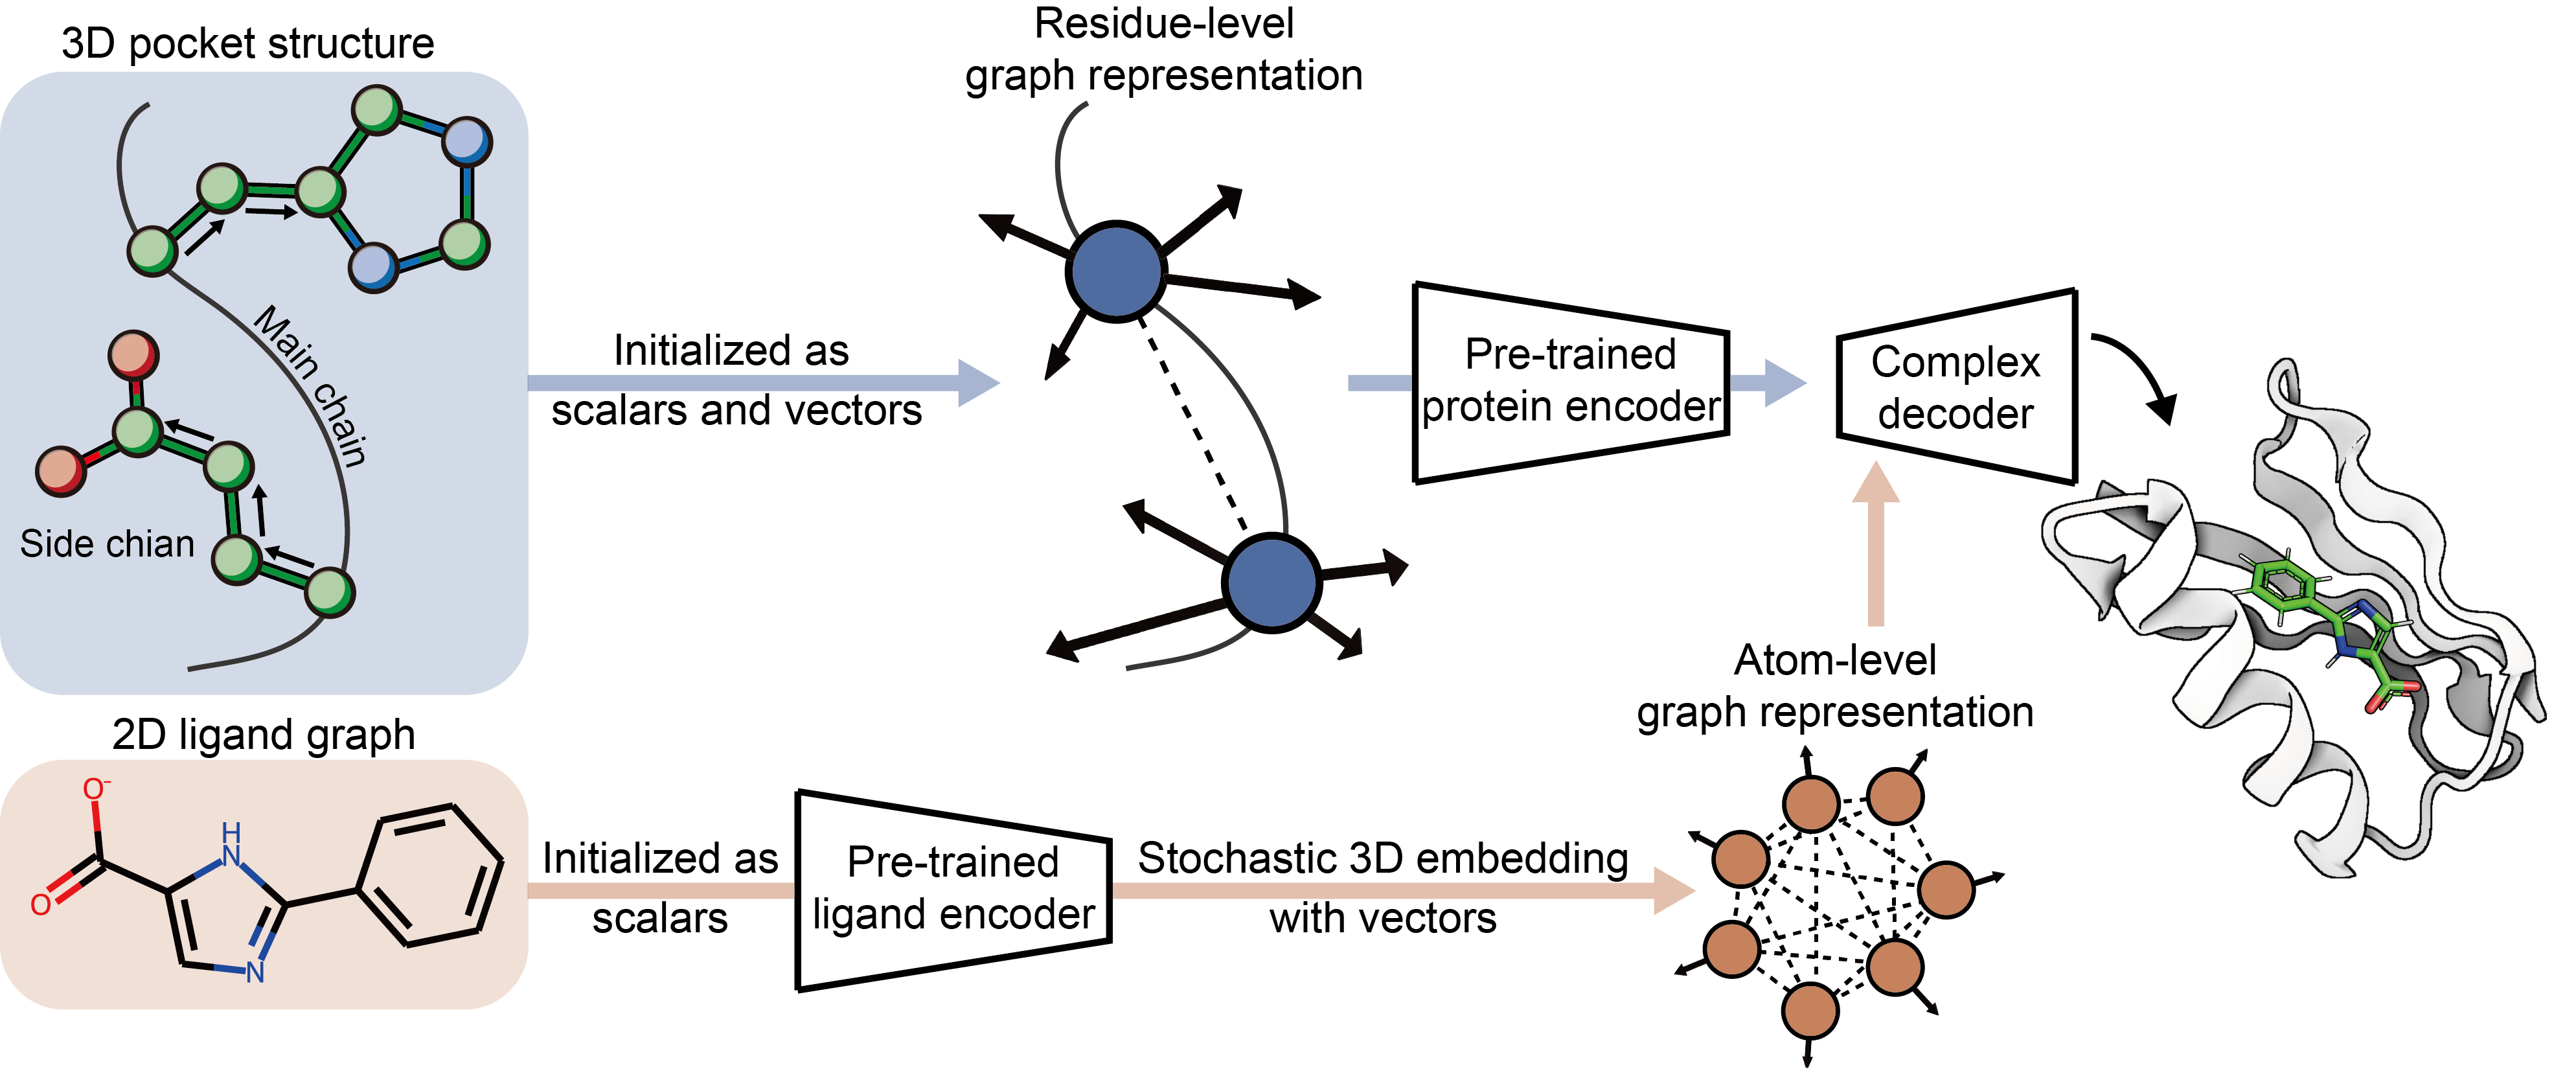
FlexPose, a framework for AI-based flexible modeling of protein-ligand binding pose.
A free light-weight web server can be found here.
Table of contents
FlexPose is implemented in PyTorch. All basic dependencies are listed in requirements.txt
and most of them can be easily installed with pip install.
We provide tested installation commands in install_cmd.txt for your reference.
pip install -e .
You can use the FlexPose as follows in demo.py:
from FlexPose.utils.prediction import predict as predict_by_FlexPose

predict_by_FlexPose(
    protein='./FlexPose/example/4r6e/4r6e_protein.pdb',               # protein path, or a list of path
    ligand='./FlexPose/example/4r6e/4r6e_ligand.mol2',                # ligand path (or SMILES), or a list of path (or SMILES)
    ref_pocket_center='./FlexPose/example/4r6e/4r6e_ligand.mol2',     # ligand-like file for selecting pocket, e.g. predictions from Fpocket
    # batch_csv='./FlexPose/example/example_input.csv',               # for batch prediction

    device='cuda:0',                                                  # device
    structure_output_path='./structure_output',                       # structure output
    output_result_path='./output.csv',                                # record output
)
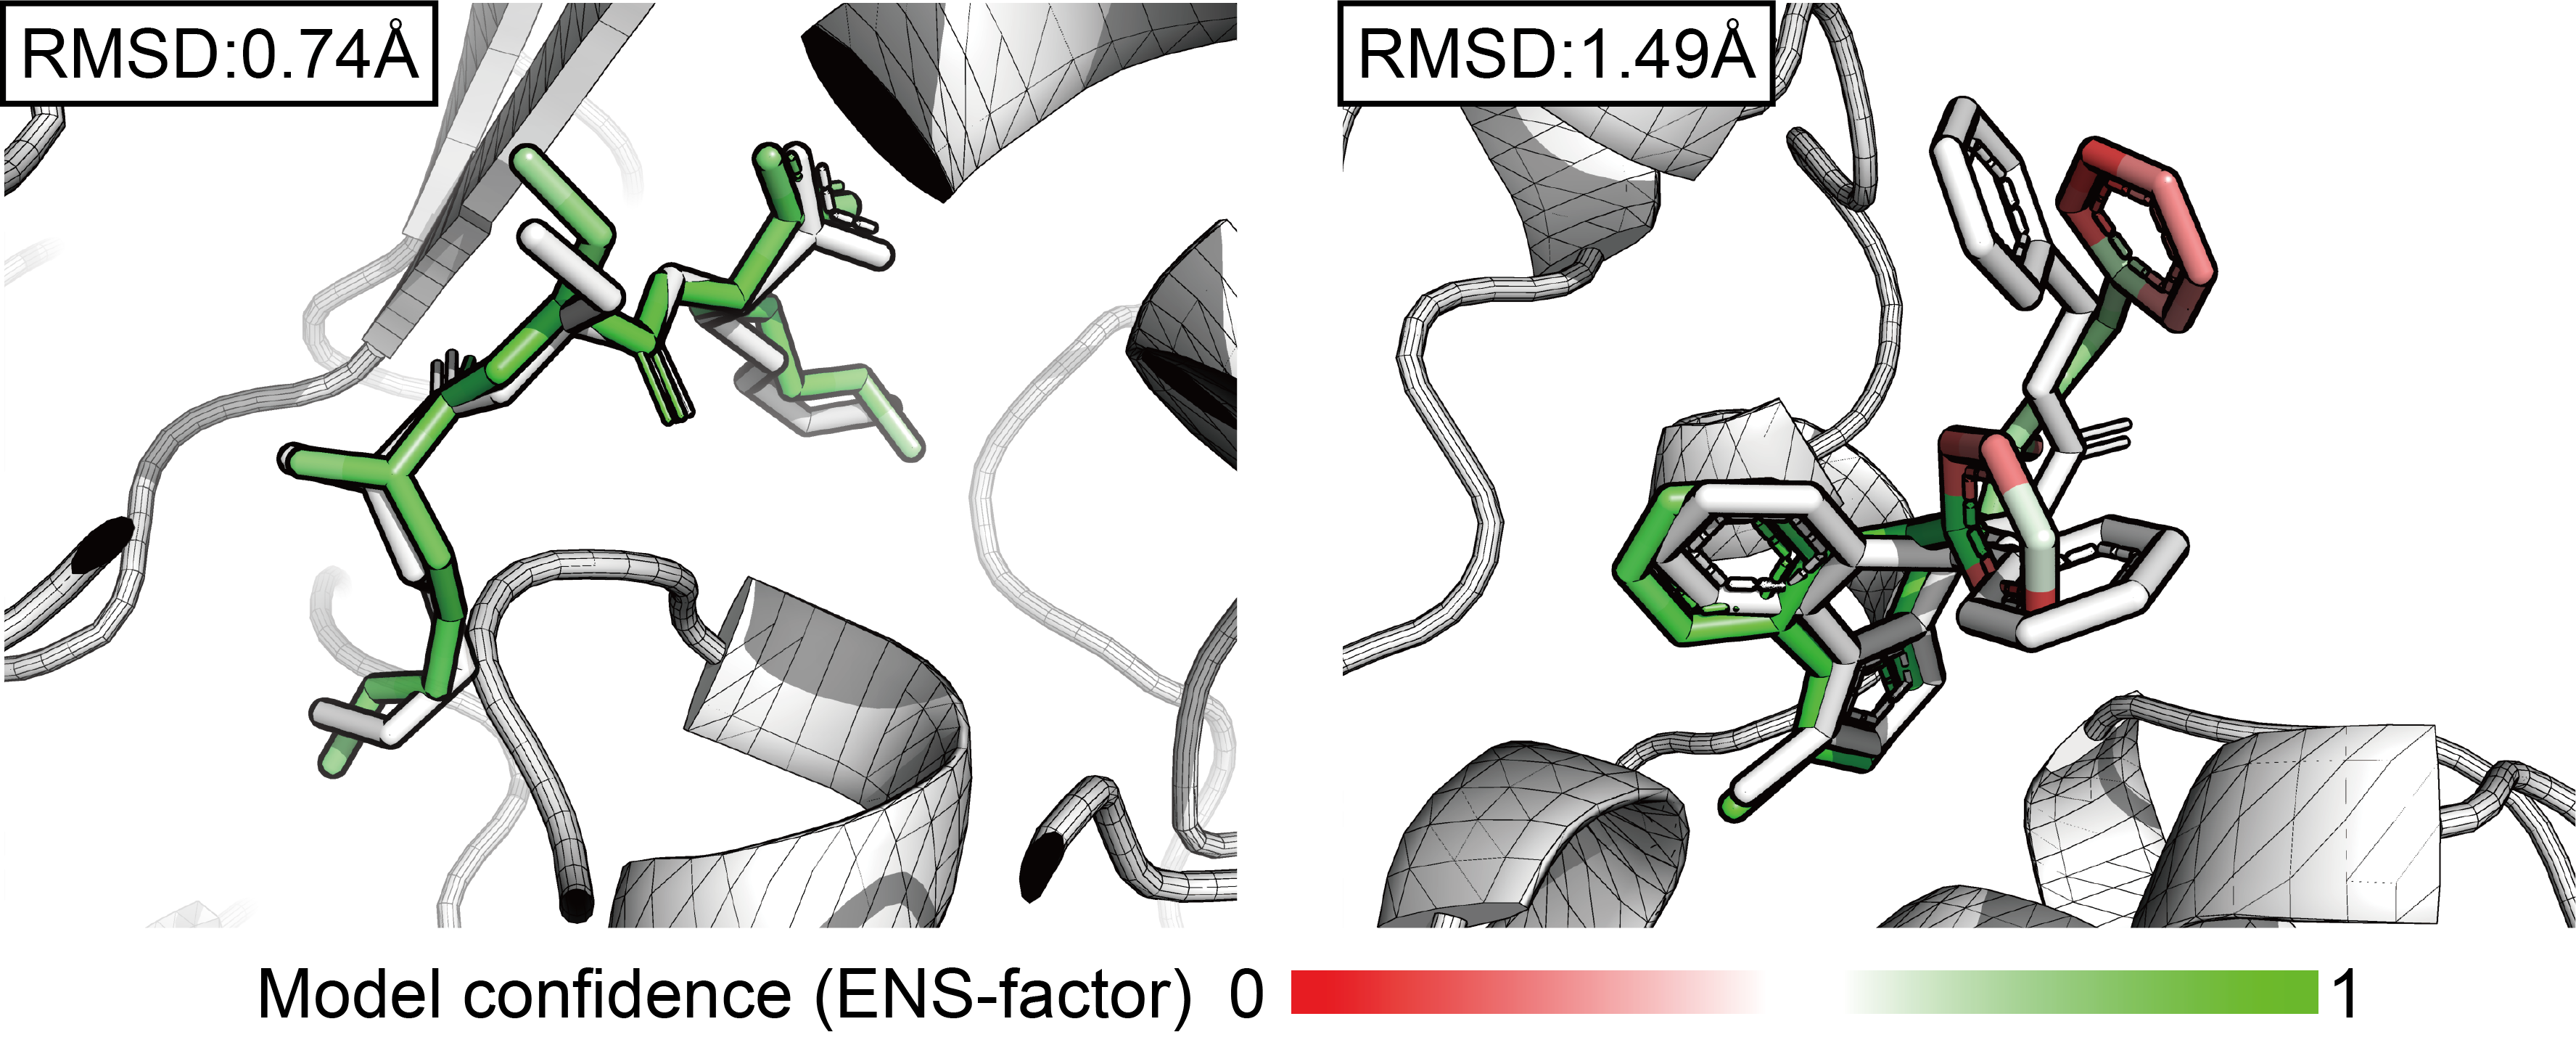
Besides, You can set model_conf = True and ens = 10 to get predicted model confidence.
Here, we provide a pipeline for training a model on the PDBbind and APObind datasets, and it is recommended to run these scripts in the root directory of FlexPose.
We use Rosetta to generate fake apo conformations from holo conformations. For each training iteration, there is a small probability that the model is trained with these fake conformations.
python FlexPose/preprocess/aug_pseudo_apo.py \
--apobind_path path/to/apobind \
--pdbbind_path path/to/pdbbind \
--save_path path/for/saving \
--n_rand_pert 3 \
--n_fixbb_repack 3 \
--n_flexbb_repack 3
You need to set --apobind_path and --pdbbind_path to path of the decompressed APObind and PDBbind,
and set the --save_path to a folder to save data augmentation.
NOTE: Generating all conformations takes hours to days (depending on the number of CPU cores used).
We recommend performing the data augmentation on computers with multiple CPU cores.
Alternatively, you can set --n_rand_pert, --n_fixbb_repack and --n_flexbb_repack to 0 to skip most of the processing.
After data augmentation, now we can generate input files for training:
python FlexPose/preprocess/prepare_APOPDBbind.py \
--apobind_path path/to/apobind \
--pdbbind_path path/to/pdbbind \
--save_path path/for/saving \
--apo_info_path path/to/apobind_all.csv \
--aff_info_path path/to/INDEX_general_PL_data.{year} \
--aug_path path/to/data/augmentation \
--tmp_path ./tmp \
--max_len_pocket 150 \
--max_len_ligand 150
You need to set --apobind_path and --pdbbind_path to path of the decompressed APObind and PDBbind (same settings as in the data augmentation),
and set the --save_path to a new folder to save preprocessed data.
--apo_info_path is the path to apobind_all.csv, which is provided by APObind.
--aff_info_path is the path to INDEX_general_PL_data.{year}, which is provided by PDBbind.
NOTE: Set --max_len_pocket and --max_len_ligand to a small number (e.g. 64) to get a toy dataset, which can speed up training.
If you want to skip data augmentation and data preprocessing, the preprocessed data can be found here. Now, we can train a toy FlexPose by running:
python FlexPose/train/train_APOPDBbind.py \
--data_path path/to/preprocessed/data \
--data_list_path path/to/data/split \
--batch_size 3 \
--lr 0.0005 \
--n_epoch 200 \
--dropout 0.1 \
--use_pretrain False \
--c_x_sca_hidden 32 \
--c_edge_sca_hidden 16 \
--c_x_vec_hidden 16 \
--c_edge_vec_hidden 8 \
--n_head 2 \
--c_block 2 \
--c_block_only_coor 1
You need to set the --data_path to the preprocessed data and set the --data_list_path to a path for saving splited data IDs.
Besides, you can set --use_pretrain to True to use pre-trained encoders,
and set (--pretrain_protein_encoder, --pretrain_ligand_encoder) to the path of pre-trained parameters, respectively
(or set them to None to load our pre-trained encoders).
We freeze pre-trained parameters by default to improve training efficiency.
You can visualize model confidence with PyMol:
spectrum b, red_white_green, minimum=0, maximum=1
Released under the MIT license.
If you find our models useful in your research, please cite the relevant paper:

