- Check to see if SQLite is installed on your computer via a terminal command
- Install SQLite on your computer
- Create and open a database file and table
- End all SQL commands using proper semicolon notation
- Exit out of SQLite using the .quit command
In this lesson, we'll set up some of the tools you'll need for interacting with
a database using SQL. There is an example database included in this lesson,
chinook.db.
Fork and clone this lesson
so you can follow along.
The chinook.db database is provided by SQLite as a way of demonstrating some
of the features of the SQLite application. If you try to view this file in your
text editor now, you won't be able to — this is a special SQLite database file,
and as such, it has all kinds of special encoding that makes it visible only
within a SQLite application. Not to worry! We'll soon see how to interact with
all the data in this file using a couple different tools.
If you are on OSX version 10.4 or greater, you probably already have SQLite installed. Find out by opening up the terminal and running:
$ which sqlite3
/usr/bin/sqlite3
If you see the output above, you have a working version of sqlite3 already installed on your system. Thanks Apple! Skip ahead to the 'SQLite VSCode Extension' section below!
If not, then there are a couple of ways you can install SQLite.
You can install SQLite using Homebrew, which you should have installed as part of your Flatiron environment setup. Install SQLite with:
$ brew install sqliteIf Homebrew isn't working out for you, you can download one of the pre-compiled binary packages available at the downloads page. Look for your operating system, download and install the appropriate binary.
Note: If you are receiving an error when trying to install SQLite, make sure the Xcode Command-Line Tools have properly installed. Try running
xcode-select --installto resolve this issue.
Below are the steps for installing SQLite on the Windows Sub-system for Linux:
- Open your WSL terminal
- Update your Ubuntu packages:
sudo apt update - Once the packages have updated, install SQLite3 with:
sudo apt install sqlite3 - Confirm installation and get the version number:
sqlite3 --version
For additional information, check out this article on getting started with databases in WSL
To make it easier to interact with SQLite databases from VSCode, you should also install the SQLite VSCode Extension.
This will give you a graphical interface where you can interact with SQLite databases without leaving VSCode! It's a great way to help visualize what's happening with your database while you familiarize yourself with SQL syntax.
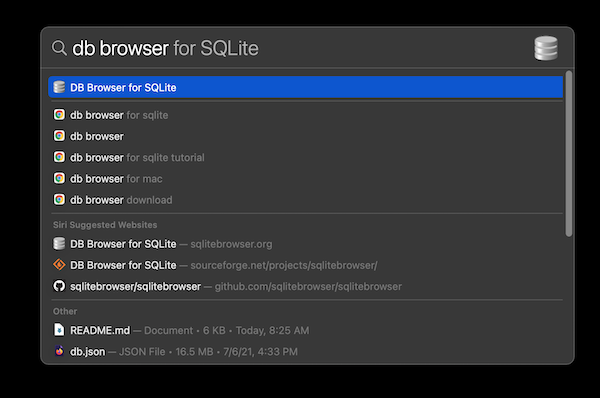
The last, and most comprehensive, graphical tool for interacting with SQLite databases is DB Browser for SQLite. It's a separate, standalone graphical user interface (GUI) application that has many features for exploring and interacting with SQL databases.
To install it, head to the downloads page, and download the installer for your operating system:
For WSL users, you should download the Windows installer, not the Linux one.
Okay, let's make sure everything is up and running. We'll show how to explore a database using both SQLite in the terminal as well as the VSCode extension.
In your terminal, type:
$ sqlite3 chinook.dbThis will open the chinook.db file in the SQLite prompt. You should see
something like:
SQLite version 3.7.12 2013-03-19 12:42:02
Enter ".help" for instructions
sqlite>
You are now looking at the SQLite prompt and can now run SQL statements and
commands. Let's explore the data from one of the tables in this database. This
command retrieves all the data from the artists table inside the chinook.db
database file:
sqlite> SELECT * FROM artists;
1|AC/DC
2|Accept
3|Aerosmith
4|Alanis Morissette
...
We'll talk more about the SELECT syntax in coming lessons. You can also view a
list of all the tables:
sqlite> .tables
albums          employees       invoices        playlists
artists         genres          media_types     tracks
customers       invoice_items   playlist_track
To exit sqlite, type .quit at the sqlite prompt.
Top-Tip: All SQL statements that you write in your terminal, inside the
sqlite prompt, sqlite>, must be terminated with a semi-colon ;. If you hit
enter without adding a semi-colon to the end of your line, you will be
trapped! Don't worry though, just add that ; on the new line and hit enter
again. Note, however, that this does not apply to sqlite commands that begin
with a . such as .quit and .tables. These commands will not work if you
add the semi-colon.
While it's nice to be able to interact with a SQL database directly from the terminal, it's even nicer to be able to have a visual representation of what the tables look like in a graphical user interface (GUI). One such GUI that we can use without even leaving our text editor is the SQLite VSCode Extension.
To use it, first right-click on the chinook.db file, then select "Open database":
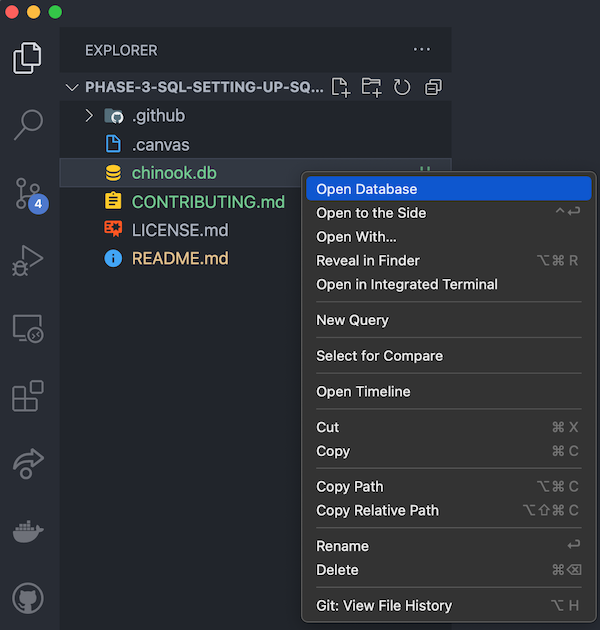
This will create a new "SQLITE EXPLORER" menu within VSCode, below the file tree:
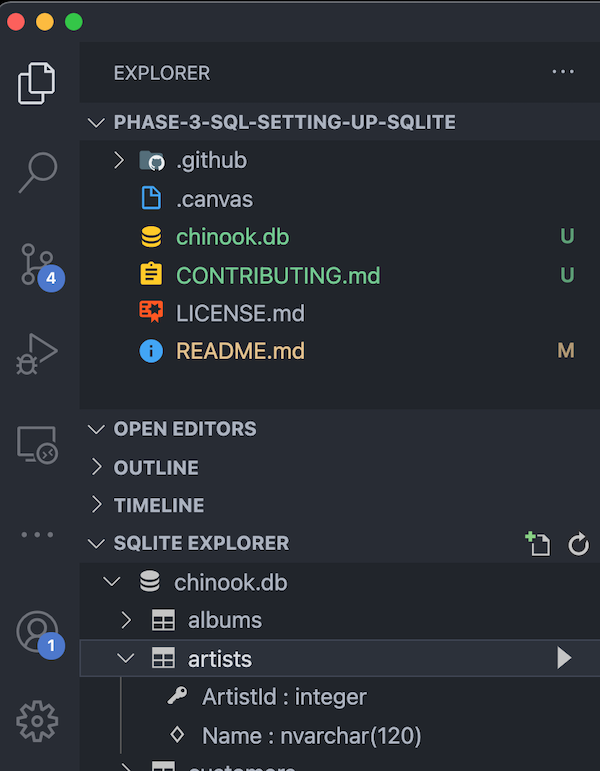
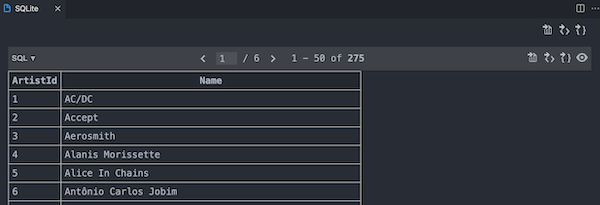
Clicking the play button (▸) next to any of the tables will open a new tab in VSCode where you can see an output of all the rows in that table in a spreadsheet-like format:
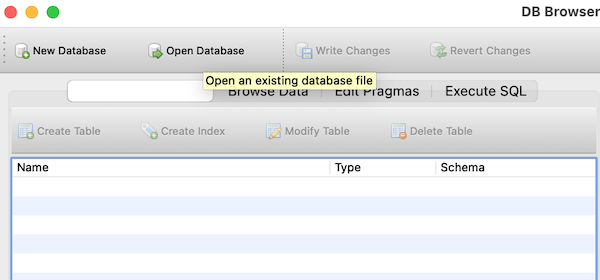
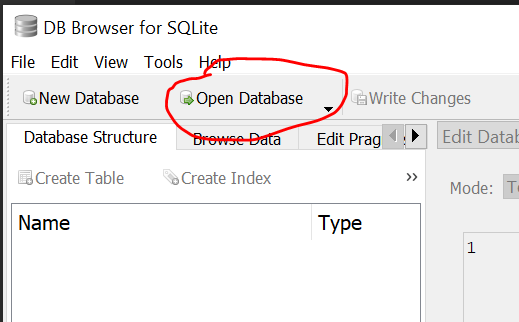
First, open the DB Browser for SQLite application:
Then, select "Open Database":
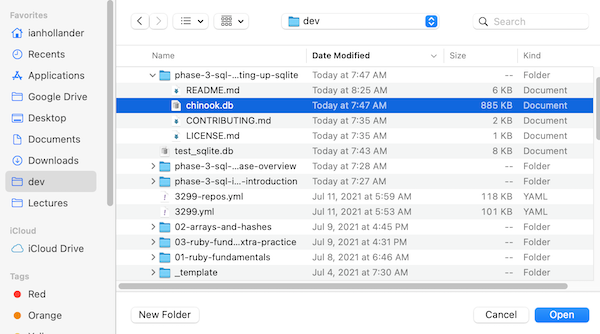
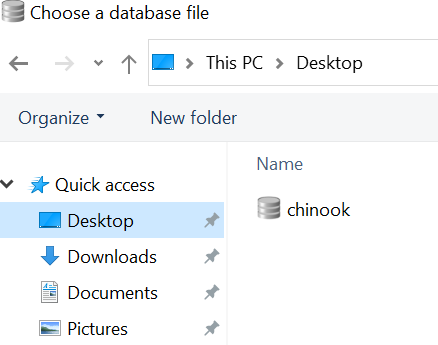
Finally, navigate to the directory where you cloned this lesson, and select the
chinook.db file:
NOTE: There are limitations to using DB Browser with files in a WSL environment. This is a known issue to the developers of DB Browser. You will need to copy the database file out of your WSL file system and into the Windows file system in order to open it in DB Browser.
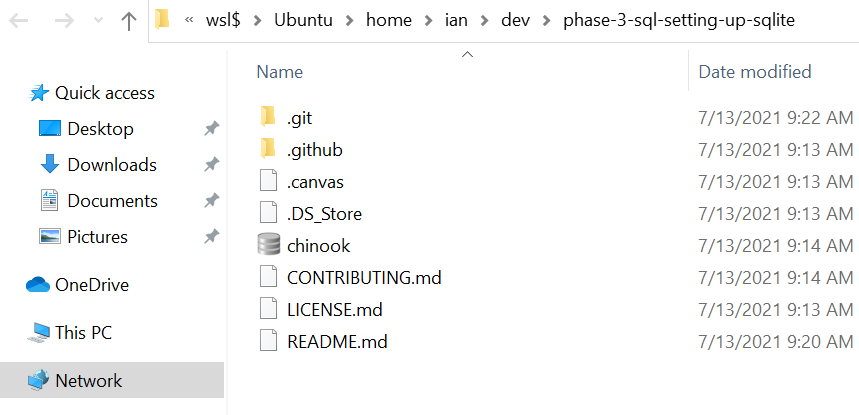
To locate the database file in the WSL file system, from your terminal, type:
$ explorer.exe .This will open the current directory in Windows File Explorer:
Then, copy the chinook.db file to any folder in your Windows file system,
like the Desktop folder:

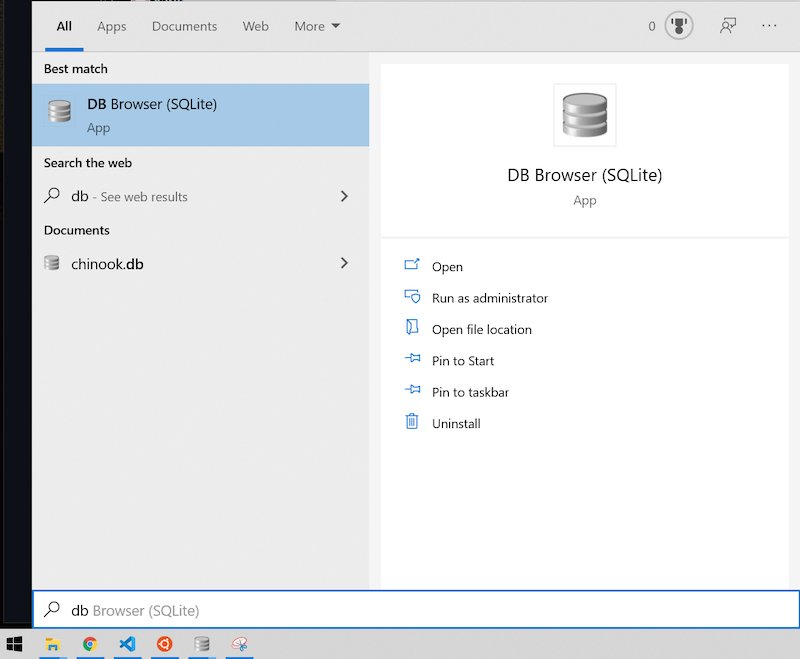
Now, open the DB Browser for SQLite application:
Then, select "Open Database":
Finally, navigate to the directory where you copied the database, and select the
chinook.db file:
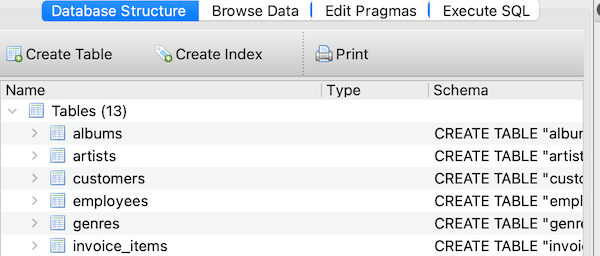
Once you've opened the database in DB Browser for SQLite, you can more easily explore all the different tables and the data contained within. For example, you can view a list of all tables in the database:
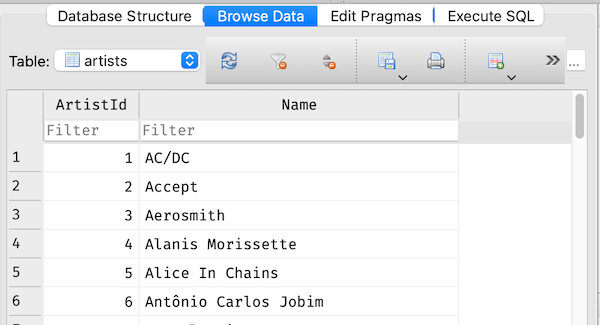
You can also view all the data from an individual table:
You can even run SQL code directly in DB Browser!

You now have three tools at your disposal for interacting with a SQLite database:
- The
sqlite3command line interface (CLI) tool- Pros: easy to run quick commands from the terminal
- Cons: harder to memorize the syntax, and no graphical representation of the data
- The SQLite VSCode extension
- Pros: built into the text editor, and easy to see a graphical representation of the data
- Cons: fewer features than the CLI tool or DB Browser
- DB Browser for SQLite
- Pros: can run SQL commands, AND has a graphical representation of the data
- Cons: more work to load a separate application (especially for WSL users)
As you work through the coming lessons and familiarize yourself with SQL databases, make sure to take advantage of each of these tools. The more comfortable you get working with the tools, the easier you'll find it to understand the underlying concepts of this section and gain proficiency with SQL.