Gradle is an open source build automation tool that is based on the concept of Apache Maven and Apache Ant. It is capable of building almost any type of software. It is designed for the multi-project build, which can be quite large. It introduces a Java and Groovy-based DSL(Domain Specific Language) instead of XML (Extensible Markup Language) for declaring the project configuration. It uses a DAG (Directed Acyclic Graph) to define the order of executing the task.
Learn more about it here.
The Gradle build is a process of creating a Gradle project. When we run a gradle command, it will look for a file called build.gradle in the current directory. This file is also called the Gradle build script. The build configuration, tasks, and plugins are described in this file. The build script describes a project and its tasks.
Let's create a small Gradle project, run some of the basic Gradle commands, and understand how Gradle manages the project.
Follow the steps below to create and test a Gradle project.
Step1: Open the command line and create a directory
First, Open the command line and create a directory for the project and change directory to it.
Let's create a demo directory.

Step2: Initialize a Gradle project
To generate a Gradle project, run the gradle init command. It will generate a simple project. With this project, we will explore and understand everything that is generated.
When we run the gradle init command, it will ask for some basic requirements. First, it will ask the type of project that we want to create. It will give four options:

Select our requirements. Hence, we are just making a demo project so that we will select the basic option. To select basic option, press 1 and Enter key. Consider the below output:
Next, it will ask for DSL. There are two options that are available for DSL:

Next, it will ask for the project name. Type the project name and press Enter key. It will take a while to build a project. After the successful execution of the project, we will get a message BUILD SUCCESSFUL.

Now we have successfully created a Gradle project. Now, what will happen to our specified directory? Consider the below structure of the Gradle project.

It is the default structure of a Gradle project. Gradle will generate the following things for us:
- The gradle file is build script for configuring the current project.
- An executable JAR file is used as a Gradle wrapper.
- Configuration properties for Gradle Wrapper.
- The gradlew is a Gradle wrapper script for UNIX based OS.
- The bat is the Gradle Wrapper script for Windows.
- The settings script for configuring the Gradle build.
The build.gradle file is crucial for configuring the build process, including setting up dependencies and build types. It allows you to control various aspects of the Android application's compilation, packaging, and deployment.
The listed dependencies are examples of commonly used libraries in Android development, such as AppCompat, ConstraintLayout, Material Design components, JUnit, Espresso, Volley, Glide, RecyclerView, Jsoup, and more. Note that the specific versions of the libraries may vary based on the project's requirements or the latest versions available at the time of development.
To build and run your app, follow these steps:
- In the toolbar, select your app from the run configurations menu.
- In the target device menu, select the device that you want to run your app on.
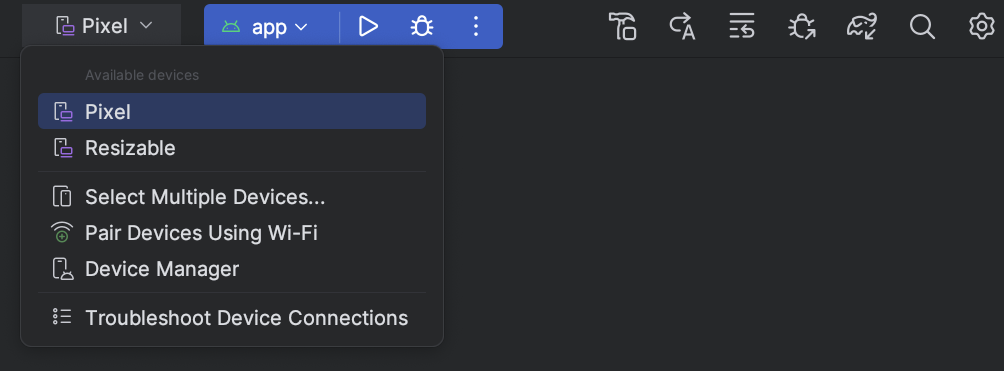
- If you don't have any devices configured, you need to either create an Android Virtual Device to use the Android Emulator or connect a physical device.
- Click Run
.

Android Studio warns you if you attempt to launch your project to a device that has an error or a warning associated with it. Iconography and stylistic changes differentiate between errors (device selections that result in a broken configuration) and warnings (device selections that might result in unexpected behavior but are still runnable).
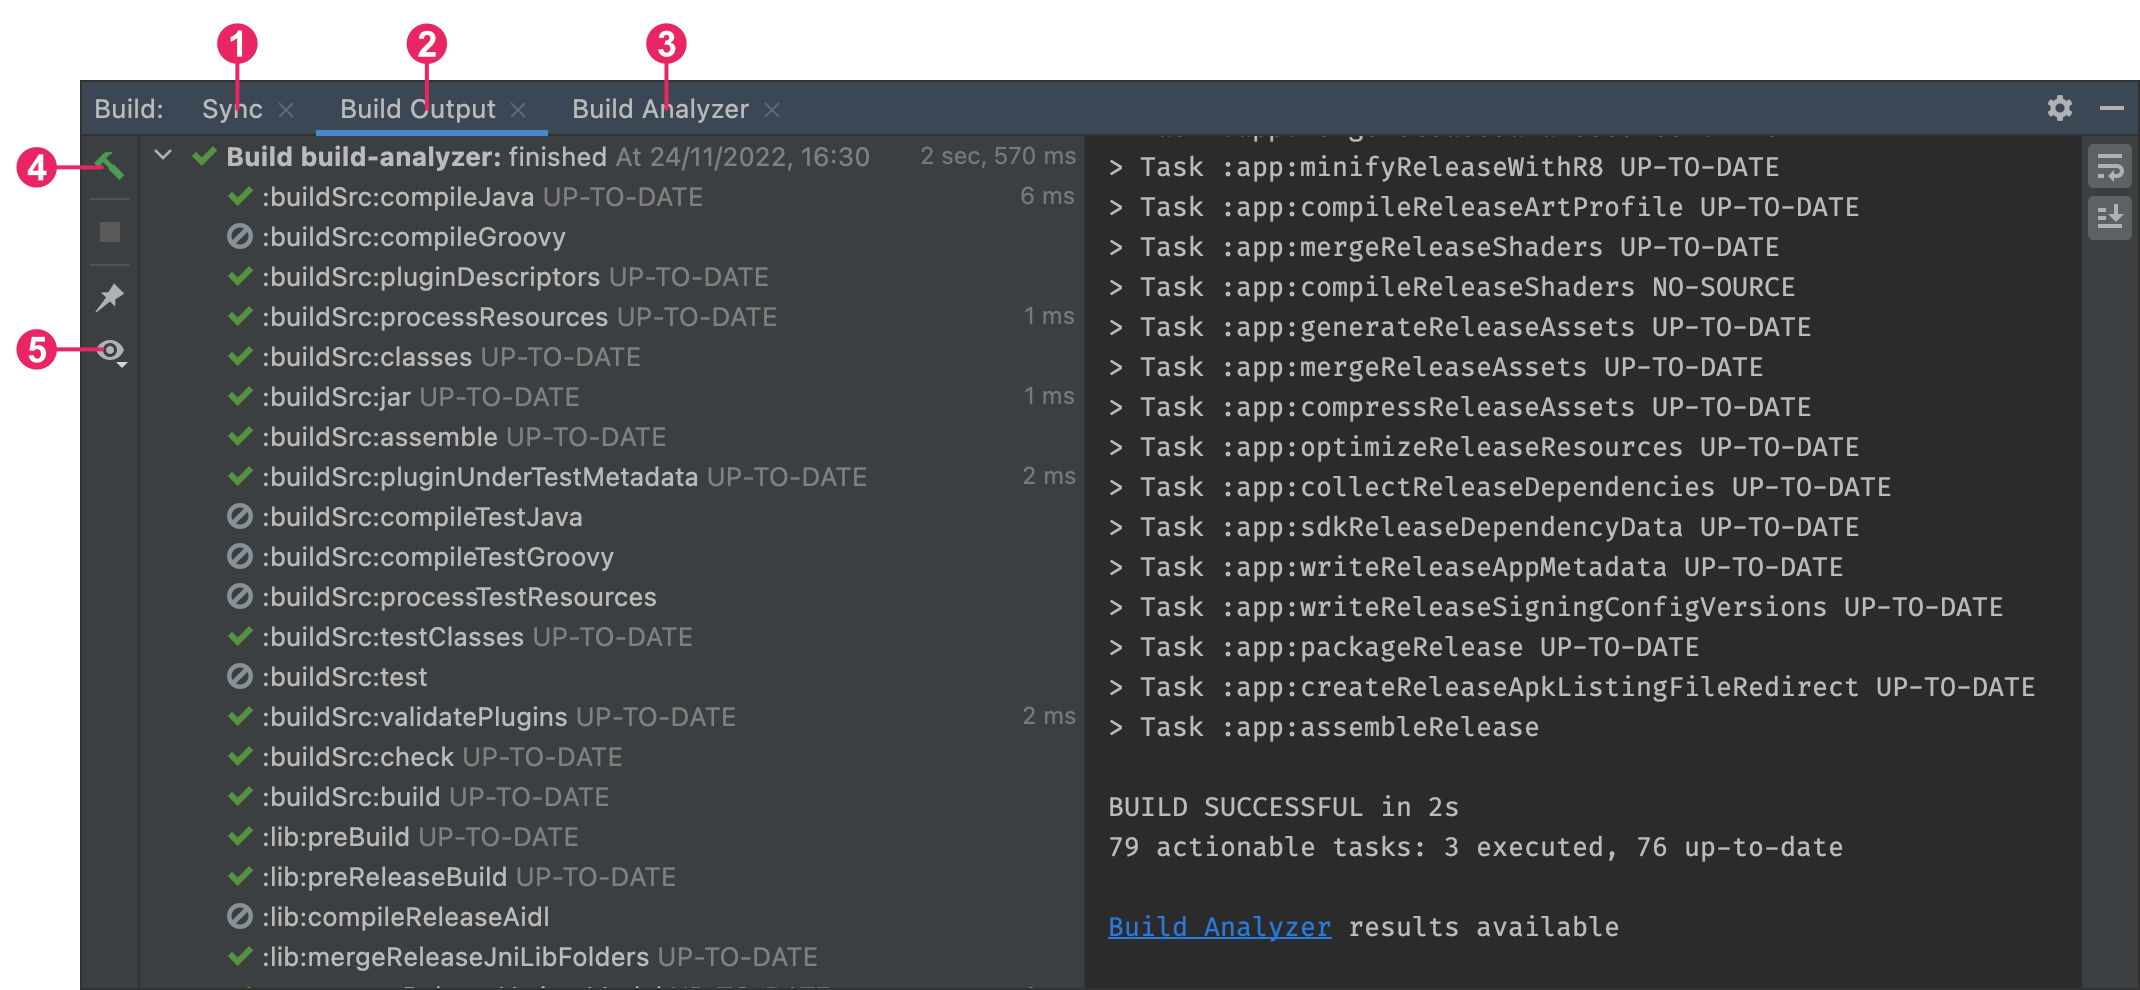
To view details about the build process, select View > Tool Windows > Build or click Build 
-
Sync tab: Displays tasks that Gradle executes to sync with your project files. Similar to the Build Output tab, if you encounter a sync error, select elements in the tree to get more information about the error.
-
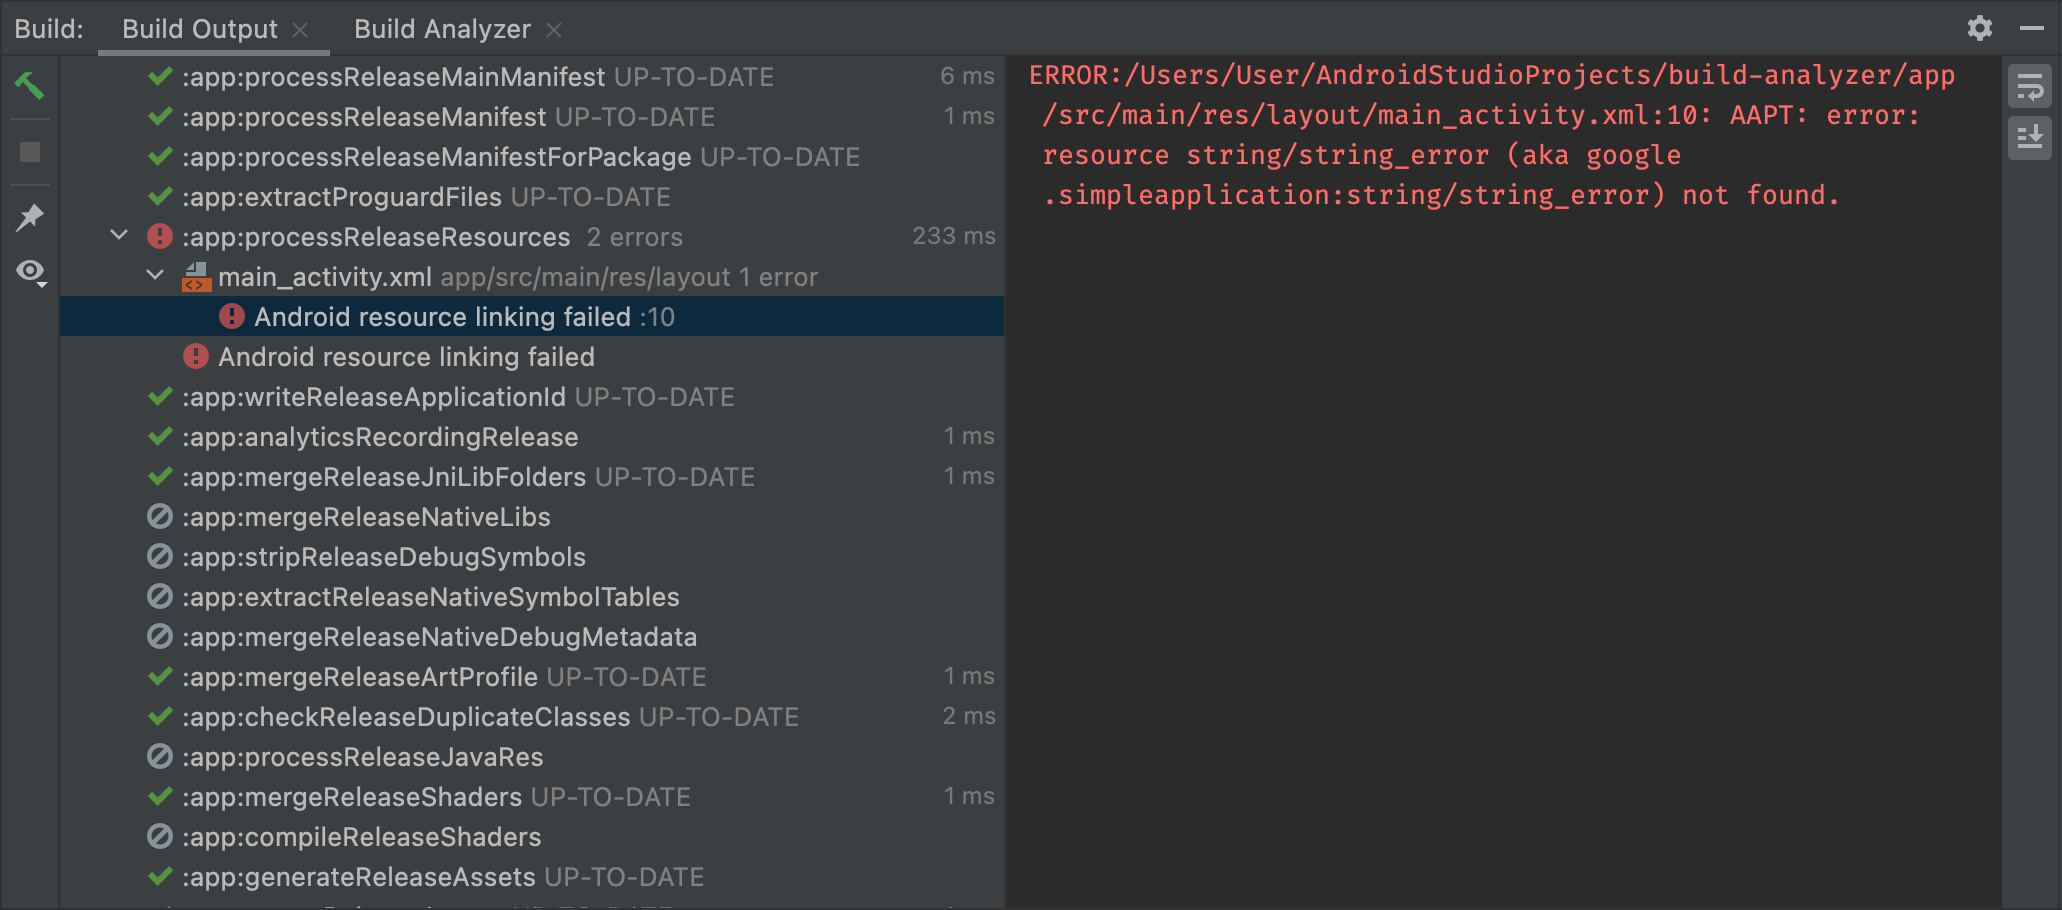
Build Output tab: Displays the tasks that Gradle executes as a tree, where each node represents either a build phase or a group of task dependencies. If you receive build-time or compile-time errors, inspect the tree and select an element to read the error output, as shown in figure 2.
Figure 2. Inspect the Build Output tab for error messages.
-
Build Analyzer tab: Provides build performance analysis information about your build. See Troubleshoot build performance with Build Analyzer for more information.
-
Restart: Performs the same action as selecting Build > Make Project, generating intermediate build files for all modules in your project.
-
Filters: Filters out warnings, tasks, or both that completed successfully. This can make it easier to find issues in the output.
If your build variants use product flavors, Gradle also invokes tasks to build those product flavors. To view the list of all available build tasks, click View > Tool Windows > Gradle or click Gradle 
If an error occurs during the build process, Gradle may recommend command-line options to help you resolve the issue, such as --stacktrace or --debug. To use command-line options with your build process:
- Open the Settings or Preferences dialog:
- On Windows or Linux, select File > Settings from the menu bar.
- On macOS, select Android Studio > Preferences from the menu bar.
- Navigate to Build, Execution, Deployment > Compiler.
- In the text field next to Command-line Options, enter your command-line options.
- Click OK to save and exit.
Gradle applies these command-line options the next time you try building your app.
Creating custom build configurations requires you to make changes to one or more build configuration files or build.gradle.kts files. These plain-text files use Domain Specific Language (DSL) to describe and manipulate the build logic using Kotlin script, which is a flavor of the Kotlin language. You can also use Groovy, which is a dynamic language for the Java Virtual Machine (JVM), to configure your builds. Build scripts written in Groovy are called build.gradle files.
You don't need to know Kotlin script or Groovy to start configuring your build, because the Android Gradle plugin introduces most of the DSL elements you need.
To learn more about the Android Gradle plugin DSL, read the DSL reference documentation. Kotlin script also relies on the underlying Gradle Kotlin DSL.
When starting a new project, Android Studio automatically creates some of these files for you and populates them based on sensible defaults. The project file structure has the following layout:
└── MyApp/  # Project
    ├── build.gradle.kts
    ├── settings.gradle
    └── app/  # Module
        ├── build.gradle.kts
        └── build/
            ├── libs/
            └── src/
                └── main/  # Source set
                    ├── java/
                    │   └── com.example.myapp
                    ├── res/
                    │   ├── drawable/
                    │   ├── values/
                    │   └── ...
                    └── AndroidManifest.xml
There are a few Gradle build configuration files that are part of the standard project structure for an Android app. Before you can start configuring your build, it's important to understand the scope and purpose of each of these files and the basic DSL elements they define.
The settings.gradle.kts file (for the Kotlin DSL) or settings.gradle file (for the Groovy DSL) is located in the root project directory. This settings file defines project-level repository settings and informs Gradle which modules it should include when building your app. Multi-module projects need to specify each module that should go into the final build.
For most projects, the file looks like the following by default:
pluginManagement {

    /**
      * The pluginManagement {repositories {...}} block configures the
      * repositories Gradle uses to search or download the Gradle plugins and
      * their transitive dependencies. Gradle pre-configures support for remote
      * repositories such as JCenter, Maven Central, and Ivy. You can also use
      * local repositories or define your own remote repositories. The code below
      * defines the Gradle Plugin Portal, Google's Maven repository,
      * and the Maven Central Repository as the repositories Gradle should use to look for its
      * dependencies.
      */

    repositories {
        gradlePluginPortal()
        google()
        mavenCentral()
    }
}
dependencyResolutionManagement {

    /**
      * The dependencyResolutionManagement {repositories {...}}
      * block is where you configure the repositories and dependencies used by
      * all modules in your project, such as libraries that you are using to
      * create your application. However, you should configure module-specific
      * dependencies in each module-level build.gradle file. For new projects,
      * Android Studio includes Google's Maven repository and the Maven Central
      * Repository by default, but it does not configure any dependencies (unless
      * you select a template that requires some).
      */

  repositoriesMode.set(RepositoriesMode.FAIL_ON_PROJECT_REPOS)
  repositories {
      google()
      mavenCentral()
  }
}
rootProject.name = "My Application"
include(":app")
The top-level build.gradle.kts file (for the Kotlin DSL) or build.gradle file (for the Groovy DSL) is located in the root project directory. It defines dependencies that apply to all modules in your project. By default, the top-level build file uses the plugins block to define the Gradle dependencies that are common to all modules in the project. In addition, the top-level build file contains code to clean your build directory.
The following code sample describes the default settings and DSL elements in the top-level build script after creating a new project:
plugins {

    /**
     * Use `apply false` in the top-level build.gradle file to add a Gradle
     * plugin as a build dependency but not apply it to the current (root)
     * project. Don't use `apply false` in sub-projects. For more information,
     * see Applying external plugins with same version to subprojects.
     */

    id("com.android.application") version "8.0.0" apply false
    id("com.android.library") version "8.0.0" apply false
    id("org.jetbrains.kotlin.android") version "1.8.20" apply false
}For Android projects that include multiple modules, it might be useful to define certain properties at the project level and share them across all the modules. You can do this by adding extra properties to the ext block in the top-level build.gradle.kts file (for the Kotlin DSL) or build.gradle file (for the Groovy DSL):
// This block encapsulates custom properties and makes them available to all
// modules in the project. The following are only a few examples of the types
// of properties you can define.
ext {
    extra["sdkVersion"] = 33
    // You can also create properties to specify versions for dependencies.
    // Having consistent versions between modules can avoid conflicts with behavior.
    extra["appcompatVersion"] = "1.6.1"
    ...
}
...
To access these properties from a module in the same project, use the following syntax in the module-level build script.
android {
    // Use the following syntax to access properties you defined at the project level:
    // rootProject.extra["property_name"]
    compileSdk = rootProject.extra["sdkVersion"]

    // Alternatively, you can access properties using a type safe delegate:
    val sdkVersion: Int by rootProject.extra
    ...
    compileSdk = sdkVersion
}
...
dependencies {
    implementation("androidx.appcompat:appcompat:${rootProject.ext.appcompatVersion}")
    ...
}
Note: Although Gradle lets you define project-wide properties at the module level, avoid doing so, because it causes the modules that share those properties to be coupled. Module coupling makes it more difficult to later export a module as a standalone project and prevents Gradle from using parallel project execution to speed up multi-module builds.
The module-level build.gradle.kts (for the Kotlin DSL) or build.gradle file (for the Groovy DSL) is located in each project/module/ directory. It lets you configure build settings for the specific module it is located in. Configuring these build settings lets you provide custom packaging options, such as additional build types and product flavors, and override settings in the main/ app manifest or top-level build script.
This sample Android app module build script outlines some of the basic DSL elements and settings:
/**
 * The first section in the build configuration applies the Android Gradle plugin
 * to this build and makes the android block available to specify
 * Android-specific build options.
 */

plugins {
    id("com.android.application")
}

/**
 * The android block is where you configure all your Android-specific
 * build options.
 */

android {

    /**
     * The app's namespace. Used primarily to access app resources.
     */

    namespace = "com.example.myapp"

    /**
     * compileSdk specifies the Android API level Gradle should use to
     * compile your app. This means your app can use the API features included in
     * this API level and lower.
     */

    compileSdk = 33

    /**
     * The defaultConfig block encapsulates default settings and entries for all
     * build variants and can override some attributes in main/AndroidManifest.xml
     * dynamically from the build system. You can configure product flavors to override
     * these values for different versions of your app.
     */

    defaultConfig {

        // Uniquely identifies the package for publishing.
        applicationId = "com.example.myapp"

        // Defines the minimum API level required to run the app.
        minSdk = 21

        // Specifies the API level used to test the app.
        targetSdk = 33

        // Defines the version number of your app.
        versionCode = 1

        // Defines a user-friendly version name for your app.
        versionName = "1.0"
    }

    /**
     * The buildTypes block is where you can configure multiple build types.
     * By default, the build system defines two build types: debug and release. The
     * debug build type is not explicitly shown in the default build configuration,
     * but it includes debugging tools and is signed with the debug key. The release
     * build type applies ProGuard settings and is not signed by default.
     */

    buildTypes {

        /**
         * By default, Android Studio configures the release build type to enable code
         * shrinking, using minifyEnabled, and specifies the default ProGuard rules file.
         */

        getByName("release") {
            isMinifyEnabled = true // Enables code shrinking for the release build type.
            proguardFiles(
                getDefaultProguardFile("proguard-android.txt"),
                "proguard-rules.pro"
            )
        }
    }

    /**
     * The productFlavors block is where you can configure multiple product flavors.
     * This lets you create different versions of your app that can
     * override the defaultConfig block with their own settings. Product flavors
     * are optional, and the build system does not create them by default.
     *
     * This example creates a free and paid product flavor. Each product flavor
     * then specifies its own application ID, so that they can exist on the Google
     * Play Store, or an Android device, simultaneously.
     *
     * If you declare product flavors, you must also declare flavor dimensions
     * and assign each flavor to a flavor dimension.
     */

    flavorDimensions += "tier"
    productFlavors {
        create("free") {
            dimension = "tier"
            applicationId = "com.example.myapp.free"
        }

        create("paid") {
            dimension = "tier"
            applicationId = "com.example.myapp.paid"
        }
    }
}

/**
 * The dependencies block in the module-level build configuration file
 * specifies dependencies required to build only the module itself.
 * To learn more, go to Add build dependencies.
 */

dependencies {
    implementation(project(":lib"))
    implementation("androidx.appcompat:appcompat:1.6.1")
    implementation(fileTree(mapOf("dir" to "libs", "include" to listOf("*.jar"))))
}
Gradle also includes two properties files, located in your root project directory, that you can use to specify settings for the Gradle build toolkit itself:
-
gradle.propertiesThis is where you can configure project-wide Gradle settings, such as the Gradle daemon's maximum heap size. For more information, see Build Environment.
-
local.propertiesConfigures local environment properties for the build system, including the following:
ndk.dir- Path to the NDK. This property has been deprecated. Any downloaded versions of the NDK are installed in thendkdirectory within the Android SDK directory.sdk.dir- Path to the SDK.cmake.dir- Path to CMake.ndk.symlinkdir- In Android Studio 3.5 and higher, creates a symlink to the NDK that can be shorter than the installed NDK path.![image-20230705021457224]
In Windows, tools in the installed NDK folder, such as ld.exe, end up with long paths. The tools don't support long paths well.
To create a shorter path, in local.properties, set the property ndk.symlinkdir to request that the Android Gradle plugin create a symlink to the NDK. The path of that symlink can be shorter than the existing NDK folder. For example, ndk.symlinkdir = C:\ will result in the following symlink: C:\ndk\19.0.5232133
When you make changes to the build configuration files in your project, Android Studio requires that you sync your project files so that it can import your build configuration changes and run some checks to make sure your configuration doesn't create build errors.
To sync your project files, click Sync Now in the notification bar that appears when you make a change, as shown in figure 1, or click Sync Project 
compileSdkVersion—the Messages window describes the issue.

Android Studio logically groups source code and resources for each module into source sets. When you create a new module, Android Studio creates a main/ source set within the module. A module's main/ source set includes the code and resources used by all its build variants.
Additional source set directories are optional, and Android Studio doesn't automatically create them for you when you configure new build variants. However, creating source sets, similar to main/, helps organize files and resources that Gradle should only use when building certain versions of your app:
-
src/main/This source set includes code and resources common to all build variants.
-
src/buildType/Create this source set to include code and resources only for a specific build type.
-
src/productFlavor/Create this source set to include code and resources only for a specific product flavor.

-
src/productFlavorBuildType/Create this source set to include code and resources only for a specific build variant.
For example, to generate the "fullDebug" version of your app, the build system merges code, settings, and resources from following source sets:
src/fullDebug/(the build variant source set)src/debug/(the build type source set)src/full/(the product flavor source set)src/main/(the main source set)

If different source sets contain different versions of the same file, Gradle uses the following priority order when deciding which file to use. Source sets on the left override the files and settings of source sets to the right:
This allows Gradle to use files that are specific to the build variant you are trying to build while reusing activities, application logic, and resources that are common to other versions of your app.
When merging multiple manifests, Gradle uses the same priority order so each build variant can define different components or permissions in the final manifest. To learn more about creating custom source sets, read Create source sets.
After successfully build, the apk will be created. On installing it, we'll get our covid tracker app!

.jpeg)

