Azure ML - AutoML for Images: Instance Segmentation
Auzre Machine Learning's AutoML for Images functionality can be used to train custom image classification, object detection, and instance segmentation models.
The notebooks contained within this sample repository demonstrate an end-to-end sample for:
✅ Creating compute resources for training and inferencing operations
✅ Uploading sample images to an AML datastore
✅ Creating and registering a labeled image dataset
✅ Building and publishing a reusable model training pipeline which submits an AutoML for Images training job
✅ Registering a trained instance segmentation model to the AML workspace
✅ Deploying a trained model to a real-time endpoint (Azure Kubernetes Service)
✅ Submitting HTTP requests to consume a deployed instance segmentation model
Follow the step-by-step guide below for instructions on running this demo, and adapting and extending with your own images!
Getting Started
Following the instructions below to set up an Azure Machine Learning workspace, create necessary compute resources, and run the instance segmentation training demo!
Required Resources
In order to run this demo you will need access to an Azure Machine Learning workspace. If you do not have access to an existing Azure Machine Learning workspace, you can provision and new instance by following the quickstart guide linked here.
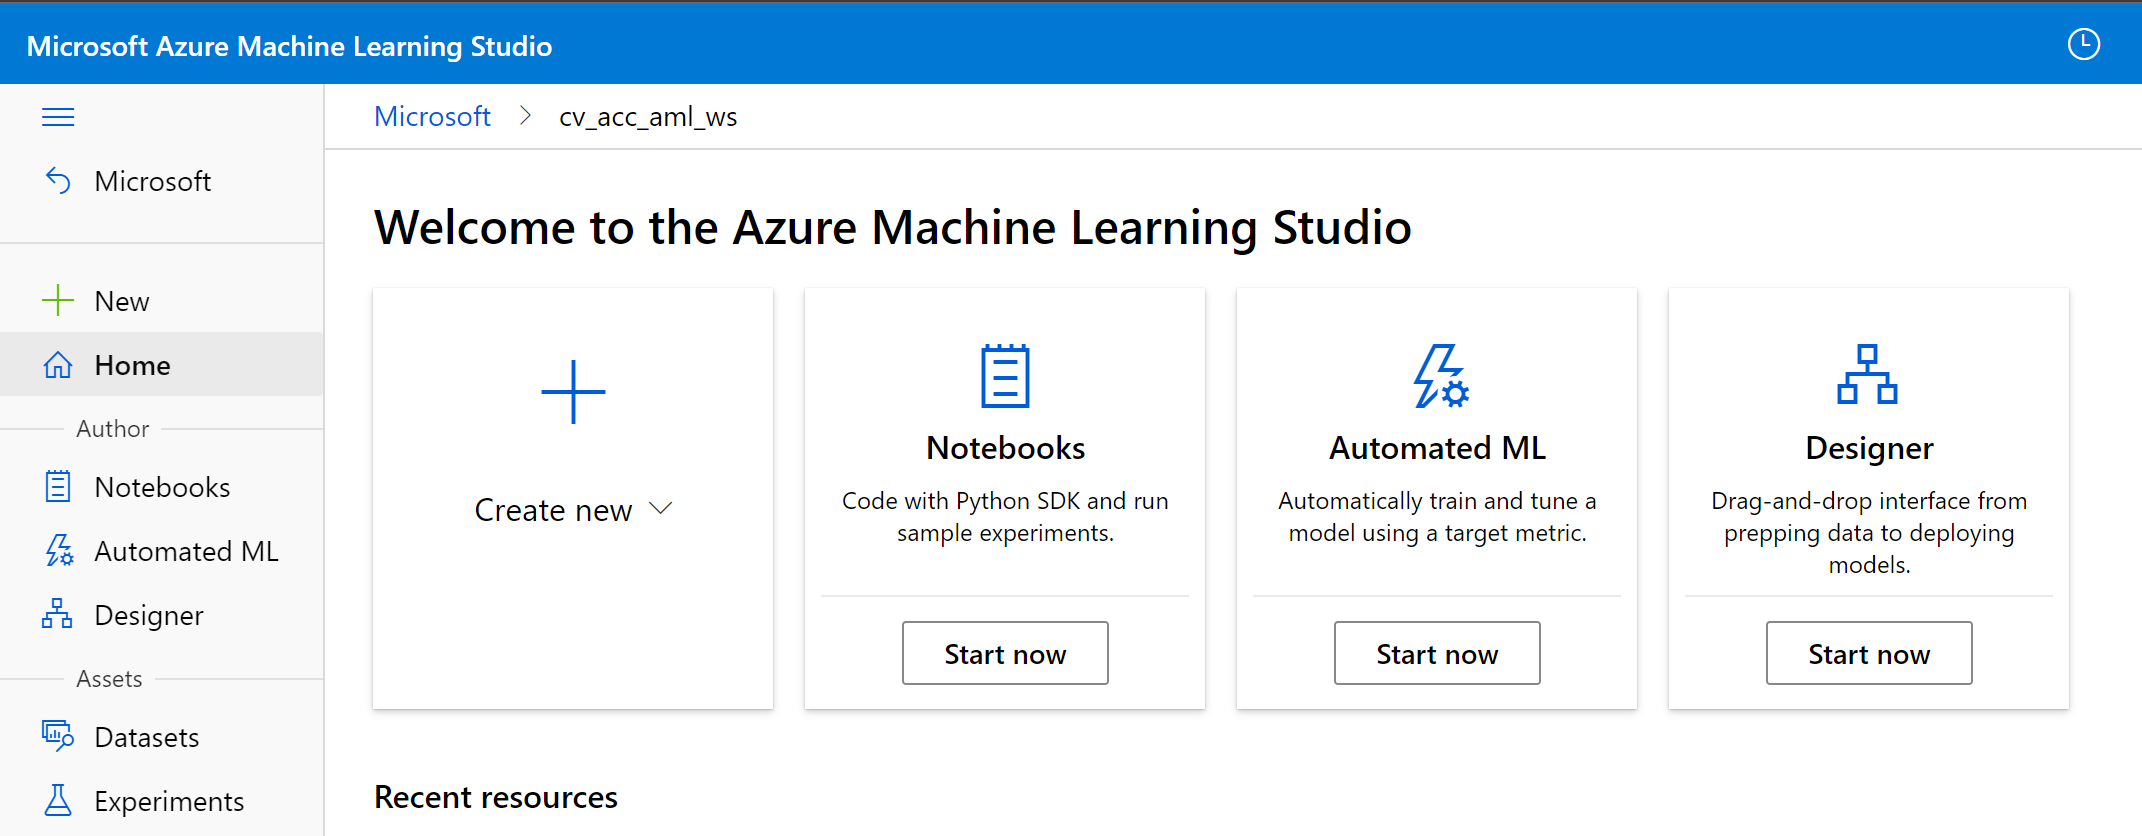
Sign into your AML workspace by navigating to ml.azure.com and selecting the target workspace you aim to run this demo inside of.
Create a Compute Instance
Compute instances inside of Azure Machine Learning are standalone virtual machines which come with preconfigured data science environments that can be used for machine learning development and testing activities. For the purpose of this demo we recommend creating a Standard_DS3_v2 compute instance and using this to execute the prepared notebooks within this repo.
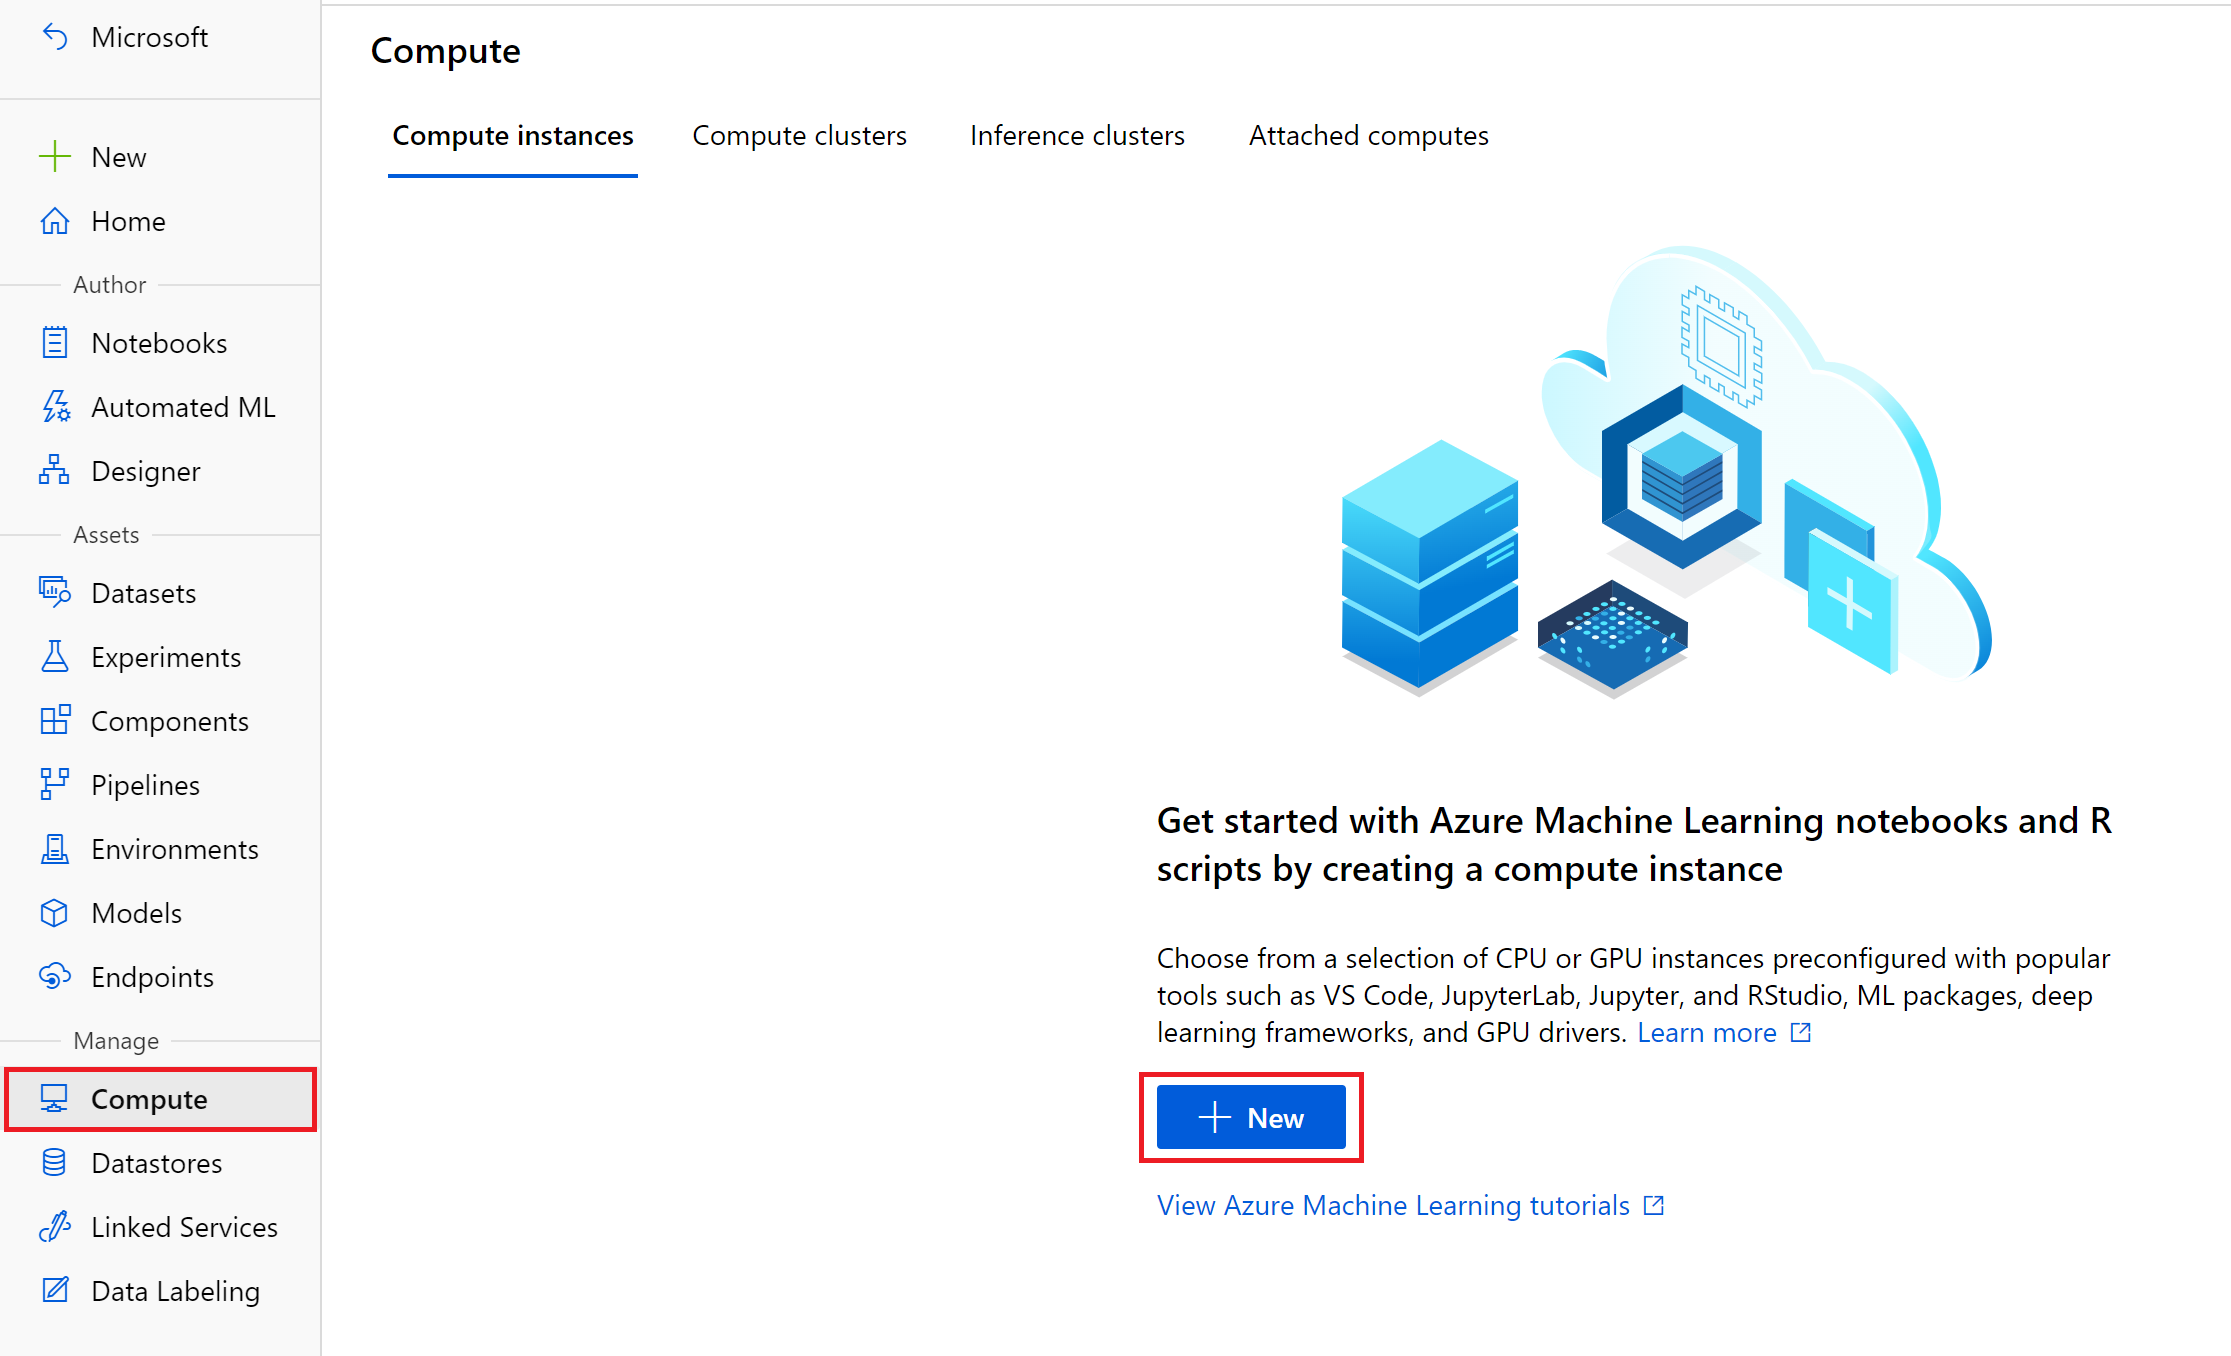
Navigate to the 'Compute' table along the left sidebar menu and click the '+ New' button under the compute instances panel.
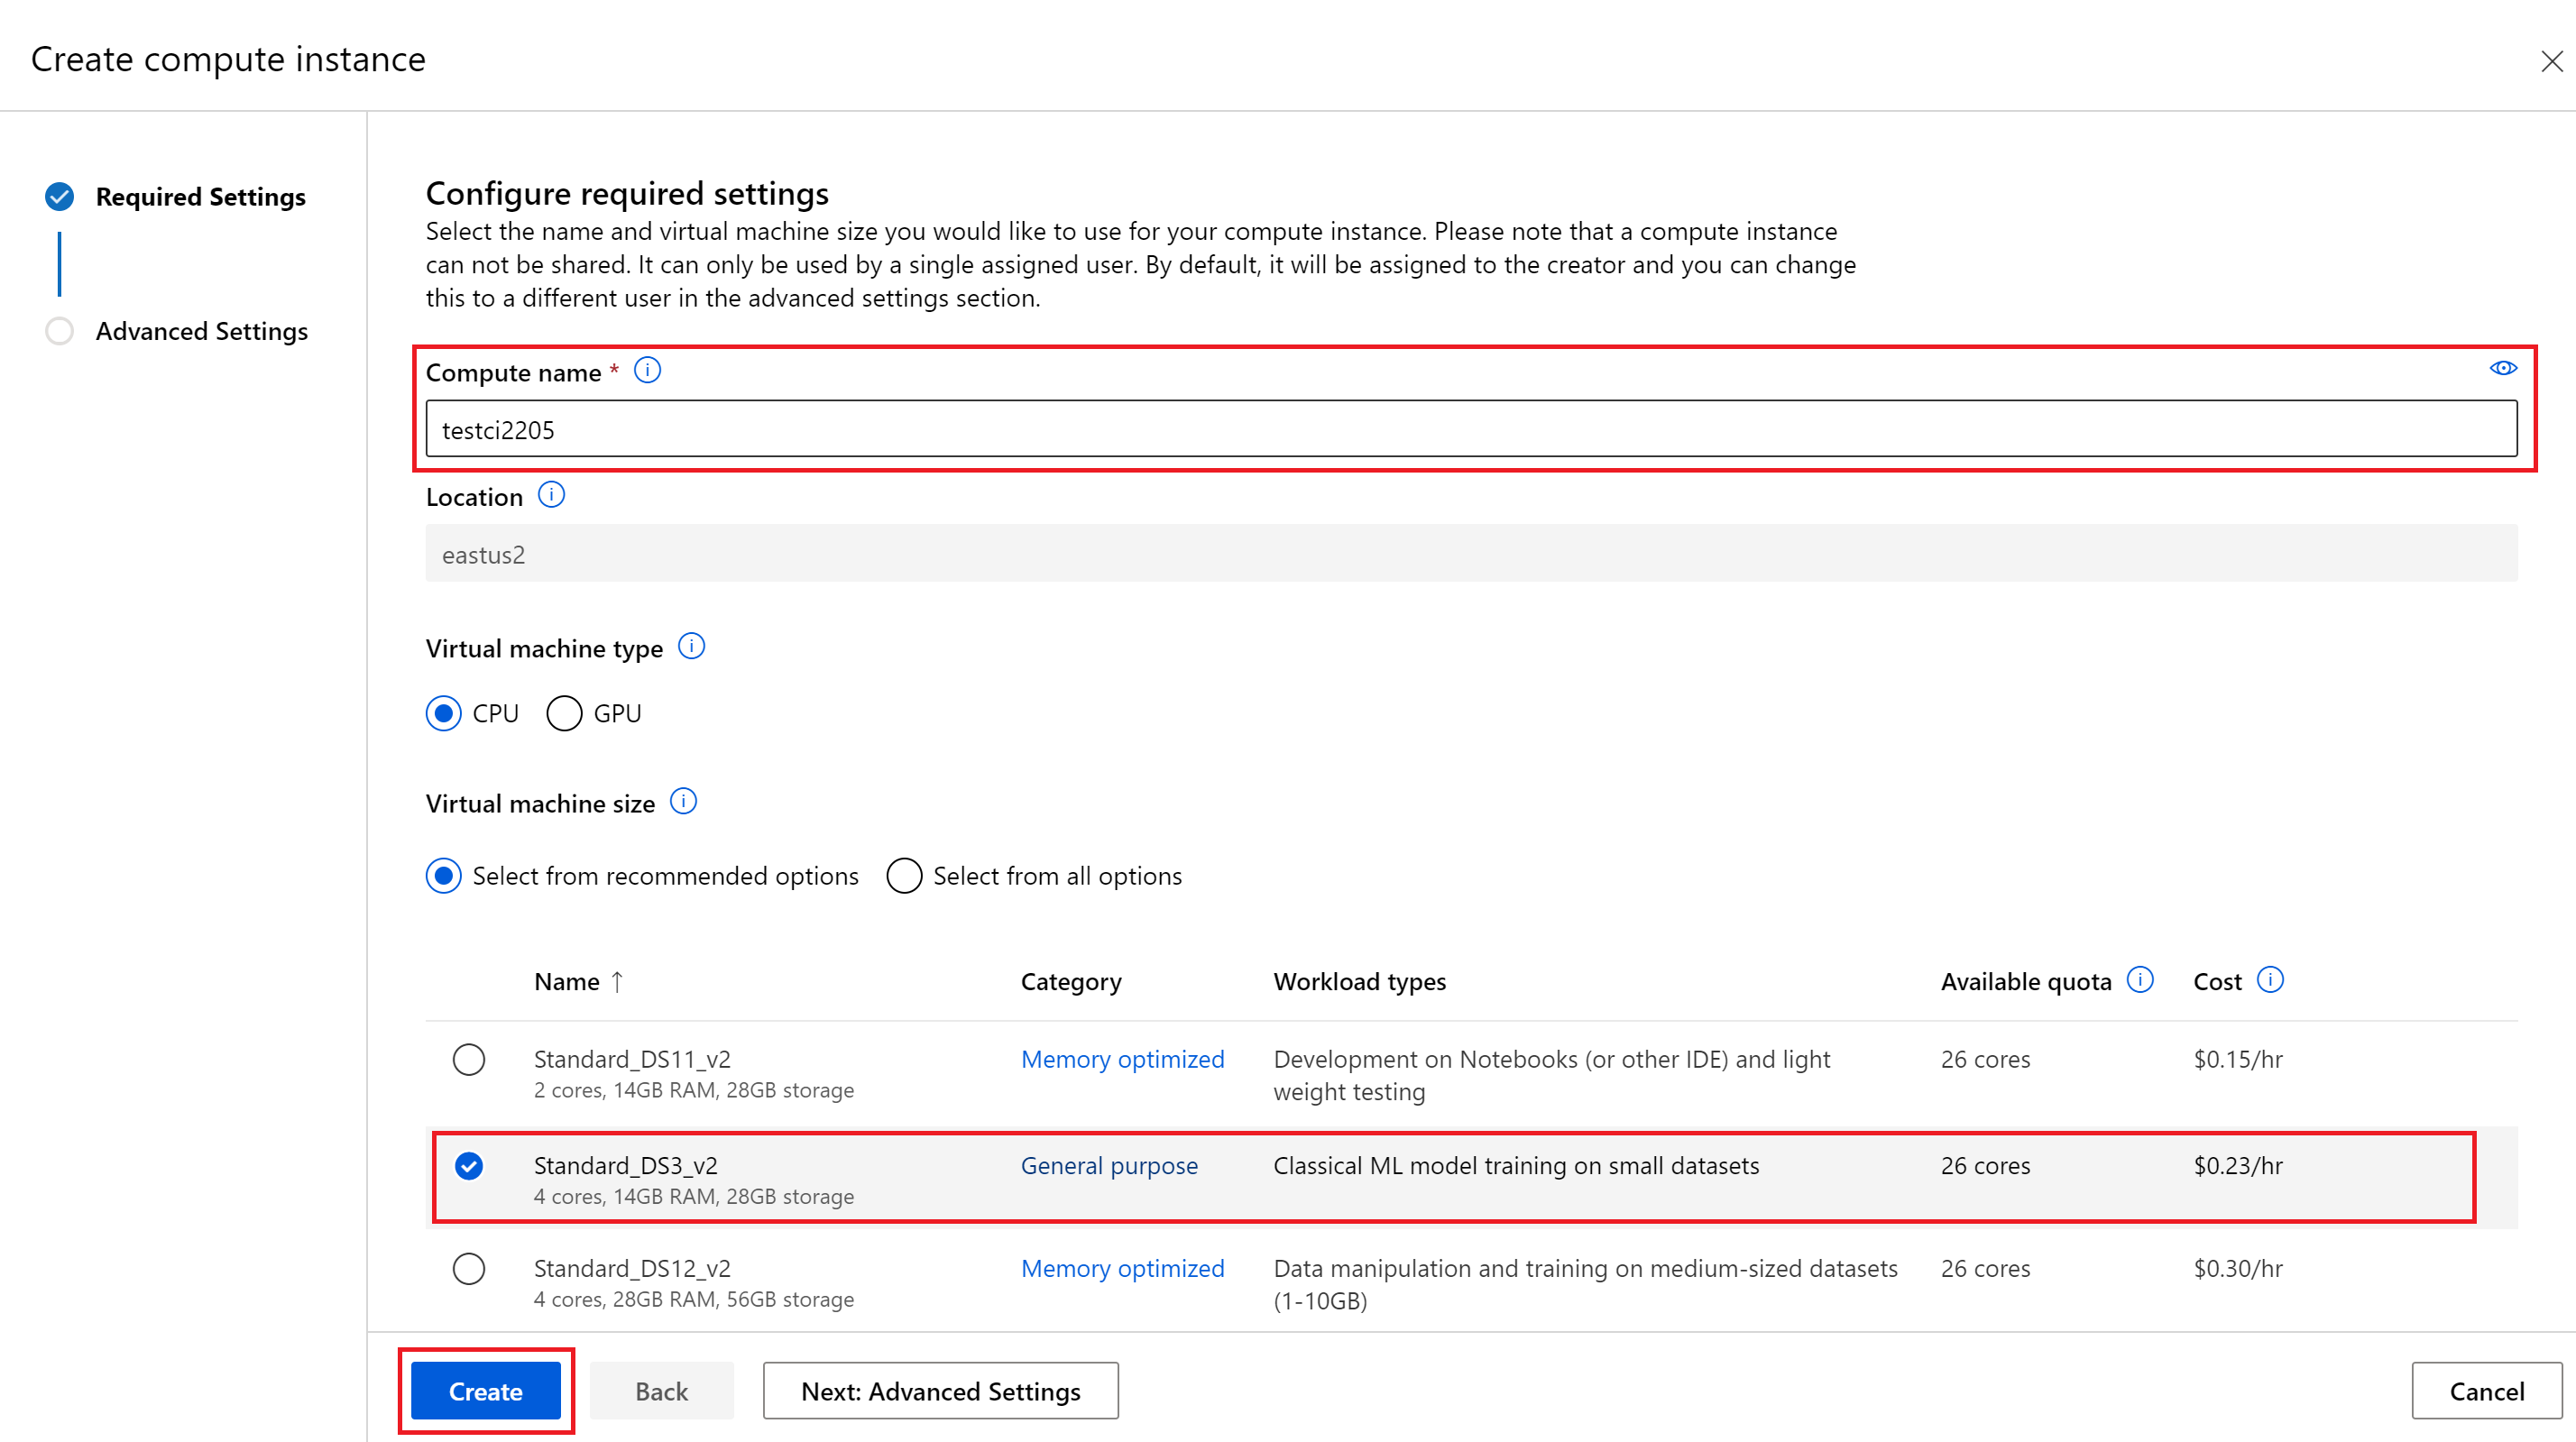
From the 'Create compute instance' tab give your compute instance a globally unique name, and select the Standard_DS3_v2 option under Virtual machine size. Also, it is recommended to create an automatic shutdown schedule under the 'Advanced Settings' tab which will help avoid any unexpected charges.
Once your compute instance has been created you should see the state message reflect 'Succeeded' and the VM will be ready for use. To follow along with the pictorial guide in this README, launch the 'JupyterLab' application from applications list.
Clone this Repo to AML Compute Instance
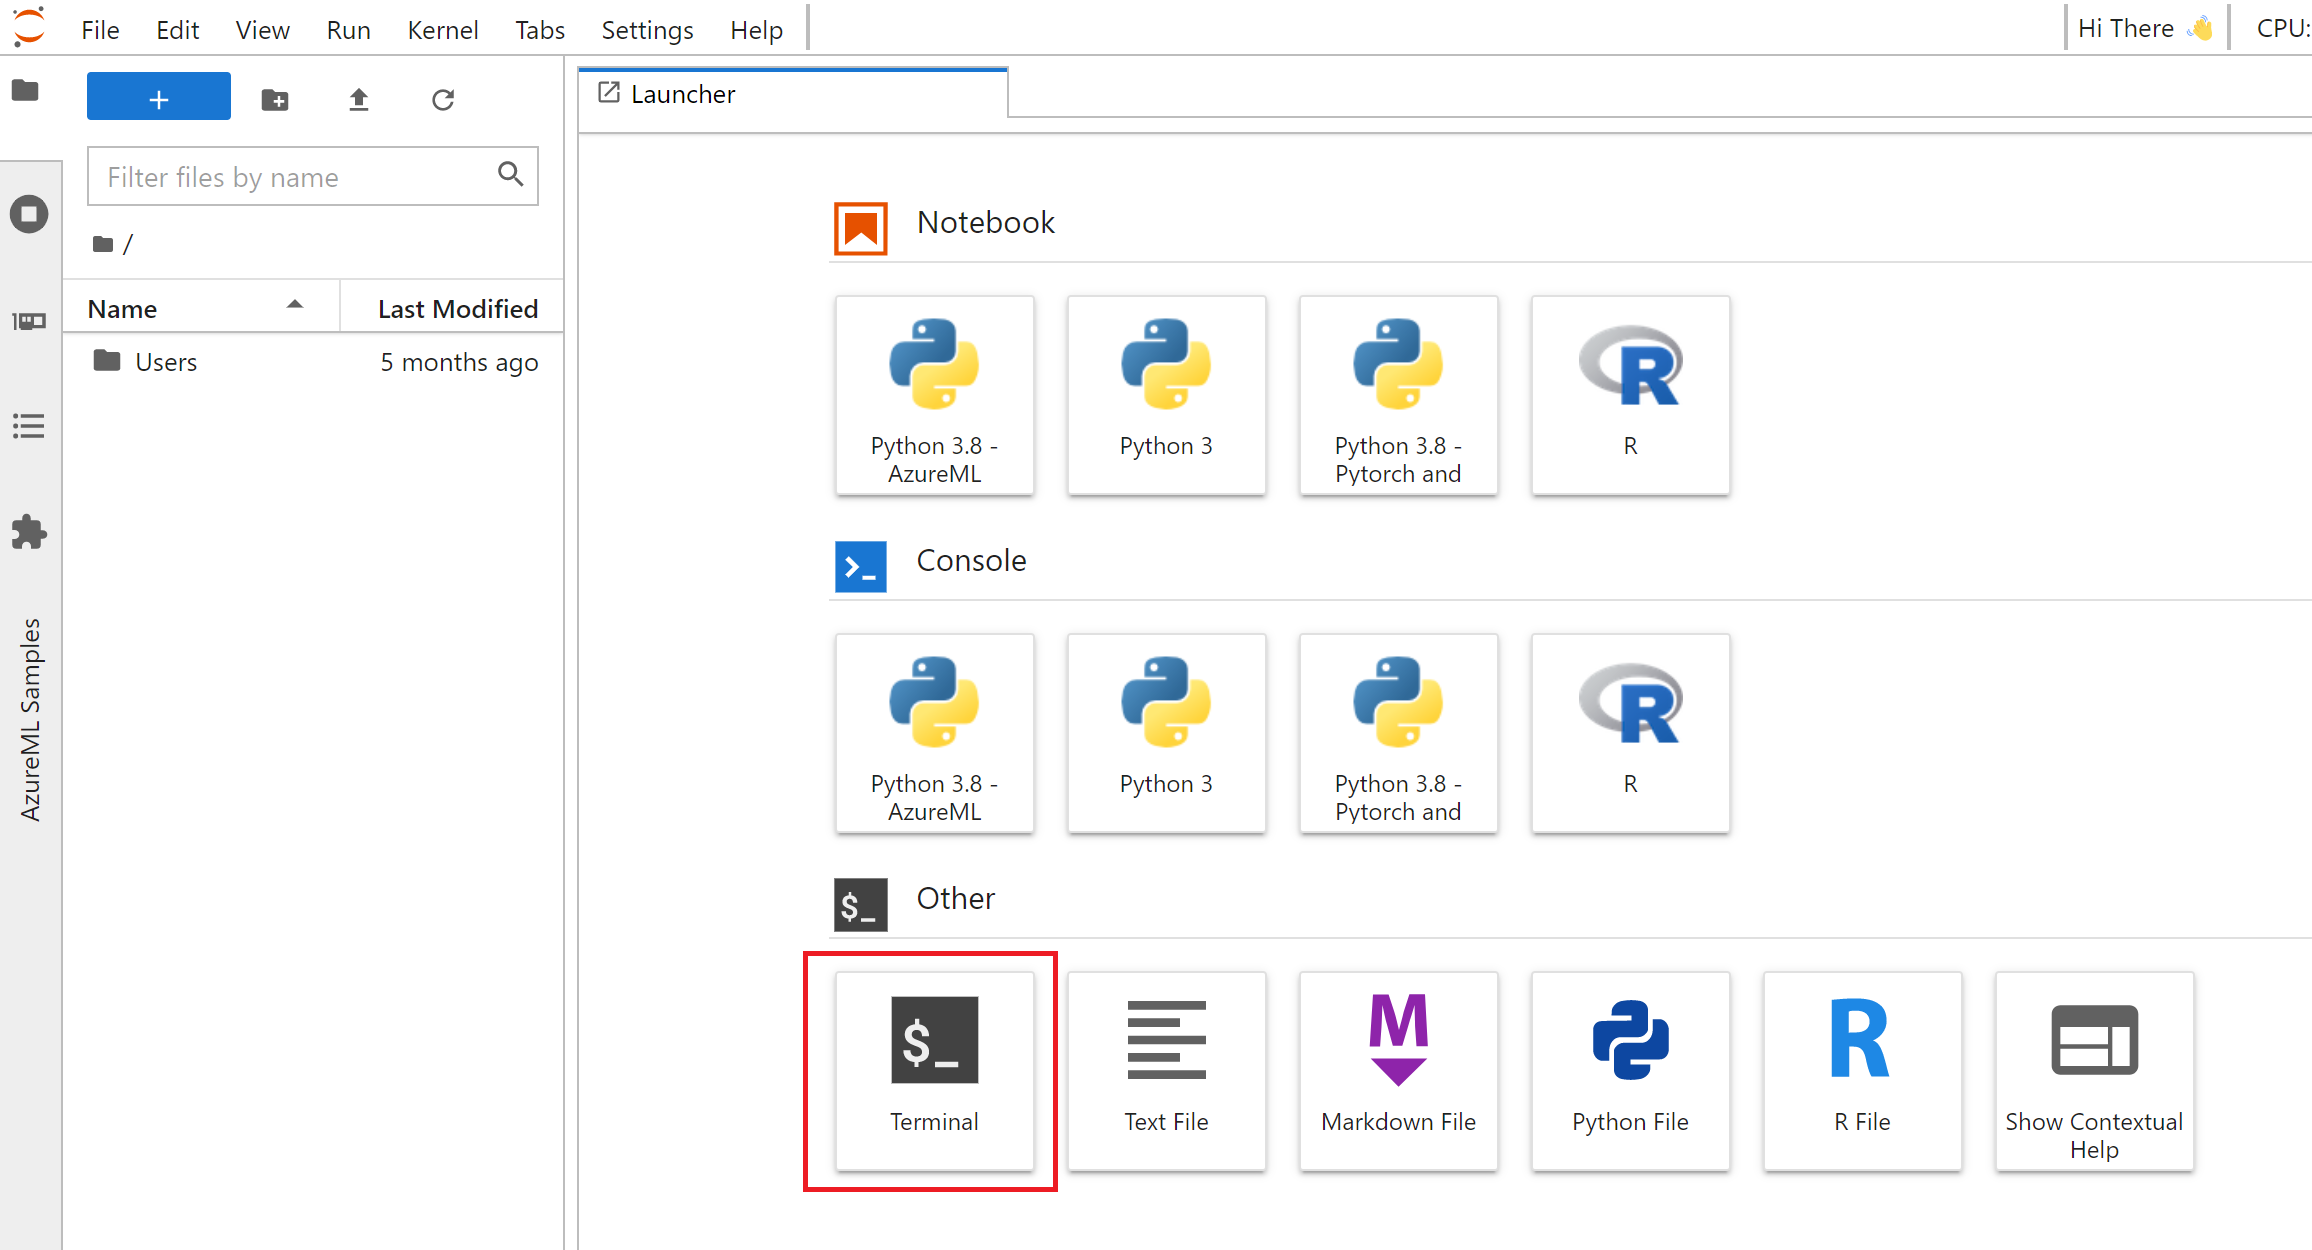
Inside of JupyterLab, launch a new terminal by clicking the 'Terminal' option from the Launcher menu.
From the newly opened terminal execute the following commands to clone this repo to a folder under your user directory:
cd Users/<YOUR-USERNAME>
git clone https://github.com/ManufacturingCSU/AzureML_AutoML_InstanceSegmentation
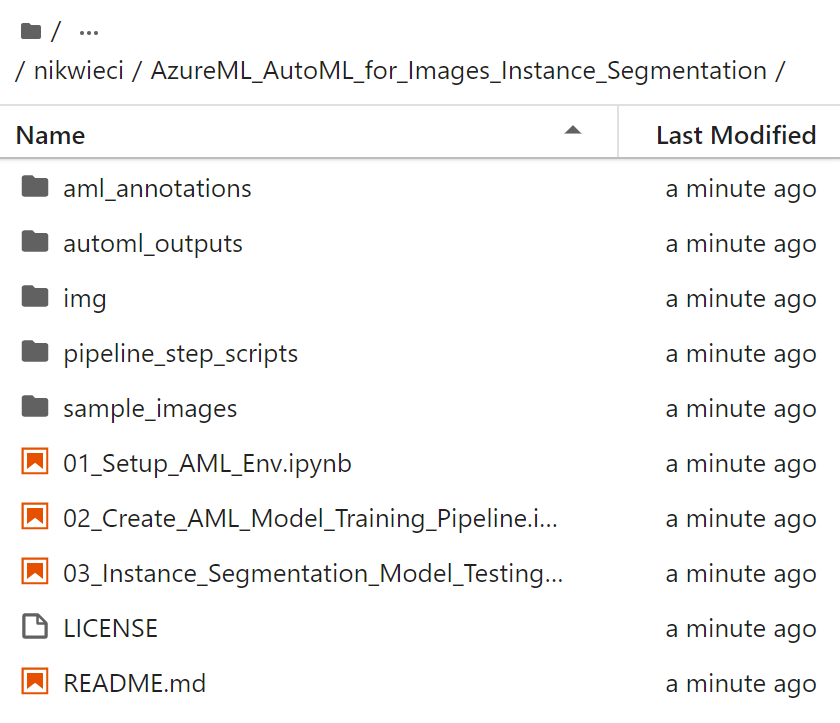
After cloning the repo you should see a directory structure that looks like what is shown below:
Run 01 Notebook to Setup AML Environment
Double-click the 01_Setup_AML_Env.ipynb notebook from the file explorer to open the environment setup notebook. This notebook contains sample code to create a compute cluster for model training, upload sample street images to an AML-linked datastore, and create/register a labeled dataset that can be used as an input to an AutoML for Images training job.
From the top menubar, click Run and select 'Run All Cells' - this will trigger execution of all cells in the notebook.
After executing all cells (should take ~1 minute) you can validate the setup inside the Azure ML Studio UI. Check that the following assets have been created:
- GPU Compute Cluster named
automlimagescompute
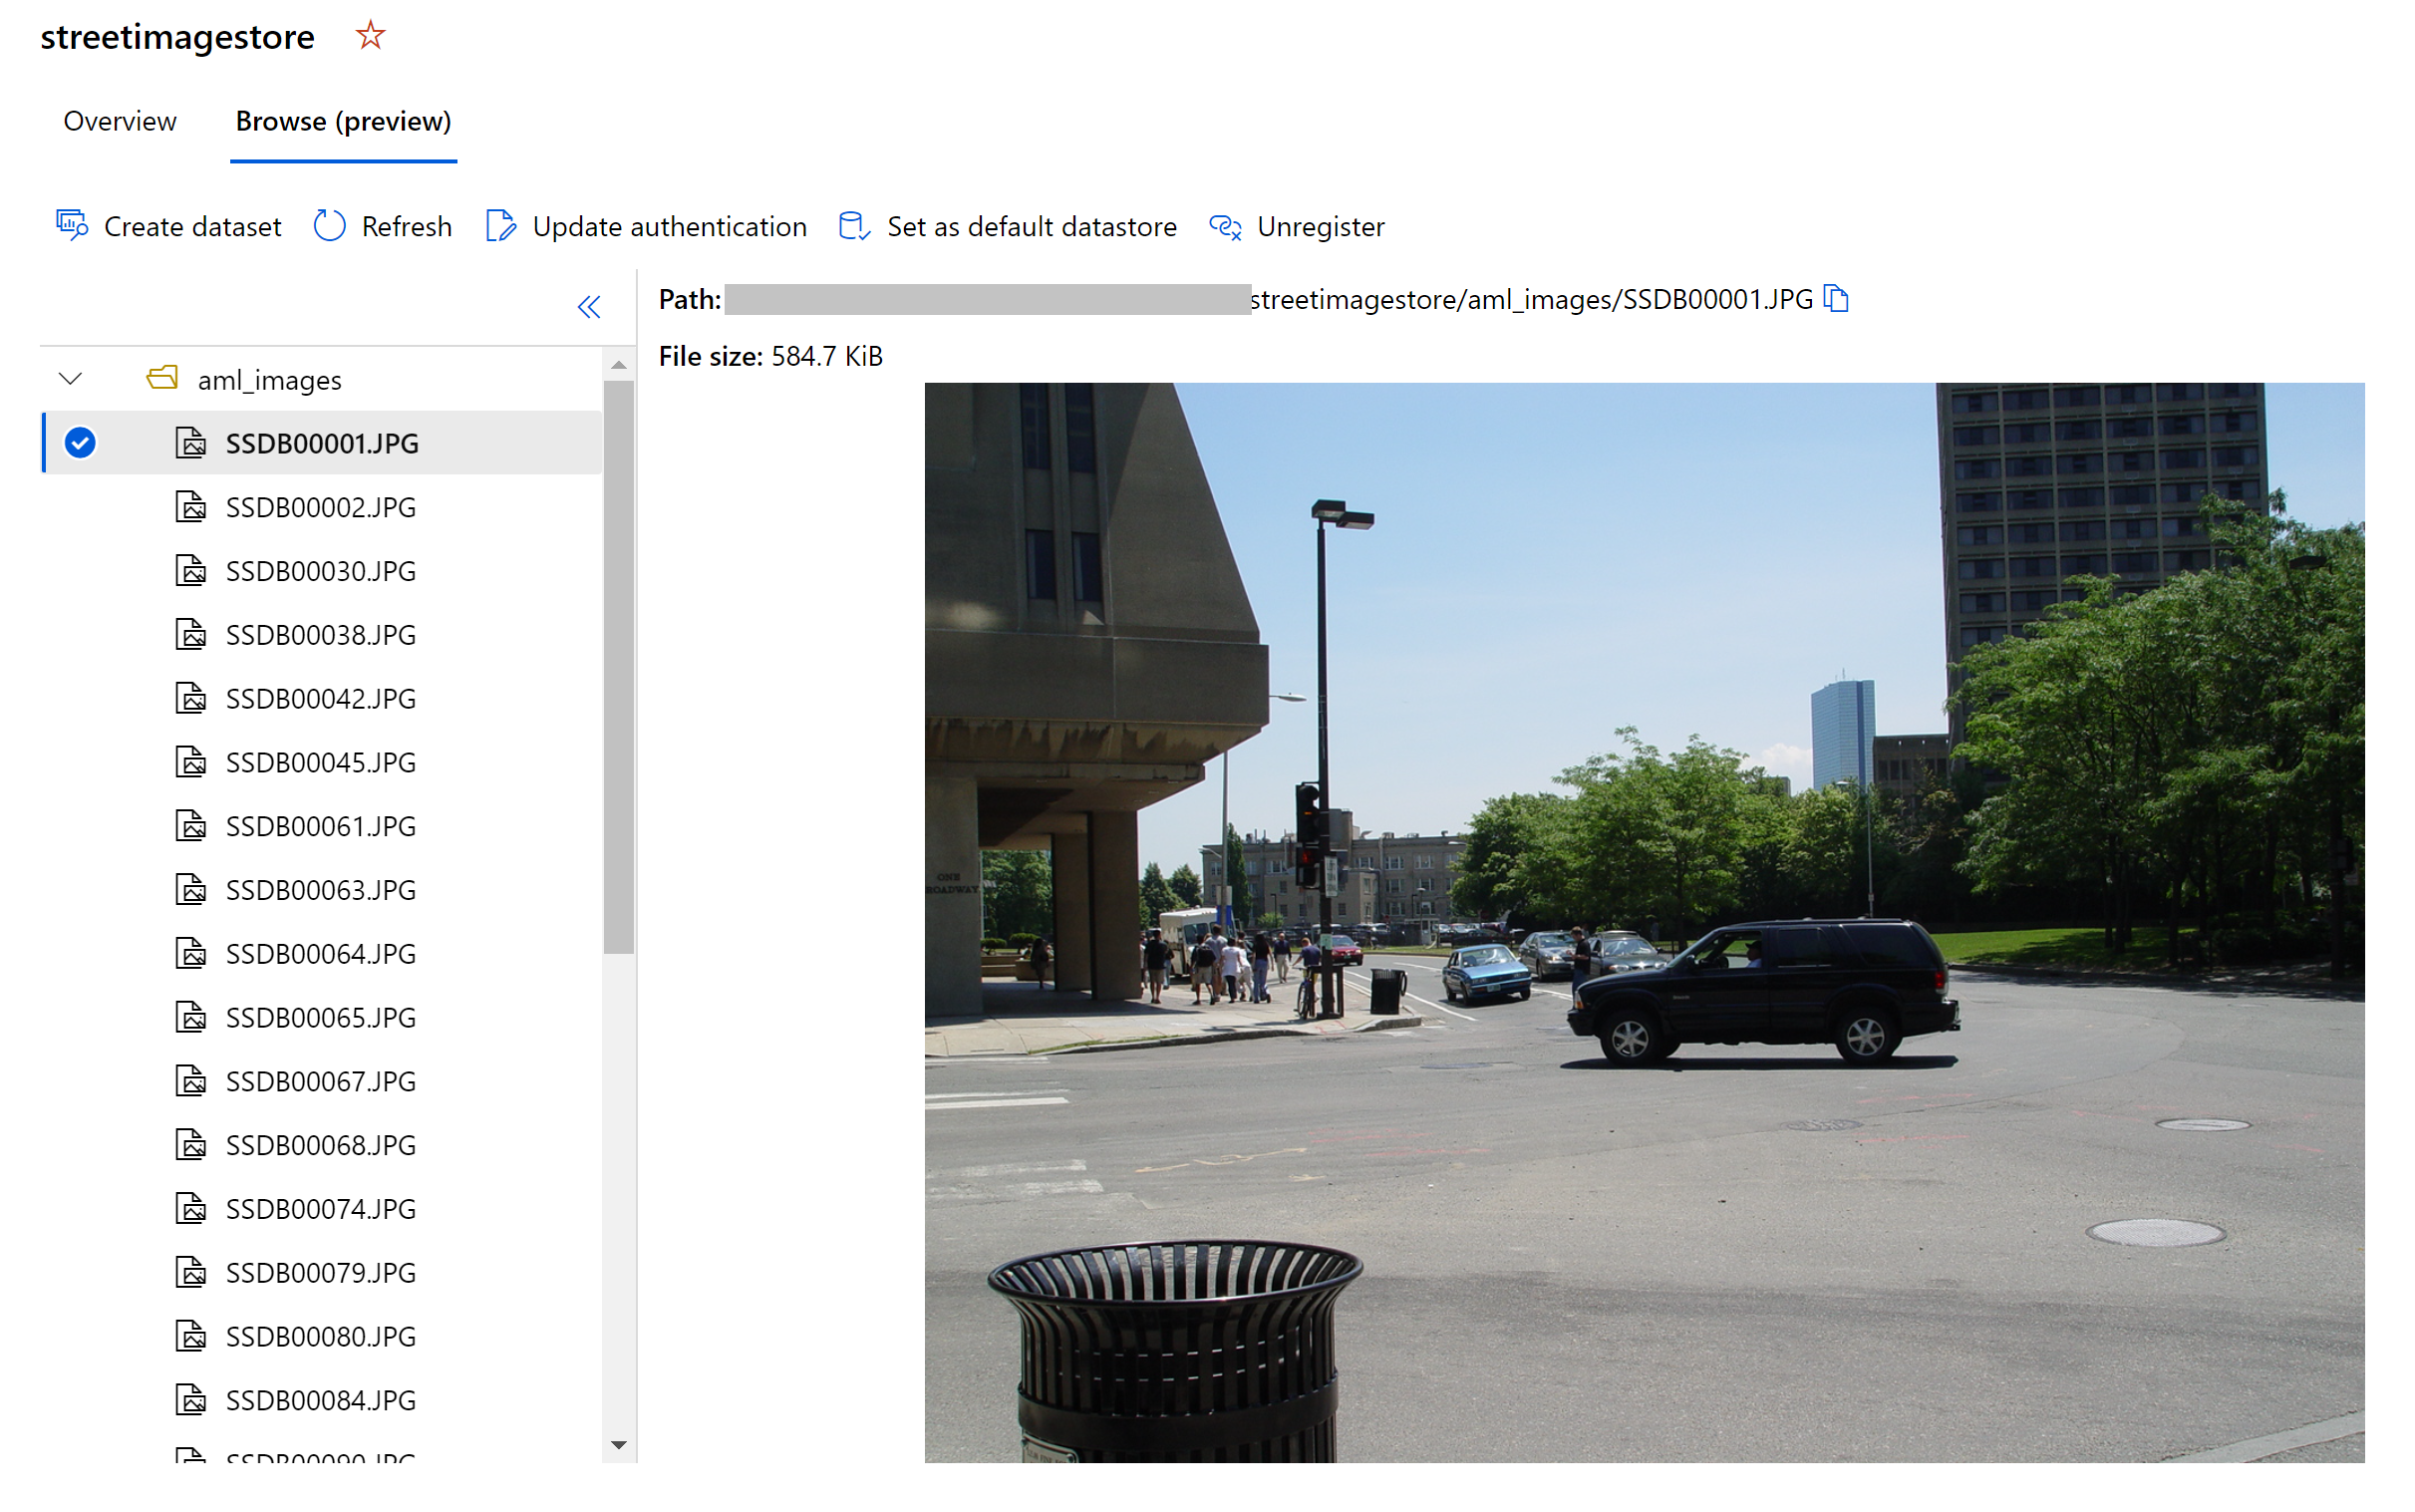
- Blob Datastore named
streetimagestorecompute with sample images
- Registered Test/Train image datasets named
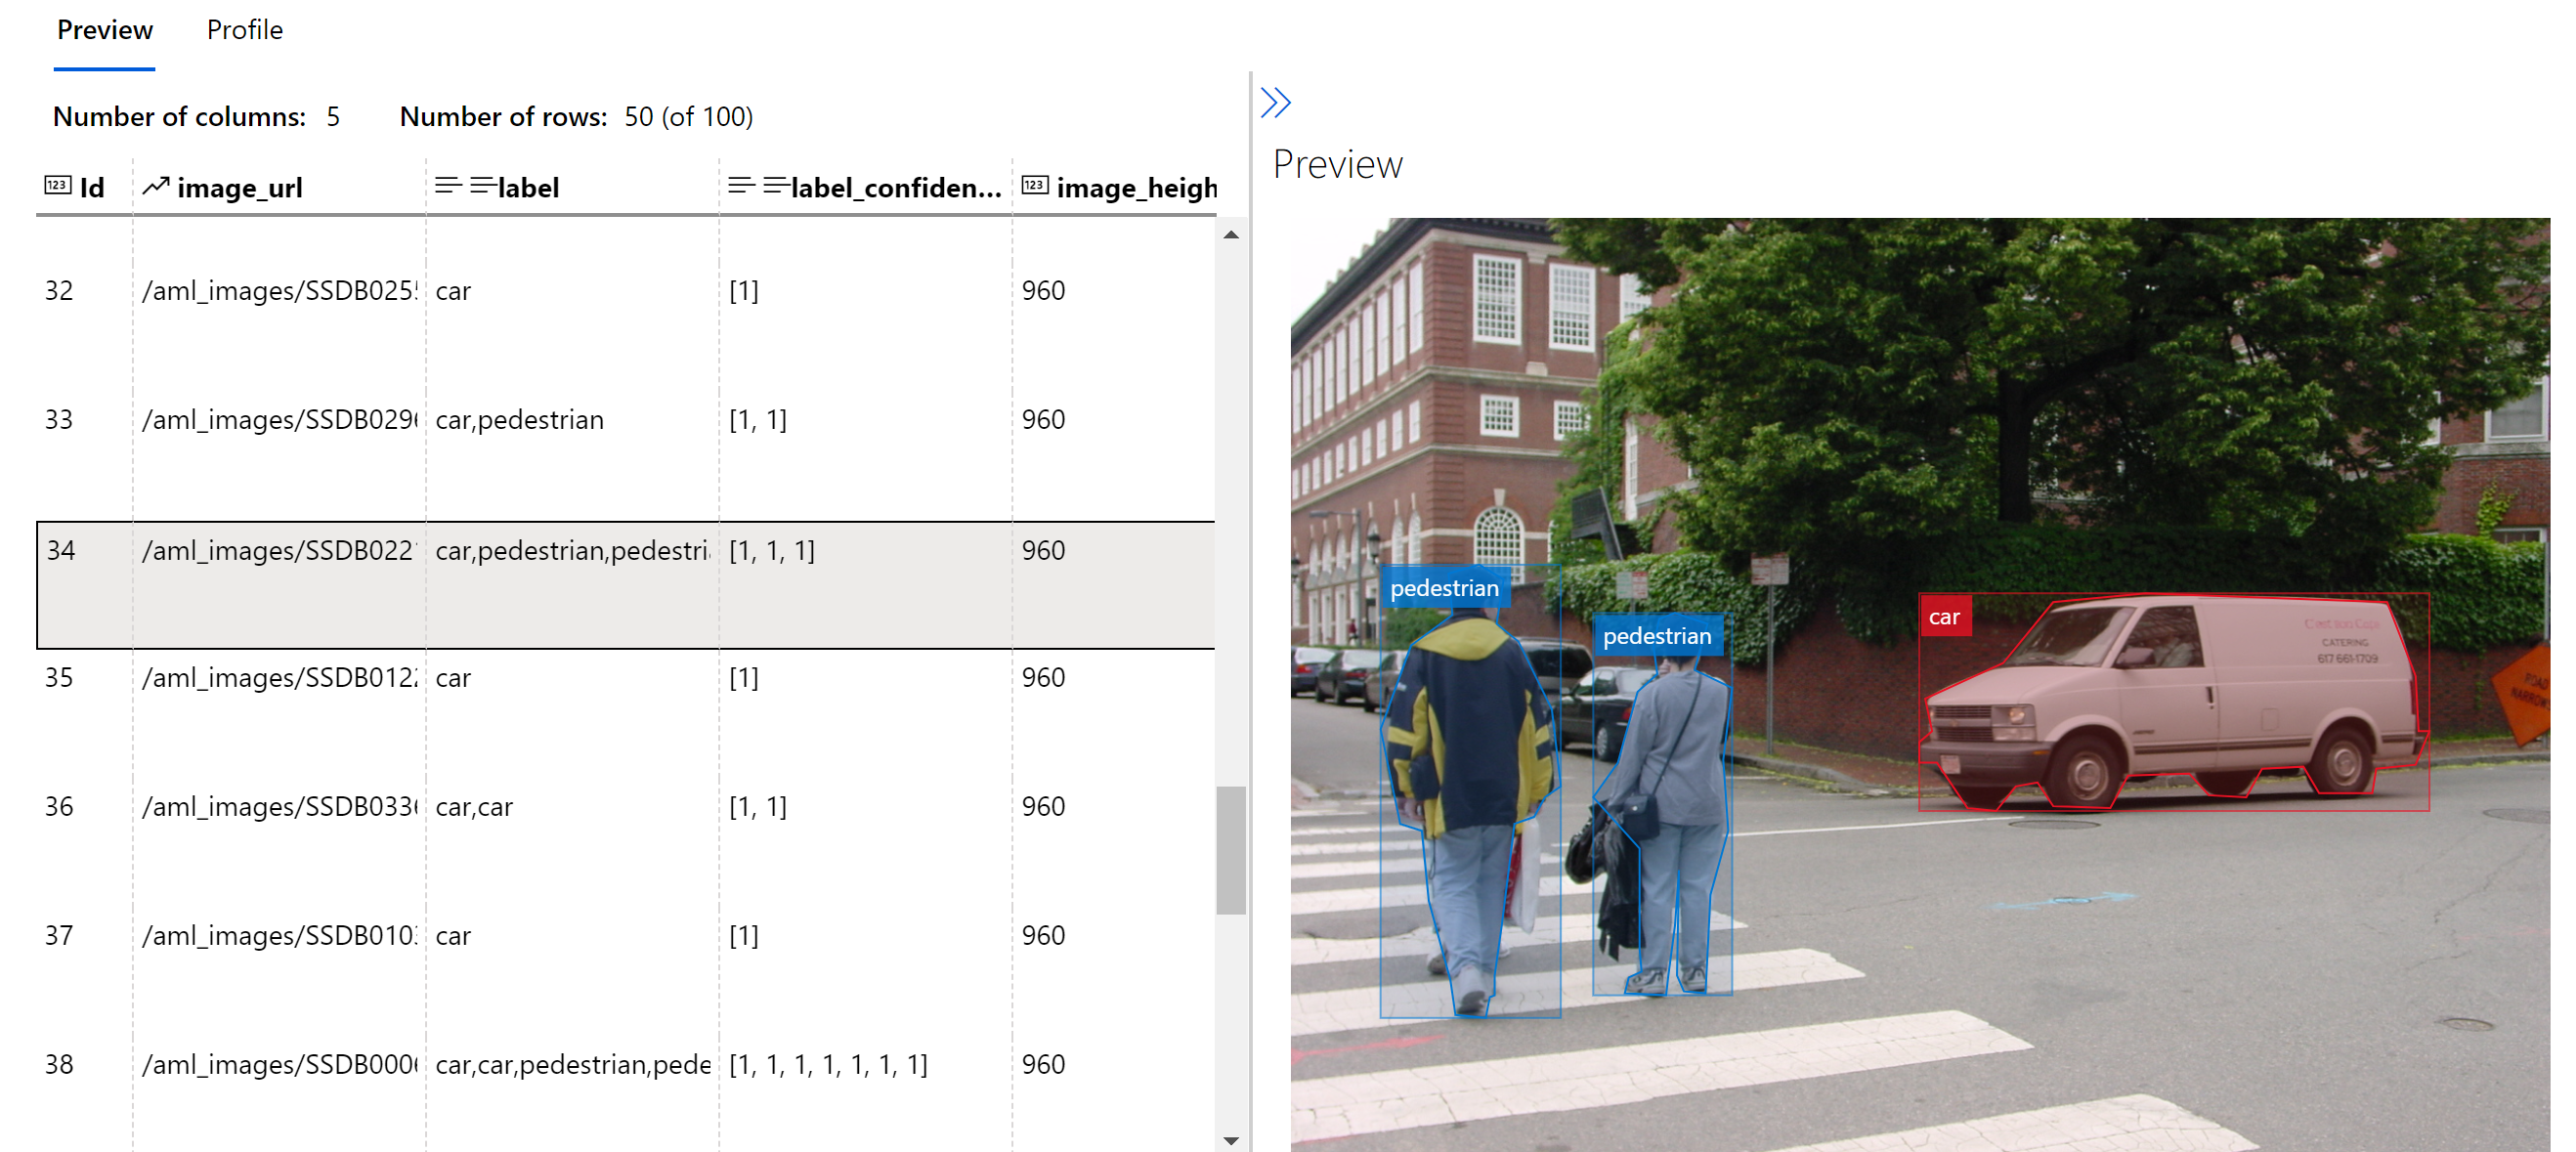
TEST_AML_Labeled_Street_ImagesandTRAIN_AML_Labeled_Street_Images, respectively. You can explore these datasets to review sample annotations as well.
Run 02 Notebook to Create AutoML for Images Training Pipeline & Submit Pipeline Run
From JupyterLab, double-click the 02_Create_AML_Model_Training_Pipeline.ipynb notebook to create a reusable instance segmentation model training pipeline that leverages AutoML for Images under the hood. Again, from the top menubar click Run and then select 'Run All Cells' to trigger all cells in the notebook.
After executing all cells (should take ~1 minute) you can validate creation of the AML pipeline and submission of a new pipeline run.
- Published Pipeline Endpoint named
Instance Segmentation Model Training.
- Submitted experiment named
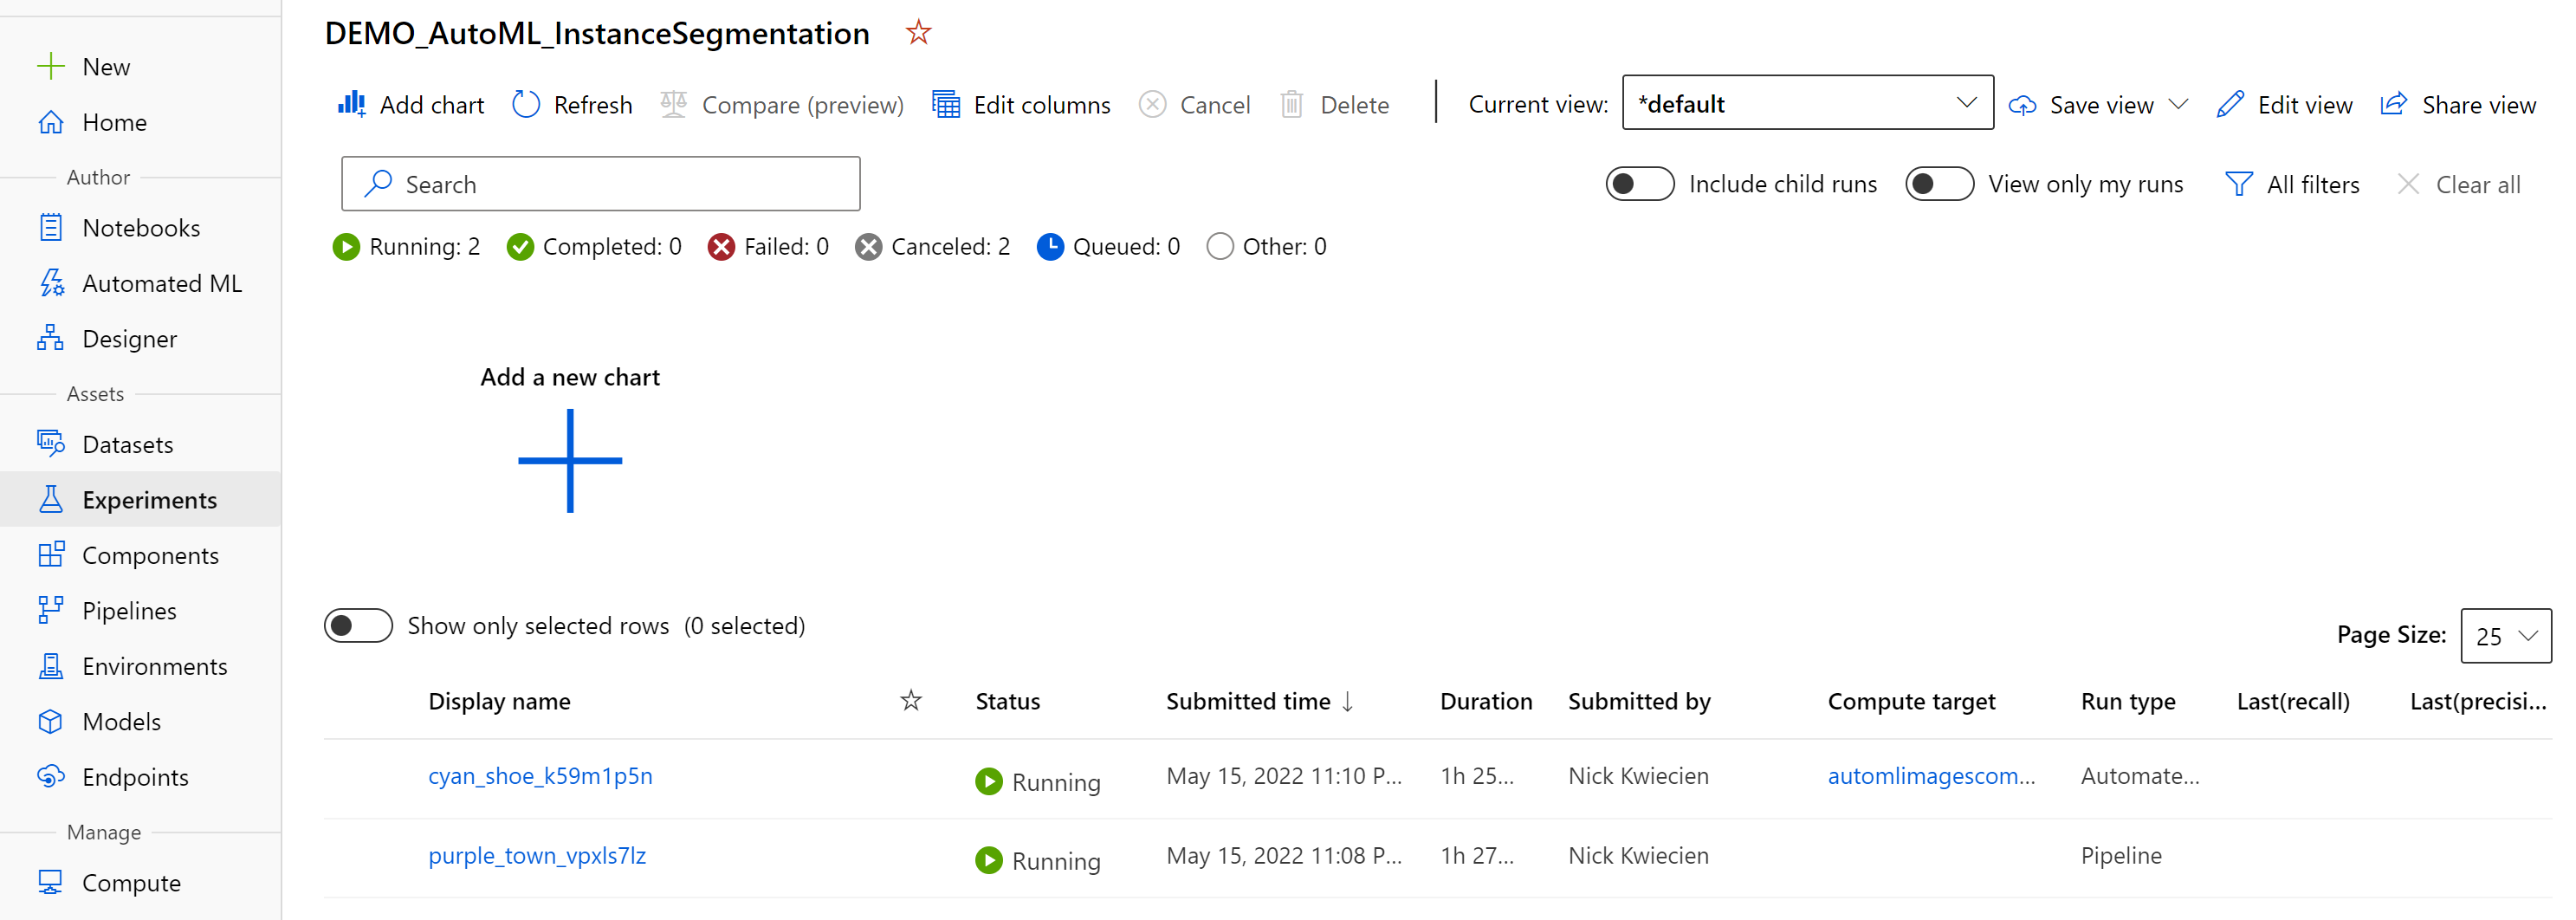
DEMO_AutoML_InstanceSegmentation. This pipeline submission will also create a child run that appears under this experiment list once the experiment run begins. Note: Some additional time is spent during your first experiment run to build an training environment (docker image) and spin up required compute.
Run 03 Notebook to Deploy Trained Model to Real-Time Endpoint and Test
🚨Note: You must wait for your previous model training experiment to complete prior to executing this notebook. In previous tests, this experiment has taken ~2 hours to complete. As you test with your own datasets, this runtime will increase/decrease based on dataset size.🚨
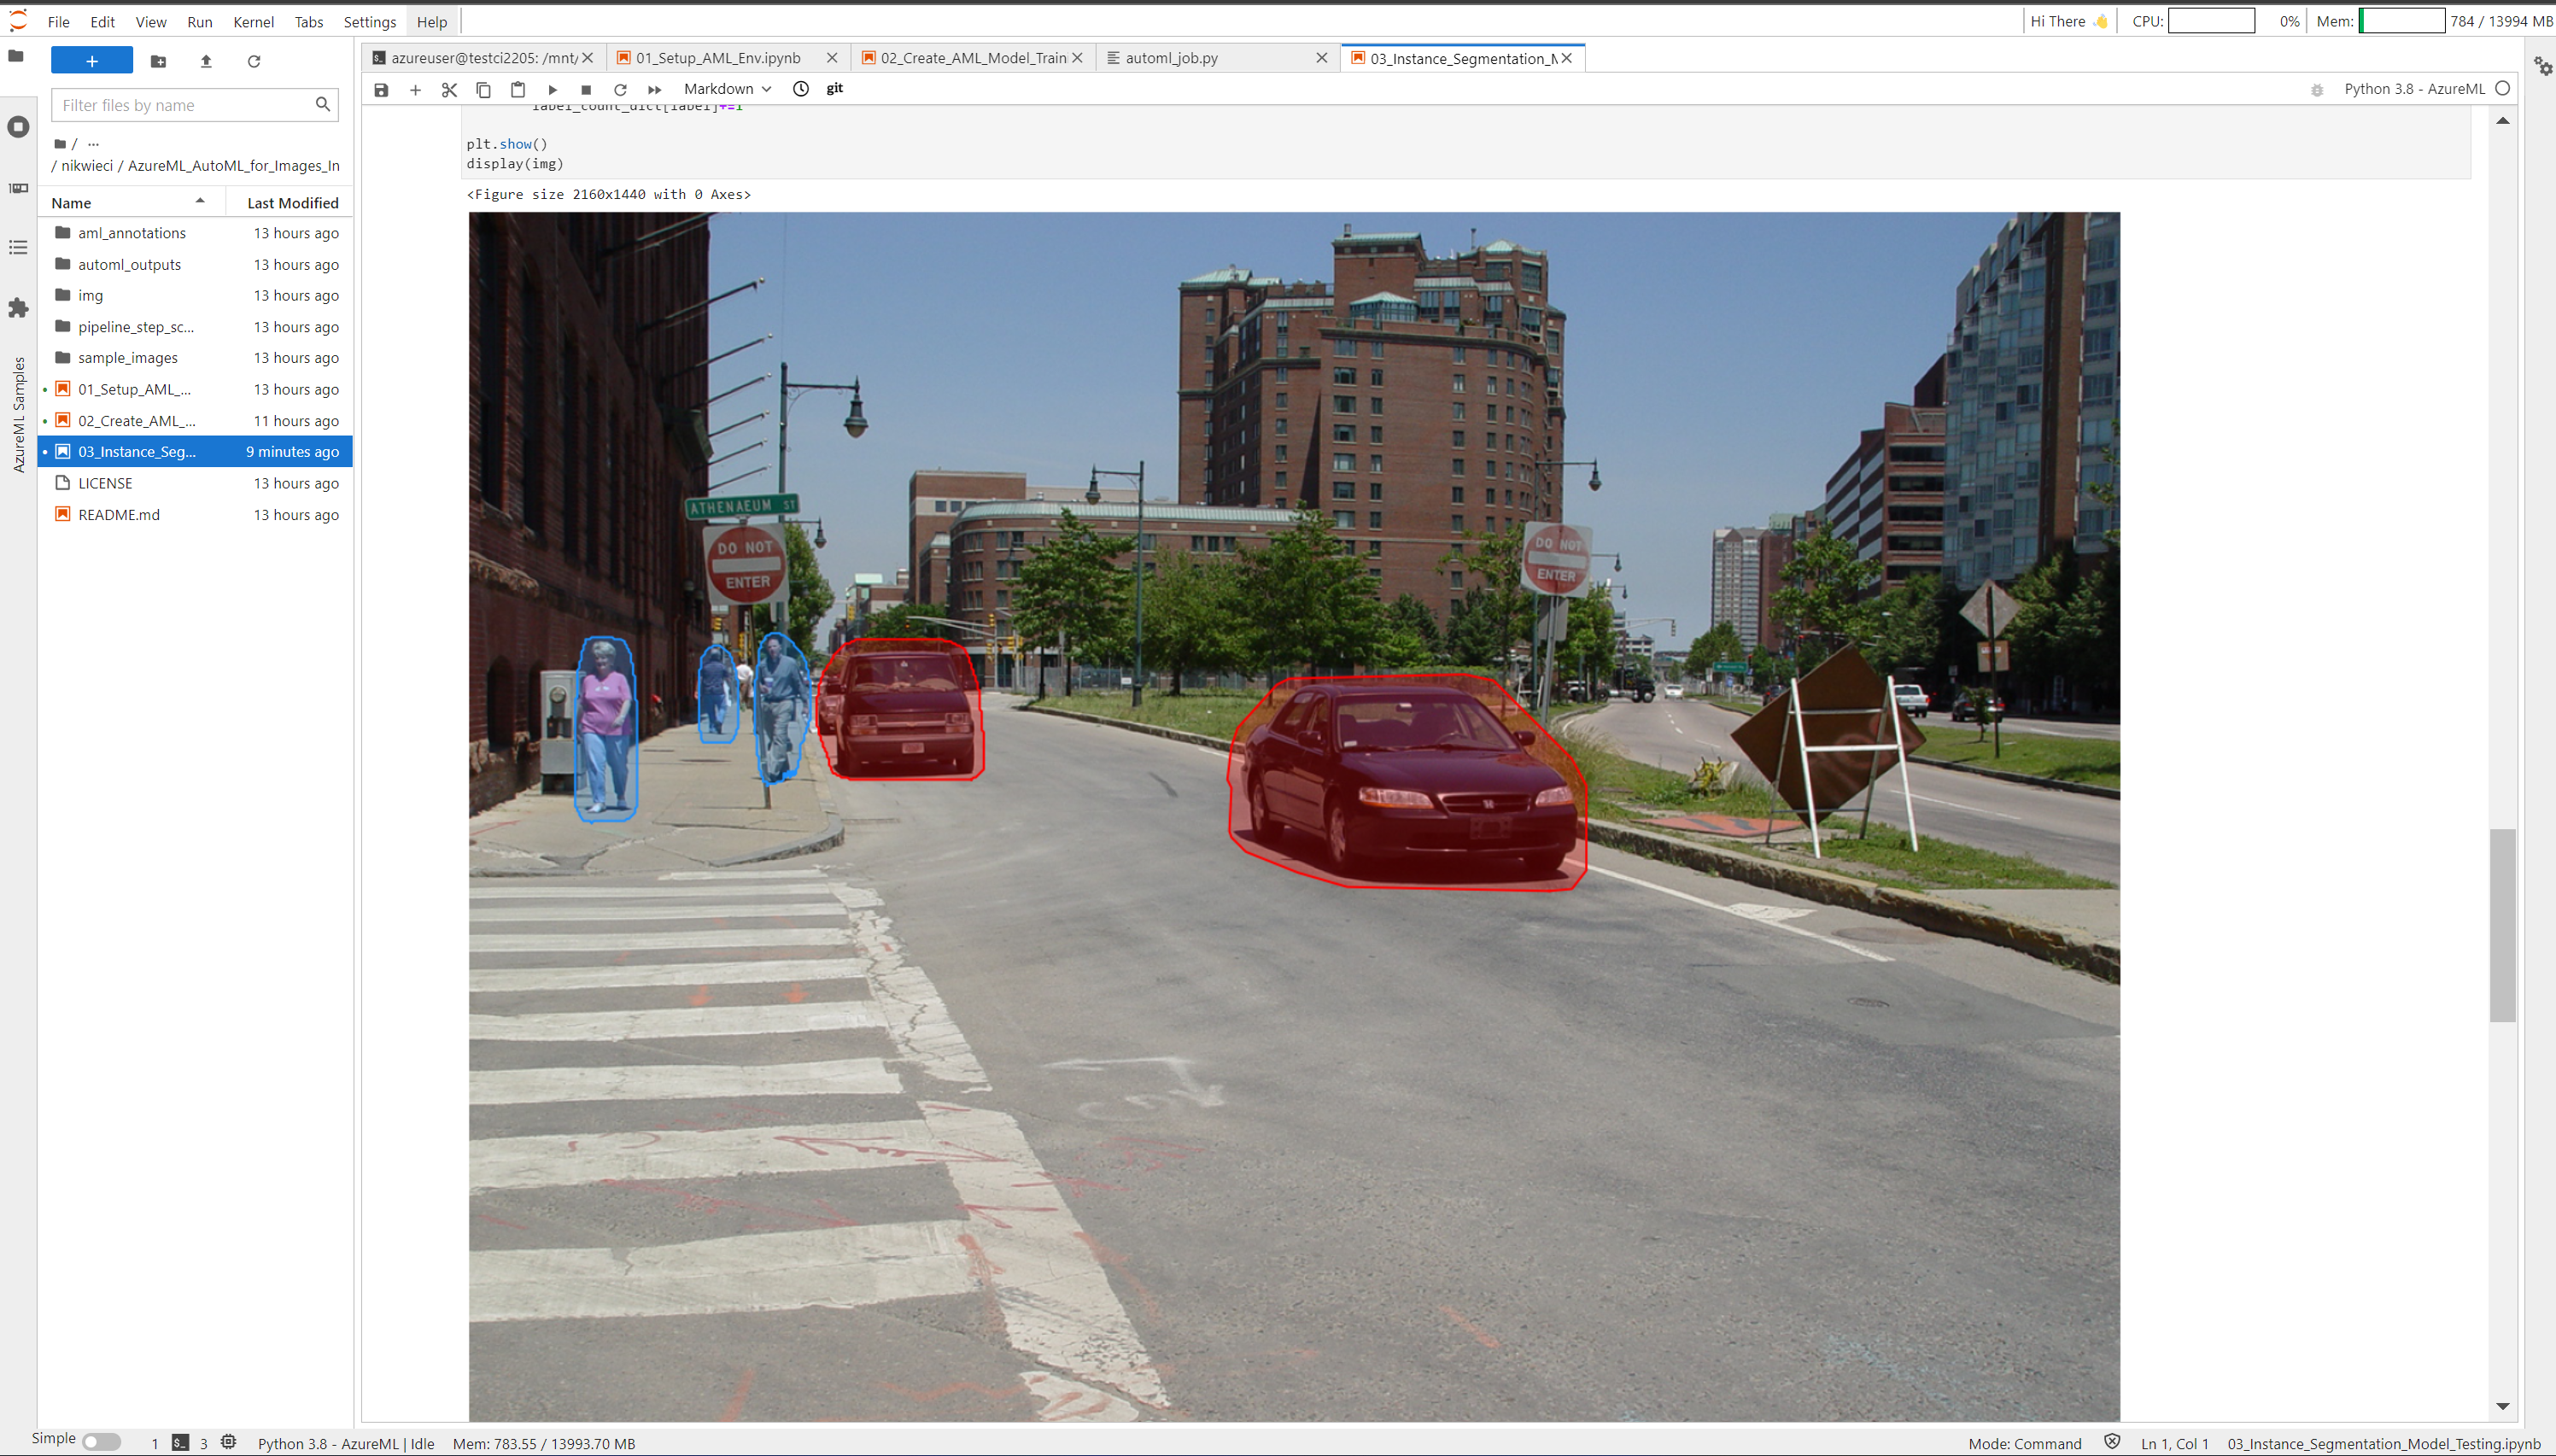
From JupyterLab, double-click the 03_Instance_Segmentation_Model_Testing.ipynb notebook and again click Run from the top menubar then select 'Run All Cells' to run the full notebook. This will deploy a new inferencing compute resource cluster-aks and deploy your registered Street_Segmentation_Model to this endpoint, then submit sample images via an API call for scoring and display within the notebook.
- Successfully deployed AKS cluster
- Instance segmentation model
Street_Segmentation_Modelsuccessfully deployed to AKS
- Annotated image that has been scored with deployed model
Adapting and Extending
This repo contains code which build a reusable (AutoML) instance segmentation model training pipeline. You can provide your own custom labeled datasets as inputs to this pipeline to train models specific to your data. Additionally, you can modify the AutoML job settings - specifically your instance segmentation model tuning parameters - inside of the ./pipeline_step_scripts/automl_job.py file. See below for instructions on editing the training parameters and incorporating your own data into model training operations.
Updating AutoML Training Parameters
The following block of code starting on line 38 inside ./pipeline_step_scripts/automl_job.py defines the AutoML model selection and hyperparameter tuning settings. These can be updated/modified to your particular model training task - see the document linked here for more details on updating hyperparameters for computer vision tasks in AutoML. After making any changes, be sure to republish your pipeline before submitting additional runs.
tuning_settings = {
    "iterations": 20,
    "max_concurrent_iterations": 5,
    "hyperparameter_sampling": GridParameterSampling({'model_name': choice('maskrcnn_resnet18_fpn', 'maskrcnn_resnet34_fpn', 'maskrcnn_resnet50_fpn','maskrcnn_resnet101_fpn','maskrcnn_resnet152_fpn', 'yolov5'), 'number_of_epochs': 50, 'img_size': 640}),
    "enable_early_stopping": False
}
Training with your own Data
To train a new instance segmentation model using your own labeled images, either create and export a new labeled dataset using the Azure Machine Learning data labeling tools, or upload a labeled dataset as a JSONL file to the AML workspace.
See the attached document for details on preparing data for computer vision tasks with AutoML.
To create a labeled dataset using the Azure ML data labeling tools see the articles below for instructions on creating a new data labeling project, labeling images and exporting.
Below is a pictorial guide showing how to export a labeled dataset, and consume it in the deployed instance segmentation training pipeline.
- After creating a labeling project and labeling sample images, navigate to the 'Export' tab at the top of the project and select 'Azure ML Dataset'. Once prompted quick submit.
- Validate the dataset contains the images/annotations you expect by navigating to the 'Datasets' tab on the left sidebar menu. You should see a newly created dataset with an appended timestamp postfix in your list of datasets. Copy this dataset name to your clipboard.
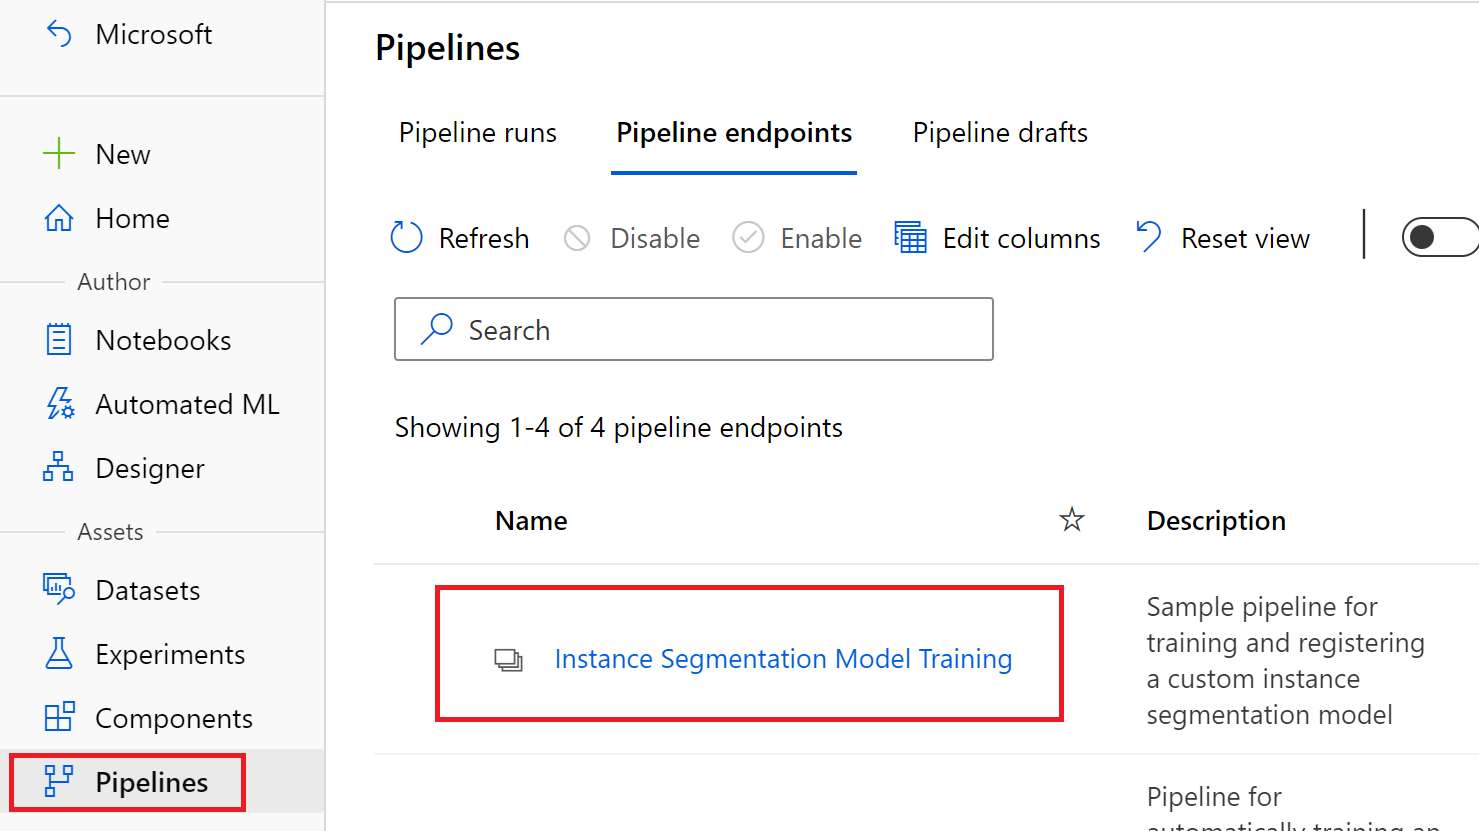
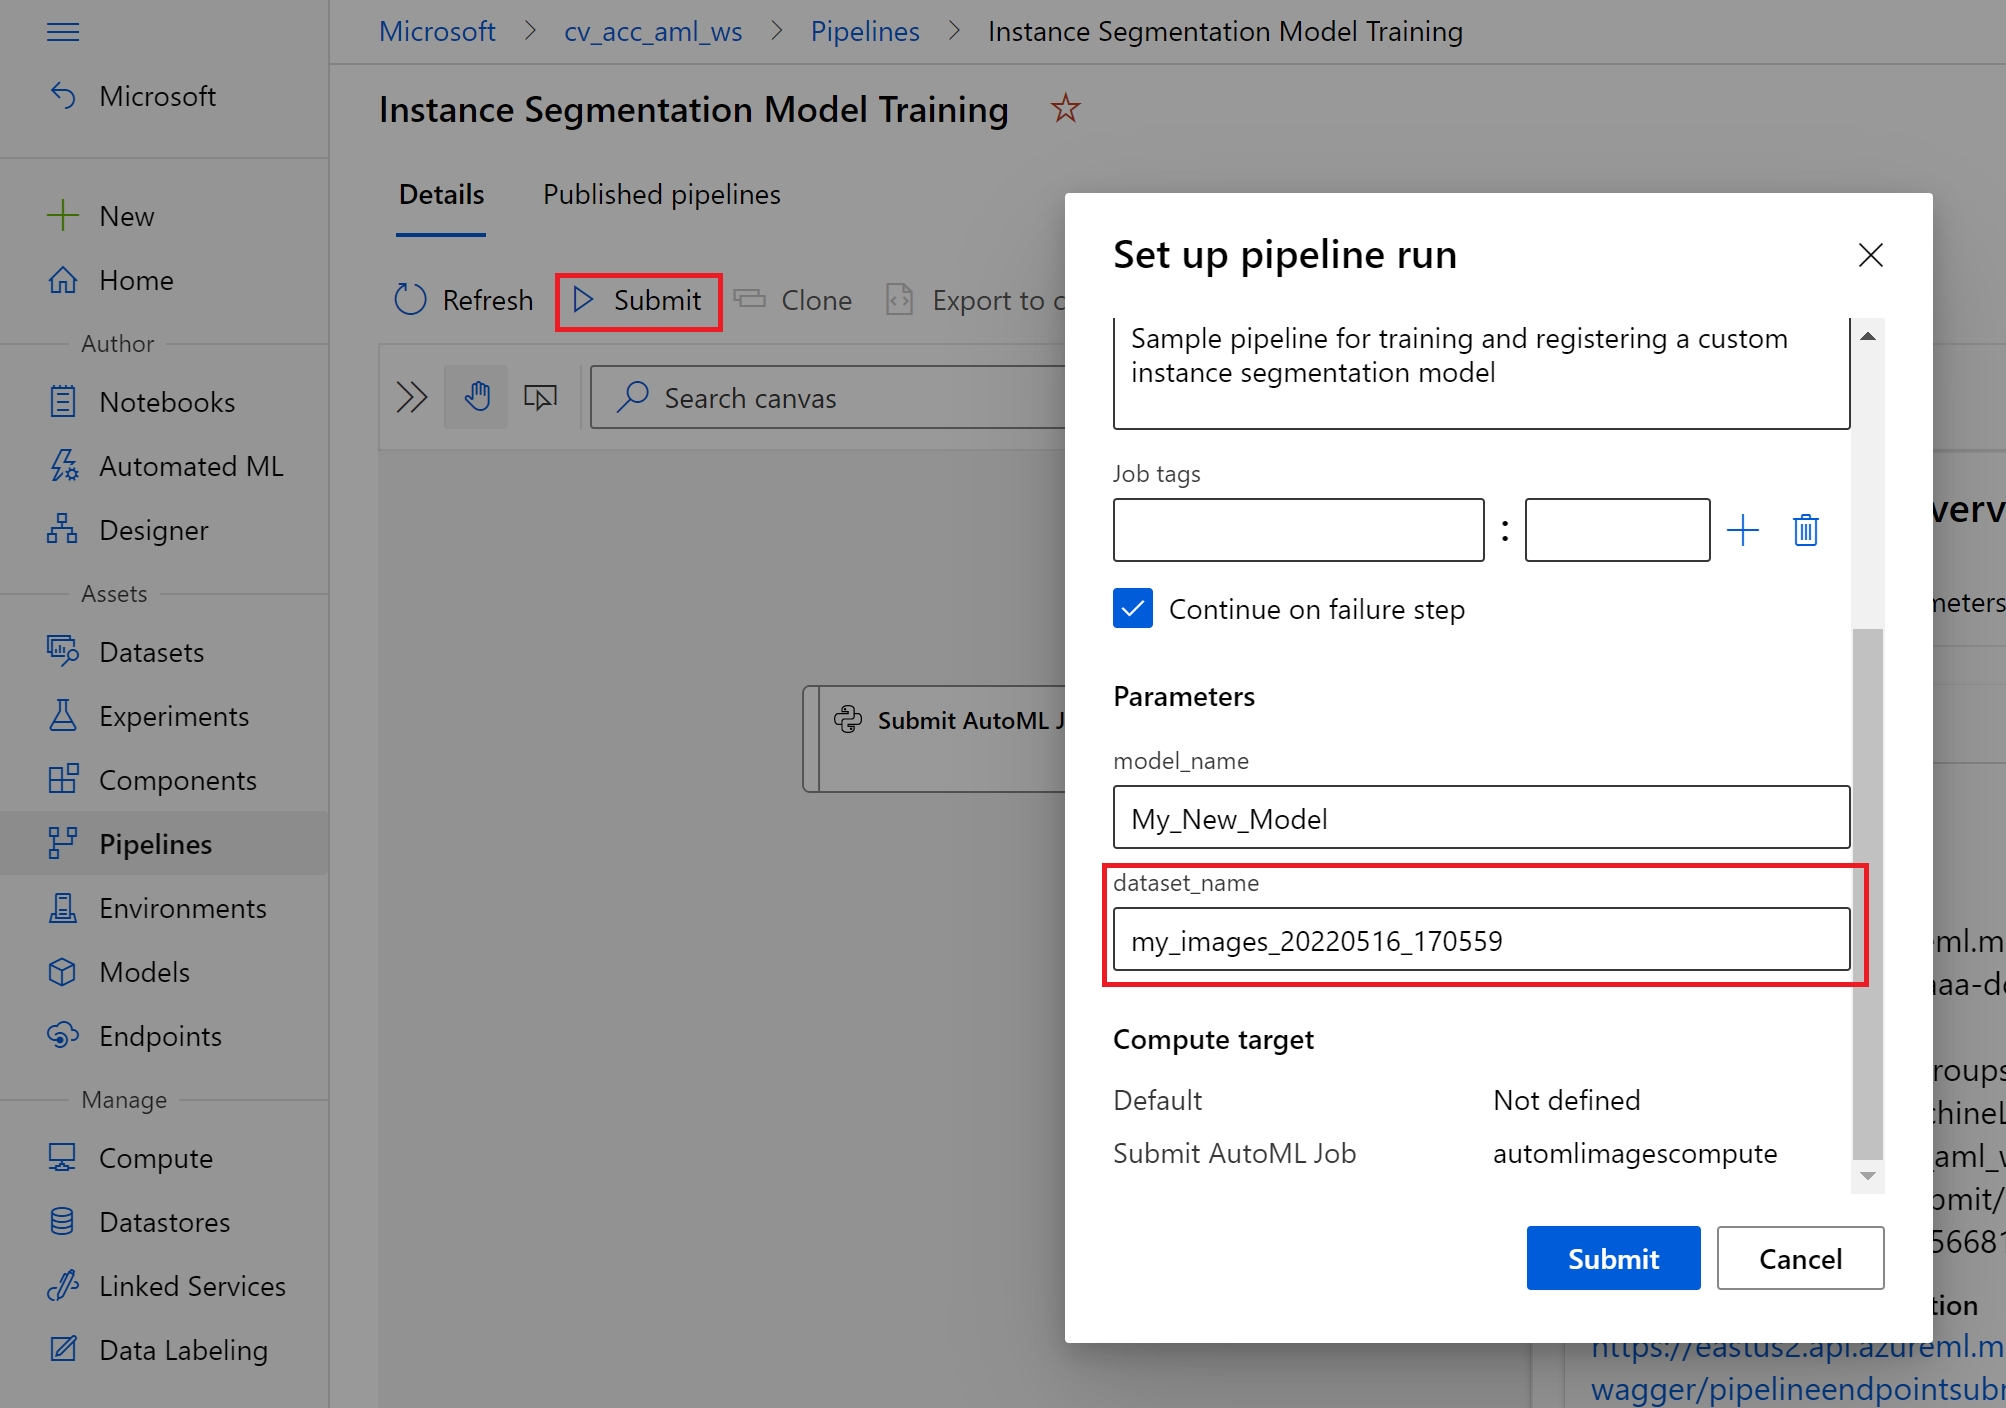
- Under Pipelines, navigate to pipeline endpoints and select the
Instance Segmentation Model Trainingpipeline. Click the submit button and select an experiment to submit your new pipeline run under. Under the pipeline parameters paste your copied dataset name under thedataset_namefield and update themodel_nameto whatever you want your new model to be called. Once this is done, click the 'Submit' button.
Once your pipeline run is complete, you should see a new model added to your registry which matches the name you provided above!
Acknowledgement
Acknowledgement - Sample images used within this repository were retrieved from the CBCL StreetScenes Challenge Framework which is a collection of images, annotations, software and performance measures for object detection. Each image was taken from a DSC-F717 camera at in and around Boston, MA. For more information on this collection see Stanley Bileschi's Doctoral Thesis cited below.
StreetScenes: Towards Scene Understanding in Still Images –Stanley Michael Bileschi — 2006 — PHD DISSERTATION, MASSACHUSETTS INST. OF TECHNOLOGY
