A Modern Multi-Purpose Continuous Deployment Pipeline Template for AWS
🧐 Feedback Welcome: Please submit issues about design quirks and problems!
👩🔧 Contributors Wanted: Help needed reviewing and adding features
Stop wasting time with the aws web console and manage your own build + deployment straight from your project repo. Reuse the same pipeline template for all your projects. Never release broken code with integrated CD using AWS CodePipeline. 👋 Join the alchemists and focus on turning your user experience to gold! 🥇
- Develop on GitHub
- Automatic github Status Updates
- No-hastle Continuous Deployment solution
- Configure pipelines once.
- All project specific build commands live in your repo. Use aws CLI for deployment!
- Use the Same Pipeline Template for individual branches
- For example, configure for testing and run
stagingbranch CI - For example, configure for deployment and run
masterbranch CD - For example, configure CI on
staging/tryingand CD onmasterand develop using a merge bot like Bors-NG. Your code only deploys when merged pull requests pass CI tests!
- For example, configure for testing and run
- Keep production environment safe by separating testing and production pipelines on Separate AWS Accounts
Write code and seamlessly automate testing and deployment.
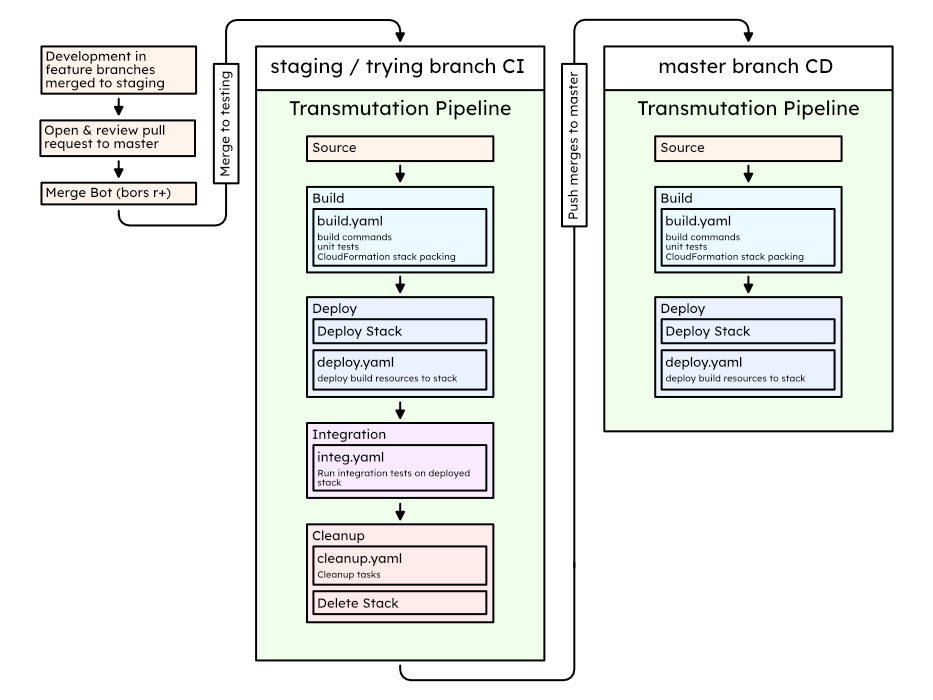
Piece of cake 🍰 with AWS Transmutation Pipeline. Take a look at this example production setup:
- Minimum Effort deployment from pull requests. Everything else is automatic!
- Pull Request Continuous Integration with Bors-NG: Merges to
master& deployments only happen when your tests succeed! - Never release broken builds! Full integration testing of stack before deployment
Every pipeline is a separate entity! Keep your deployment pipeline on a production AWS account and all your testing on accounts you can afford to accidentally mess stuff up in! All cross communication happens within git enabled by live status updates.
Local development can be hit or miss. It's not always possible to perfectly replicate AWS on your local machine, and often requires paid tools like localstack to do so accurately.
Add Transmutation template to your toolset. Develop locally and then push with confidence.
With a pipeline template it becomes possible for anyone to easily launch their own pipeline and automate test deployment. Any developer sets up a Transmutation pipeline on their own account and configure it to deploy a specific development git branch. Commit changes and wait for build to succeede (or not)! Cheapen and simplify the way your develop.
-
Fork the example repo located at https://github.com/MarcGuiselin/aws-transmutation-starter
Make sure to keep it public, otherwise bors-ng will ignore the project
-
Create GitHub OAuth Token. Instructions here.
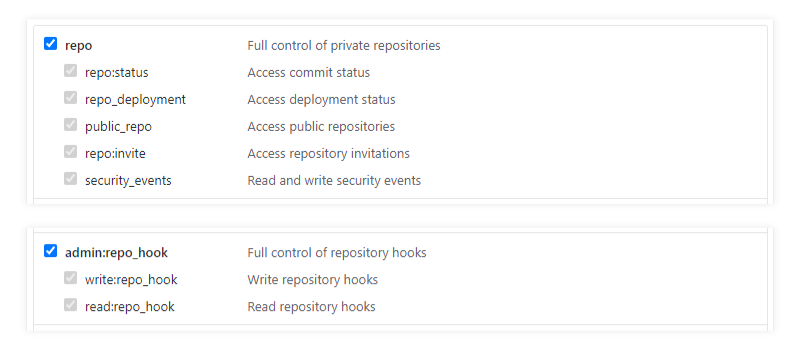
When you get to the scopes/permissions page, you should select the "repo" and "admin:repo_hook" scopes
-
This project will have CI on
stagingandtrying(for Bors-NG) and CD onmasterfor production, so we will create a pipeline for each. You can skiptryingif you are not using a merge bot like Bors-NG.-
Launch Transmutation Pipeline Stack for
masterusing the button below.- Click Next
- Rename Pipeline Configuration Name to
my-transmutation-starter-master-pipeline - Rename Deploy Stack Name to
my-transmutation-starter-master-stack - Select Stage
prod - Select Features
Build > Deploy - Input your GitHub OAuth Token
- Input the Repo Owner / Name for your forked repository
- Input
masterfor your Branch - We want to load the parameters for production deployment, so rename CloudFormation Template Configuration to
prod-configuration.json - Click Next
- Click Next again
- Acknowledge Access Capabilities
- Click Create stack
-
Launch Transmutation Pipeline Stack for
stagingusing the button below.- Click Next
- Rename Pipeline Configuration Name to
my-transmutation-starter-staging-pipeline - Rename Deploy Stack Name to
my-transmutation-starter-staging-stack - Select Features
Build > Deploy > Integration > Cleanup - Input your GitHub OAuth Token
- Input the Repo Owner / Name for your forked repository
- Input
stagingfor your Branch - Click Next
- Click Next again
- Acknowledge Access Capabilities
- Click Create stack
-
Launch Transmutation Pipeline Stack for
tryingusing the button below. (optional)- Click Next
- Rename Pipeline Configuration Name to
my-transmutation-starter-trying-pipeline - Rename Deploy Stack Name to
my-transmutation-starter-trying-stack - Select Features
Build > Deploy > Integration > Cleanup - Input your GitHub OAuth Token
- Input the Repo Owner / Name for your forked repository
- Input
tryingfor your Branch - Click Next
- Click Next again
- Acknowledge Access Capabilities
- Click Create stack
-
-
The
master(deployment) pipeline will build and deploy your project! Once the pipeline succeeds (can take up to 5 minutes), find the outputs from cloudformation and visitHomepageUrlto see your project: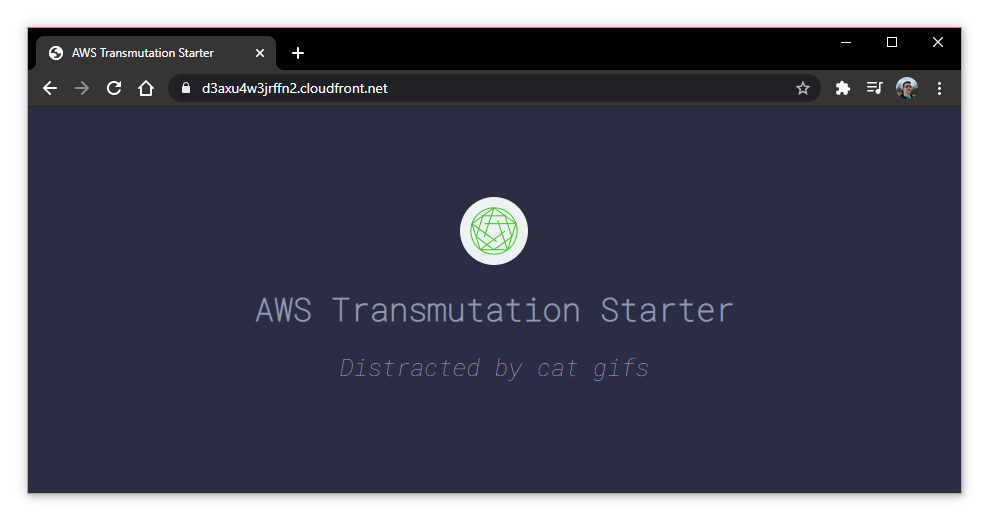
-
Install Bors-NG (optional)
- Give Bors access to your repo
- Click
Only select repositories - Select your forked repository
- Click Install
You can also Setup your own Bors-NG instance
-
Clone your forked repo locally with
git clone -
Let's make some changes to
index.html. Make the project yours!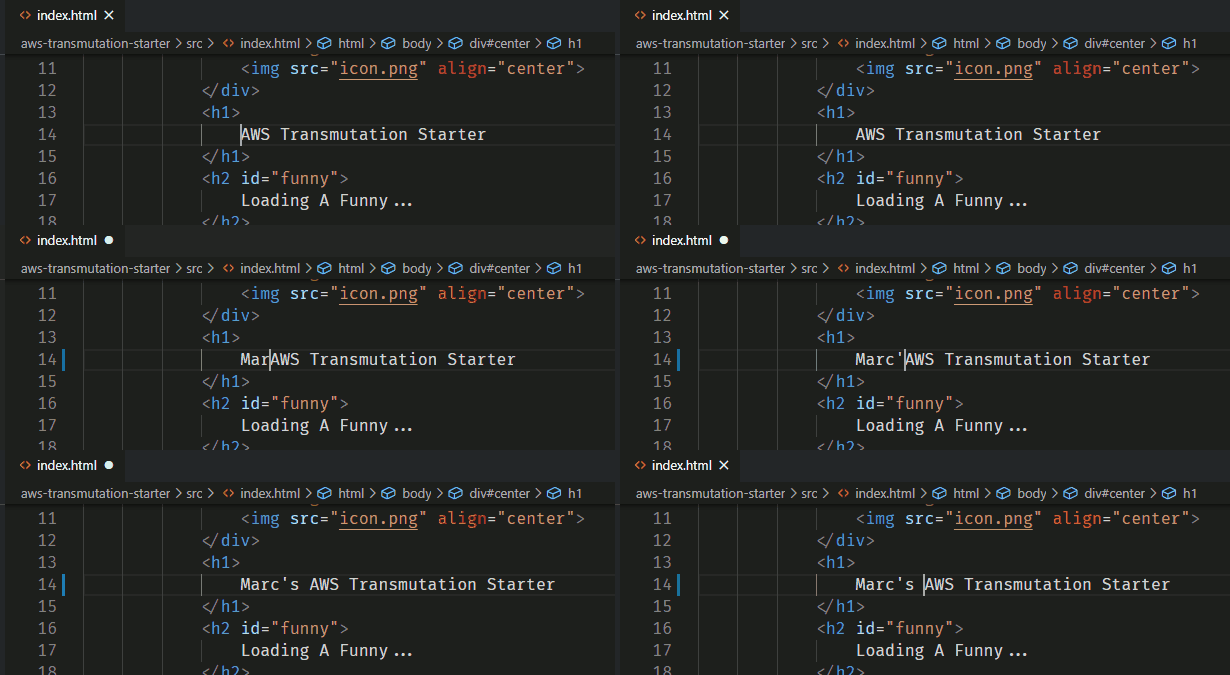
-
Create a
new-featurebranch, commit, and push to itgit branch new-feature git checkout new-feature git add .\src\index.html git commit git push --set-upstream origin new-feature -
Create a pull request on GitHub.
- Merge
new-featureintomaster - Describe your new feature
- If you are using bors-ng, then do not click the green Merge button. Comment
bors r+and wait for bors to run integration tests and merge! - If you arn't using bors, then you can click the Merge button.
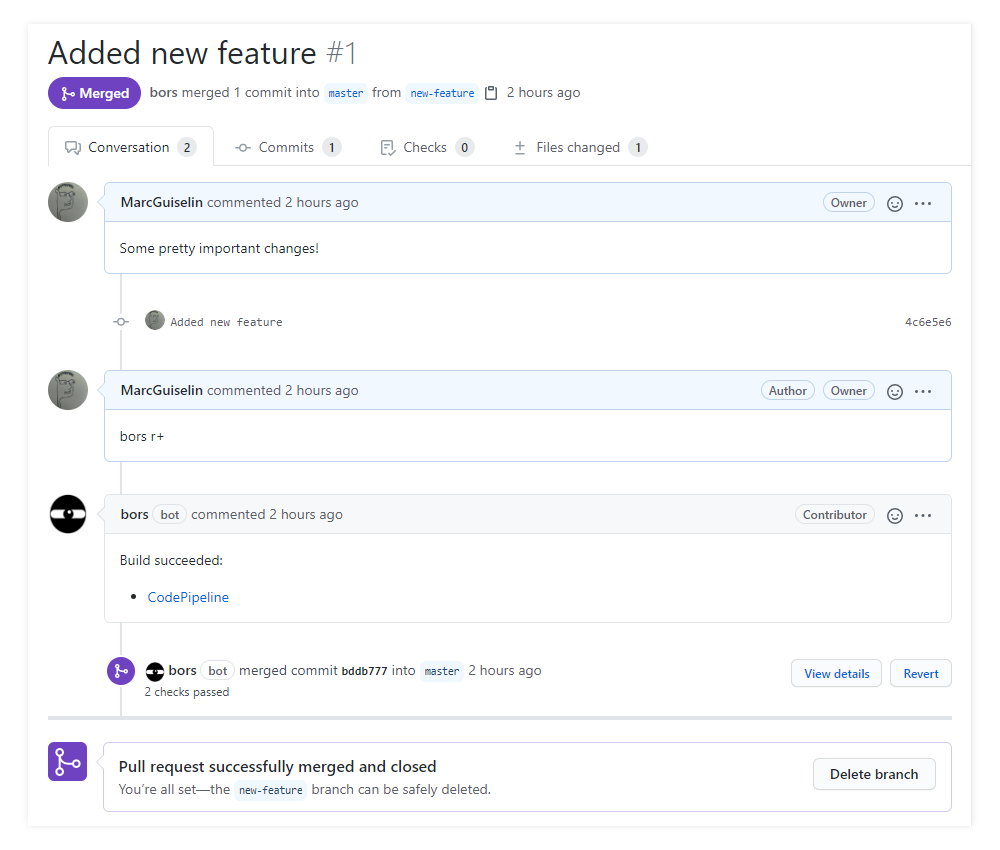
- Merge
-
Now that the merge passed integration tests and our changes finally made it to
masterthe deployment pipeline will automatically kick into gear! Once the pipeline succeeds (can take up to 5 minutes), reload your project's homepage and you will see your changes!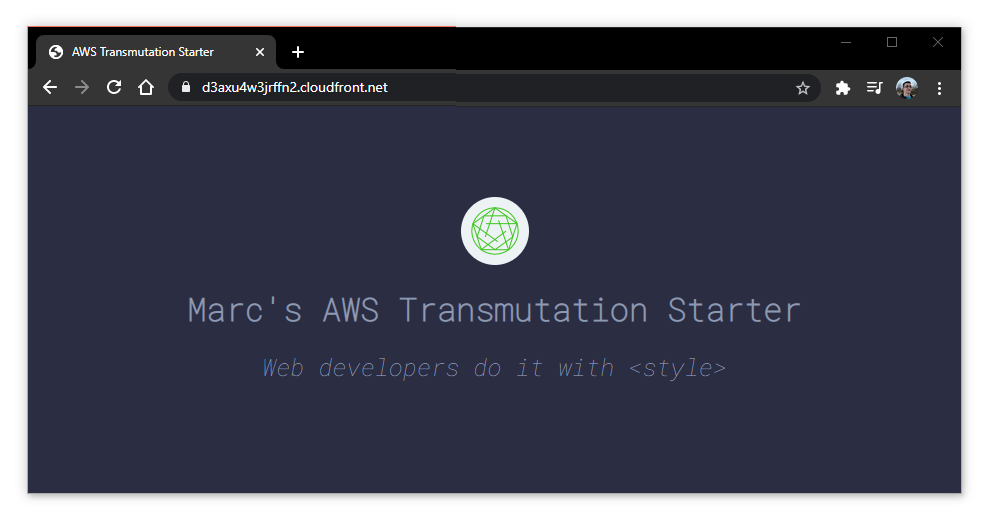
Shift to the staging > master model of development. Develop on the staging branch and merge releases into master with pull requests. Bors-NG is a popular tool that lets you automate this.
When you are ready, create a pull request. Bors will run build, unit, and integration tests using in instance of Transmutation Pipeline configured for integration testing. Upon successful completion of tests Bors will finalize the merge.
Once a new release makes it to master, the production pipeline will kick into gear and deploy your code to production.
Pro Tip: Although it isn't built-in to Transmutation (yet), it's wise to configure manual confirmation of test deployments before they are cleaned up. Send an email to the head of your team, or post a status on github so someone can manually confirm everything looks good before letting the pipeline succeed and deployment subsequently occur.
"Bors is a GitHub bot that prevents merge skew / semantic merge conflicts, so when a developer checks out the main branch, they can expect all of the tests to pass out-of-the-box."
What that means for you is that your master branch will always contain working, deployment-ready code. You can then configure a Transmutation Pipeline to deploy changes to master once they pass all tests and are merged. Your users will never experience broken releases!
my-transmutation-repo
├ src, web, or whatever!  # Develop a static site development top level, or organize every part of your project in folders to your pleasing
├ backend                 # Keep code for backend stuff like apis, ec2 stuff, database creation templates and such here.
│ ├ Serverless functions
│ ├ Database templates
│ └ ...
├ testing                 # Keep tests in their own folder
│ ├ Unit tests
│ └ Integration tests
├ template.yaml           # Cloudformation template for whole project
├ build.yaml              # Build commands. For example: build production static site, do unit tests
├ deploy.yaml             # Deploy commands. For example: upload s3 site content, update SQL database structure
├ integ.yaml              # Integration test commands. For example: perform api tests with postman, test website contact form
├ cleanup.yaml            # Cleanup after staging/testing. For example: empty s3 buckets so they can be deleted
└ prod-configuration.json # Configure CloudFormation parameters for production buildsTransmutation does something a little naughty: it rewrites deployment (CodeBuild) permissions every time your stack is deployed. The PermissionsUpdate lambda function reads all the resources created from your stack and writes new permissions that allow codebuild to have access to these resources. What this means is that you never have to rewrite your pipeline's permissions even as your own CloudFormation stack grows!
Help needed adding more! Submit a pull request.
Raw definitions to these supported resource types are in aws-arn-from-resource-id.js
| Compute | Storage | Database | Networking |
|---|---|---|---|
| EC2 (partial) | S3 | RDS | VPC (partial) |
| Lambda | S3 Glacier | DynamoDB | CloudFront |
| EFS | Route53 (partial) |
A number of issues and major services like s3 and dynamodb do not support ResourceTag based global condition keys (see the listed resource-based policies here). In addition some services like CloudFront do not have the tag aws:cloudformation:stack-name automatically populated when they are created. Hence a rule that relied on this tag could not work. A script, however, could cover a much broader range of resources.
The way this script is implemented guarantees that no erroneous or overly permissive permissions are added. This policy ends up looking something like this:
{
    "Version": "2012-10-17",
    "Statement": {
        "Effect": "Allow",
        "Action": "*",
        "Resource": [
            "arn:aws:cloudfront::123456789123:distribution/ABCDEFGHIJKLMN",
            "arn:aws:apigateway:us-east-1:123456789123:/apis/abcdefghij",
            "arn:aws:apigateway:us-east-1:123456789123:/apis/abcdefghij/*",
            "arn:aws:s3:::my-bucket",
            "arn:aws:s3:::my-bucket/*"
        ]
    }
}
Remember that these auto-generated permissions are only given to the codebuild resources which run each of your pipeline yaml files. Obviously this will not work for everyone, so you can disable Automatic Build Permissions when creating your pipeline. This will remove this step.
All pipeline steps are executed using AWS CodeBuild virtual containers that will run respective yaml files. Your commands will have access to the following environment variables:
PIPELINE_BUCKET= name of artifact bucketPIPELINE_STAGE= eitherprodortestPIPELINE_STACK_NAME= name of the stack we are deploying to- Load more from
prod.envortest.envfiles with the commandexport $(cat $PIPELINE_STAGE.env | xargs)
Say you want to release your production to a real domain, but don't want to deploy test builds to that same domain as well!
Instead of hard coding values like a domain name in your template, use CloudFormation Parameters and Conditions. Then use test-configuration.json and prod-configuration.json files to set different parameters for test and prod builds. Transmutation is configured to optionally use these files during template changeset creation/execution.
For example, aws-transmutation-starter if you don't set Domain, the template will output the cloudfront distribution url to the static website and api. However, if you set a Domain the template will configure a Route53 to the domain and link our static site and api through it.
There are many ways to get outputs from your template, but the most straight forward method gets outputs using the aws cli and export the output as an environment variable like so:
phases:
  install:
    commands:
      # Get output 'ApiUrl' as an environment variable
      - >
        export API_URL="$( \
          aws cloudformation describe-stacks \
            --stack-name $PIPELINE_STACK_NAME \
            --query "Stacks[0].Outputs[?OutputKey=='ApiUrl'].OutputValue" \
            --output text \
)"Find your pipeline stack and delete it. This won't affect your production stack. You can then create your own custom pipeline or recreate a Transmutation Pipeline using the same name and branch.
@honglu @jamesiri @jlhood and everyone else involved in the development of AWS SAM CodePipeline CD.
@jenseickmeyer's project github-commit-status-bot which heavily inspired the design of github-status-update.
🍻 If you use or enjoy my work buy me a drink or show your support by staring this repository. Both are very appreciated!
Please see the LICENSE for an up to date copy of the copyright and license for the entire project. If you make a derivative project off of mine please let me know! I'd love to see what people make with my work!

