Download this extension from the VS Gallery or get the nightly build.
An extension built for and by Visual Studio extension authors.
See the changelog for changes and roadmap.
- VSCT files
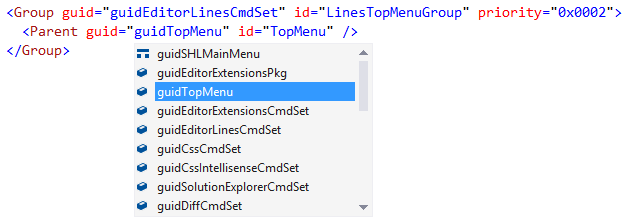
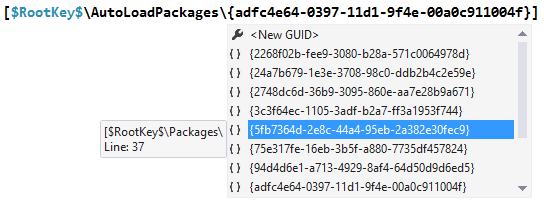
- Intellisense for custom GUIDs
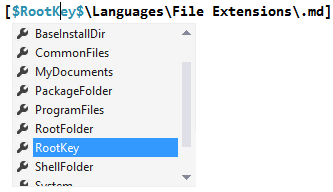
- Intellisense for custom IDs
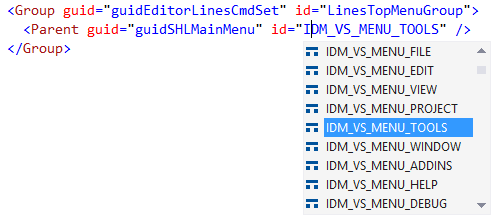
- Intellisense for built-in groups and menus
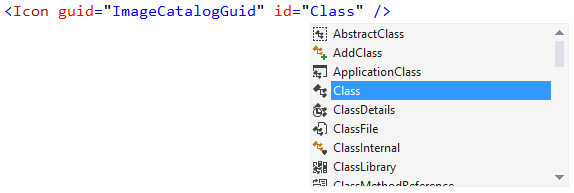
- ImageMoniker Intellisense
- Snippets
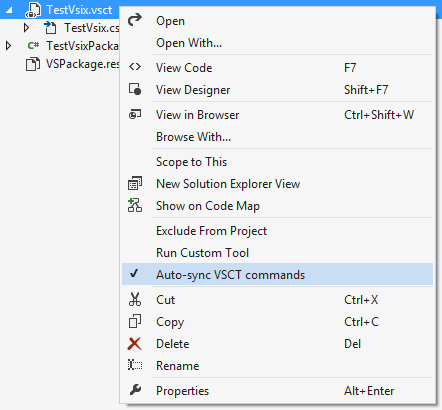
- Auto-sync VSCT commands to C# class
- Editor margin
- Shows document encoding
- Shows content type of the
ITextBufferunder caret - Shows active classifications under caret
- Shows caret position and selection range
- Dialog for digitally signing VSIXs
- Pkgdef/pkgundef files
- Syntax highlighting
- Intellisense
- Snippets
- Brace matching
- Validation
- Formatting
- VsixManifest files
- Auto-sync to Resx file
- Automatically create .ico file based on icon file
- Support for VsixGallery.com
- Show Project information (for debug purposes)
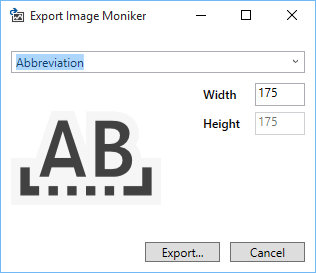
- Export KnownMonikers to PNG file
- VS Theme color swatch window
- View Activity Log
- Enable VSIP Logging
- Item templates
- Snippet file
- Browser Link Provider class
- Editor drop handler
- Create ImageManifest files
The Visual Studio Command Table leaves a lot to be desired in terms of both Intellisense and discoverability of even the most common use cases.
This extension improves on that.
Get Intellisense for symbols and groups through out the .vsct file
whether you're defining Groups, Menus, Buttons, KeyBindings or
CommandPlacements.
Provides Intellisense for IDs based on the guid attribute on
the same XML element.
All the built-in groups and menus are located under the guidSHLMainMenu
GUID and Intellisense is now provided for all the corresponding IDs.
Over 3500 images is available as ImageMonikers in the KnownMonikers collection in VS. You can now see all the images directly inside Intellisense.
All main XML elements in the VSCT file has snippets associated with them and can be invoked by hitting the Tab key.
Auto-generate the PackageGuids and PackageIds classes every time
you save the VSCT file. This keeps your code in sync with the VSCT file
at all times.
Feature contributed by phofman
The margin is located below the bottom scrollbar and comes in handy when writing extensions that extends the VS editor.
Shows the encoding of the current document and more details on hover.
Shows the content type of the ITextBuffer at the caret position. The
over tooltip shows the name of the base content type.
Displays the name of the classification at the caret position in the
document. The hover tooltip shows the inheritance hierarchy of the
EditorFormatDefinition's BaseDefinition attribute.
Displays the start and end position of the editor selection as well as the total length of the selection.
Colorizes registry keys, strings, keywords, comments and more.
Intellisense is provided for tokens and GUIDs.
By typing a question mark on an empty line, a list of snippets appear.
Hit Tab on the snippet you want and it will be inserted.
Matches parentheses and square brackets.
Validates various common mistakes like unknown tokens and unclosed strings and braces.
Format the entire document or just the selected lines.
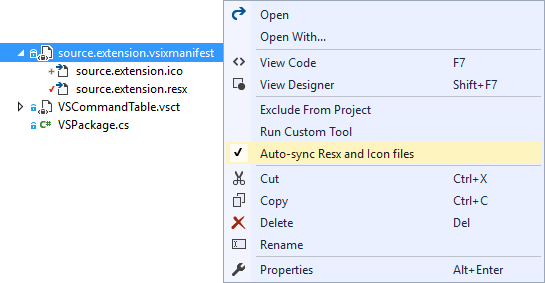
You can enable auto-sync on any .vsixmanifest file. Simply right-click the file in Solution Explorer and select Auto-sync Resx and Icon Files.
This will generate a file called source.extension.resx that is designed to replace the VSPackage.resx file that is added by default by the VSIX project template.
Whenever you change the .vsixmanifest file, the .resx files is updated accordingly as well.
Icon files (.ico) are always hard to create and maintain, so this feature will auto-generate it for you automatically.
All there is required is that you've referenced an image file in the .vsixmanifest's Icon property and a new .ico file is automtically generated with the right dimensions for VS extensions.
A C# class file is also produced which contains a static class with various string constants such as Name, Description and Version of the VSIX.
Example:
namespace MyExtension
{
    public static class Vsix
    {
        public const string Id = "f86b5aa5-733c-4e8f-8d3b-ea6f9b97b344";
        public const string Name = "Name of VSIX";
        public const string Description = "Description of VSIX";
        public const string Version = "1.0";
    }
}VsixGallery.com is an open source gallery for Visual Studio extensions and is primarily used for hosting CI built extensions - a staging environment.
There are two things that make automatic integration with VsixGallery.com easy. Put your code on GitHub and automate the build process with AppVeyor.
It sounds like a lot of work, but it isn't. Right-click the solution node in Solution Explorer and click both of the buttons shown below.
That will add some files to the solution folder that require almost no modifications by you. These files are AppVeyor.yml as well as common GitHub files such as CONTRIBUTION.md (tailored to VSIX development), CHANGELOG.md etc.
Read more about adding your extension to VsixGallery.
A context-menu command is available on every project type that makes it very easy to see all the properties on said project.
This makes it easy to troubleshoot and debug project related issues.
You can now easily export any of the KnownMonikers from
IVsImageService2 to a PNG file on disk in the size you
need it in.
The button to invoke the Export Image Moniker dialog is located in the top level Tools menu.
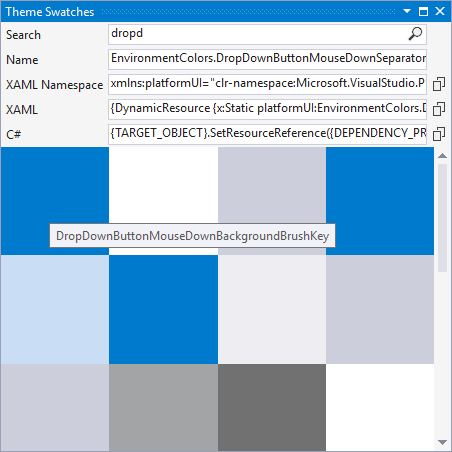
To see all the VS environment colors available used in the Light, Blue and Dark theme, you can use the Theme Swatches window.
Open it from View -> Other Windows -> Theme Swatches
The tool window lets you search for colors and provides an easy way to copy them into XAML or C#.
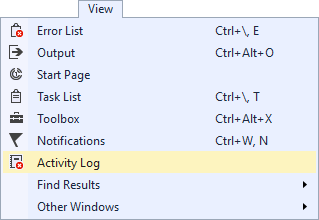
Getting to the Visual Studio Activity Log can sometimes be a bit cumbersome when dealing with both the regular and the experimental instance.
A menu command under the top level View menu let's you open the right Activity Log easily.
This will open the Activity Log in the Visual Studio web browser.
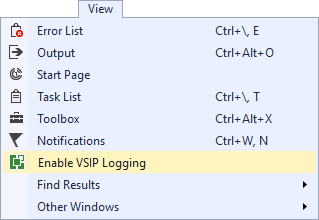
VSIP Logging allows you to see GUIDs and command ids for menu commands. Just press Ctrl+Shift as you click a menu item or group with the mouse.
Read more about VSIP Logging.
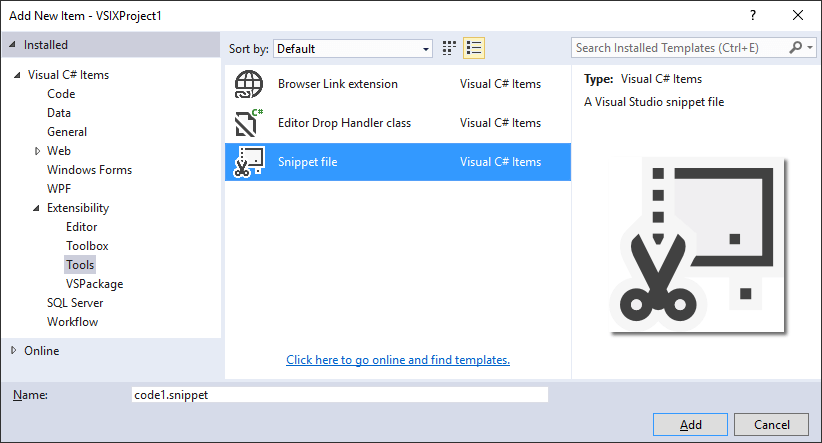
Several item templates are added to make it easier to create extension. These item templates all come with functionality that's easy to modify to your needs.
Right-click any .png or .xaml files and invoke the Generate Image Manifest command from the context menu.
This will ask you where to put the .imagemanifest file and then generate it. If a .imagemanifest file already exist, the guid will remain the same but the sources and IDs will be updated.
Check out the contribution guidelines if you want to contribute to this project.
