This repository contains Otter scripts, PowerShell script, and other resource you can use to bootstrap your Otter setup.
The first thing you will want to do is install Otter, you can download the latest installer from https://inedo.com/otter/versions.
After you have installed Otter, you will want to create a fork of this repository.
Rafts are the mechanism by which content is stored in Otter. We will focus on using Git Rafts for now because they lend themselves to working with infrastructure in a very code-like way.
You then can create a new Otter Git raft by doing:
-
Open your local Otter instance (by default http://localhost:8626)
-
Go to the Administration section (the Gear icon in the upper right of the screen
 )
) -
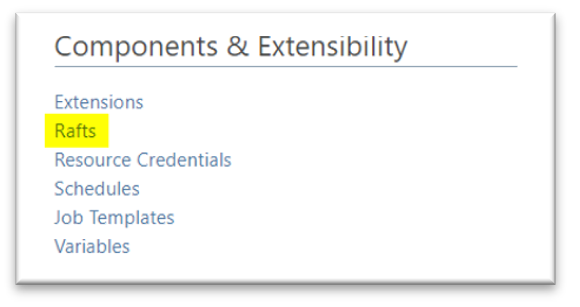
Then click the “Rafts” link in the “Components & Extensibility” section
-
Then click the “Create Raft” button
-
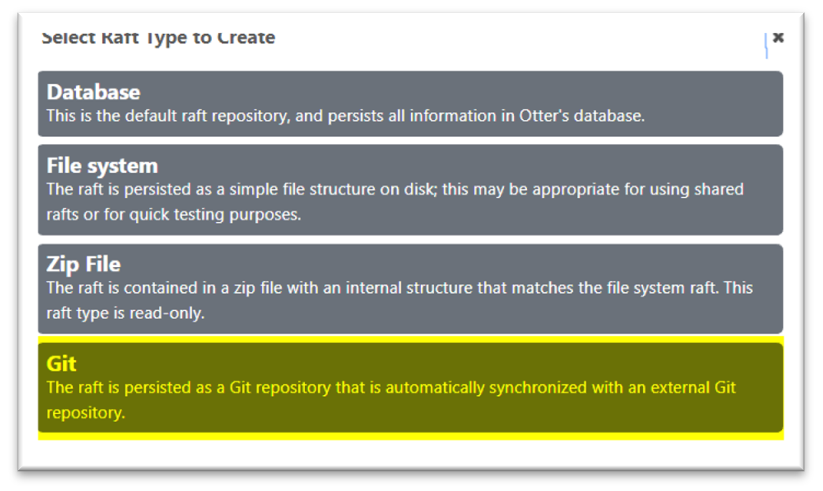
Then click the “Git” button from the dialog window
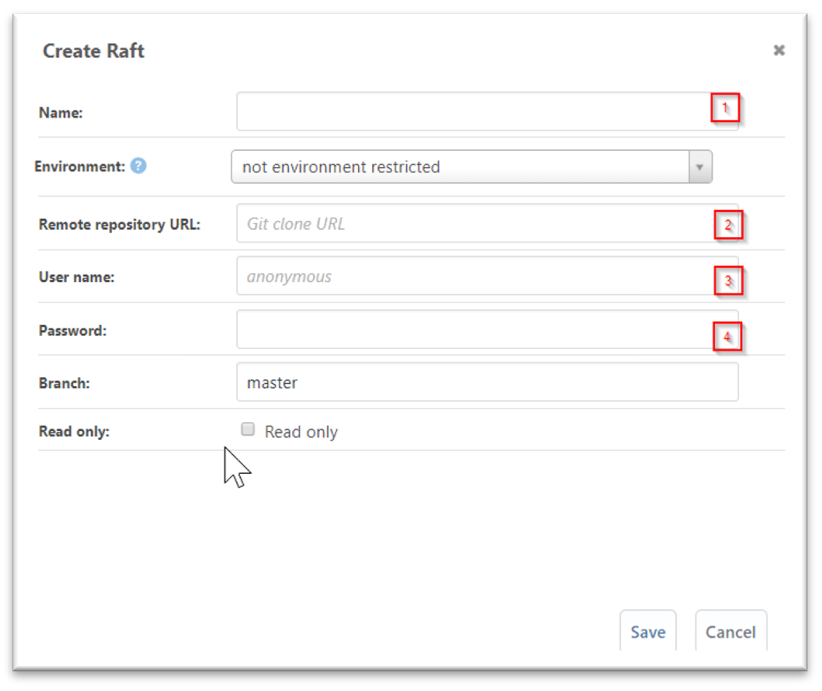
- You will now be presented with a dialog to configure the Git Raft
-
The Name (1) should be something meaningful, since we intend to replace the default raft with our new Git Raft, let’s name it “Default_New”
-
In the “Remote Repository UL” (2) put the address of your fork (i.e. https://github.com/MarkRobertJohnson/otter-dsc-webinar.git)
-
Then put your GitHub username and password in fields 3 & 4 (You can use other Git hosting services such as GitLab and BitBucket too)
-
Then for the branch, let’s use the “dev” branch for the default (we generally would not want to edit directly on master, because we are trying embrace development best-practices)
-
Then click save
-
Then delete the existing “Default” raft (Click the red X)
-
Then edit the “Default_New” rafts and rename it to “Default”
-
The new Git raft is now set up and ready to go to work
-
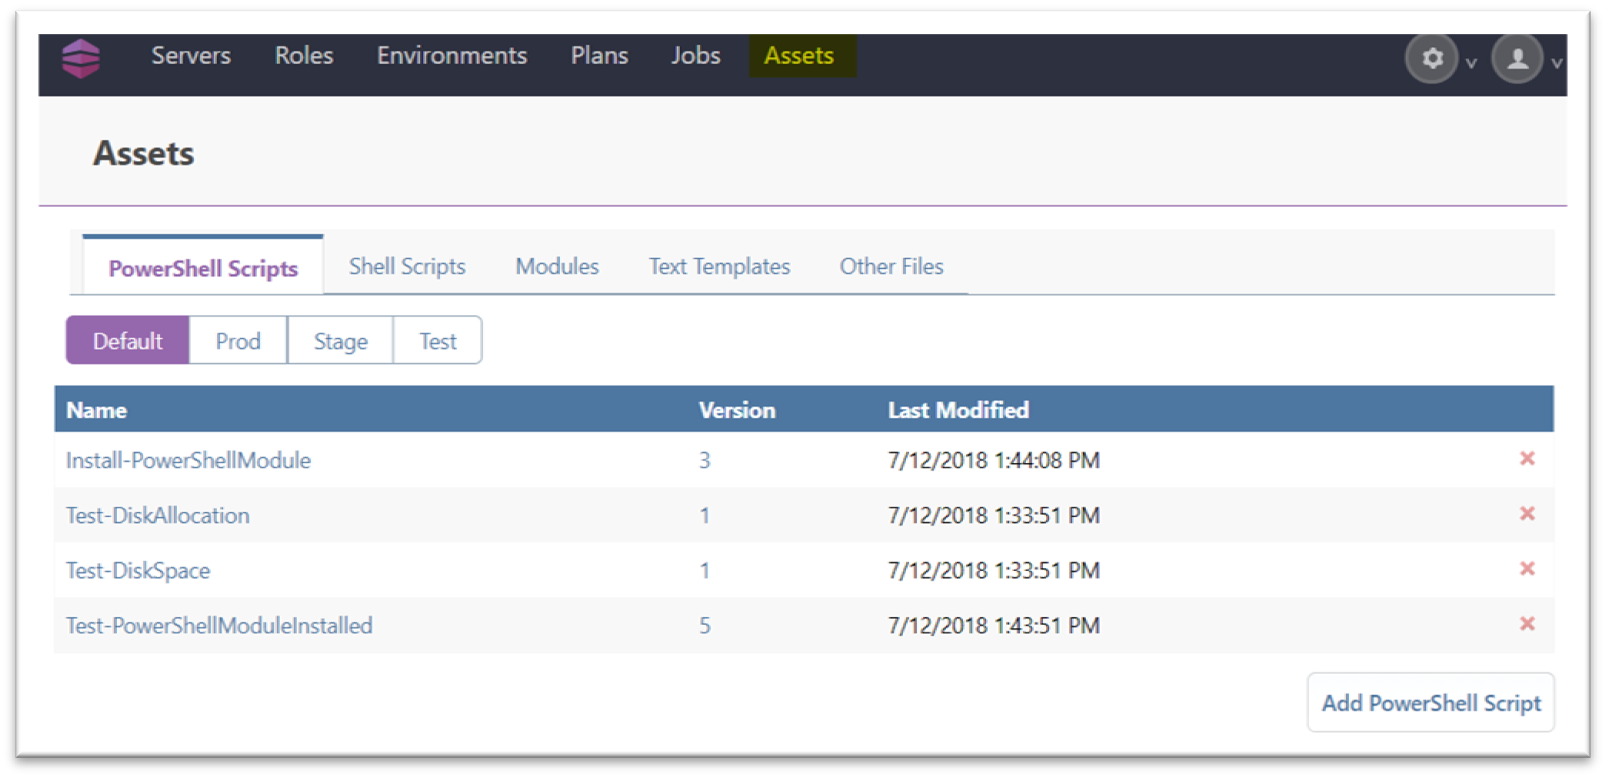
To verify the Git Raft is working, browse to “Assets” and you should see something like this (with the exception of multiple rafts, we will add more rafts later on)
Otter allows using most, if not all DSC resources directly within OtterScript. This tutorial will walk you through how to execute your first DSC resource
First, go to the Servers, you will see one server named “LOCALHOST”, that is your local machine. Click LOCALHOST to go to the server page then scroll down to the “Configuration Plan” section, and click “create”
An editor window will now pop up, click the purple “Switch to Text Mode” button in the lower right (DSC resources can only be created in Text Mode)
Then copy and paste this Otter script:
PSDsc Environment (
   Name: MyFirstOtterVar,
   Value: This variable is set on $ServerName,
   Ensure: Present,
   Path: false
);
Then click the “Save Plan” button. The dialog will close and you will return to the server screen. The server should now check the configuration automatically, if not, click the “Check Configuration” button
Wait for the configuration check to complete
The server will be in a drifted state. Click the “Configuration” tab to see the details of the drift
Click the “MyFirstOtterVar” entry in the “DSC-Environment” section, and you will see a dialog like:
Notice that the Ensure is “Absent”. Click the Close button of the dialog.
Now we will remediate this drift.
Click the “Remediate with Job” button and then click "Create Job"
A new job is now launched to automatically remediate the drift. In this case, a new environment variable is created named "MyFirstOtterVar"
To verify that the environment variable was really set, open a PowerShell console and execute
[environment]::GetEnvironmentVariable("MyFirstOtterVar", "Machine")
You should see “This variable is set on LOCAL” printed out
Also, on the server’s configuration tab, you should now see


