This library bridges React Native with zoom.us SDK and implements the SDK authentication process.
Library updated to use iOS SDK 5.0.24433.0616 and Android SDK version 5.0.24437.0708, or higher
Note: User login using zoom user accounts is not implemented.
Install the library from npm:
npm i @mokriya/react-native-zoom-us-bridge --saveor
yarn add @mokriya/react-native-zoom-us-bridgeLibrary autolinks for React-Native 60 or higher.
RN 59 or lower please make sure to
react-native link @mokriya/react-native-zoom-us-bridgeThen follow the instructions for your platform to add ZoomUS SDK into your project:
Using CocoaPods
Due to the size of the sdk you will need to enable git lfs
brew install git-lfs
git lfs install
Setup your Podfile by adding this line inside of your app target (found at ios/Podfile).
pod 'ZoomSDK', :git => 'https://github.com/mokriya-org/zoom-us-ios-sdk-dev-pod.git'Note: This particular pod cannot be used for release build. You must use the production Pod instead. However, this pod file does not work with simulators.
Then run in the ios folder
pod install`pod 'ZoomSDK', :git => 'https://github.com/mokriya-org/zoom-us-ios-sdk-pod.git'`Manual Link
Download zoom.us iOS SDK at https://github.com/zoom/zoom-sdk-ios
- Unzip the sdk and locate contents.
- Drag lib folder into the iOS Project

- Make sure to check
copy if needed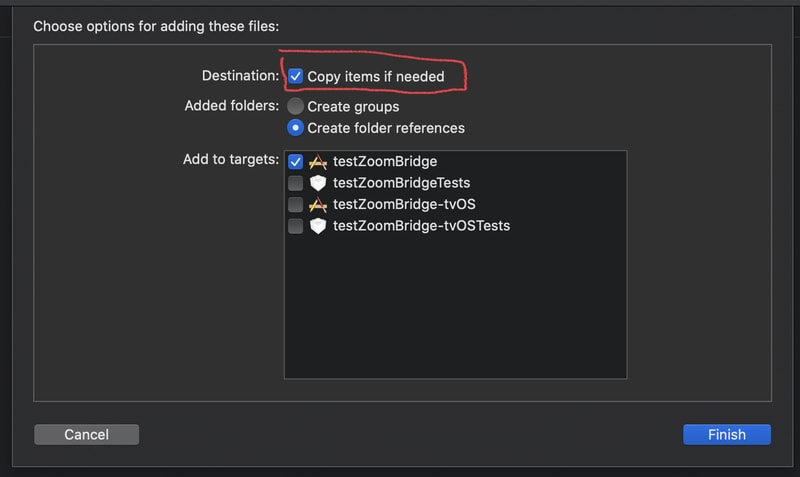
- Rename folder to
ZoomSDKdouble check by looking up the folder in finder or terminal.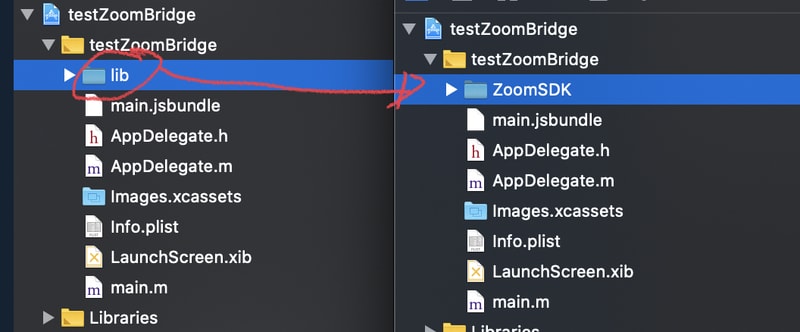
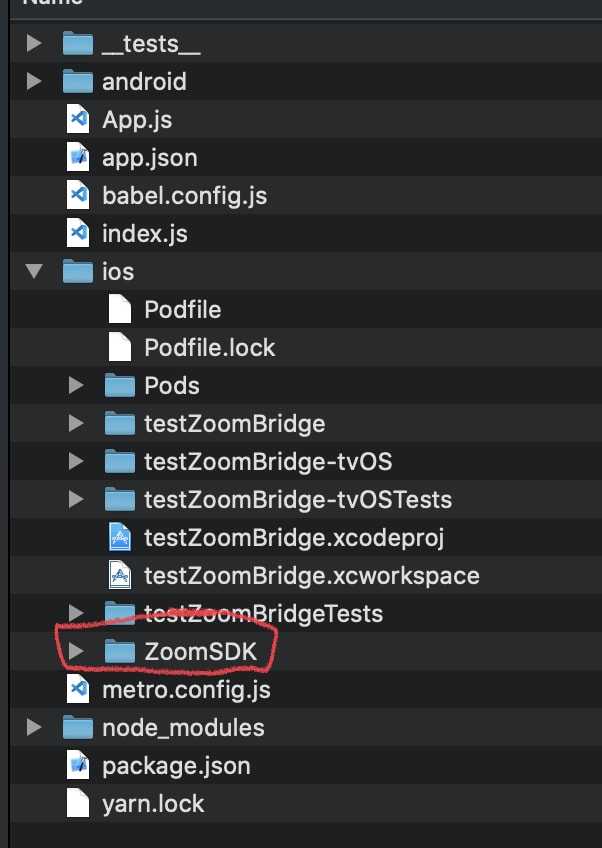
- On Xcode Open ZoomSDK folder, find MobileRTC.framework, drag it to General -> Frameworks, Libraries... make sure its set to
Embed & Sign(ios_image5)
- Verify the
ZoomSDKfolder is inBuild Phases,Copy Bundle Resources, if not, drag the folder in there.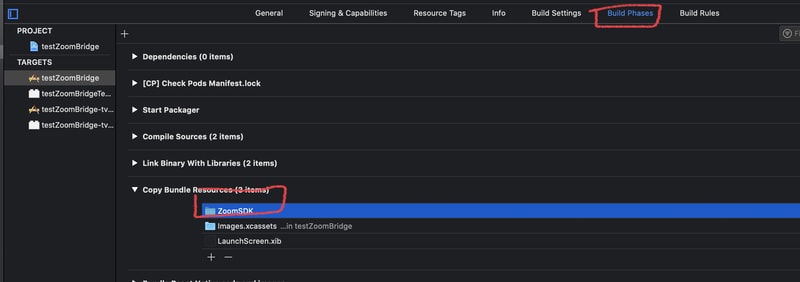
See here for more information.
Zoom SDK library does not support bitcode. Please make sure to set bitcode to No

The app's Info.plist file must contain a NSCameraUsageDescription and NSMicrophoneUsageDescription with a description explaining clearly why your app needs access to the camera and microphone, otherwise Apple will reject your app submission.
If you are using RN 59 or lower, you will need to enable Android X. Add this to your gradle.properties
android.useAndroidX=true
android.enableJetifier=true
There are no semi-auto way to install the Android SDK at the moment. It must be done 100% manually.
Download zoom.us Android SDK at https://github.com/zoom/zoom-sdk-android
-
Unzip the sdk and locate
commonlibandmobilertc. -
Drag both folders into your android project (Project/android)
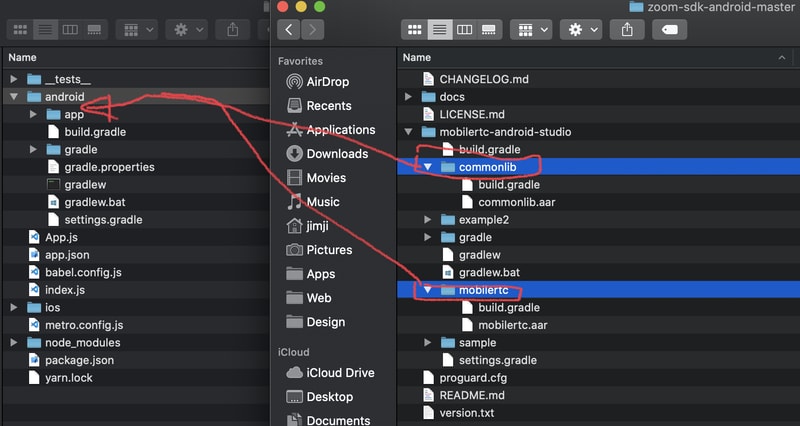
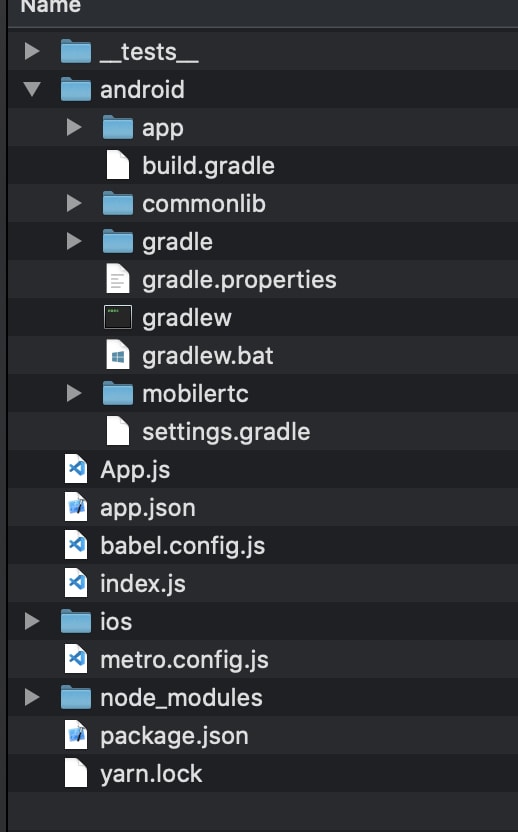
-
Open
android/settings.gradle -
Add the following string
, ':mobilertc', ':commonlib'into theinclude ':app'
-
Open
android/build.gradle -
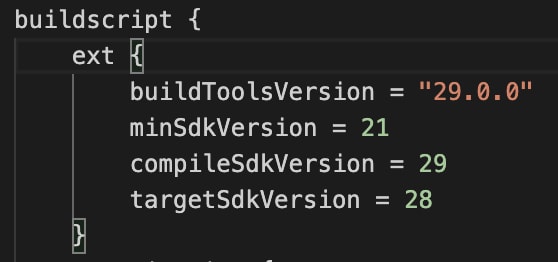
Update your SDK versions to match the following
    buildToolsVersion = "29.0.0"
    minSdkVersion = 21
    compileSdkVersion = 29
    targetSdkVersion = 28
-
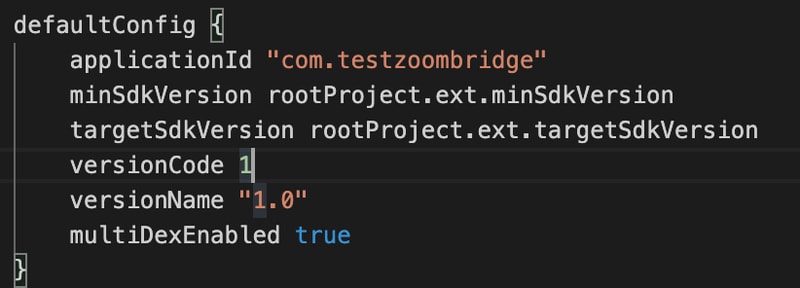
Open
android/app/build.gradle
See here for more information.
- Signup for an account
- Verify your email
- Signin to the developer console
- Agree to terms of becoming a developer
- Create a new SDK App
- Create a new JWT App (optional for hosting meetings)
You should avoid hardcoding your App/Jwt key and secret. In our example we hardcode the data for example only. There are various ways to store your key/secret safely on the net. Please make sure to read and find your best possible way. rn security
APP key and secret is required
import RNZoomUsBridge from '@mokriya/react-native-zoom-us-bridge';

RNZoomUsBridge.initialize(
  ZOOM_APP_KEY,
  ZOOM_APP_SECRET,
);

RNZoomUsBridge.joinMeeting(
  meetingId,
  userName,
  meetingPassword,
);JWT key and secret is required
import RNZoomUsBridge from '@mokriya/react-native-zoom-us-bridge';

RNZoomUsBridge.initialize(
  ZOOM_APP_KEY,
  ZOOM_APP_SECRET,
);

// create accessToken used to communicate with zoom api
const accessToken = await RNZoomUsBridge.createJWT(
  ZOOM_JWT_APP_KEY,
  ZOOM_JWT_APP_SECRET
).then().catch((err) => console.log(err));

// use accessToken to get userId of the user account you are creating the meeting with
const userId = await getUserID('user@email.com', accessToken);

// use the userId to obtain the user Zoom Access Token
const userZak = await createUserZAK(userId, accessToken);

// use Access Token etc, to create a meeting
const createMeetingResult = await createMeeting(userId, accessToken);

// get meeting id from result
const {id: meetingId} = createMeetingResult;

// use the meeting Id, userId, user name and user zoom access token to start & join the meting
RNZoomUsBridge.startMeeting(
  meetingId,
  userName,
  userId,
  userZak
);Use event emitter to listen for meeting state changes
import RNZoomUsBridge, {RNZoomUsBridgeEventEmitter} from '@mokriya/react-native-zoom-us-bridge';

const meetingEventEmitter = new NativeEventEmitter(RNZoomUsBridgeEventEmitter);

meetingEventEmitter.addListener(
  'SDKInitialized',
  () => {
    console.log("SDKInitialized");
  }
);| Listener | Description |
|---|---|
| SDKInitialized | Status update - SDK initialized successfully |
| meetingStarted | Status update - Meeting started successfully |
| meetingJoined | Status update - Meeting joined successfully |
| meetingEnded | Status update - Meeting ended without error |
| meetingStatusChanged | Status update - Updates the meeting status |
| meetingError | Error - Meeting ended with error |
| waitingRoomActive | Error - Meeting waiting room is active |
Yes, as long as waiting room is turned off (iOS only), and user does not need to login.
Yes.
Yes, as long as the user matches the user whom created the meeting.
No, not currently (iOS only). Android does support waiting room.
No, not currently (iOS only).
No, not currently.
The result returned from startMeeting and joinMeeting are simple status that indicate if the command was executed successfully or not. The actual meeting joined status might not be available until a few seconds later. Always rely on the meetingJoined listener to determine if meeting have been joined successfully.
No, not currently. At the moment Zoom US bridge uses SDK App Key and JWT App Key.
Yes.
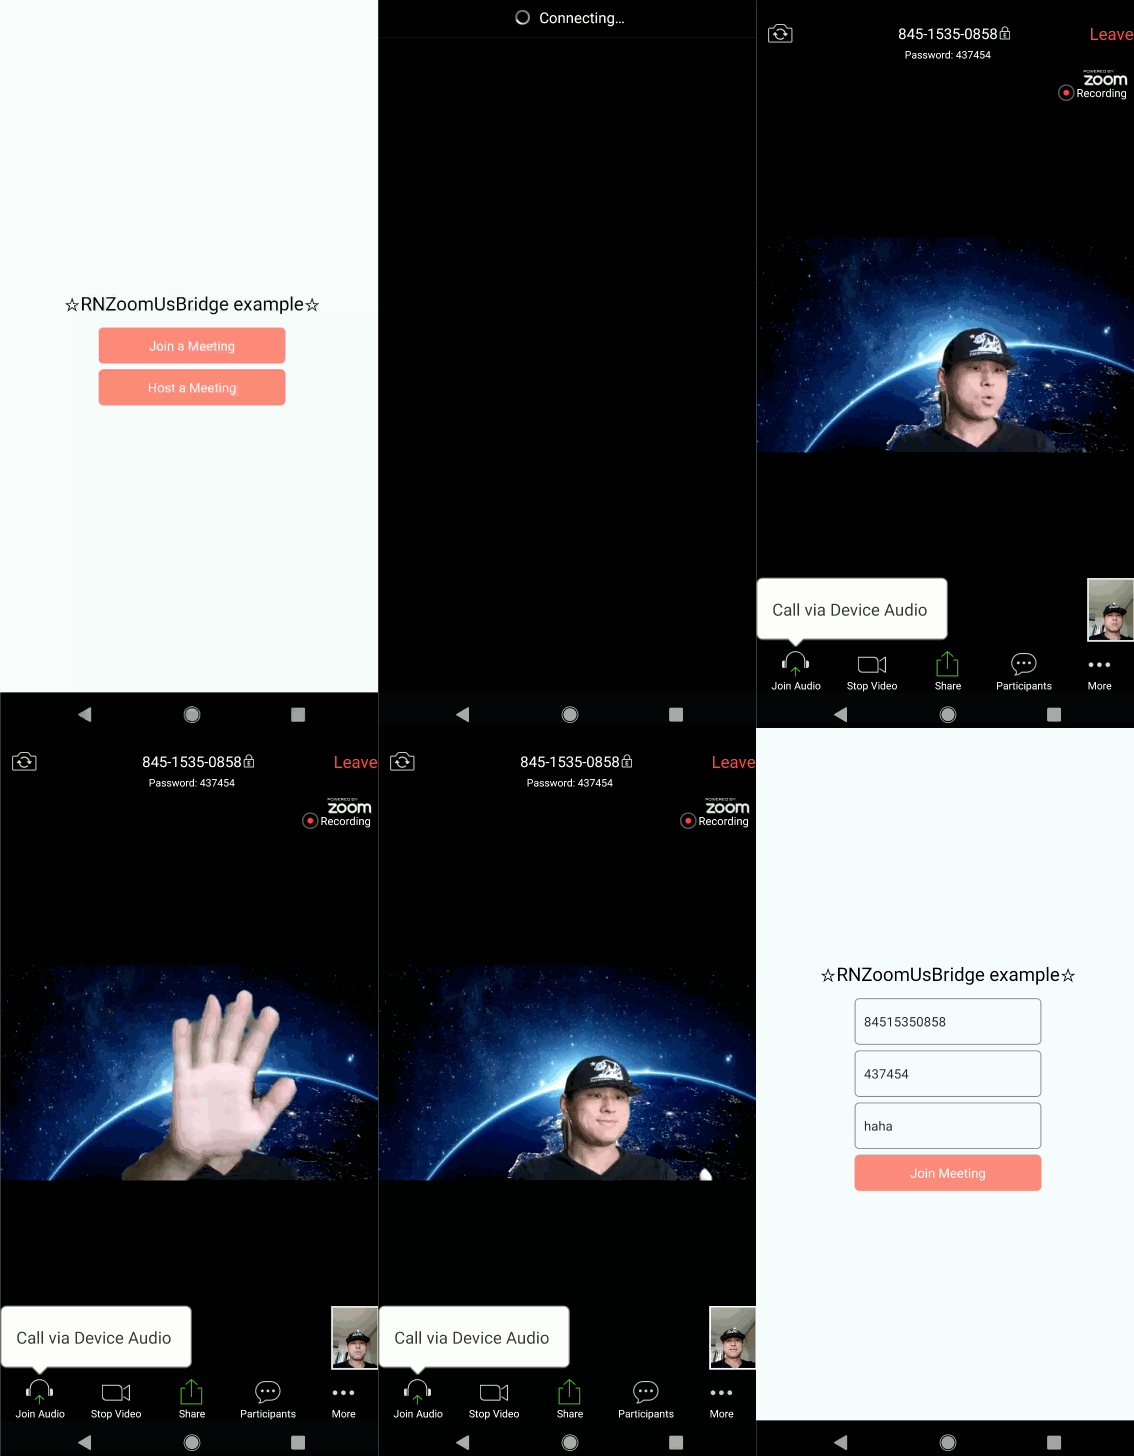
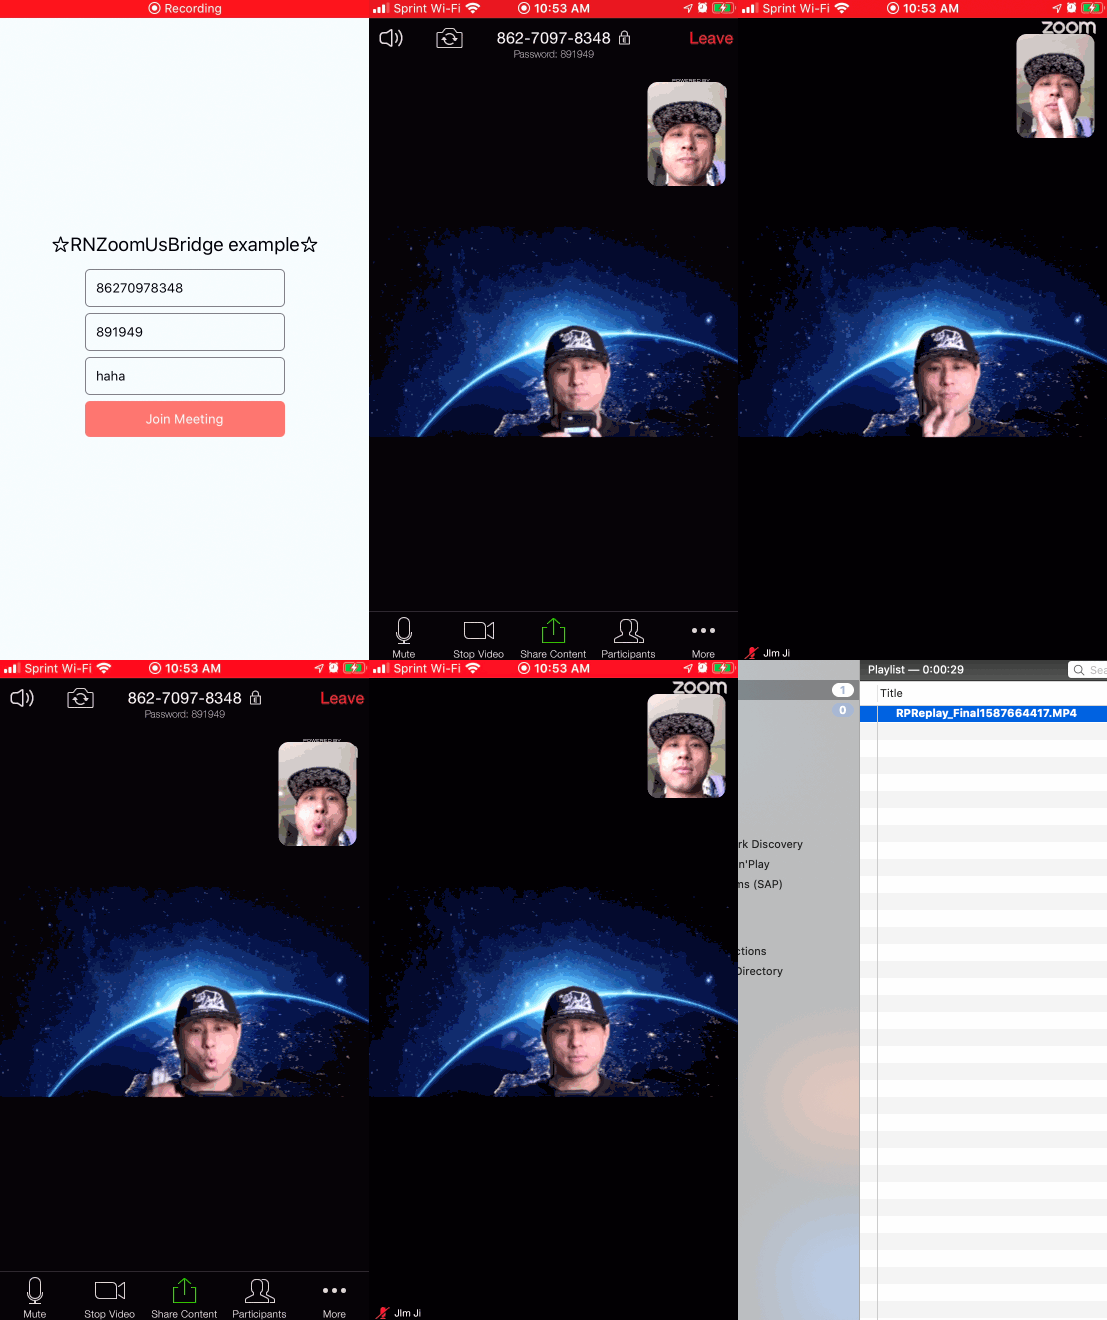
| Android | iOS |
|---|---|
 |
 |
