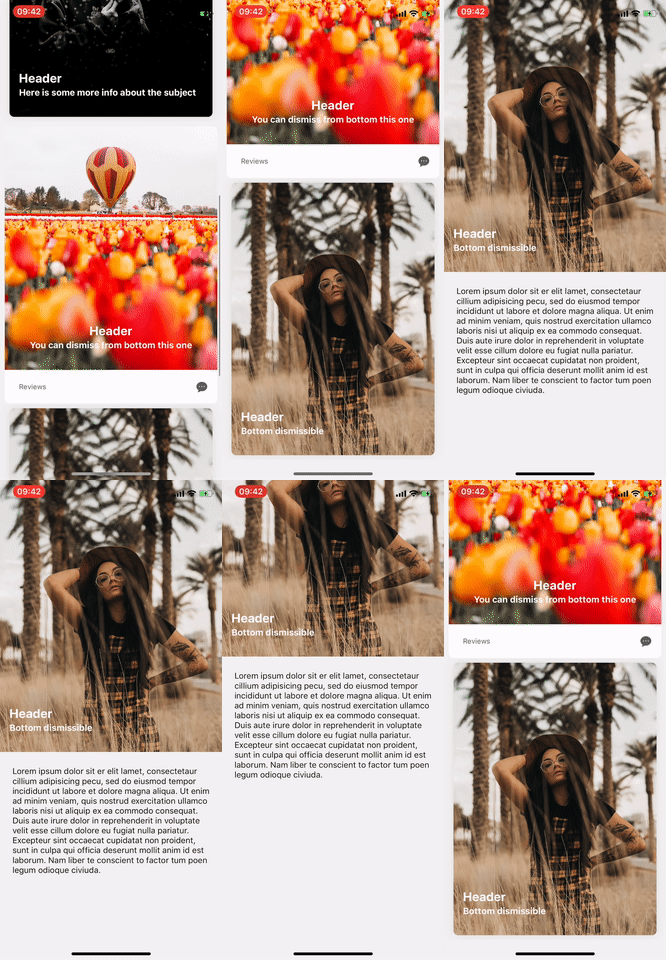
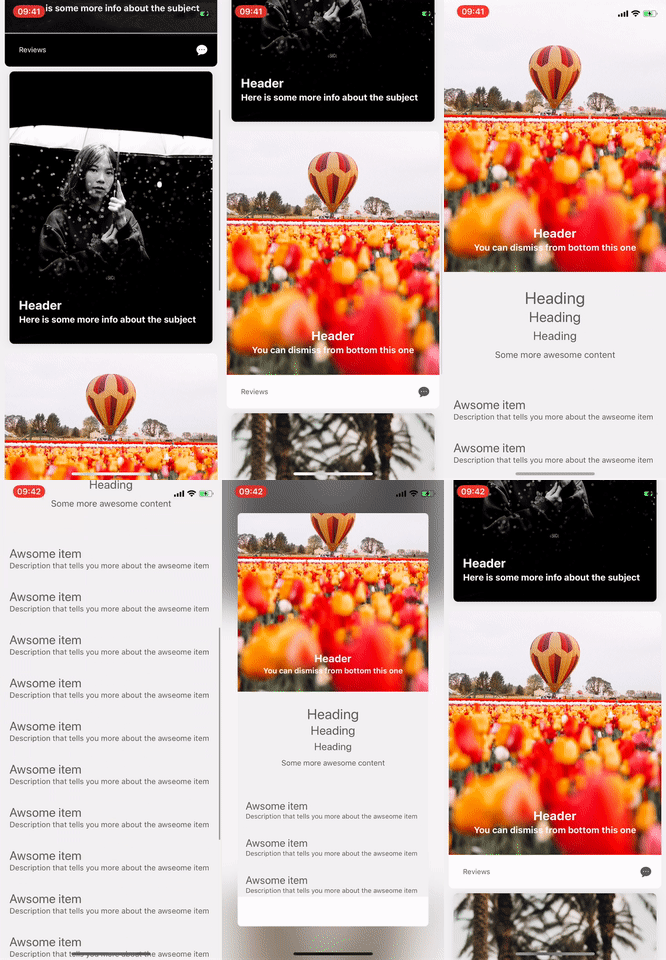
Appstore card animation transition. UICollectionView and UITableView card expand animated transition. This library tries to add the appstore transition to your own app. The goal is to be as simple as possible to integrate in an app while keeping the flexibility and customization alive.
appstore-card-transition uses the UIViewControllerTransitioningDelegate to implement the a custom transition animation. The initial frame of the selected cell is taken and the details view controller is animated from that position to the final expanded mode. Making sure that the expansion of the details view controller looks good falls in your responsability.
For closing the details view controller, gesture recognizers are used and the details view controller is animated back to the size of the cell, note that you can change the position of the cell while the details is shown to provide a more dynamic behaviour.
Most of the parameteres are customizable and callbacks for each meaningful action is provided.
CocoaPods is a dependency manager for Cocoa projects. You can install it with the following command:
$ gem install cocoapodsTo integrate appstore-card-transition into your Xcode project using CocoaPods, specify it in your Podfile:
use_frameworks!

target '<Your Target Name>' do
    pod 'appstore-card-transition'
end
Then, run the following command:
$ pod repo update
$ pod installThe Swift Package Manager is a tool for automating the distribution of Swift code and is integrated into the swift compiler. It is in early development, but appstore-card-transition does support its use on supported platforms.
Once you have your Swift package set up, adding appstore-card-transition as a dependency is as easy as adding it to the dependencies value of your Package.swift.
dependencies: [
    .package(url: "https://github.com/appssemble/appstore-card-transition.git", from: "1.0.3")
]Add the library project as a subproject and set the library as a target dependency. Here is a step by step that we recommend:
- Clone this repo (as a submodule or in a different directory, it's up to you);
- Drag
AppstoreTransition.xcodeprojas a subproject; - In your main
.xcodeprojfile, select the desired target(s); - Go to Build Phases, expand Target Dependencies, and add
AppstoreTransition; - In Swift,
import AppstoreTransitionand you are good to go!
First make sure your cells implement the CardCollectionViewCell protocol.
extension YourCollectionViewCell: CardCollectionViewCell {
    var cardContentView: UIView {
        get {
            return containerView
        }
    }
}
If you want your cells to also be responsive to touches, override the following methods:
    override func touchesBegan(_ touches: Set<UITouch>, with event: UIEvent?) {
        super.touchesBegan(touches, with: event)
        animate(isHighlighted: true)
    }

    override func touchesEnded(_ touches: Set<UITouch>, with event: UIEvent?) {
        super.touchesEnded(touches, with: event)
        animate(isHighlighted: false)
    }

    override func touchesCancelled(_ touches: Set<UITouch>, with event: UIEvent?) {
        super.touchesCancelled(touches, with: event)
        animate(isHighlighted: false)
    }
Your cell is now all setup, now go to your details view controller and make it conform to the CardDetailViewController protocol.
extension YourDetailsViewController: CardDetailViewController {

    var scrollView: UIScrollView {
        return contentScrollView // the scrollview (or tableview) you use in your details view controller
    }


    var cardContentView: UIView {
        return headerView // can be just a view at the top of the scrollview or the tableHeaderView
    }

}
One more thing you need to hook in your details view controller. Make sure you call the dismissHandler in your scrollViewDidScroll:
    func scrollViewDidScroll(_ scrollView: UIScrollView) {
        dismissHandler.scrollViewDidScroll(scrollView)
    }
Now you are ready to add the actual transition. In your cellForItemAt method, after you configured your cell as desired, make sure you set the following:
        cell.settings.cardContainerInsets = UIEdgeInsets(top: 8.0, left: 16.0, bottom: 8.0, right: 16.0) //set this only if your cardContentView has some margins relative to the actual cell content view.

        transition = CardTransition(cell: cell, settings: cell.settings) //create the transition
        viewController.settings = cell.settings //make sure same settings are used by both the details view controller and the cell
        //set the transition
        viewController.transitioningDelegate = transition
        viewController.modalPresentationStyle = .custom

        //actually present the details view controller
        presentExpansion(viewController, cell: cell, animated: true)
If you got here you should now have a basic appstore transition. It might not be perfect yet but its definitely a strong start. If something doesn't look well check if the constraints from your details view controller play well with resizing.
Playing with the parameters: check the TransitionSettings class.
Most common issues are animation glitches. To prevent those, make sure your constraints are properly set (especailly the top ones) and safe areas work as expected.
Next, make sure your cardContainerInsets are properly set and they reflect the actual ones from your cell.
Lastly, your scrollview might need some scrolling to match the actual cell look (it might need some more top inset than the cell for instance). For this case you can scroll the content as needed in your viewDidLoad method and for the dismiss animation you can use the dismissalScrollViewContentOffset property from TransitionSettings.
Most often than not, you'll want to animate some other content alongside the appstore animation. For this purpose action blocks are available. You can implement the following callbacks to receive changes in the transition progress.
extension YourDetailsViewController: CardDetailViewController {

    func didStartPresentAnimationProgress() { ... }
    func didFinishPresentAnimationProgress() { ... }

    func willBeginDismissAnimation() { ... }
    func didChangeDismissAnimationProgress(progress:CGFloat) { ... }
    func didFinishDismissAnimation() { ... }
    func didCancelDismissAnimation(progress:CGFloat) { ... }

}Checkout the demo project to see some examples of what the library can do and how its done.
We're aware that this is far from perfect so any improvement or feature is welcomed. If you made an awesome change don't hesitate to create a pull request.
This project is inspired from this project
Do you need help with your app development? Drop us a line


