UPDATE(2024 May 5) Postshot since 0.3.99 can reliably import CSV/PLY from Reality capture. This script is no longer needed.
This script was made to simplify the process from this guide: https://gist.github.com/jo-chemla/258e6e40d3d6c2220b29518ff3c17c40 by jo-chemla
This repository contains a Python script designed to automate the process of converting images and data from RealityCapture to a format compatible with Postshot via Colmap.
- Ensure you have Python installed on your system, and the
pippackage manager is functional. - Install Colmap on your system. You can download it from the Colmap github.
- Ensure that
colmap.exeandcolmap.batare exposed on your computer's PATH environment variable. This means that you should be able to runcolmapfrom any directory in the command line.
(location of colmap.bat)
E:\Program Files\Colmap\COLMAP-3.9.1-windows-cuda
(location of colmap.exe)
E:\Program Files\Colmap\COLMAP-3.9.1-windows-cuda\bin
These two paths should be added to your system's PATH as environment variables.
- Open your command line terminal and navigate to the directory where you want to store the script. Example:
cd C:\<some directory>- Clone the repository:
git clone https://github.com/Maxiviper117/RealityCapture-to-Postshot- Navigate to the cloned directory:
cd RealityCapture-to-PostshotChoose a folder to store the exported file.
- Set
Fitoption toInner Region. - Set
Resolutionoption toFit. - Ensure
Export Imagesis set toNo.- We will export the images separately in the next step when exporting the
Undistorted images with image list.export option
- We will export the images separately in the next step when exporting the
Choose a folder to store the exported file.
- Set
Fitoption toInner Region. - Set
Resolutionoption toFit. - Under
Export image settings, choose the desired image format (preferablyjpgorjpeg). - Set
Naming Conventiontooriginal file name. - Enable
Customize image pathand select the folder to store images.- Just store the images in a
imagesfolder in the same directory as the.outand.lstfiles.
- Just store the images in a
- Leave all other settings as default.
Back in your terminal, where you have navigated to the cloned directory, run the following command to start the web GUI interface:
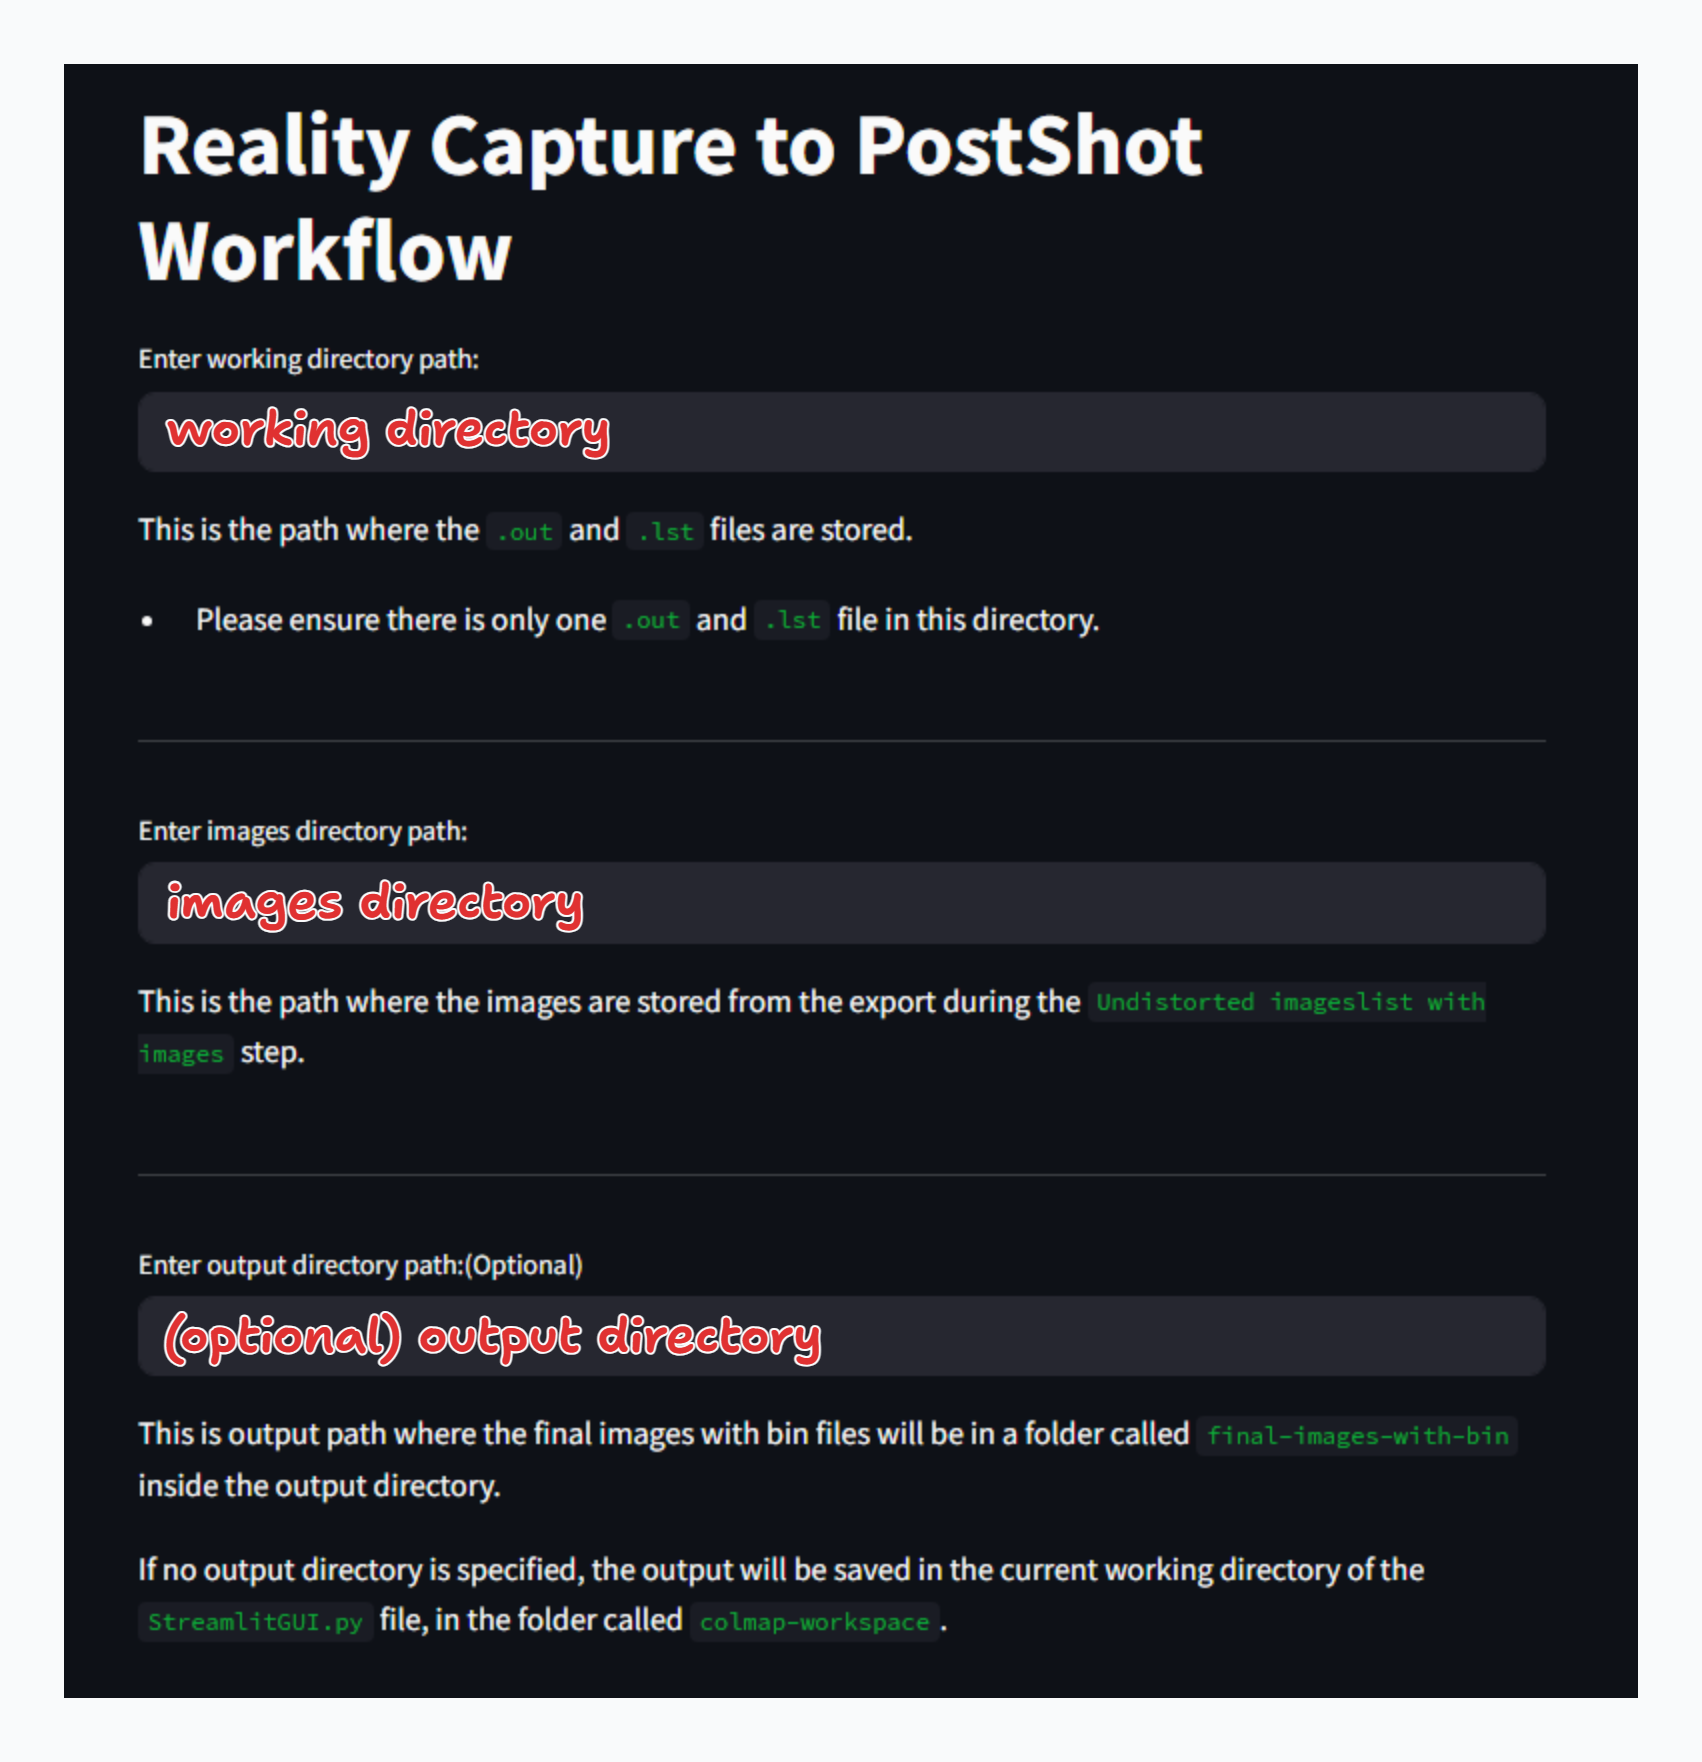
streamlit run ./WebGUI.py- Here you must provide the directoy path
working directoryto the folder containing the.outand.lstfiles - As well as the directory path to the folder containing the undistorted images (I added this as you may have choosen a different folder to store the undistorted images in the previous step)
- You can specify the output directory, but it is optional. And it will default a folder named
colmap-workspacein the working directory.
- Next once you have provided the paths, click on the
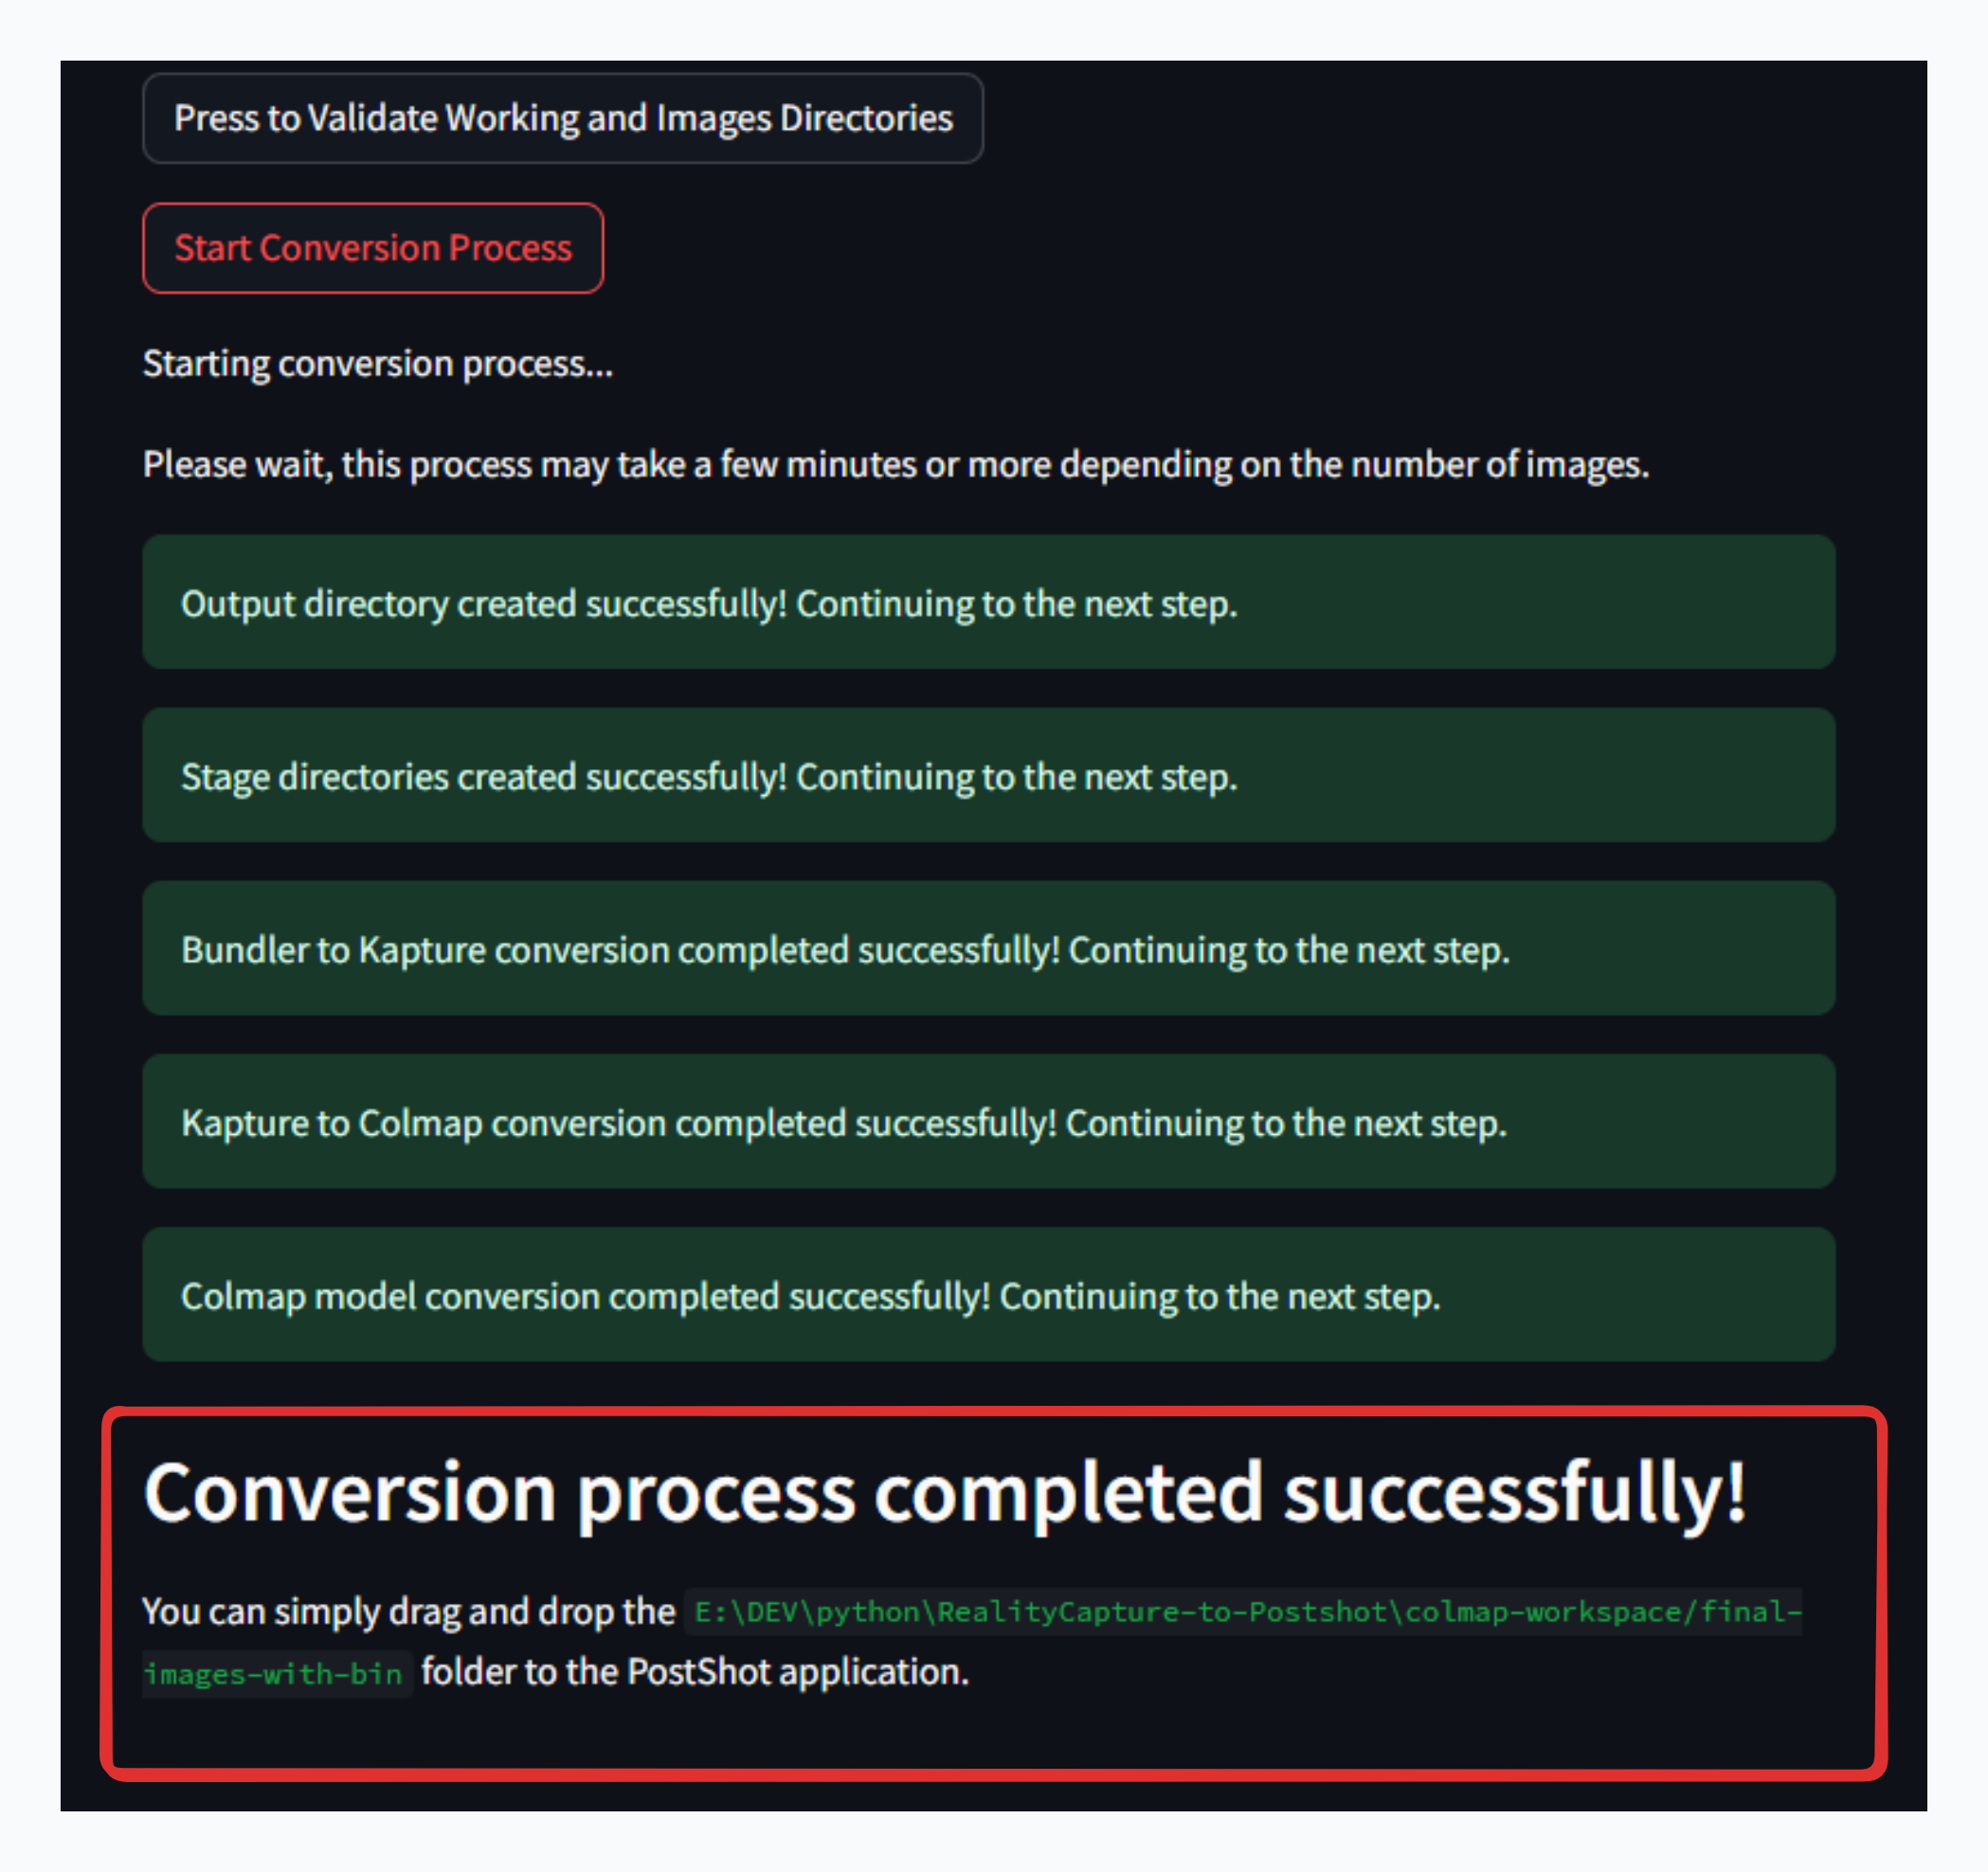
Press to Validate Working and Images Directoriesbutton to validate the paths. - If the paths are valid, another button will appear ->
Start Conversion Process, press this button to start the conversion process.
Once the process is complete, you will be shown the folder path where the images and bin files are stored. This folder can be simply dragged and dropped into Postshot to start the import process.
If you see this error, when you drag and drop the folder into Postshot, try close and open Postshot again, and drag and drop the folder again.


