-
In a new window, sign in to the Azure Portal (http://portal.azure.com).
-
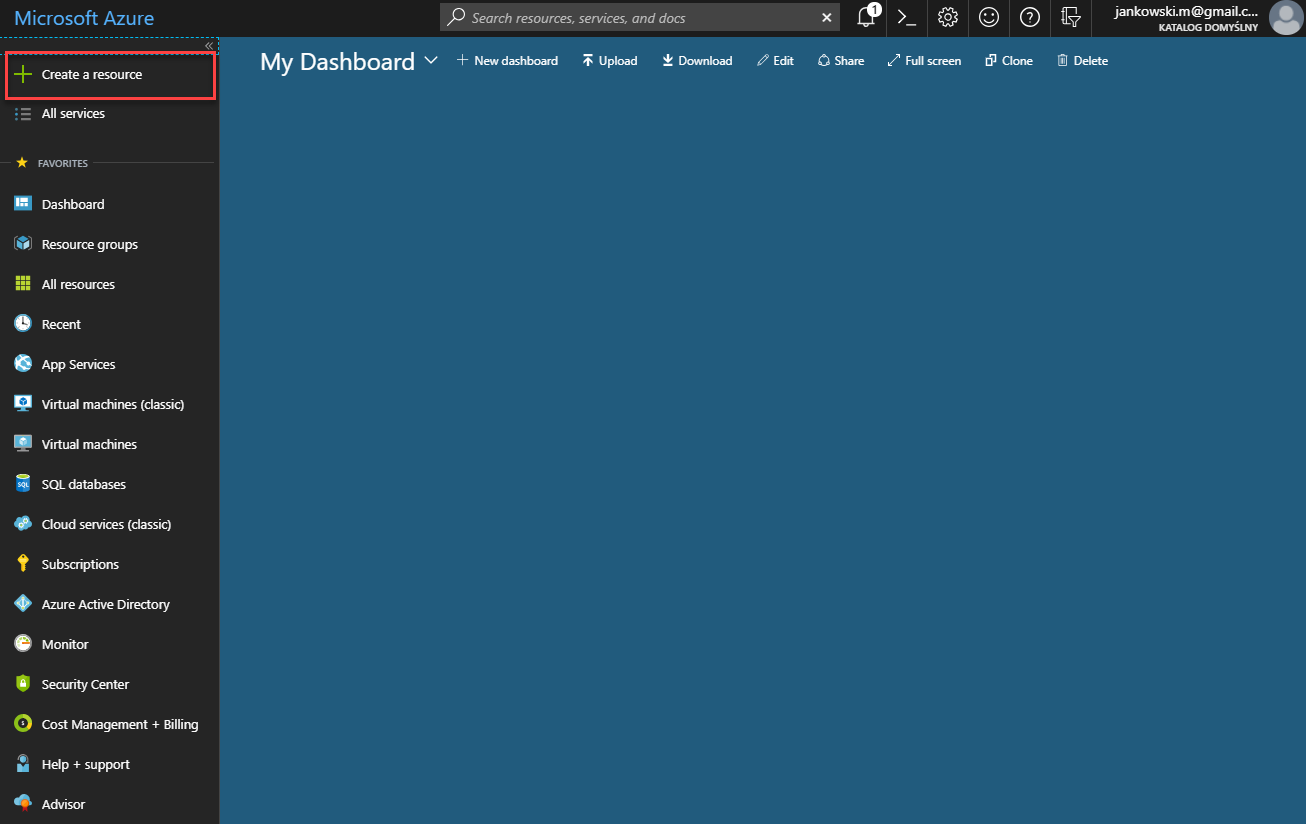
On the left side of the portal, click the Create a resource link.
-
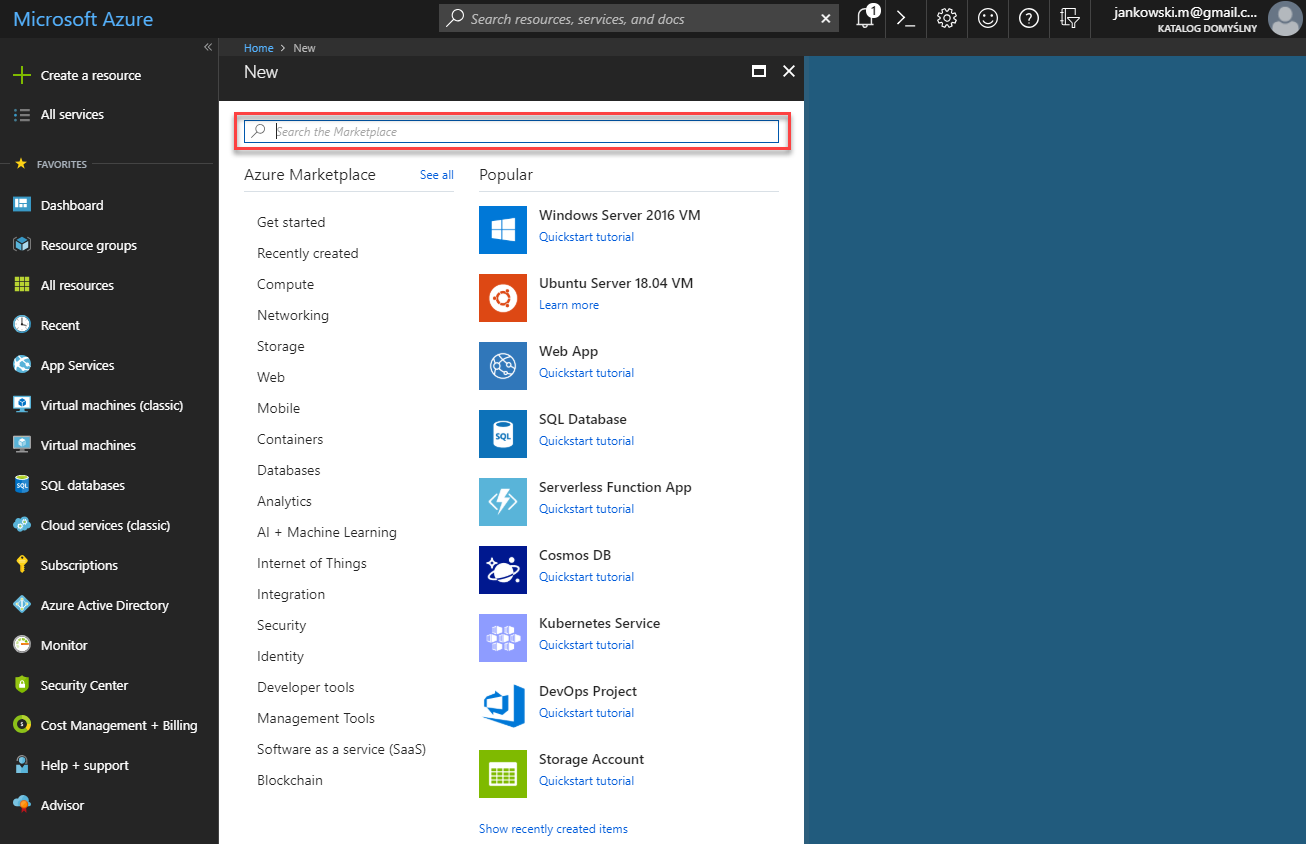
At the top of the New blade, locate the Search the Marketplace field.
-
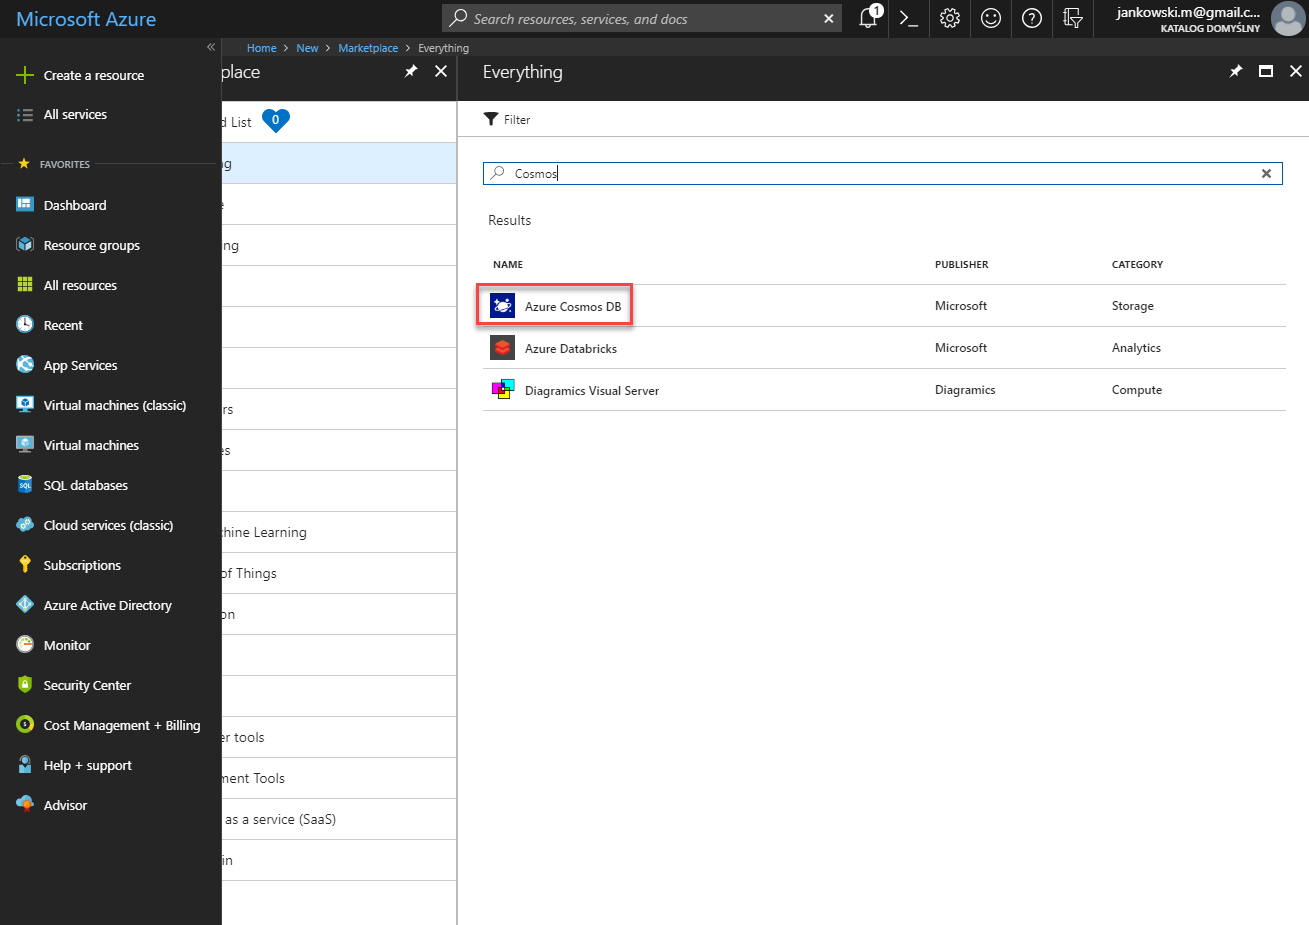
Enter the text Cosmos into the search field and press Enter.
-
In the Everything search results blade, select the Azure Cosmos DB result.
-
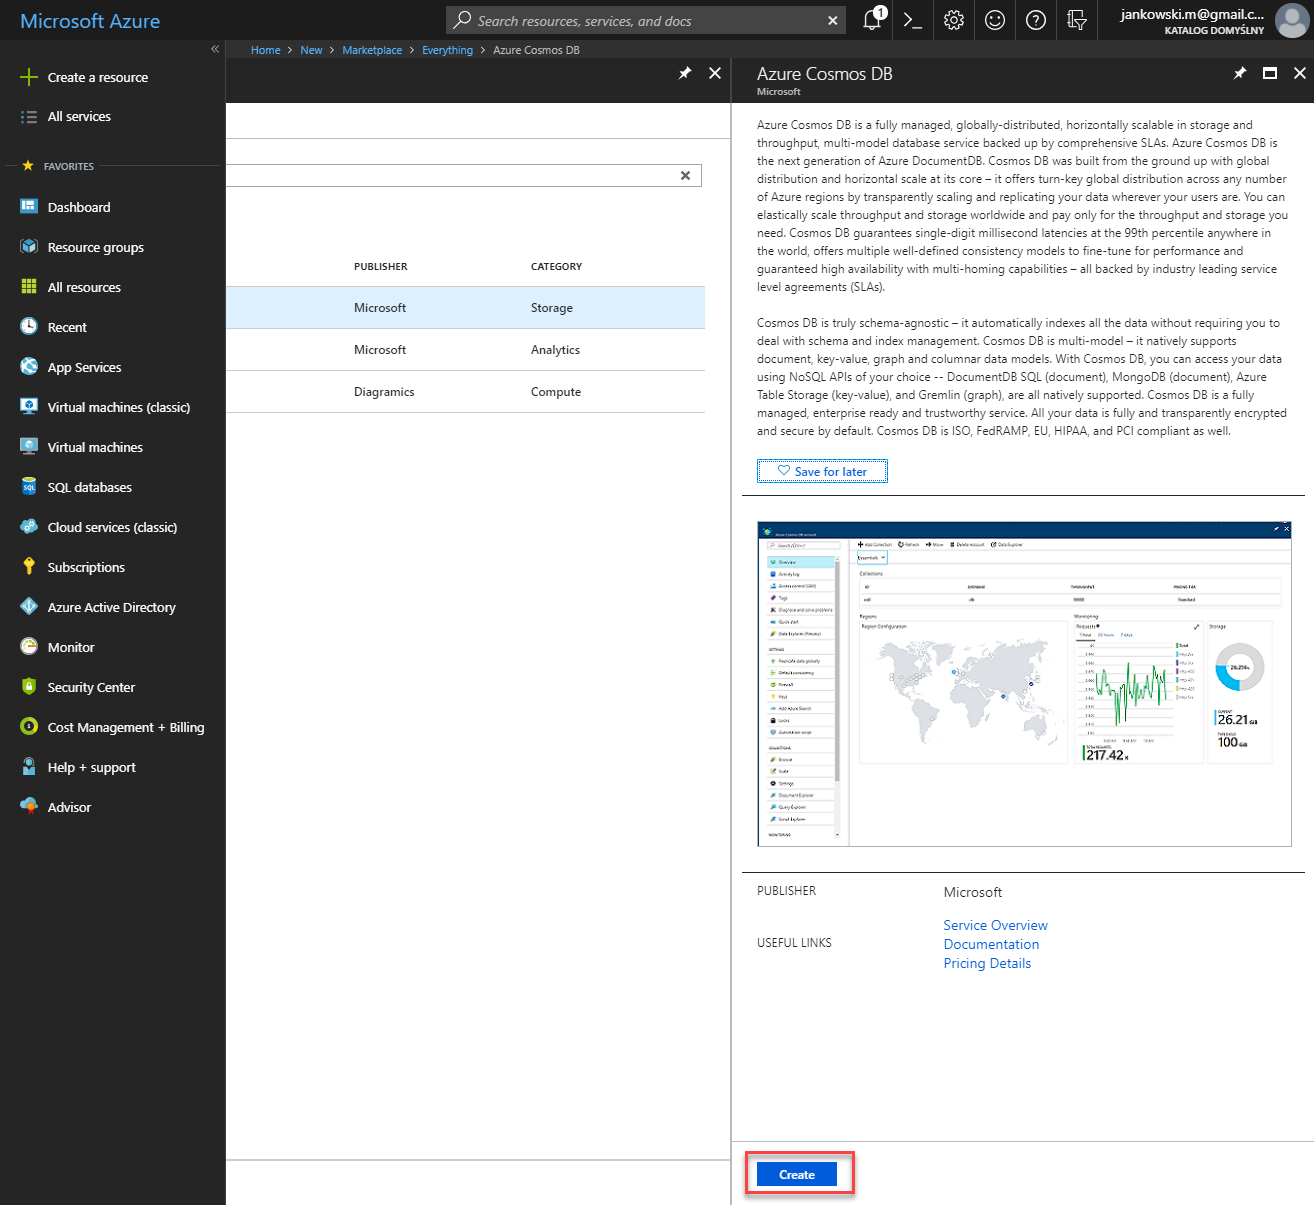
In the Azure Cosmos DB blade, click the Create button.
-
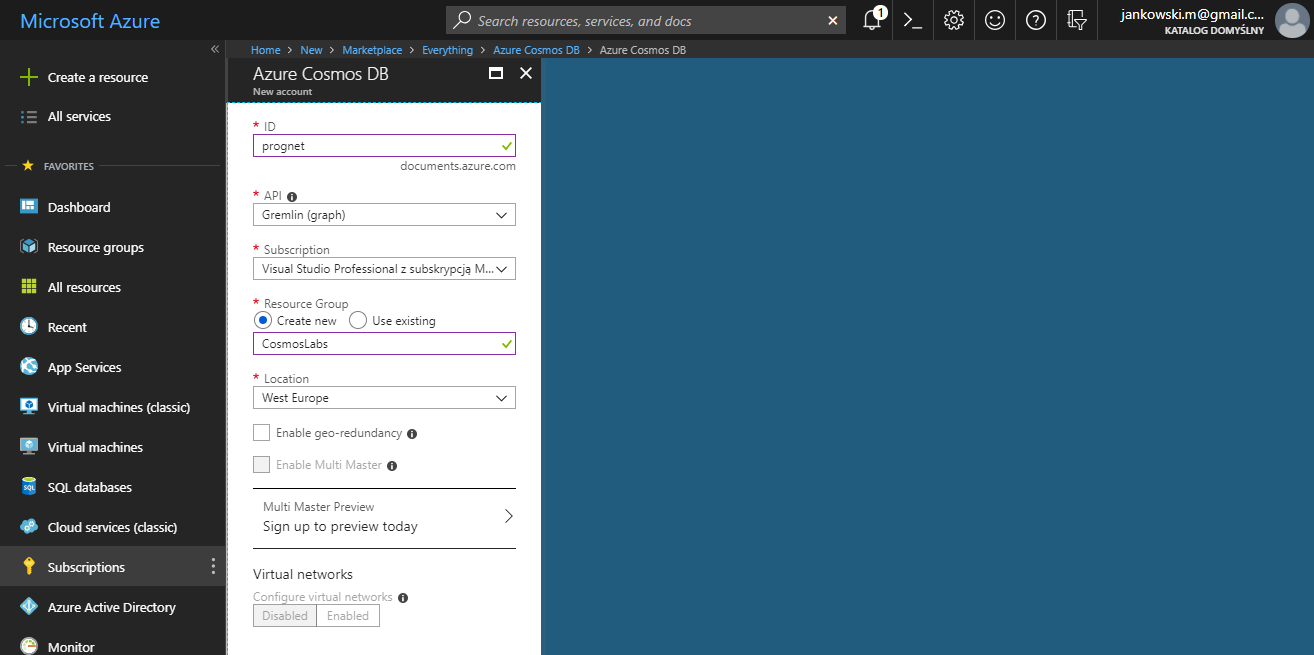
In the new Azure Cosmos DB blade, perform the following actions:
-
In the ID field, enter a globally unique value.
-
In the API list, select the Gremlin (graph) option.
-
Leave the Subscription field set to its default value.
-
In the Resource group section, select the Create new option.
-
In the Resource group section, enter the value CosmosLabs into the empty field.
-
In the Location field, select the West Europe location.
-
Ensure the Enable geo-redundancy option is not selected.
This option creates a replicated version of your database in a second (paired) region.
-
Ensure the Enable Multi Master option is not selected.
With Azure Cosmos DB multi-master support, you can perform writes on containers of data (for example, collections, graphs, tables) distributed anywhere in the world. You can update data in any region that is associated with your database account. These data updates can propagate asynchronously.
-
In the Virtual networks section, select the Disabled option.
Azure CosmosDB accounts can be configured to allow access only from specific subnet of an Azure Virtual Network. By enabling a Service Endpoint for Azure CosmosDB from a Virtual Network and its subnet, traffic is ensured an optimal and secure route to the Azure Cosmos DB.
-
Click the Create button.
- Wait for database creation
-
-
In the Resource groups blade, locate and select the CosmosLabs Resource Group.
-
In the CosmosLabs blade, select the Azure Cosmos DB account you recently created.
-
In the Azure Cosmos DB blade, locate and click the Overview link on the left side of the blade.
-
At the top of the Azure Cosmos DB blade, click the Add Graph button.
-
In the Add Graph popup, perform the following actions:
-
In the Database id field, select the Create new option and enter the value TheWorld.
-
Ensure the Provision database throughput option is not selected.
-
In the Collection id field, enter the value AirportsNetwork.
-
In the Storage capacity section, select the Fixed-Size option.
-
In the Throughput field, enter the value
4000. -
Click the OK button.
-
-
Wait for the creation of the collection.
git clone https://github.com/MichalJankowskii/CosmosDB-Graph-Generator.git
-
Open in Visual Studio GraphCreator solution. It is located in the src folder.
-
Open Program.cs file and update value of Hostname and AuthKey variables.
-
To get Hostname:
-
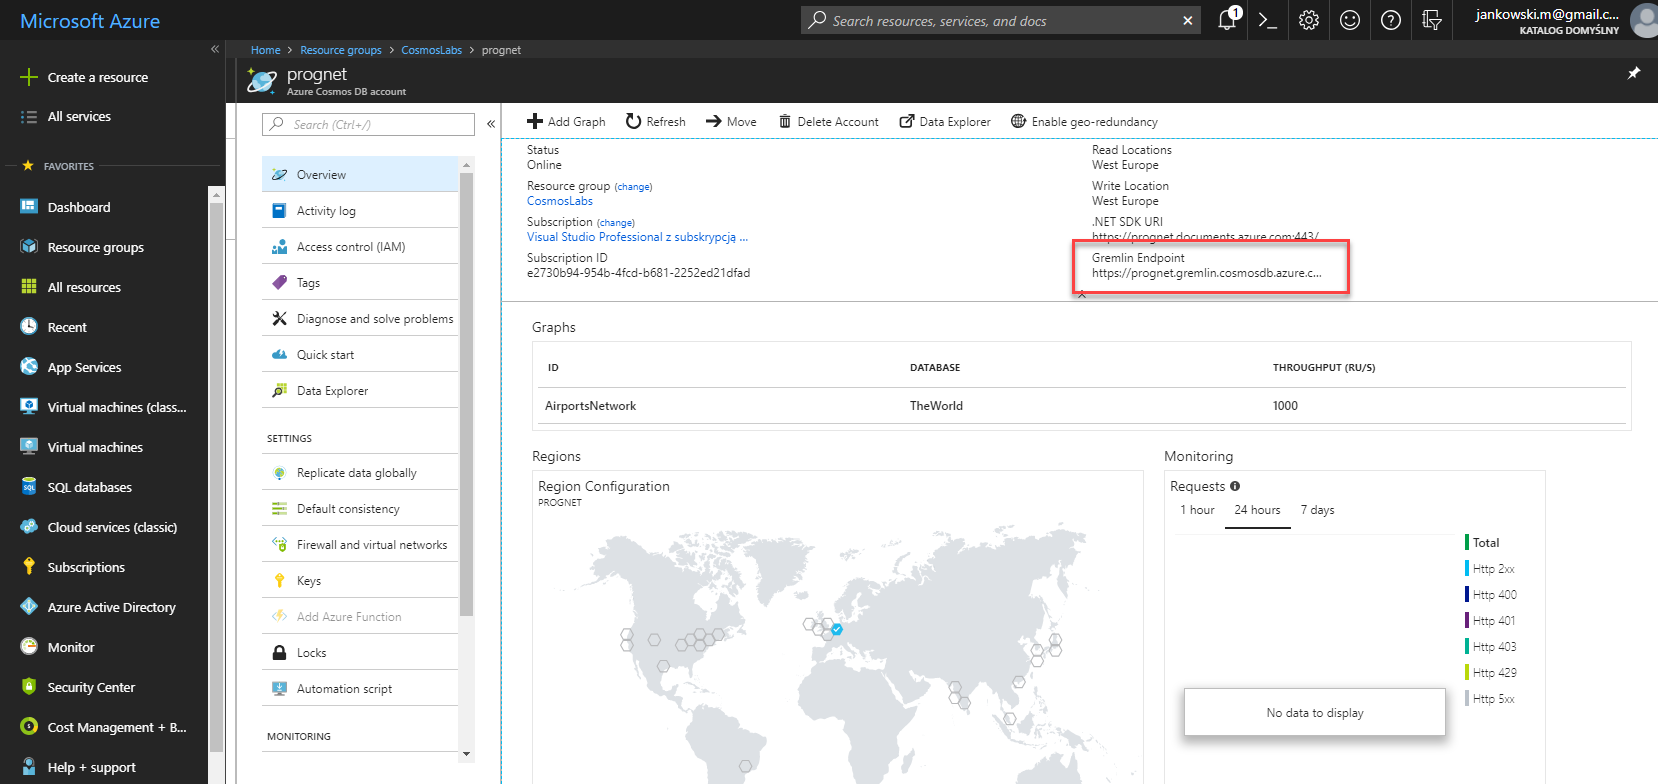
On the left side of the Azure Cosmos DB blade, locate the Settings section and click the Overview link.
-
Copy value of Gremlin Endpoint
-
-
To get AuthKey:
-
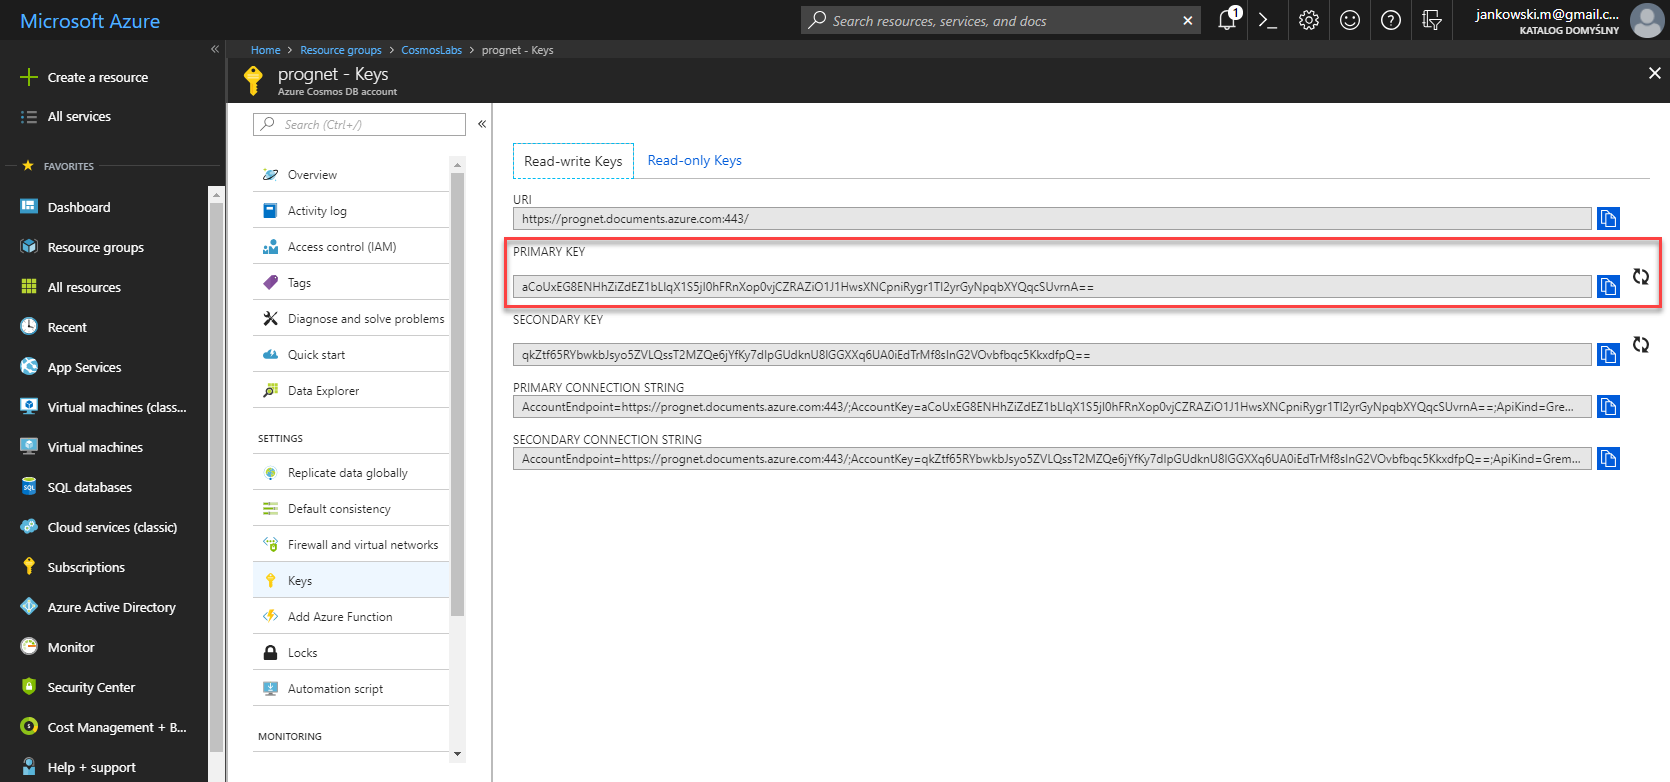
On the left side of the Azure Cosmos DB blade, locate the Settings section and click the Keys link.
-
Copy value of PRIMARY KEY
-
-
Compile and run the application. After a while your database will be created.
