Using Python script and Thinkspeak values to turn a AC light on or off Python-light-relay
The objective was to find a way to turn a light on and off using the SparkFun RedBoard and interacting with the Arduino software using a Python script. We set out to have a user input a “1” or “0” into Python which would transfer the data to ThingSpeak. Then, pull out the data from Thingspeak and subsequently run a current through the relay to operate the light.
| component | vendor |
|---|---|
| Arduino | SparkFun RedBoard - Programmed with Arduino |
| Relay | SparkFun Beefcake Relay Control Kit (Ver. 2.0) |
| Jumper wires | Jumper Wires Premium 6" M/M Pack of 10 |
| Mini-B USB cable | SparkFun USB Mini-B Cable - 6 Foot |
| Enclosure | Big Red Box - Enclosure |
| Wire Nuts | Recieved from PCC Engineering Lab |
| zip ties for strain relief | Recieved from PCC Engineering Lab |
| extension cord male end | Recieved from PCC Engineering Lab |
| extension cord female end | Recieved from PCC Engineering Lab |
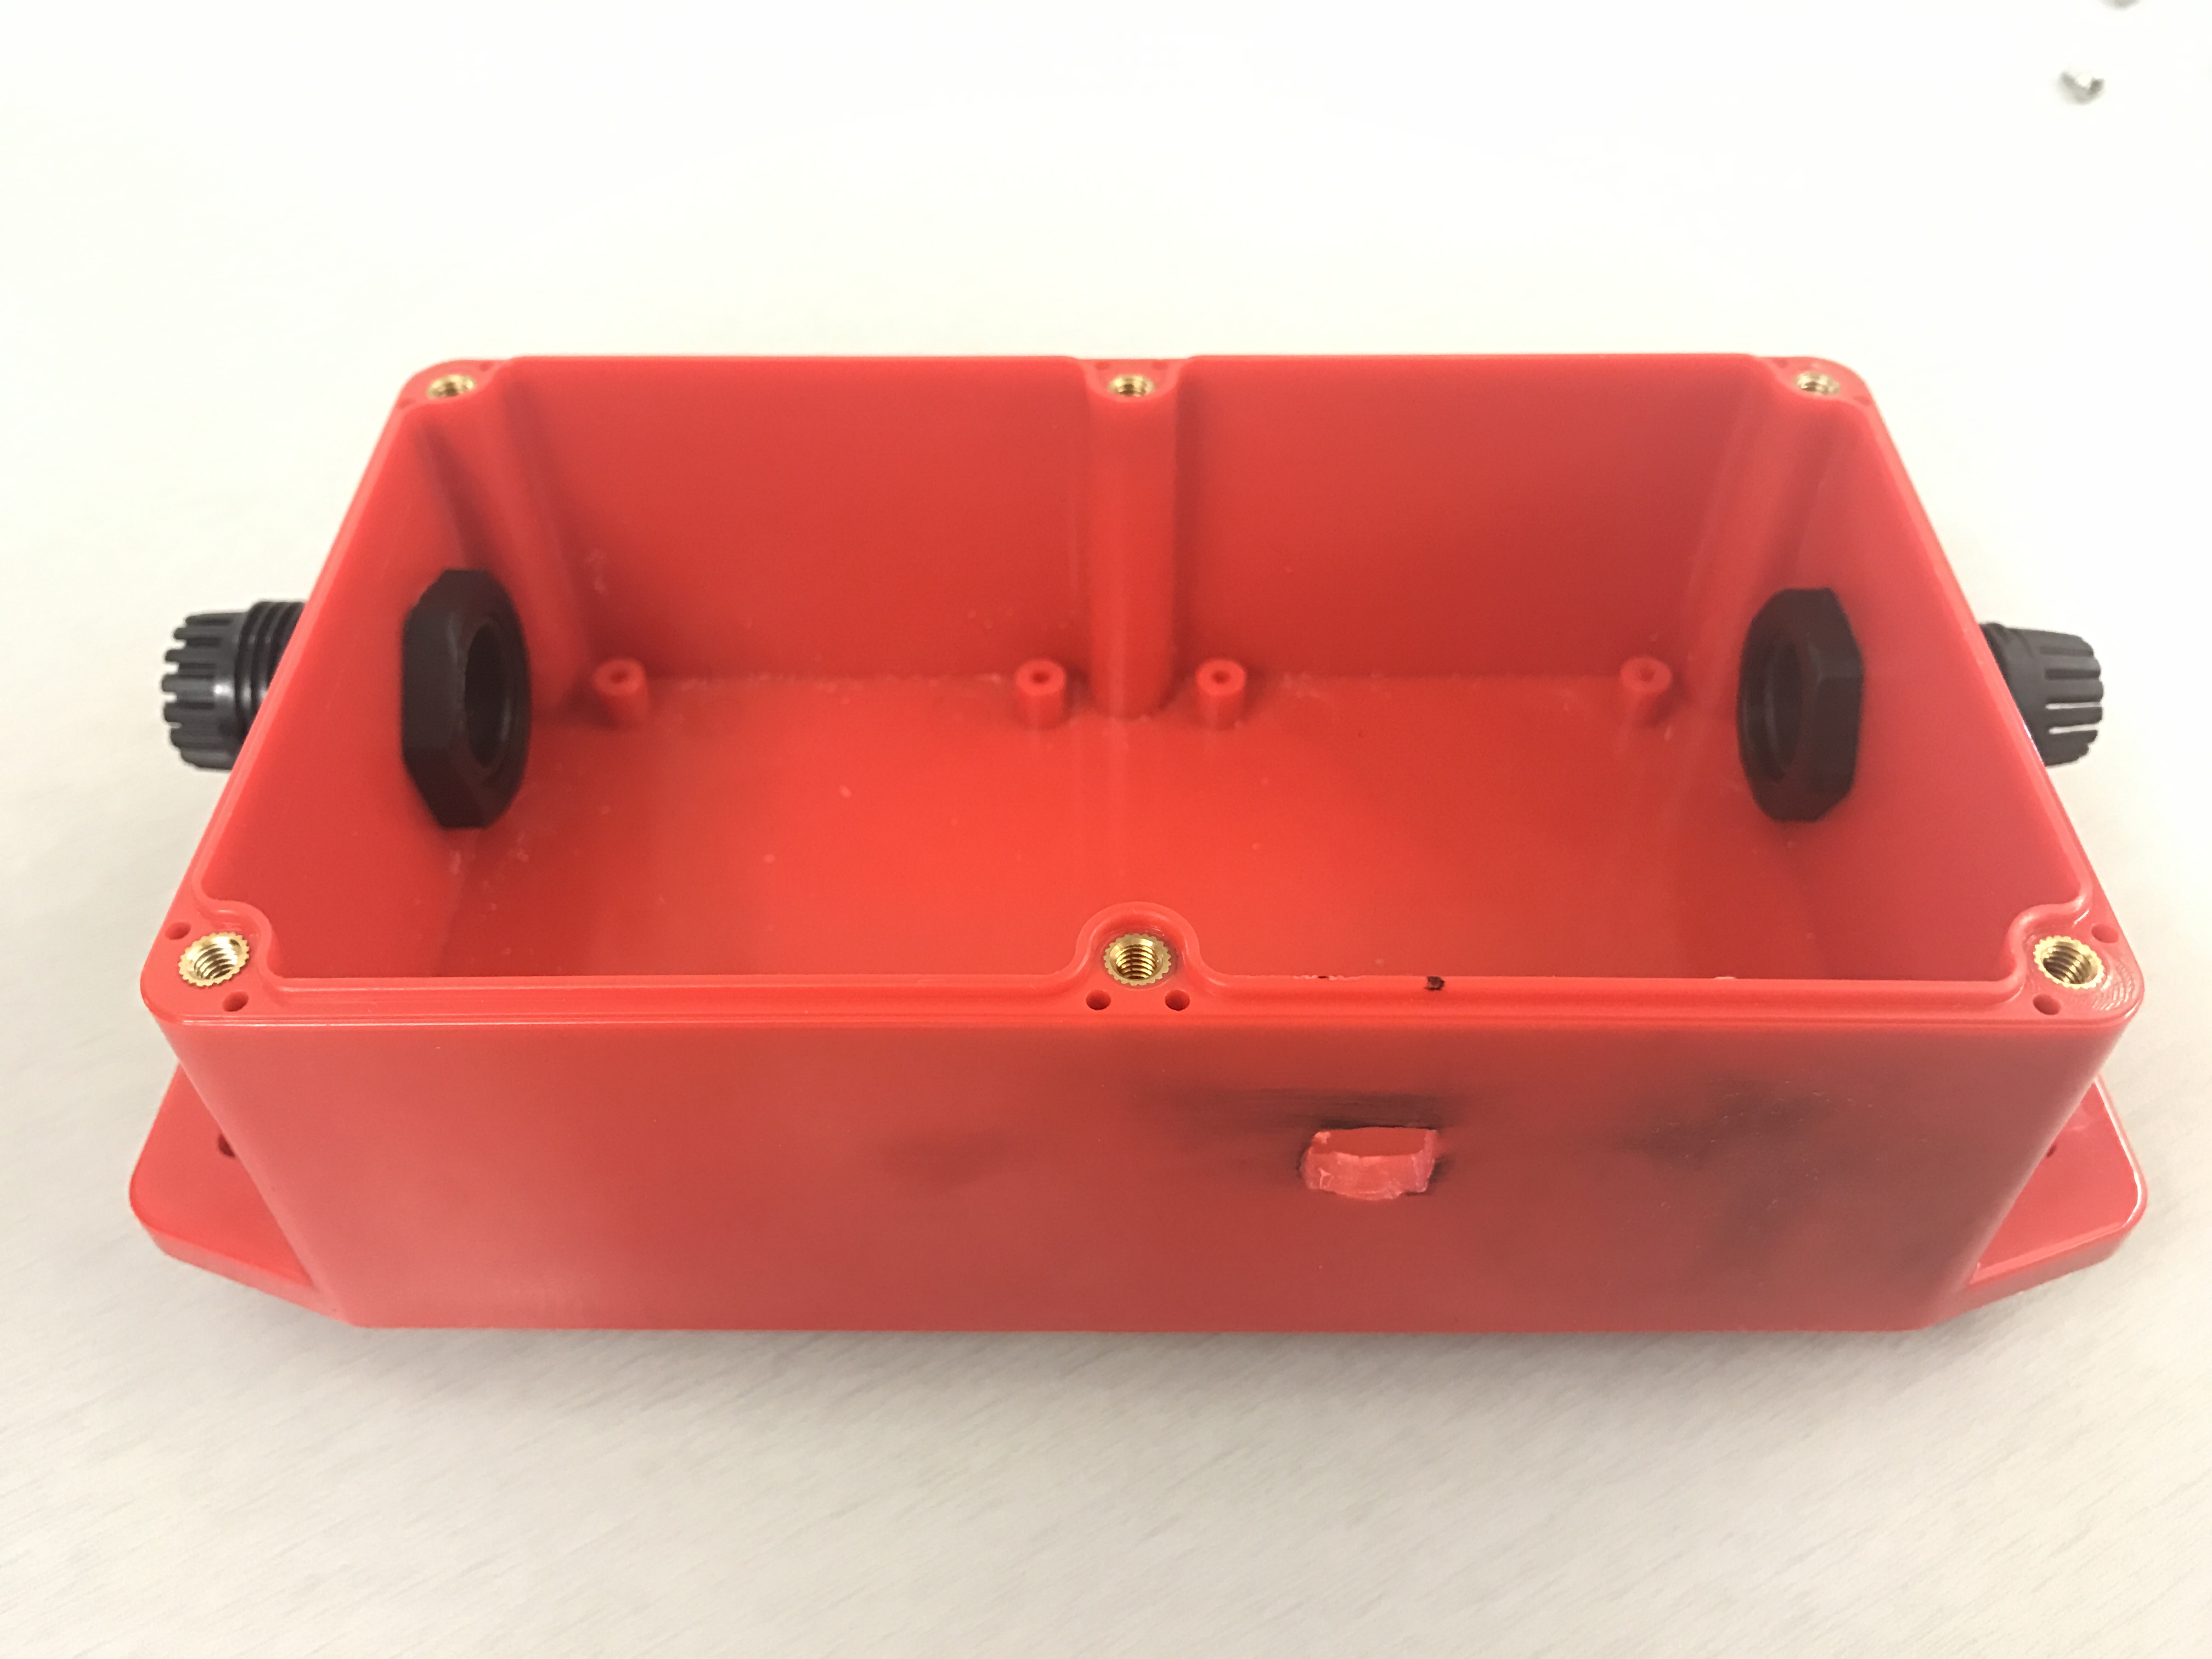
Cut holes into Big Red Box enclosure. Make sure that the Arduino MiniB connector line up.
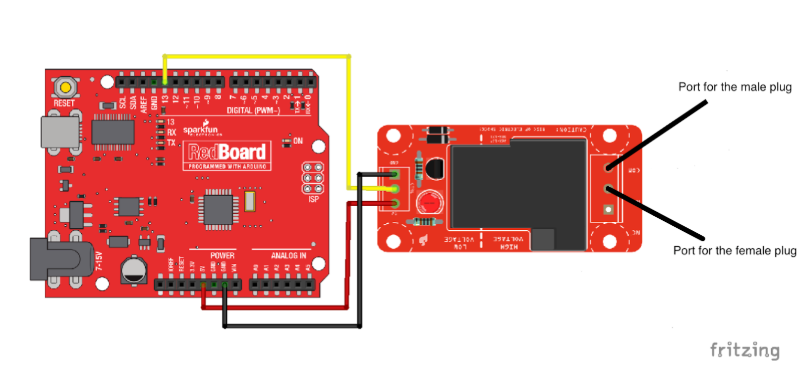
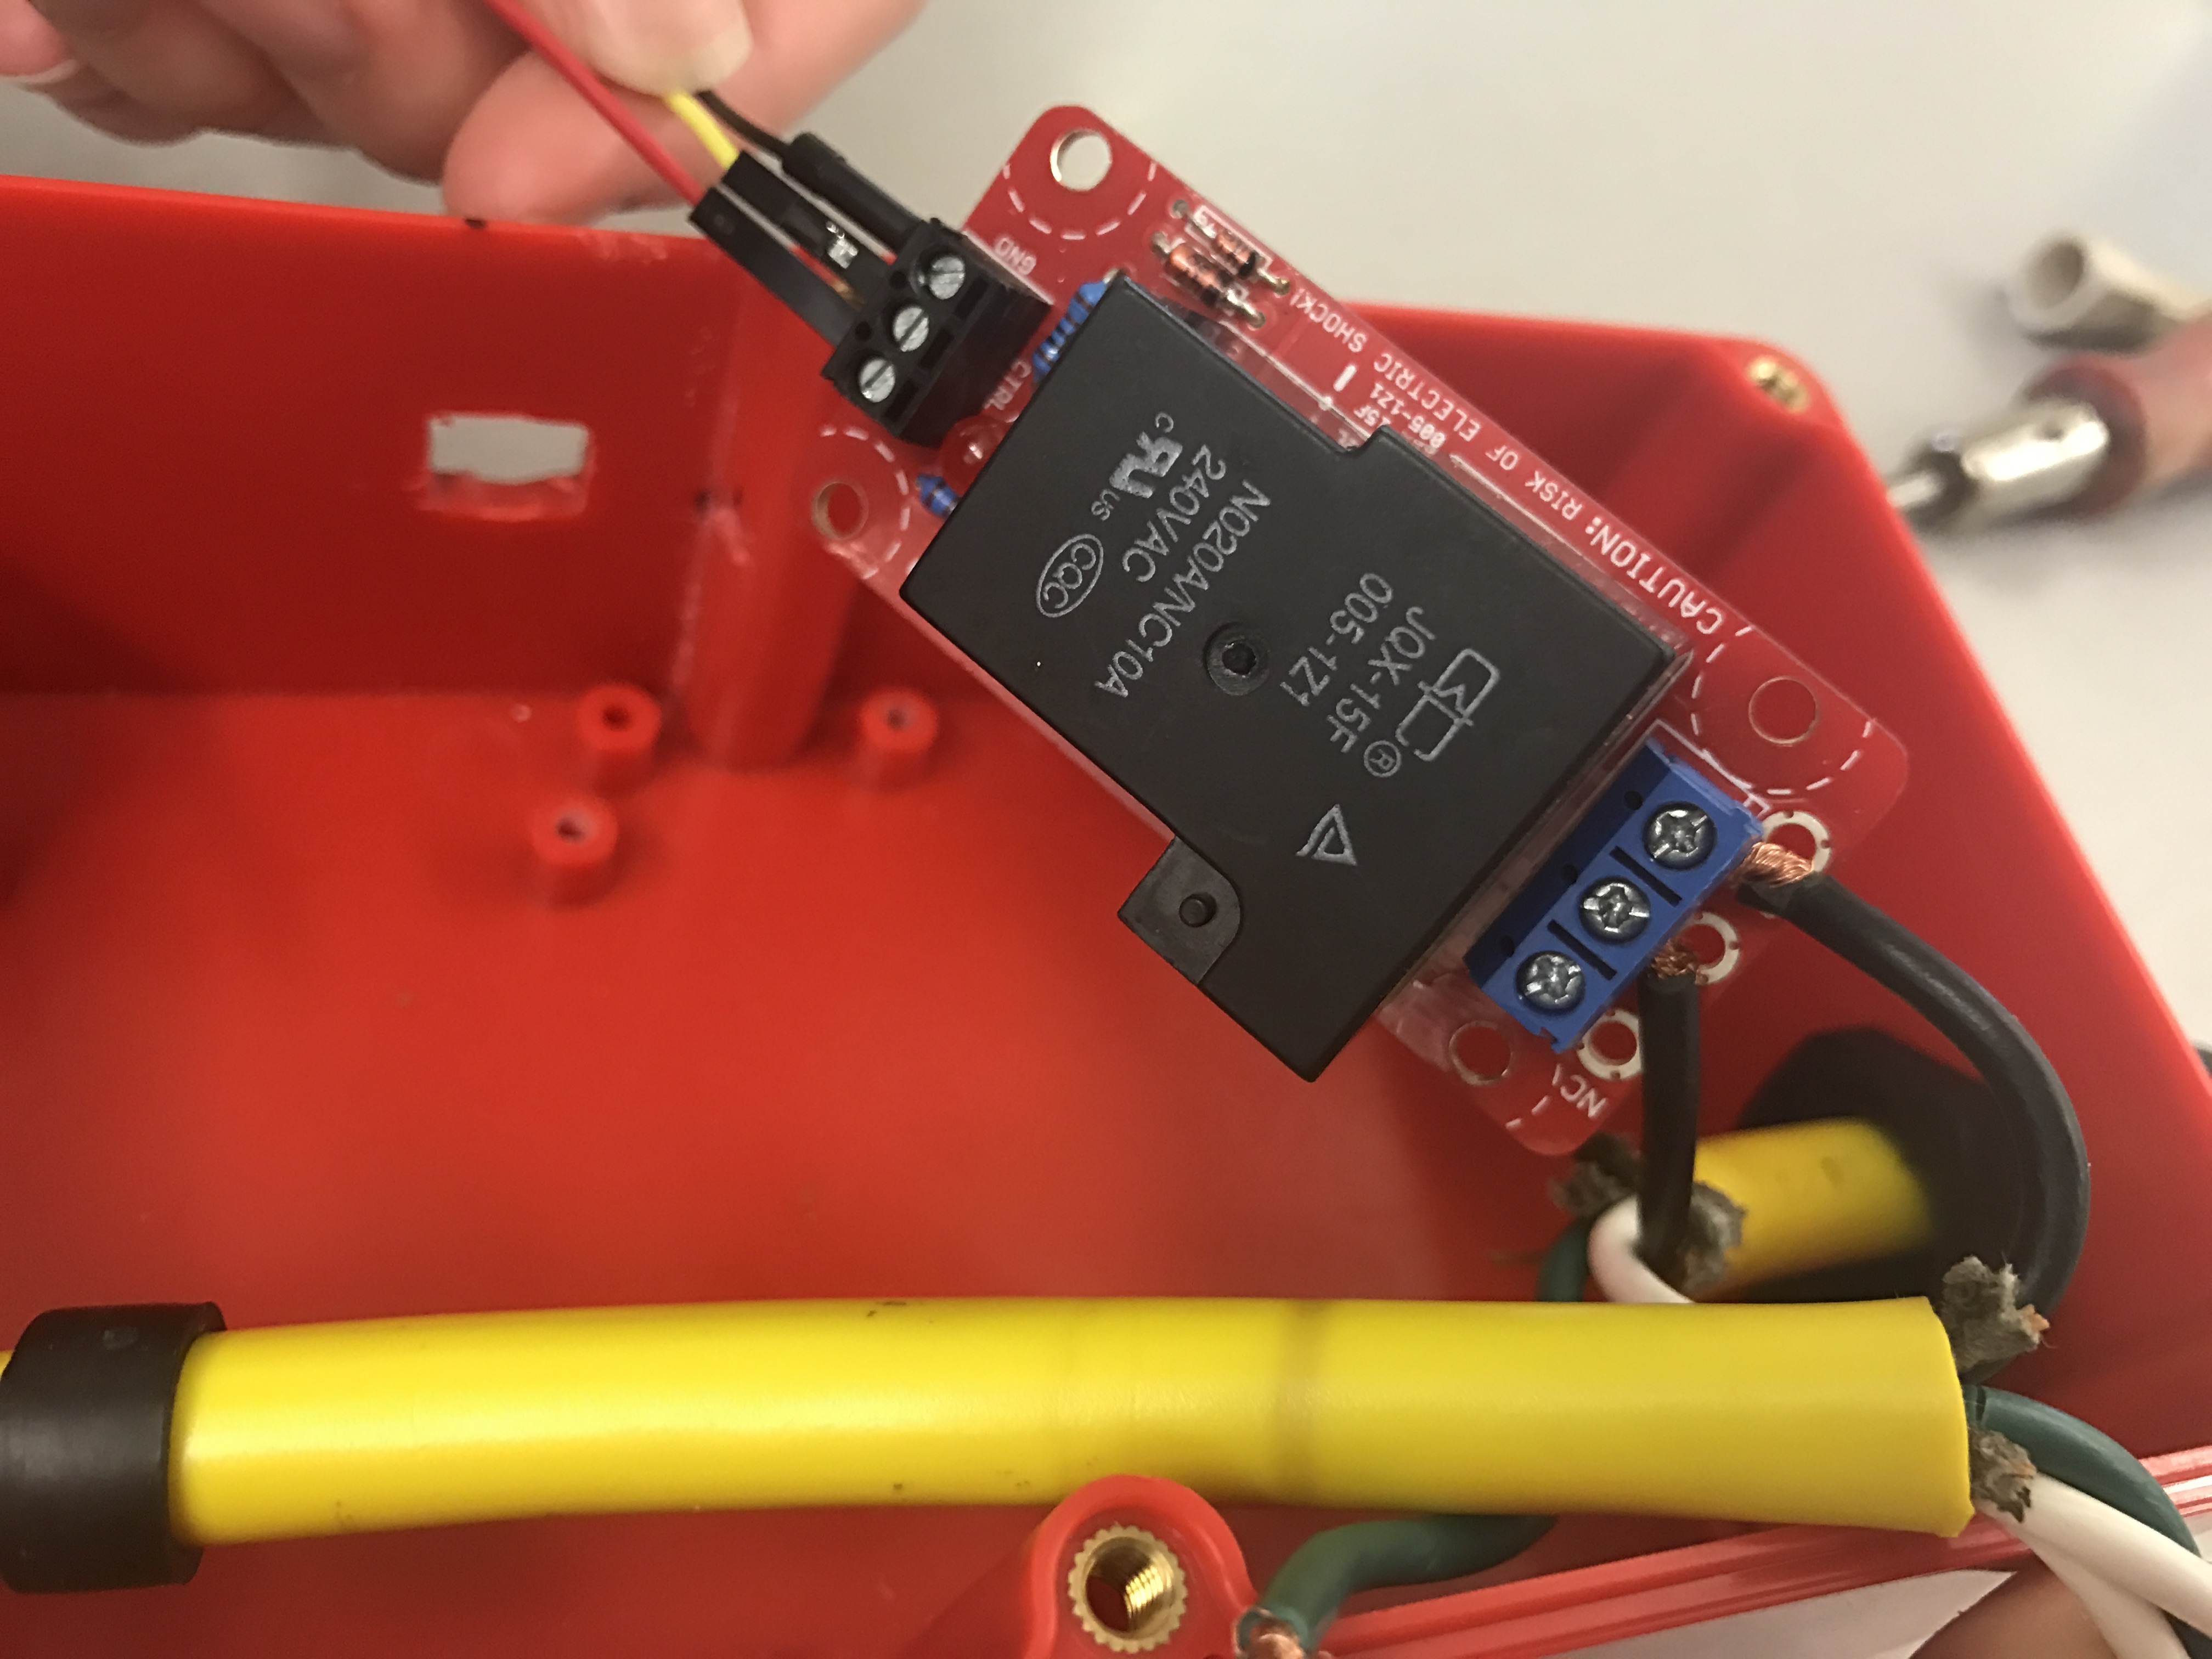
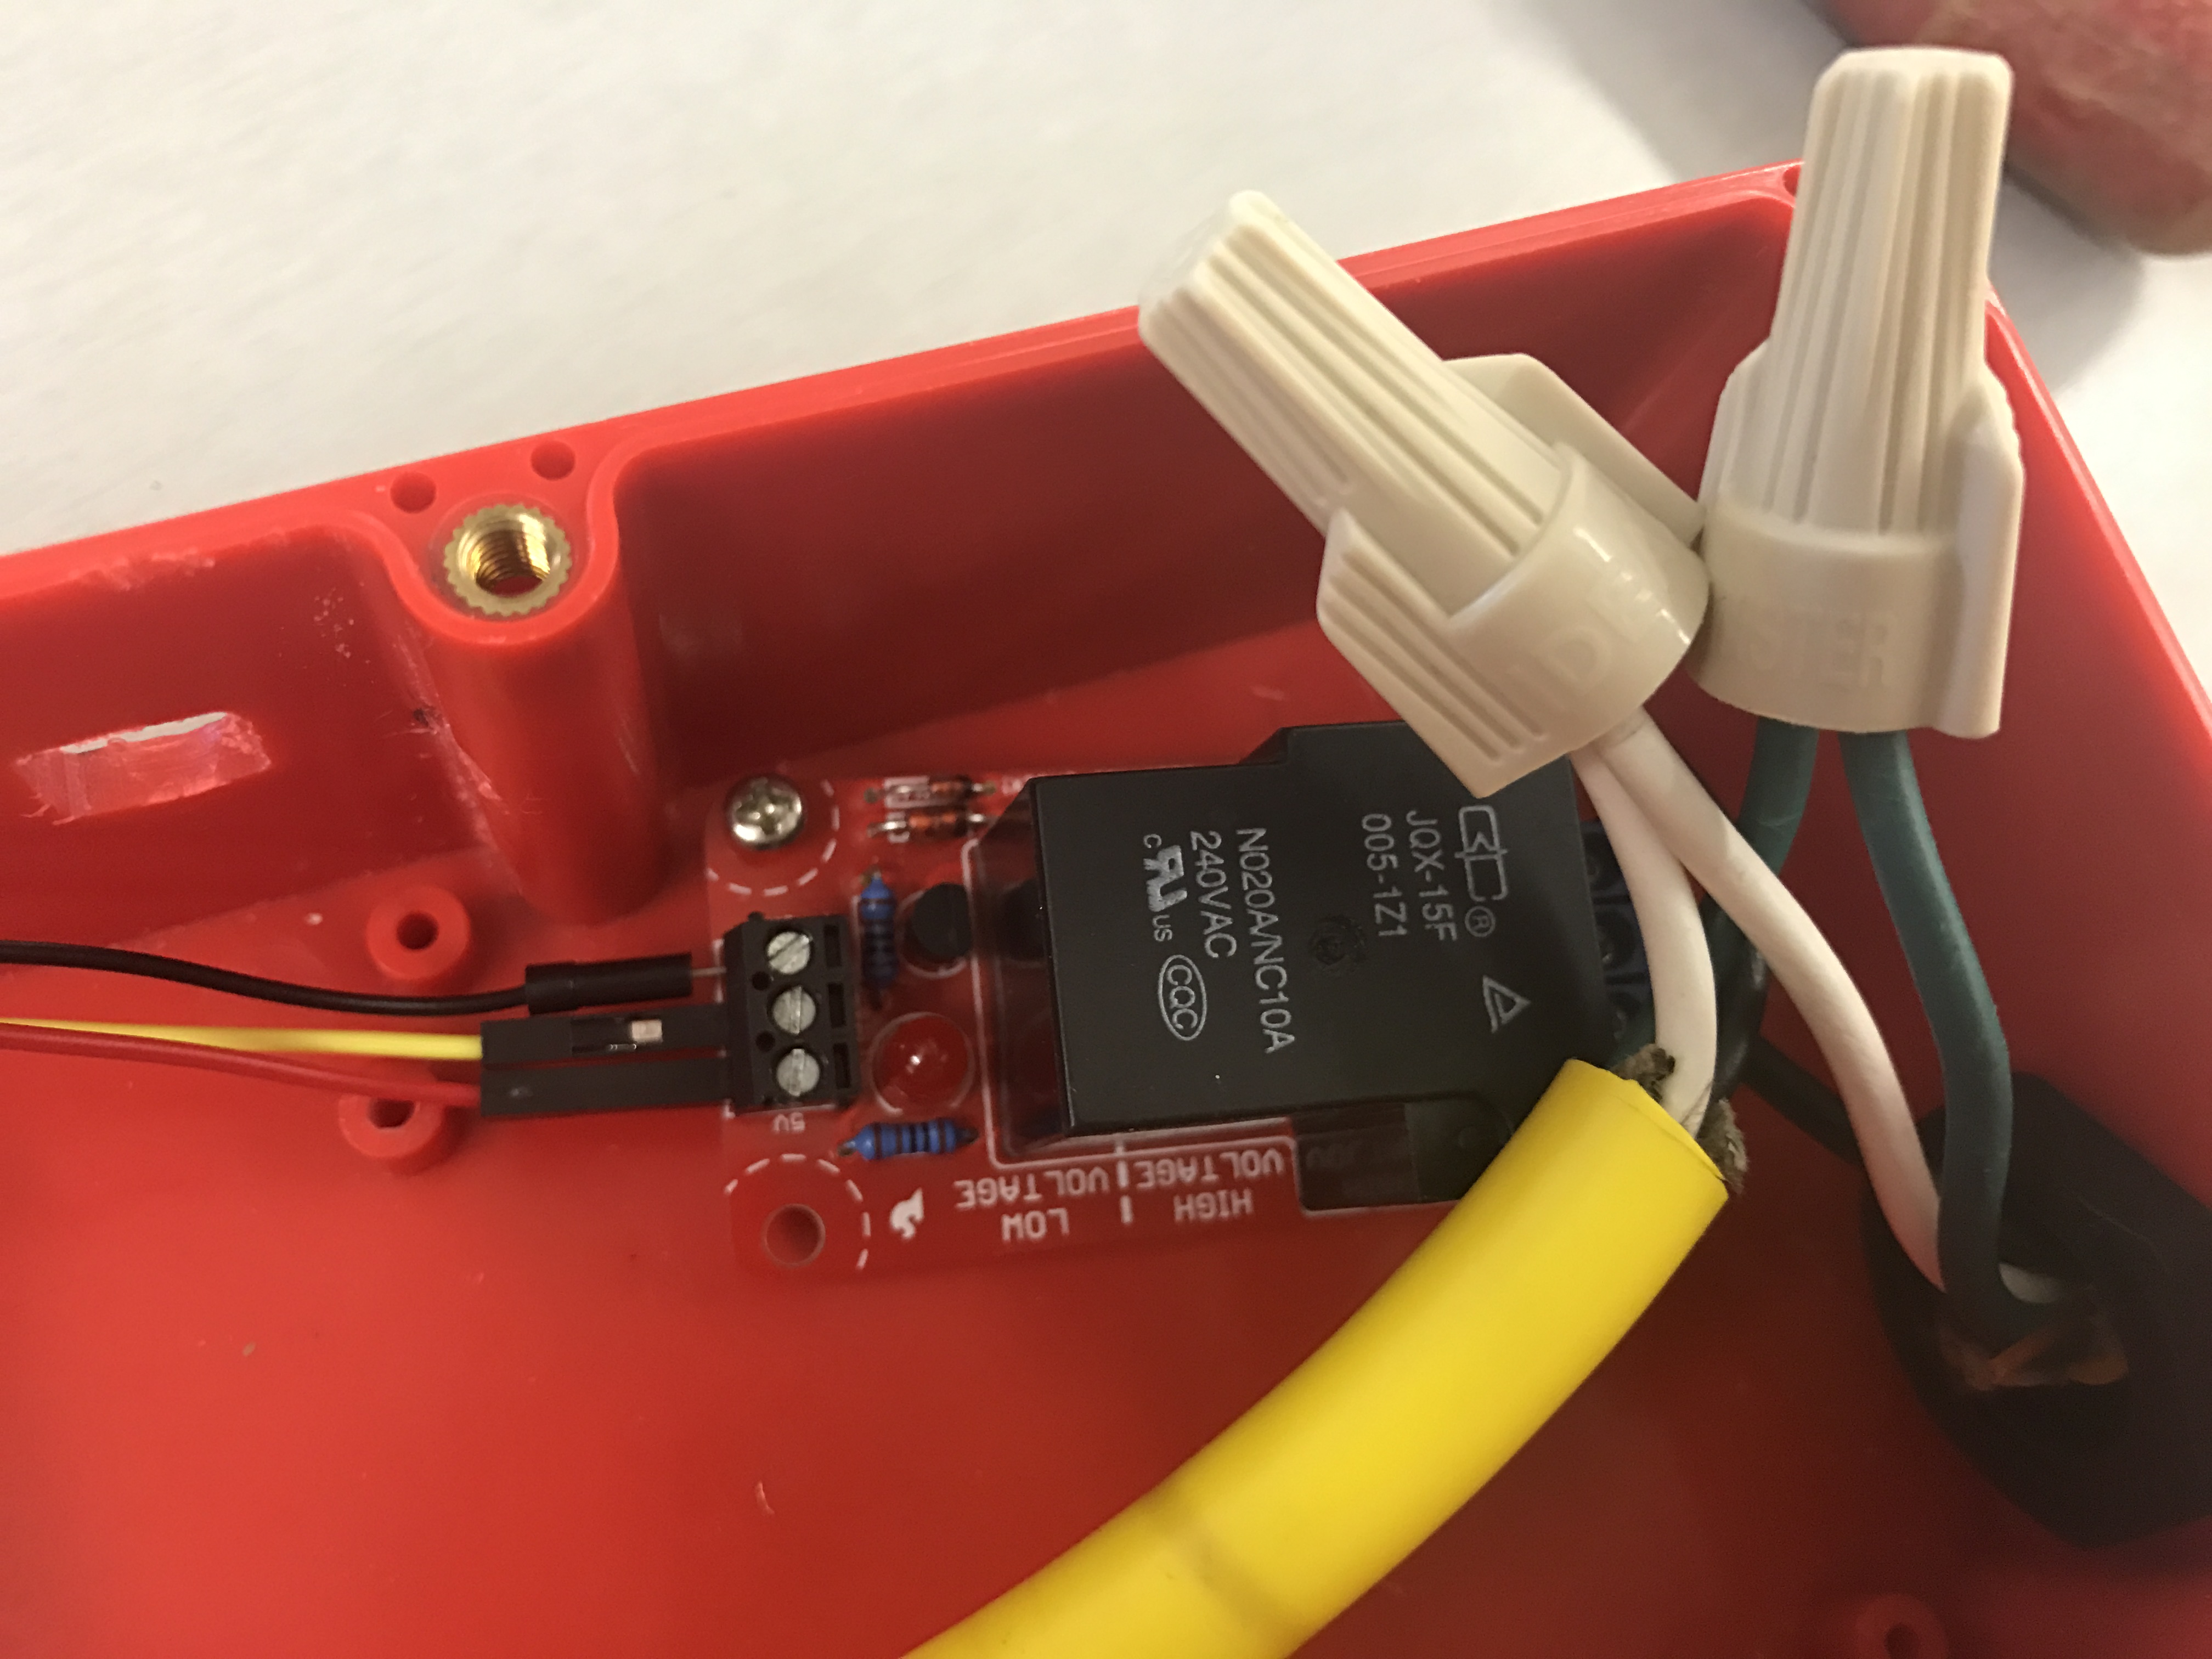
Thread the power cables through the side holes and separate the wire colors. Now using the black wires, connect the Male prong to the High voltage side of the relay marked COM. Next, do the same with the female, but connect to the spot in the middle marked NO. In this step, you will also connect three jumper wires to the low voltage side of the relay.
Next, using the twist-on wire connectors, twist both white wires together and both green wires together. Tuck them down in the Big Red Box somewhere out of the way. In this step, you will also want to screw down the Beefcake relay into one of the risers that are provided.
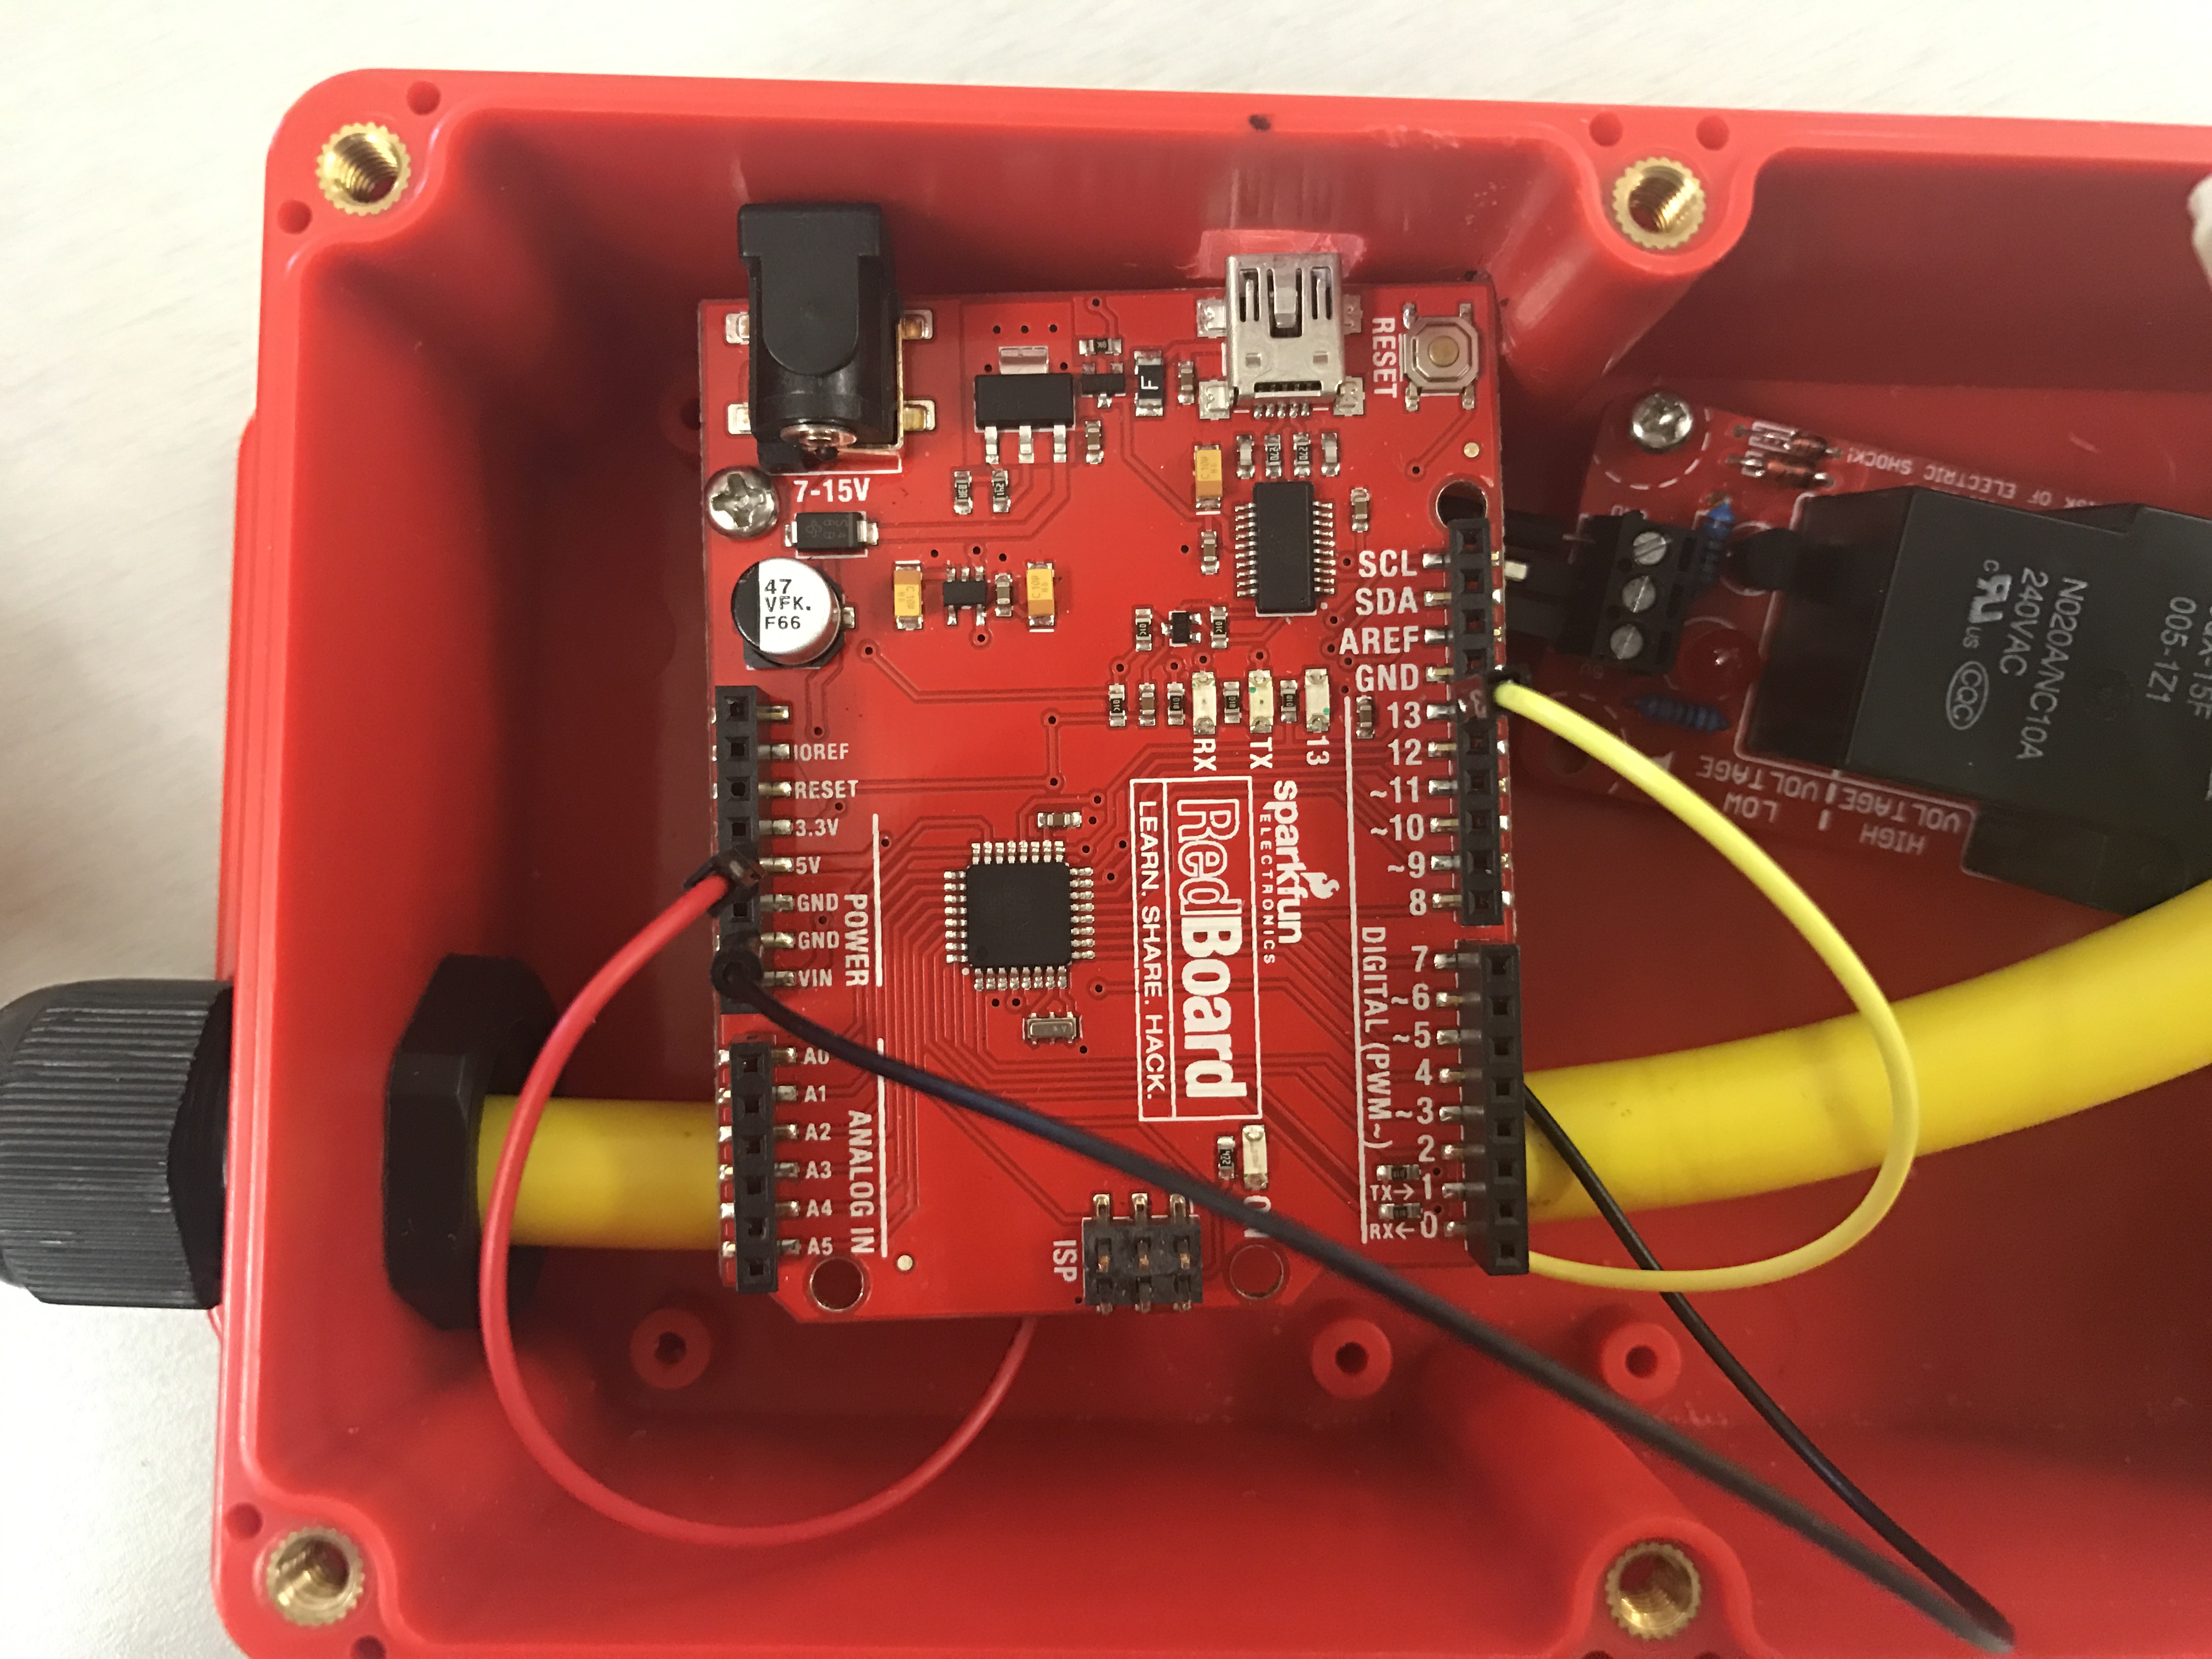
In this final step place your Arduino on one of the ¾ inch risers and secure it to one of the spaces in the bottom of the box. The next thing you will need to do is connect the wires from the relay. Take the black jumper wire secured to the ground port and connect it to the Arduino’s GND port. Now, take the Yellow wire secured to the CTRL port on the relay and connect it to port #13 on the Arduino. Finally, Take the red wire secured tot he 5v port on the relay and connect it to the 5v port on your Arduino.
The light_relay.py script was run in Python.
import serial
serial.__version__
import serial
import time
import requests
user_input = input('Type 1 to turn light on, Type 0 to turn light off')
url = f'https://api.thingspeak.com/update?api_key=PYZU7IZ814A3PGGE&field1={user_input}'
print(url)
r = requests.get(url)
print(r)


#use the requests library to pull down the data from thingspeak into a variable
url = 'https://api.thingspeak.com/channels/712547/fields/1.json?results=1'
r = requests.get(url)
print(r)
json_data = r.json()
print(json_data['feeds'][0]['field1'])

ser = serial.Serial('/dev/cu.usbserial-DN02SRDI',9600)   #This is our port /dev/cu.usbserial-DN02SRDI

time.sleep(2)
# print(ser.name)
 # Turn light on
if json_data['feeds'][0]['field1'] == '1':
    ser.write(b'H')
    print('Light is now on')

 # Turn light off
elif json_data['feeds'][0]['field1'] == '0':
    ser.write(B'L')
    print('Light is now off')
ser.close()  # close port
The light_relay.ino sketch was uploaded on the Arduino using the Arduino IDE. /* Physical Pixel
An example of using the Arduino board to receive data from the computer. In
this case, the Arduino boards turns on an LED when it receives the character
'H', and turns off the LED when it receives the character 'L'.

The data can be sent from the Arduino Serial Monitor, or another program like
Processing (see code below), Flash (via a serial-net proxy), PD, or Max/MSP.

The circuit:
- LED connected from digital pin 13 to ground

  created 2006
  by David A. Mellis
  modified 30 Aug 2011
  by Tom Igoe and Scott Fitzgerald

  This example code is in the public domain.

  http://www.arduino.cc/en/Tutorial/PhysicalPixel
*/

const int ledPin = 13; // the pin that the LED is attached to
int incomingByte;      // a variable to read incoming serial data into

void setup() {
// initialize serial communication:
Serial.begin(9600);
// initialize the LED pin as an output:
pinMode(ledPin, OUTPUT);
}

void loop() {
  // see if there's incoming serial data:
  if (Serial.available() > 0) {
    // read the oldest byte in the serial buffer:
    incomingByte = Serial.read();
    // if it's a capital H (ASCII 72), turn on the LED:
    if (incomingByte == 'H') {
      digitalWrite(ledPin, HIGH);
    }
    // if it's an L (ASCII 76) turn off the LED:
    if (incomingByte == 'L') {
      digitalWrite(ledPin, LOW);
    }
  }
}
Future endeavors are to automate the lighting, so the lights turn on and off relative to the falling and rising of the sun. The times for this could be collected using data online providing when sunrise and sunset occur each day.
GNU General Public License v3.0
