This repo serves as a reference for integrating React Native into a brand new Android app.
The official React Native docs to integrate in an Android app are outdated and inaccurate. I have created a issue to get them updated here: facebook/react-native-website#2118
- Create a new Android app using the "No Activity" template.
- Set the minimum SDK version to 23
- Delete the un-used tests.
The app won't run intially as it doesn't have the MainApplication and/or MainActivity files. This serves as a starting point for the app and so it will fail with "Default Activity not found".
Next go ahead and create the MainApplication.java and MainActivity.java classes. This commit adds it.
Go ahead and build and run the app and you should see a simple Android app with a navigation bar title that says "Android React Native App".
You now have a working Android application. 👏
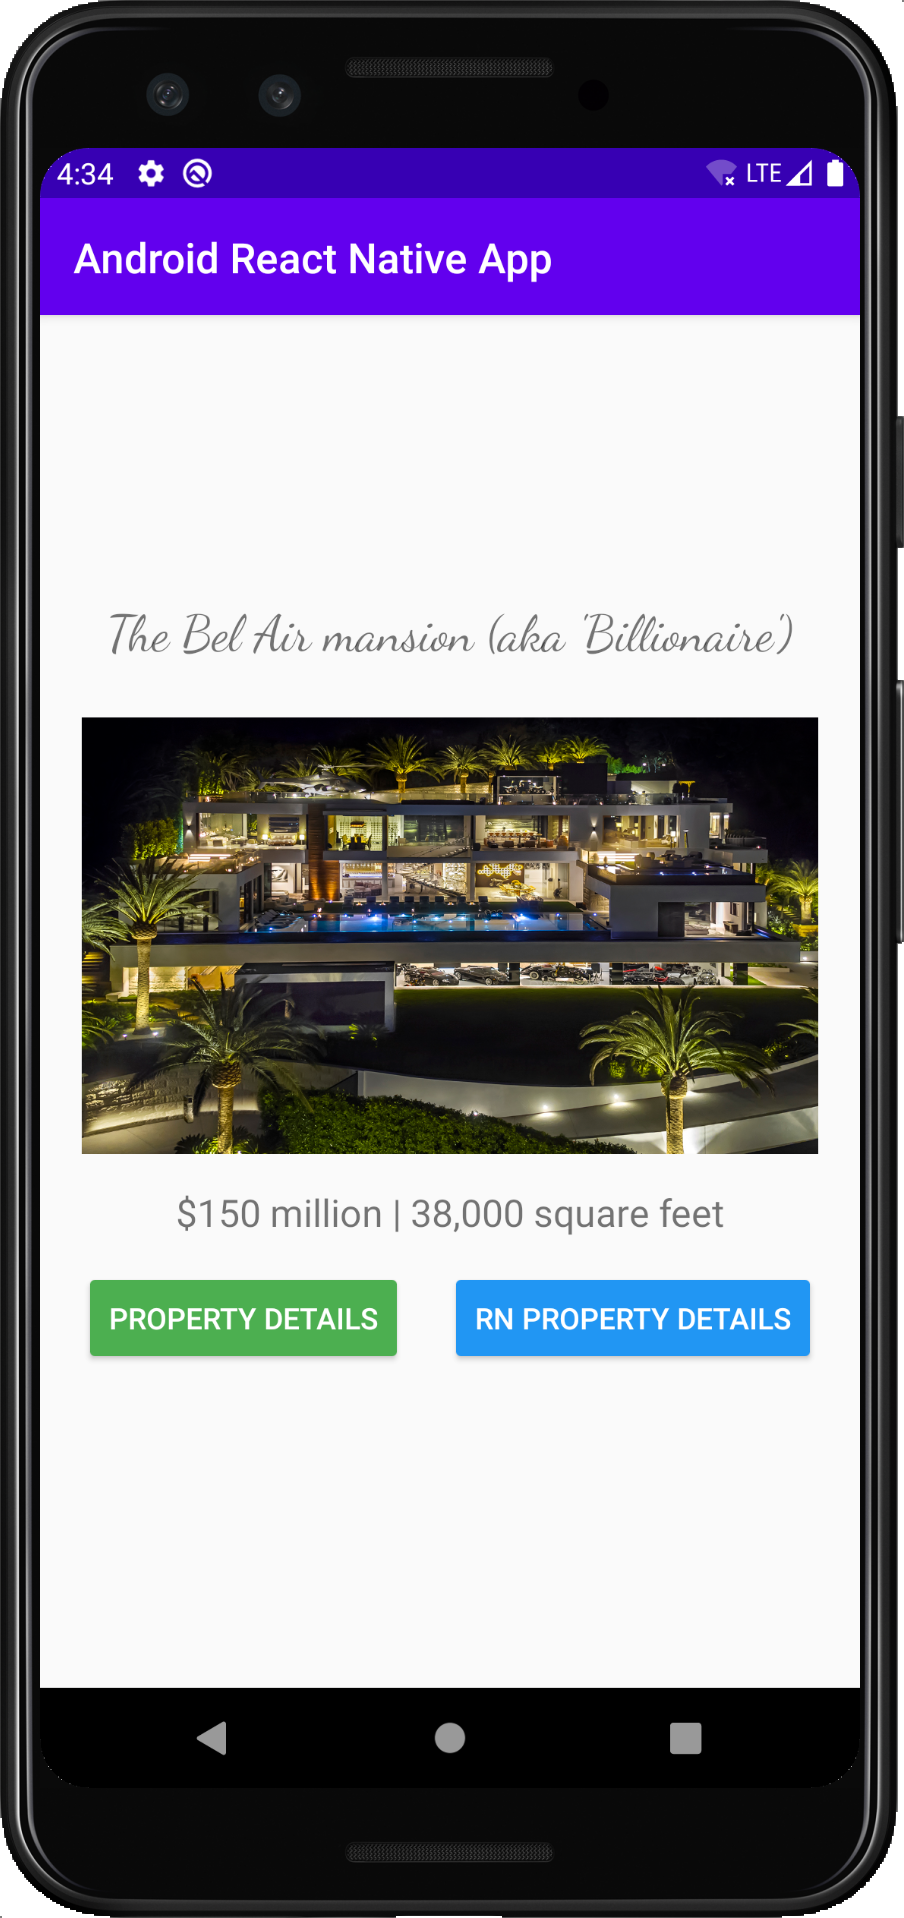
Our Android app serves as a Property Guide. The user will land on the Property screen, which will be a native Java screen.
This screen will have two buttons:
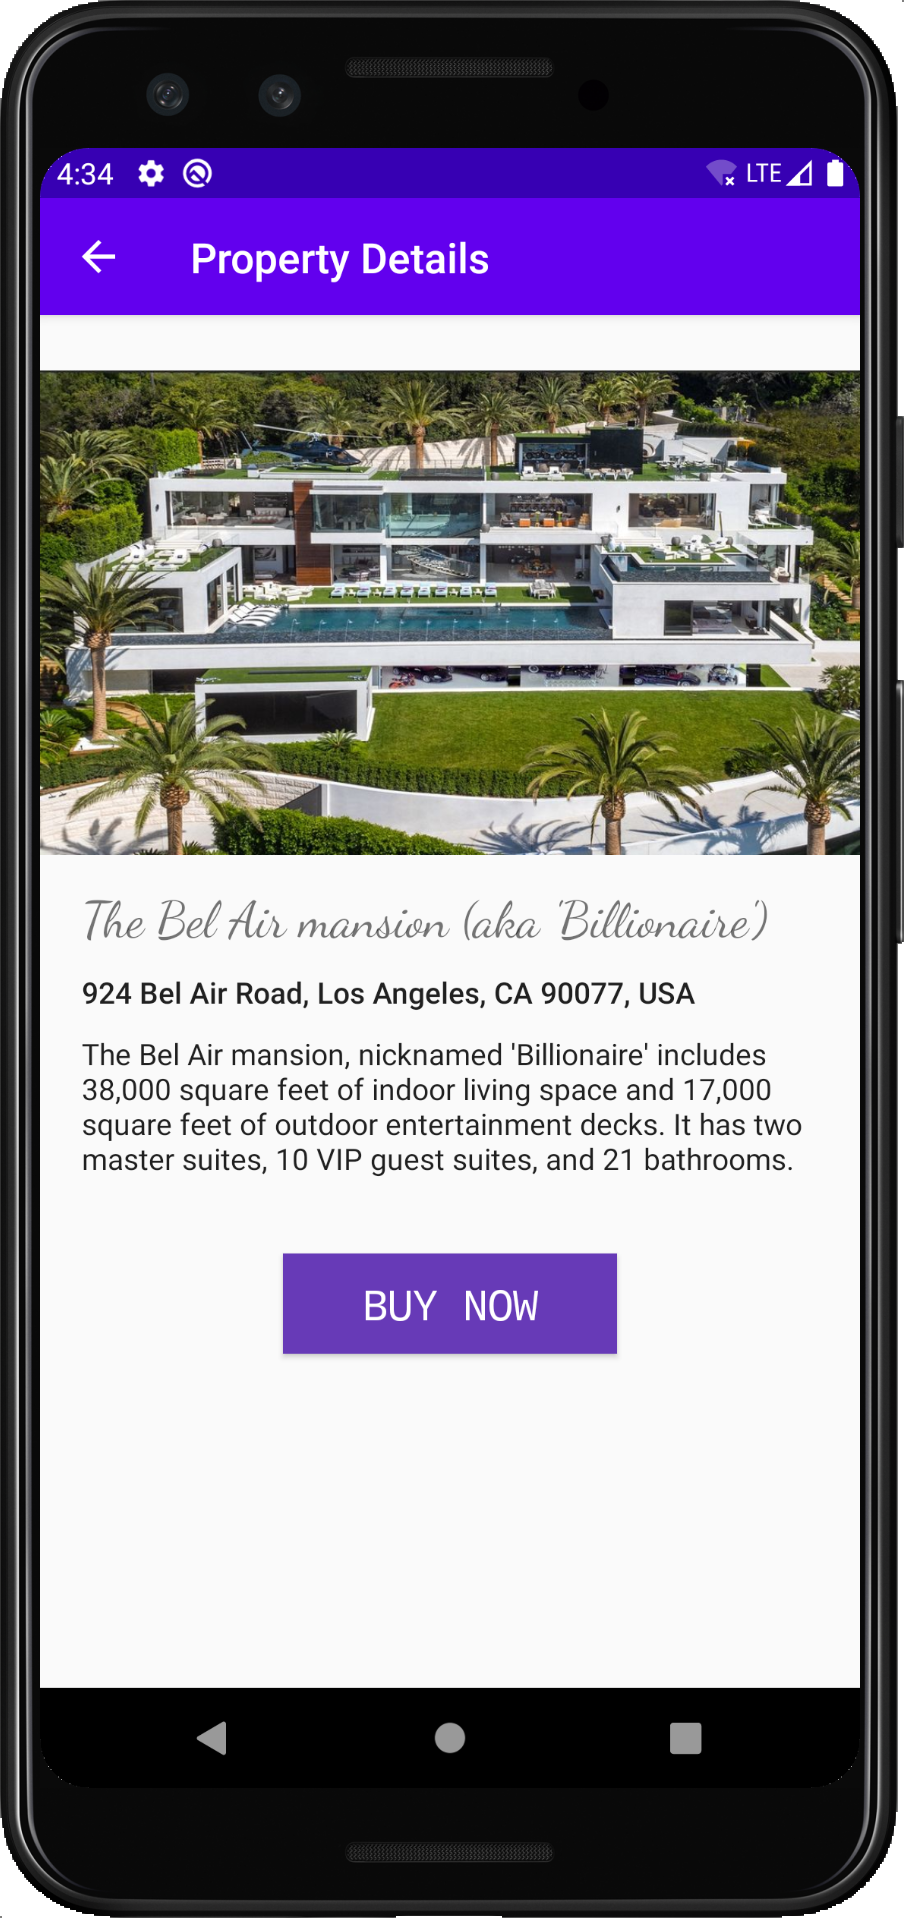
- The first button Property Details will navigate the user to the Property Details screen. This will be a native Java screen.
- The second button RN Property Details will also navigate the user to the Property Details screen. This will be a fully React Native screen.
Let's start by getting the native Property and Property Details screen setup. You can checkout this commit which adds it.
Here's what the completed native screens look like:
The following setup uses "react-native": "^0.63.2" although it should be the same if you are on React Native v0.60+.
-
Create a
package.jsonin the root{ "name": "android-react-native-app", "version": "1.0.0", "private": true, "scripts": { "start": "yarn react-native start", "android": "yarn react-native run-android" } }
-
Install the following packages
yarn add react-native
yarn add react@version_printed_above
yarn add hermes-engine
yarn add jsc-android
-
Add the following code to
/app/build.gradlefile// Add this ABOVE the dependencies section project.ext.react = [ entryFile: "index.js" , enableHermes: false, ] def jscFlavor = 'org.webkit:android-jsc:+' def enableHermes = project.ext.react.get("enableHermes", false); // Add this WITHIN the dependencies section implementation 'com.android.support:appcompat-v7:28.0.0' implementation "com.facebook.react:react-native:+" // React Native if (enableHermes) { def hermesPath = "../node_modules/hermes-engine/android/"; debugImplementation files(hermesPath + "hermes-debug.aar") releaseImplementation files(hermesPath + "hermes-release.aar") } else { implementation jscFlavor } debugImplementation("com.facebook.flipper:flipper:${FLIPPER_VERSION}") { exclude group:'com.facebook.fbjni' } debugImplementation("com.facebook.flipper:flipper-network-plugin:${FLIPPER_VERSION}") { exclude group:'com.facebook.flipper' exclude group:'com.squareup.okhttp3', module:'okhttp' } debugImplementation("com.facebook.flipper:flipper-fresco-plugin:${FLIPPER_VERSION}") { exclude group:'com.facebook.flipper' } // At this at the BOTTOM of the file // This sets up React Native AutoLinking on Android apply from: file("../node_modules/@react-native-community/cli-platform-android/native_modules.gradle"); applyNativeModulesAppBuildGradle(project)
-
Add the following code to
build.gradlefile// Add this INSIDE allprojects -> repositories // Make sure it's above all other maven repositories maven { // All of React Native (JS, Android binaries) is installed from npm url ("$rootDir/node_modules/react-native/android") } maven { // Android JSC is installed from npm url("$rootDir/node_modules/jsc-android/dist") }
-
Define your
FLIPPERversion ingradle.properties# Flipper version used by React Native FLIPPER_VERSION=0.33.1
-
Setup AutoLinking in
settings.gradlefileapply from: file("node_modules/@react-native-community/cli-platform-android/native_modules.gradle"); applyNativeModulesSettingsGradle(settings)
-
Since the Android app is at the root, we need to setup
react-native.config.jsto tell the React Native CLI to look at the root.module.exports = { project: { android: { sourceDir: './' } } };
Finally run ./gradlew clean on the terminal and Sync Gradle (the "elephant with down-arrow" icon on the top right on Android Studio).
If the gradle sync works and you are able to run the app again - you are on the right track! 🎉
Otherwise something might have changed in the RN Android setup 😕
- Either open a issue on this repo and I can investigate or
- Debug the issue and submit a PR to this repo to update the instructions
You can view all the changes needed in this commit.
We'll now configure the Android app to be able to display a React Native screen.
-
Add the following to
AndroidManifest.xml<uses-permission android:name="android.permission.INTERNET" /> // This show the React Native Developer Menu <activity android:name="com.facebook.react.devsupport.DevSettingsActivity" /> // Starting from API level 28 it is disabled by default and this will prevent you from connecting to your Metro bundler. <application ... android:usesCleartextTraffic="true" tools:targetApi="28">
-
Implement
ReactApplicationinMainApplicationand make the following code changespublic class MainApplication extends Application implements ReactApplication { ... private final ReactNativeHost mReactNativeHost = new ReactNativeHost(this) { @Override public boolean getUseDeveloperSupport() { return BuildConfig.DEBUG; } @Override protected List<ReactPackage> getPackages() { @SuppressWarnings("UnnecessaryLocalVariable") List<ReactPackage> packages = new PackageList(this).getPackages(); // Packages that cannot be auto-linked yet can be added manually here, for example: // packages.add(new MyReactNativePackage()); return packages; } @Override protected String getJSMainModuleName() { return "index"; } }; @Override public void onCreate() { ... SoLoader.init(this, /* native exopackage */ false); initializeFlipper(this, getReactNativeHost().getReactInstanceManager()); } /** * Get the default {@link ReactNativeHost} for this app. */ @Override public ReactNativeHost getReactNativeHost() { return mReactNativeHost; } private static void initializeFlipper(Context context, ReactInstanceManager reactInstanceManager) { if (BuildConfig.DEBUG) { try { // We use reflection here to pick up the class that initializes Flipper, // since Flipper library is not available in release mode Class<?> aClass = Class.forName("sg.gov.tech.onemobileapp.ReactNativeFlipper"); aClass.getMethod("initializeFlipper", Context.class, ReactInstanceManager.class).invoke(null, context, reactInstanceManager); } catch (ClassNotFoundException e) { e.printStackTrace(); } catch (NoSuchMethodException e) { e.printStackTrace(); } catch (IllegalAccessException e) { e.printStackTrace(); } catch (InvocationTargetException e) { e.printStackTrace(); } } } }
Note: In case you get a error for
PackageListnot being defined, make sure to runyarn androidin the terminal and try again. More info on this Github issue. -
Add config for
Flipperto work inDEBUGmode. CreateAndroidManifest.xmlinside/app/debug.You will need to create a new folder called
debuginside/app. Then create a new fileAndroidManifest.xmland add the following code.<?xml version="1.0" encoding="utf-8"?> <manifest xmlns:android="http://schemas.android.com/apk/res/android" xmlns:tools="http://schemas.android.com/tools"> <uses-permission android:name="android.permission.SYSTEM_ALERT_WINDOW"/> <application android:usesCleartextTraffic="true" tools:targetApi="28" tools:ignore="GoogleAppIndexingWarning" /> </manifest>
-
Add config for
Flipperto work inDEBUGmode. CreateReactNativeFlipper.javainside/app/src/debug/java/com/example/androidreactnativeapp/.You will need to create a new folder called
javainside/debugand then create a package calledcom.example.androidreactnativeappwhich will create the required folder structure.Then create a new file
ReactNativeFlipper.javaand add the following code.package com.example.androidreactnativeapp; import android.content.Context; import com.facebook.flipper.android.AndroidFlipperClient; import com.facebook.flipper.android.utils.FlipperUtils; import com.facebook.flipper.core.FlipperClient; import com.facebook.flipper.plugins.crashreporter.CrashReporterPlugin; import com.facebook.flipper.plugins.databases.DatabasesFlipperPlugin; import com.facebook.flipper.plugins.fresco.FrescoFlipperPlugin; import com.facebook.flipper.plugins.inspector.DescriptorMapping; import com.facebook.flipper.plugins.inspector.InspectorFlipperPlugin; import com.facebook.flipper.plugins.network.FlipperOkhttpInterceptor; import com.facebook.flipper.plugins.network.NetworkFlipperPlugin; import com.facebook.flipper.plugins.react.ReactFlipperPlugin; import com.facebook.flipper.plugins.sharedpreferences.SharedPreferencesFlipperPlugin; import com.facebook.react.ReactInstanceManager; import com.facebook.react.bridge.ReactContext; import com.facebook.react.modules.network.NetworkingModule; import okhttp3.OkHttpClient; public class ReactNativeFlipper { public static void initializeFlipper(Context context, final ReactInstanceManager reactInstanceManager) { if (FlipperUtils.shouldEnableFlipper(context)) { final FlipperClient client = AndroidFlipperClient.getInstance(context); client.addPlugin(new InspectorFlipperPlugin(context, DescriptorMapping.withDefaults())); client.addPlugin(new ReactFlipperPlugin()); client.addPlugin(new DatabasesFlipperPlugin(context)); client.addPlugin(new SharedPreferencesFlipperPlugin(context)); client.addPlugin(CrashReporterPlugin.getInstance()); final NetworkFlipperPlugin networkFlipperPlugin = new NetworkFlipperPlugin(); NetworkingModule.setCustomClientBuilder( new NetworkingModule.CustomClientBuilder() { @Override public void apply(OkHttpClient.Builder builder) { builder.addNetworkInterceptor(new FlipperOkhttpInterceptor(networkFlipperPlugin)); } }); client.addPlugin(networkFlipperPlugin); client.start(); // Fresco Plugin needs to ensure that ImagePipelineFactory is initialized // Hence we run if after all native modules have been initialized ReactContext reactContext = reactInstanceManager.getCurrentReactContext(); if (reactContext == null) { reactInstanceManager.addReactInstanceEventListener( new ReactInstanceManager.ReactInstanceEventListener() { @Override public void onReactContextInitialized(ReactContext reactContext) { reactInstanceManager.removeReactInstanceEventListener(this); reactContext.runOnNativeModulesQueueThread( new Runnable() { @Override public void run() { client.addPlugin(new FrescoFlipperPlugin()); } }); } }); } else { client.addPlugin(new FrescoFlipperPlugin()); } } } }
-
Create a new file
RNPropertyDetails.javawhich will extendReactActivityand contain our React Native screen.package com.example.androidreactnativeapp; import androidx.annotation.Nullable; import com.facebook.react.ReactActivity; public class RNPropertyDetails extends ReactActivity { @Nullable @Override protected String getMainComponentName() { return "RNPropertyDetails"; } }
-
Register
RNPropertyDetailsinAndroidManifest.xmlas a new activity so we can navigate to it.<activity android:name=".RNPropertyDetails" android:label="@string/app_name" android:theme="@style/Theme.AppCompat.Light.NoActionBar"/>
-
Setup the navigation in
MainActivityto show theRNPropertyDetailsclass when the "RN Property Details" button is pressed.public void showRNPropertyDetailsScreen(View view) { Intent intent = new Intent(this, RNPropertyDetails.class); startActivity(intent); }
-
Finally create a new file
index.jsin the root of the project. This will be the entrypoint for our React Native application.import React from 'react'; import { AppRegistry, StyleSheet, Text, View } from 'react-native'; class RNPropertyDetails extends React.Component { render() { return ( <View style={styles.container}> <Text style={styles.label}> React Native Property Details </Text> </View> ); } } var styles = StyleSheet.create({ container: { flex: 1, justifyContent: 'center', backgroundColor: 'white', }, label: { fontSize: 24, textAlign: 'center', margin: 10 } }); AppRegistry.registerComponent('RNPropertyDetails', () => RNPropertyDetails);
Note that AppRegistry.registerComponent method registers the name RNPropertyDetails which is the same as the name in RNPropertyDetails.java above.
Finally, build and run the app. 😬 Make sure you start the React Native packager locally by running yarn start on the terminal.
Then click on the "RN Property Details" button and...
There's your React Native screen!! In all it's glory - inside your Android app. Pretty seamless right!? 💃


