OpenCV is a huge open-source library for computer vision, machine learning, and image processing. It can process images and videos to identify objects, faces, or even the handwriting of a human.
Press the Enter button and it will download all the related OpenCV configuration.
OpenCV is a Python library so it is necessary to install Python in the system and install OpenCV using pip command:
We can install it without extra modules by the following command:
Open the command prompt and type the following code to check if the OpenCV is installed or not.
from matplotlib import pyplot as plt # import library
import numpy as np # import library
import cv2 # import library

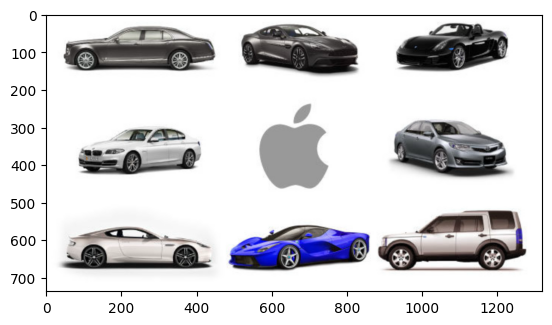
img = cv2.imread(r"car.jpg") # It is used to load an image in the Python program

# The imshow() function in pyplot module of matplotlib library is used
# to display data as an image; i.e. on a 2D regular raster.
plt.imshow(img)
<matplotlib.image.AxesImage at 0x2021925cb20>
from matplotlib import pyplot as plt # import library
import numpy as np # import library
import cv2 # import library

img = cv2.imread("car.jpg") # It is used to load an image in the Python program

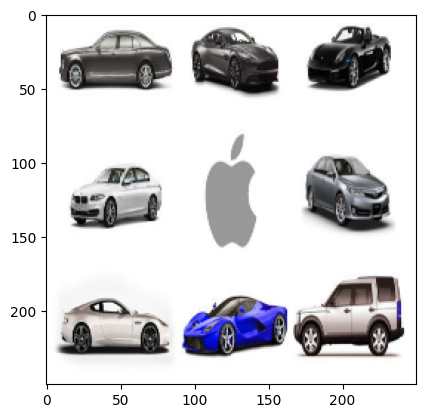
increase = cv2.resize(img,(250,250))
# The imshow() function in pyplot module of matplotlib library is used
# to display data as an image; i.e. on a 2D regular raster.
plt.imshow(increase) # for increase image size
<matplotlib.image.AxesImage at 0x2021bd207c0>
from matplotlib import pyplot as plt # import library
import numpy as np # import library
import cv2 # import library

img = cv2.imread("car.jpg") # It is used to load an image in the Python program

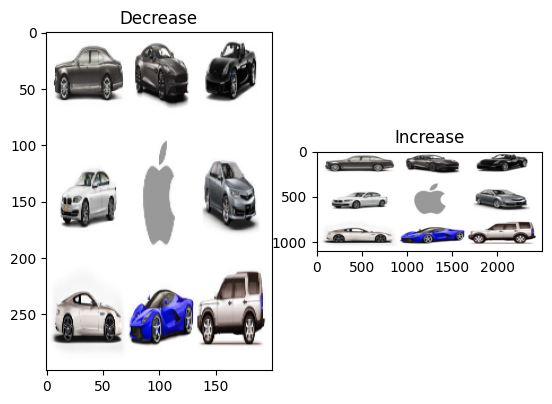
decrease = cv2.resize(img,(200,300))
increase = cv2.resize(img,(2500,1100))
# The imshow() function in pyplot module of matplotlib library is used
# to display data as an image; i.e. on a 2D regular raster.
# plt.imshow(decrease) # for increase image size
# plt.imshow(decrease)

plt.subplot(121),plt.imshow(decrease),plt.title("Decrease")
plt.subplot(122),plt.imshow(increase),plt.title("Increase")
(<Axes: title={'center': 'Increase'}>,
<matplotlib.image.AxesImage at 0x2021bd20220>,
Text(0.5, 1.0, 'Increase'))
from matplotlib import pyplot as plt # import library
import numpy as np # import library
import cv2 # import library

img = cv2.imread("road.jpg") # It is used to load an image in the Python program

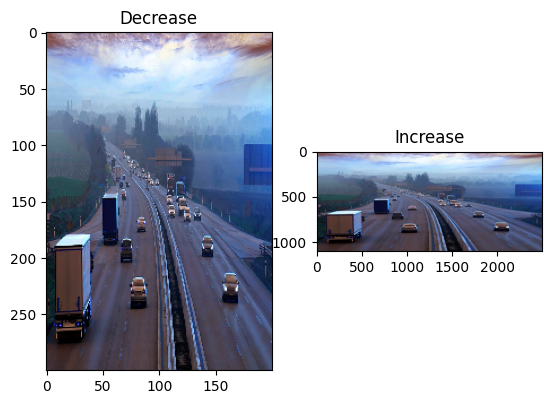
decrease = cv2.resize(img,(200,300))
increase = cv2.resize(img,(2500,1100))
# The imshow() function in pyplot module of matplotlib library is used
# to display data as an image; i.e. on a 2D regular raster.

plt.subplot(121),plt.imshow(decrease),plt.title("Decrease")
plt.subplot(122),plt.imshow(increase),plt.title("Increase")
(<Axes: title={'center': 'Increase'}>,
<matplotlib.image.AxesImage at 0x2021be25cd0>,
Text(0.5, 1.0, 'Increase'))
from matplotlib import pyplot as plt # import library
import numpy as np # import library
import cv2 # import library

img = cv2.imread("chess.jpg") # It is used to load an image in the Python program

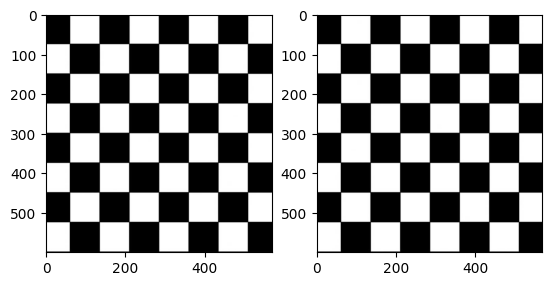
rotate_clockwise1 = cv2.rotate(img, cv2.ROTATE_90_CLOCKWISE)

rotate_clockwise2 = cv2.rotate(img, cv2.ROTATE_90_COUNTERCLOCKWISE)

# rotate_clockwise = cv2.rotate(img, cv2.ROTATE_180)

# plt.imshow(rotate_clockwise)
plt.subplot(121),plt.imshow(rotate_clockwise1)
plt.subplot(122),plt.imshow(rotate_clockwise2)
(<Axes: >, <matplotlib.image.AxesImage at 0x2021bf203d0>)
from matplotlib import pyplot as plt # import library
import numpy as np # import library
import cv2 # import library

img = cv2.imread("elon.jpg") # It is used to load an image in the Python program

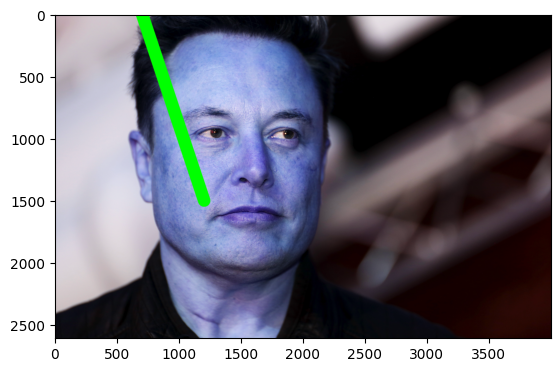
start = (700,0) # x , y cordinate
end = (1200,1500) # x , y cordinate
color = (0,255,0) # color code
thickness = (100) # thickness

draw_line = cv2.line(img, start,end,color,thickness)

plt.imshow(draw_line)
<matplotlib.image.AxesImage at 0x2021bf8fb50>
from matplotlib import pyplot as plt # import library
import numpy as np # import library
import cv2 # import library

img = cv2.imread("iron_man.jpg") # It is used to load an image in the Python program

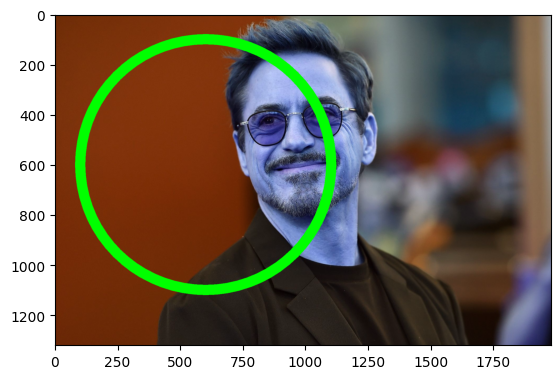
start = (600,600) # x , y cordinate
color = (0,255,0) # color code
circle_size = 500
thickness = 40 # thickness

draw_line = cv2.circle(img,start,circle_size, color, thickness)

plt.imshow(draw_line)
<matplotlib.image.AxesImage at 0x2021bf60d60>
# import numpy as np
import cv2
import matplotlib.pyplot as plt

img = cv2.imread("elon.jpg")

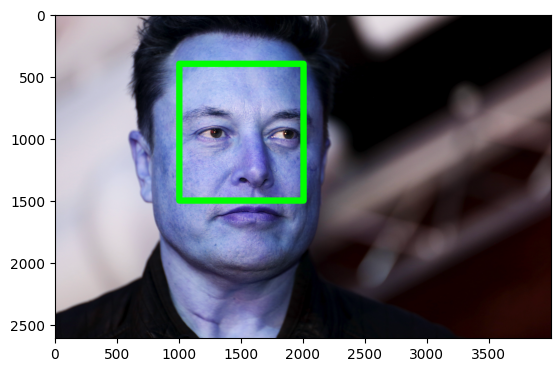
cordinate = (2000,1500) # x, y
cordinate_end = (1000,400) # x, y

color = (0,255,0)

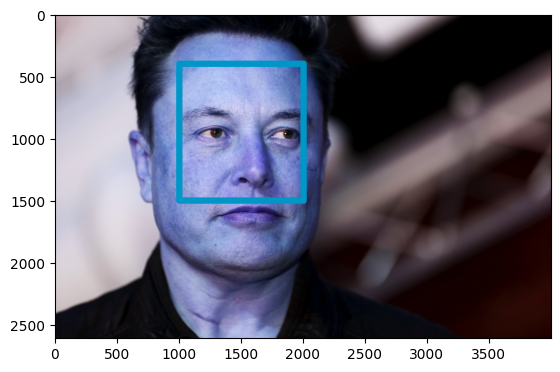
draw_rec = cv2.rectangle(img,cordinate, cordinate_end, color, 50)

plt.imshow(draw_rec)
<matplotlib.image.AxesImage at 0x2021c1f6670>
# import numpy as np
import cv2
import matplotlib.pyplot as plt

img = cv2.imread("elon.jpg")

draw_rec = cv2.rectangle(img,(2000,1500), (1000,400), (0,150,200), 50)

plt.imshow(draw_rec)
<matplotlib.image.AxesImage at 0x2021c117bb0>
# import numpy as np
import cv2
img = cv2.imread(r"image.jpg",1)

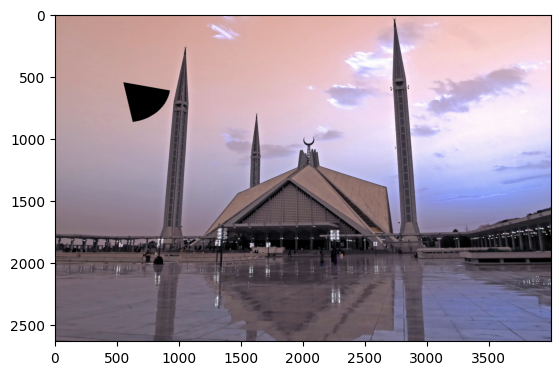
draw_ellip = cv2.ellipse(img, (550, 550), (380, 320), 10, 0, 70, (0,0,0), -1)

plt.imshow(draw_ellip)
<matplotlib.image.AxesImage at 0x2021c18c2b0>
import matplotlib.pyplot as plt
import numpy as np
import cv2
img = cv2.imread('elon.jpg',cv2.IMREAD_COLOR)
#defining points for polylines
pts = np.array([[300,250],[400,300],[700,200],[500,100]], np.int32)
# pts = pts.reshape((-1,1,2))
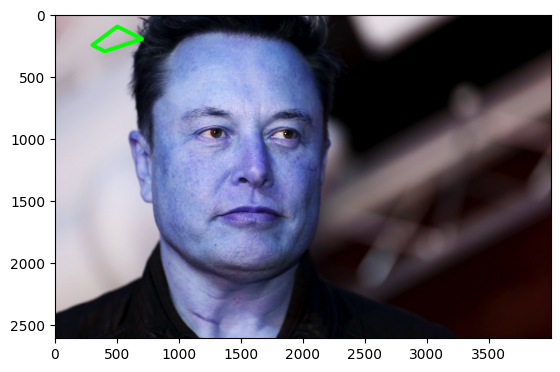
draw_poly = cv2.polylines(img, [pts], True, (0,255,0), 30)

plt.imshow(draw_poly)
<matplotlib.image.AxesImage at 0x2021c255490>
import matplotlib.pyplot as plt
import cv2
img = cv2.imread(r'image.jpg',cv2.IMREAD_COLOR)
cv2.putText(img, "Faisal Masjid", (250,500),
            cv2.FONT_HERSHEY_SIMPLEX, 15, (80, 155, 40), 30)

plt.imshow(img)
plt.show()
import cv2
import numpy as np
import matplotlib.pyplot as plt
img_size = 255 * np.ones(shape=[1012, 1012, 3], dtype=np.uint8)
cv2.putText(img_size, text='Python with OpenCV', org=(100,200),
fontFace= cv2.FONT_HERSHEY_SIMPLEX, fontScale=2, color=(0,0,0),
thickness=6, lineType=cv2.LINE_AA)
plt.imshow(img_size)
plt.show()from matplotlib import pyplot as plt # import library
import numpy as np # import library
import cv2 # import library
img = cv2.imread("road.jpg") # It is used to load an image in the Python program
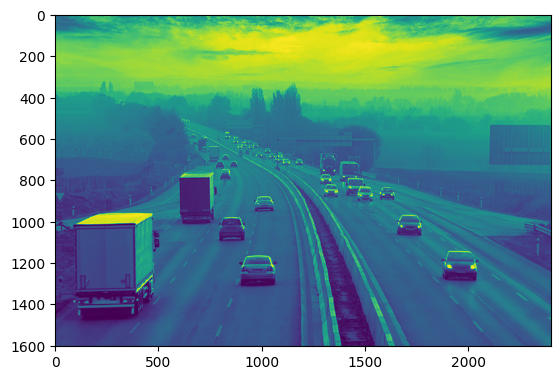
gray = cv2.cvtColor(img, cv2.COLOR_BGR2GRAY)
plt.imshow(gray)<matplotlib.image.AxesImage at 0x2021c59c190>
from matplotlib import pyplot as plt # import library
import numpy as np # import library
import cv2 # import library

img = cv2.imread("road.jpg") # It is used to load an image in the Python program

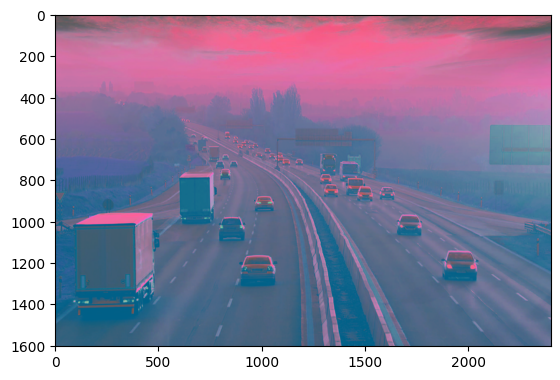
grayscale = cv2.cvtColor(img, cv2.COLOR_BGR2Luv)

plt.imshow(grayscale)
<matplotlib.image.AxesImage at 0x2021c65b100>
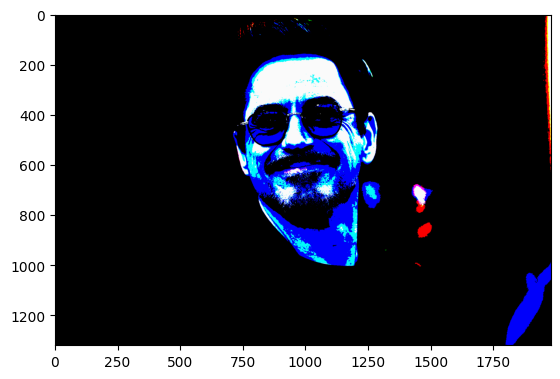
In image processing, image thresholding is a necessary intermediary step. It helps remove contours and darker or lighter regions of images.
from matplotlib import pyplot as plt # import library
import numpy as np # import library
import cv2 # import library

img = cv2.imread("iron_man.jpg") # It is used to load an image in the Python program

ret, threshold_binary = cv2.threshold(img,150,250,cv2.THRESH_BINARY)

plt.imshow(threshold_binary)
<matplotlib.image.AxesImage at 0x2021c7143d0>
Edge detection is an effective segmentation mechanism used to find the boundaries of objects of an image.
from matplotlib import pyplot as plt # import library
import numpy as np # import library
import cv2 # import library

img = cv2.imread("marvel.jpg") # It is used to load an image in the Python program

edge = cv2.Canny(img,50,50)

# plt.imshow(edge)

cv2.imshow('Image to Egde',edge)
cv2.waitKey(0)
cv2.destroyAllWindows()# Importing the OpenCV library
import cv2
# Reading the image using imread() function
image = cv2.imread('road.jpg')
# Extracting the height and width of an image
h, w = image.shape[:2]
# Displaying the height and width
print("Height = {}, Width = {}".format(h, w))Height = 1603, Width = 2400
# Python code to read image
import cv2

# To read image from disk, we use
# cv2.imread function, in below method,
img = cv2.imread("marvel.jpg", cv2.IMREAD_COLOR)

# Creating GUI window to display an image on screen
# first Parameter is windows title (should be in string format)
# Second Parameter is image array
cv2.imshow("image", img)

# To hold the window on screen, we use cv2.waitKey method
# Once it detected the close input, it will release the control
# To the next line
# First Parameter is for holding screen for specified milliseconds
# It should be positive integer. If 0 pass an parameter, then it will
# hold the screen until user close it.
cv2.waitKey(0)

# It is for removing/deleting created GUI window from screen
# and memory
cv2.destroyAllWindows()# Python program to explain cv2.imread() method
# importing cv2
import cv2
# path
path = "eye3.jpg"
# Using cv2.imread() method
# Using 0 to read image in grayscale mode
img = cv2.imread(path,0)
# Displaying the image
cv2.imshow('image', img)
cv2.waitKey(0)
cv2.destroyAllWindows()#importing the opencv module
import cv2
# using imread('path') and 0 denotes read as grayscale image
img = cv2.imread("eye3.jpg",1)
#This is using for display the image
cv2.imshow('image',img)
cv2.waitKey(0) # This is necessary to be required so that the image doesn't close immediately.
#It will run continuously until the key press.
cv2.destroyAllWindows() # import numpy as np
import cv2 # import library
img = cv2.imread(r"img.jpg",1) # add image in imread() function
cordinate = (58,50) # define cordinate for where we plant circle
color = (0,255,0) # define color
radius = 22 # define radius
cv2.circle(img,cordinate, radius, color, 5)
cv2.imshow('image',img)
cv2.waitKey(0)
cv2.destroyAllWindows() # import numpy as np
import cv2
img = cv2.imread(r"marvel.jpg",1)
cordinate = (58,50) # x, y
color = (0,255,0)
radius = (200,100) # x, y
cv2.rectangle(img,cordinate, radius, color, 2)
cv2.imshow('image',img)
cv2.waitKey(0)
cv2.destroyAllWindows() import numpy as np
import cv2
img = cv2.imread(r"eye3.jpg",1)
cv2.rectangle(img,(15,25),(200,150),(0,255,255),15)
cv2.imshow('image',img)
cv2.waitKey(0)
cv2.destroyAllWindows() import numpy as np
import cv2
img = cv2.imread(r"marvel_3.jpg",1)
cv2.ellipse(img, (250, 150), (80, 20), 5, 0, 360, (0,0,255), -1)
cv2.imshow('image',img)
cv2.waitKey(0)
cv2.destroyAllWindows() import numpy as np
import cv2
img = cv2.imread(r"img.jpg",1)
cv2.line(img,(10,0),(150,150),(0,200,0),15)
cv2.imshow('image',img)
cv2.waitKey(0)
cv2.destroyAllWindows() import numpy as np
import cv2
img = cv2.imread(r'eye3.jpg',cv2.IMREAD_COLOR)
#defining points for polylines
pts = np.array([[100,50],[200,300],[700,200],[500,100]], np.int32)
# pts = pts.reshape((-1,1,2))
cv2.polylines(img, [pts], True, (0,255,255), 3)
cv2.imshow('image',img)
cv2.waitKey(0)
cv2.destroyAllWindows() import numpy as np
import cv2
img = cv2.imread(r'marvel.jpg',cv2.IMREAD_COLOR)
cv2.putText(img, "OpenCV + Marvel Heroes", (10, 25),
cv2.FONT_HERSHEY_SIMPLEX, 0.7, (0, 255, 0), 2)
cv2.imshow("Text", img)
cv2.waitKey(0)
cv2.destroyAllWindows() import cv2
import numpy as np
import matplotlib.pyplot as plt
# Read image
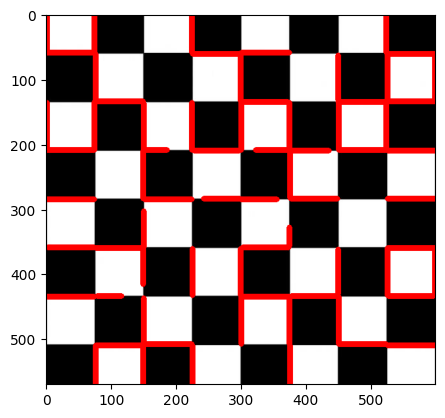
image = cv2.imread('chess.jpg')
# Convert image to grayscale
gray = cv2.cvtColor(image,cv2.COLOR_BGR2GRAY)
# Use canny edge detection
edges = cv2.Canny(gray,50,150,apertureSize=3)
# Apply HoughLinesP method to
# to directly obtain line end points
lines_list =[]
lines = cv2.HoughLinesP(
edges, # Input edge image
1, # Distance resolution in pixels
np.pi/180, # Angle resolution in radians
threshold=100, # Min number of votes for valid line
minLineLength=5, # Min allowed length of line
maxLineGap=10 # Max allowed gap between line for joining them
)
# Iterate over points
for points in lines:
# Extracted points nested in the list
x1,y1,x2,y2=points[0]
# Draw the lines joing the points
# On the original image
cv2.line(image,(x1,y1),(x2,y2),(255,0,0),8)
# Maintain a simples lookup list for points
lines_list.append([(x1,y1),(x2,y2)])
plt.imshow(image)<matplotlib.image.AxesImage at 0x2021c798b50>
# import the required library
import numpy as np
import cv2
from matplotlib import pyplot as plt


# read the image
img = cv2.imread('corner.png')

# convert image to gray scale image
gray = cv2.cvtColor(img, cv2.COLOR_BGR2GRAY)

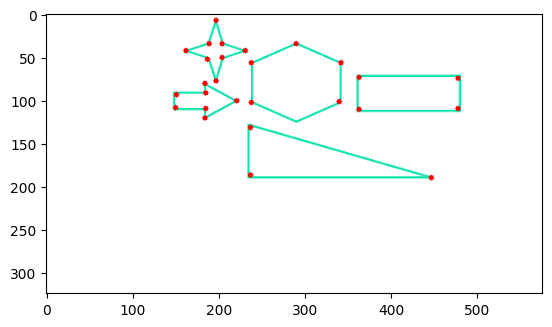
# detect corners with the goodFeaturesToTrack function.
corners = cv2.goodFeaturesToTrack(gray, 27, 0.01, 10)
corners = np.int0(corners)

# we iterate through each corner,
# making a circle at each point that we think is a corner.
for i in corners:
    x, y = i.ravel()
    cv2.circle(img, (x, y), 3, 255, -1)

plt.imshow(img), plt.show()
(<matplotlib.image.AxesImage at 0x2021bde2d60>, None)
before we start we need haarcascade file for face, eye, number plate, emotion, full body, smile etc... detections
goto this link and download this file which is selected
https://github.com/MuhammadRaheelNaseem/OpenCV-Cascade-Files/tree/4.x/data/haarcascades
import matplotlib.pyplot as plt
import cv2
# Load the cascade
face_cascade = cv2.CascadeClassifier('haarcascade_frontalface_default.xml')
# Read the input image
img = cv2.imread('marvel.jpg')
# Convert into grayscale
gray = cv2.cvtColor(img, cv2.COLOR_RGB2BGR)
# Detect faces
faces = face_cascade.detectMultiScale(gray, 1.1, 4)
# Draw rectangle around the faces
for (x, y, w, h) in faces:
    cv2.rectangle(img, (x, y), (x+w, y+h), (0, 255, 0), 4)
# Display the output
# cv2.imwrite("abcdefg.jpg",faces)
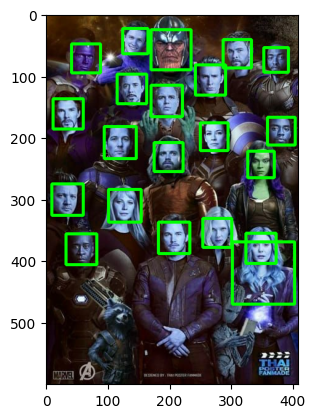
plt.imshow(img)
<matplotlib.image.AxesImage at 0x2021bdcad30>
import cv2
import sys

# Get user supplied values
imagePath = sys.argv[1]
cascPath = "haarcascade_frontalface_default.xml"

# Create the haar cascade
faceCascade = cv2.CascadeClassifier(cascPath)

# Read the image
image = cv2.imread(r'marvel.jpg')
gray = cv2.cvtColor(image, cv2.COLOR_BGR2GRAY)

# Detect faces in the image
faces = faceCascade.detectMultiScale(
    gray,
    scaleFactor=1.1,
    minNeighbors=5,
    minSize=(30, 30)
)

print("Found {0} faces!".format(len(faces)))

# Draw a rectangle around the faces
for (x, y, w, h) in faces:
    cv2.rectangle(image, (x, y), (x+w, y+h), (0, 255, 0), 2)

cv2.imshow("Faces found", image)
cv2.waitKey(0)
cv2.destroyAllWindows()
Found 21 faces!
import cv2
import matplotlib.pyplot as plt


cascPath = "haarcascade_frontalface_default.xml"

# Create the haar cascade
faceCascade = cv2.CascadeClassifier(cascPath)

# Read the image
image = cv2.imread("facess.png")
gray = cv2.cvtColor(image, cv2.COLOR_BGR2GRAY)

# Detect faces in the image
faces = faceCascade.detectMultiScale(
    gray,
    scaleFactor=1.1,
    minNeighbors=5,
    minSize=(30, 30)
)

print("Found {0} faces!".format(len(faces)))

# Draw a rectangle around the faces
for (x, y, w, h) in faces:
    cv2.rectangle(image, (x, y), (x+w, y+h), (0, 255, 0), 2)

plt.imshow(image)
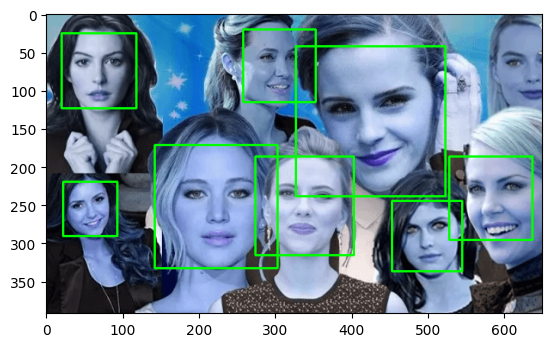
Found 8 faces!
<matplotlib.image.AxesImage at 0x2021c103460>
import cv2
import sys

# im = cv2.imread("/img.jpg", 1)

# Load the cascade
face_cascade = cv2.CascadeClassifier('haarcascade_frontalface_default.xml')

# To capture video from webcam.
# cap = cv2.VideoCapture(0)  # for camera
cap = cv2.VideoCapture("face.mp4")  # for video


while True:
    # Read the frame
    _, img = cap.read()

    # Convert to grayscale
    gray = cv2.cvtColor(img, cv2.COLOR_BGR2GRAY)

    # Detect the faces
    faces = face_cascade.detectMultiScale(gray, 1.1, 4)

    # Draw the rectangle around each face
    for (x, y, w, h) in faces:
        cv2.rectangle(img, (x, y), (x+w, y+h), (255, 0, 0), 2)

    # Display
    cv2.imshow('Video', img)

    # Stop if escape key is pressed
    k = cv2.waitKey(30) & 0xff
    if k==27:
        break

# Release the VideoCapture object import cv2
# Load the cascade
face_cascade = cv2.CascadeClassifier('haarcascade_frontalface_default.xml')
# To capture video from existing video.
cap = cv2.VideoCapture(r'face_live.mp4')
while True:
# Read the frame
_, img = cap.read()
# Convert to grayscale
gray = cv2.cvtColor(img, cv2.COLOR_RGB2BGR)
# Detect the faces
faces = face_cascade.detectMultiScale(gray, 1.1, 4)
# Draw the rectangle around each face
for (x, y, w, h) in faces:
cv2.rectangle(img, (x, y), (x+w, y+h), (255, 0, 0), 2)
# Display
cv2.imshow('Video', img)
# Stop if escape key is pressed
k = cv2.waitKey(30) & 0xff
if k==27:
break
# Release the VideoCapture object
cap.release() This process is specific to windows for recognizing faces using the model, and is only applicable for windows.
First, visit the following Visual Studio free download link https://visualstudio.microsoft.com/downloads/

You can select Visual Studio 2022 Community Edition
Click on the downloaded .exe file
In the next screen, click continue to start Visual Studio installation
Visual Studio will start downloading the initial files. Download speed will vary as per your internet connection.
In next screen, click install
In next screen,
Select “Desktop Development C++”
Click install
Visual Studio will download the relevant files based on the selection in step 6
Once the download is done, you will be asked to reboot the PC to complete Visual Studio setup
Post reboot, open the Visual Studio IDE
Select a theme of your choice
Click Start Visual Studio
Open terminal
write pip install dlib | py -m pip install dlib |
if this is not work then write this
pip install https://files.pythonhosted.org/packages/05/57/e8a8caa3c89a27f80bc78da39c423e2553f482a3705adc619176a3a24b36/dlib-19.17.0.tar.gz
ownload cmake-*.exe installer from https://cmake.org/download/ and run it.
Click Download:
Open it,
Click Next:
Click I agree:
Check one of the Add CMake to the system PATH ... if you want to have CMake in PATH. Check Create CMake Desktop Icon to create icon on desktop:
Choose installation path. Add suffix with version in case you want to have several versions installed simultaneously:
Shortcut in Start Menu folder:
Installing...
Click Finish:
Desktop icon created:
pip install cmake
# Sample code to recognize faces using face_recognition library
# (You need to install the face_recognition library first)

import face_recognition
import cv2
from matplotlib import pyplot as plt

# Load an image and find faces
image = face_recognition.load_image_file("elon.jpg")
face_locations = face_recognition.face_locations(image)

# Draw rectangles around the faces
for top, right, bottom, left in face_locations:
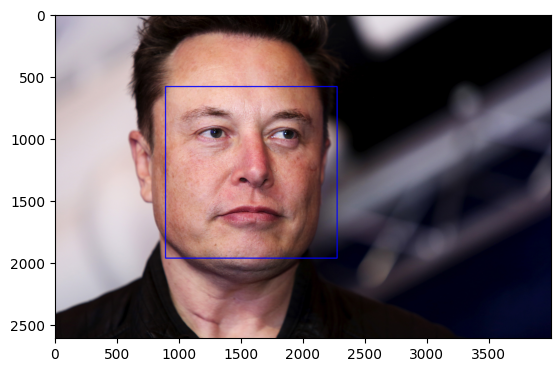
    cv2.rectangle(image, (left, top), (right, bottom), (0, 0, 255), 8)


plt.imshow(image)
# Display the image with faces recognized
# cv2.imshow("Face Recognition", image)
# cv2.waitKey(0)
# cv2.destroyAllWindows()
<matplotlib.image.AxesImage at 0x20218cab040>
import face_recognition
import cv2
from matplotlib import pyplot as plt

def encode_known_faces():
    # Load images of known faces
    elon_image = face_recognition.load_image_file("elon.jpg")
    robert_image = face_recognition.load_image_file("iron_man.jpg")
    # Add more images of known faces here

    # Encode known faces
    elon_encoding = face_recognition.face_encodings(elon_image)[0]
    robert_encoding = face_recognition.face_encodings(robert_image)[0]
    print("################## Encoding ####################/n",elon_encoding)
    print("################## Encoding ####################/n",robert_encoding)
    # Encode more known faces here

    # Create arrays of known face encodings and their corresponding names
    known_face_encodings = [elon_encoding,robert_encoding]
    known_face_names = ["Elon Musk","Iron Man - Robert"]  # Make sure to add more names accordingly

    return known_face_encodings, known_face_names

def recognize_faces(image_path, known_face_encodings, known_face_names):
    # Load the input image
    image = face_recognition.load_image_file(image_path)

    # Find all face locations and face encodings in the image
    face_locations = face_recognition.face_locations(image)
    face_encodings = face_recognition.face_encodings(image, face_locations)

    print("Giving Image Encoding")
    print("################## Encoding ####################/n",face_encodings)

    # Initialize an array for recognized names
    face_names = []

    for face_encoding in face_encodings:
        # Compare the face encoding with the known face encodings
        matches = face_recognition.compare_faces(known_face_encodings, face_encoding)
        name = "Unknown"

        # If a match is found, use the known face name
        if True in matches:
            match_index = matches.index(True)
            name = known_face_names[match_index]

        face_names.append(name)

    # Draw rectangles around the faces and display the names
    for (top, right, bottom, left), name in zip(face_locations, face_names):
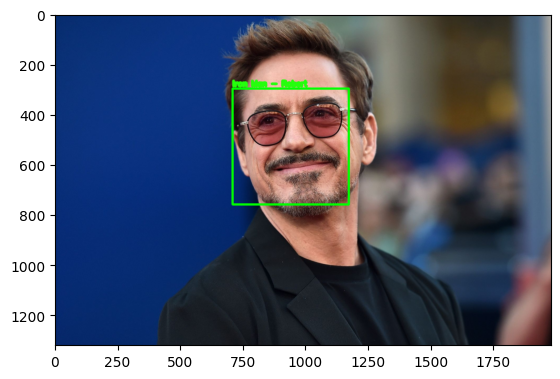
        cv2.rectangle(image, (left, top), (right, bottom), (0, 255, 0), 8)
        cv2.putText(image, name, (left, top - 10), cv2.FONT_HERSHEY_SIMPLEX, 1, (36, 255, 12), 10)
    print("Detection Name is: ",name)


    # Display the image with faces recognized
#     cv2.imshow("Face Recognition", image)
#     cv2.waitKey(0)
#     cv2.destroyAllWindows()
    plt.imshow(image)

if __name__ == "__main__":
    # First, encode the known faces
    known_face_encodings, known_face_names = encode_known_faces()

    # Then, perform face recognition on the input image
    recognize_faces("iron_man.jpg", known_face_encodings, known_face_names)
################## Encoding ####################/n [-0.05474405 0.09901528 0.1241566 0.00264821 -0.21344182 -0.03341666
-0.03063807 -0.18207441 0.14338571 -0.0576258 0.26655084 -0.07524312
-0.23843548 -0.0116273 0.01982536 0.09669773 -0.1074248 -0.12256016
-0.00501894 -0.10053775 0.06852433 0.02464913 -0.00693316 -0.04149093
-0.11877727 -0.31602502 -0.12302428 -0.03829131 0.13136061 -0.08322924
0.03445714 0.07750347 -0.13897331 -0.09439123 0.07031438 0.01866165
-0.11276377 -0.09173281 0.18417974 -0.06026226 -0.1888081 -0.08012091
0.00448392 0.19467938 0.09113618 0.0548287 0.07541551 -0.13929498
0.09618489 -0.18462469 0.10926796 0.14791933 0.06350181 0.00768057
0.13304196 -0.18290807 -0.00405087 0.21724239 -0.1533742 0.10205458
0.12617995 -0.11874933 -0.01087303 -0.06593663 0.15805599 0.04400664
-0.01326342 -0.14566652 0.2133323 -0.04443194 -0.11142903 0.1132137
-0.10700901 -0.17943084 -0.30859166 -0.00501699 0.5098837 0.05118804
-0.17709807 -0.00533283 -0.0077635 0.01344945 0.15684636 0.03821474
-0.05338221 -0.09705238 -0.15268008 -0.02296404 0.20689805 -0.0676768
-0.05301016 0.17968005 -0.00547987 0.05078281 0.04552337 0.05524134
-0.08359936 0.01339446 -0.09383676 -0.09836838 0.09448993 -0.05811253
-0.0258737 0.17125247 -0.1947069 0.15315706 0.02289372 0.01860685
-0.02614888 -0.08563286 -0.05032963 0.01685279 0.1726561 -0.3036651
0.16302355 0.15740746 -0.00400023 0.15801597 0.0175605 0.00792926
0.02166665 -0.12385691 -0.2046084 -0.07372616 0.03094033 -0.02699156
-0.04503476 0.05535955]
################## Encoding ####################/n [-0.05431071 0.01027051 0.07078883 -0.01248605 -0.04013558 -0.08359192
-0.04556673 -0.09264778 0.13483314 -0.10769505 0.25247583 -0.00242966
-0.24117815 -0.02970565 -0.01937623 0.12212192 -0.1356632 -0.08532277
-0.13838637 -0.08842614 -0.06056976 0.01883886 0.12247433 0.03435862
-0.22010678 -0.34413773 -0.14441149 -0.11154358 0.05644756 -0.06447552
-0.04563772 0.04219426 -0.18257472 -0.10148688 0.02885335 0.07615646
-0.0796221 -0.0881763 0.24752541 0.1415755 -0.15273798 0.01211198
0.03957835 0.30730566 0.2342684 0.05150539 0.11425403 -0.05912963
0.10034234 -0.26748002 0.0930147 0.08711745 0.0801874 0.0740717
0.18017718 -0.14433375 0.05047535 0.19370458 -0.11680725 0.09379934
0.06497239 0.01583652 0.08645853 0.00359171 0.22406903 0.02986854
-0.12052146 -0.05036166 0.09018125 -0.15832122 -0.0272034 0.11005827
-0.08811986 -0.16490895 -0.37078264 0.02802555 0.43720725 0.16903882
-0.09586893 0.01880627 -0.08652435 -0.10222644 0.08488924 0.04729614
-0.09756698 -0.00823996 -0.11265345 -0.00497997 0.23682724 0.05389332
-0.03215324 0.20151581 -0.04683866 0.01571763 0.04471086 0.05067032
-0.23802398 -0.04022458 -0.06986368 -0.03263003 0.00362798 -0.08927172
0.00183542 0.07227091 -0.2055902 0.12797275 -0.06369568 -0.05813322
-0.02595552 0.01657255 -0.14537166 0.01513408 0.13941622 -0.31558624
0.11389145 0.21128207 0.00226721 0.10608539 0.12875158 -0.00861937
-0.07713388 0.06024557 -0.12804104 -0.09212247 -0.00830872 -0.04158328
0.13225797 0.01816292]
Giving Image Encoding
################## Encoding ####################/n [array([-0.05431071, 0.01027051, 0.07078883, -0.01248605, -0.04013558,
-0.08359192, -0.04556673, -0.09264778, 0.13483314, -0.10769505,
0.25247583, -0.00242966, -0.24117815, -0.02970565, -0.01937623,
0.12212192, -0.1356632 , -0.08532277, -0.13838637, -0.08842614,
-0.06056976, 0.01883886, 0.12247433, 0.03435862, -0.22010678,
-0.34413773, -0.14441149, -0.11154358, 0.05644756, -0.06447552,
-0.04563772, 0.04219426, -0.18257472, -0.10148688, 0.02885335,
0.07615646, -0.0796221 , -0.0881763 , 0.24752541, 0.1415755 ,
-0.15273798, 0.01211198, 0.03957835, 0.30730566, 0.2342684 ,
0.05150539, 0.11425403, -0.05912963, 0.10034234, -0.26748002,
0.0930147 , 0.08711745, 0.0801874 , 0.0740717 , 0.18017718,
-0.14433375, 0.05047535, 0.19370458, -0.11680725, 0.09379934,
0.06497239, 0.01583652, 0.08645853, 0.00359171, 0.22406903,
0.02986854, -0.12052146, -0.05036166, 0.09018125, -0.15832122,
-0.0272034 , 0.11005827, -0.08811986, -0.16490895, -0.37078264,
0.02802555, 0.43720725, 0.16903882, -0.09586893, 0.01880627,
-0.08652435, -0.10222644, 0.08488924, 0.04729614, -0.09756698,
-0.00823996, -0.11265345, -0.00497997, 0.23682724, 0.05389332,
-0.03215324, 0.20151581, -0.04683866, 0.01571763, 0.04471086,
0.05067032, -0.23802398, -0.04022458, -0.06986368, -0.03263003,
0.00362798, -0.08927172, 0.00183542, 0.07227091, -0.2055902 ,
0.12797275, -0.06369568, -0.05813322, -0.02595552, 0.01657255,
-0.14537166, 0.01513408, 0.13941622, -0.31558624, 0.11389145,
0.21128207, 0.00226721, 0.10608539, 0.12875158, -0.00861937,
-0.07713388, 0.06024557, -0.12804104, -0.09212247, -0.00830872,
-0.04158328, 0.13225797, 0.01816292])]
Detection Name is: Iron Man - Robert


