Alpha-Blogger-Template
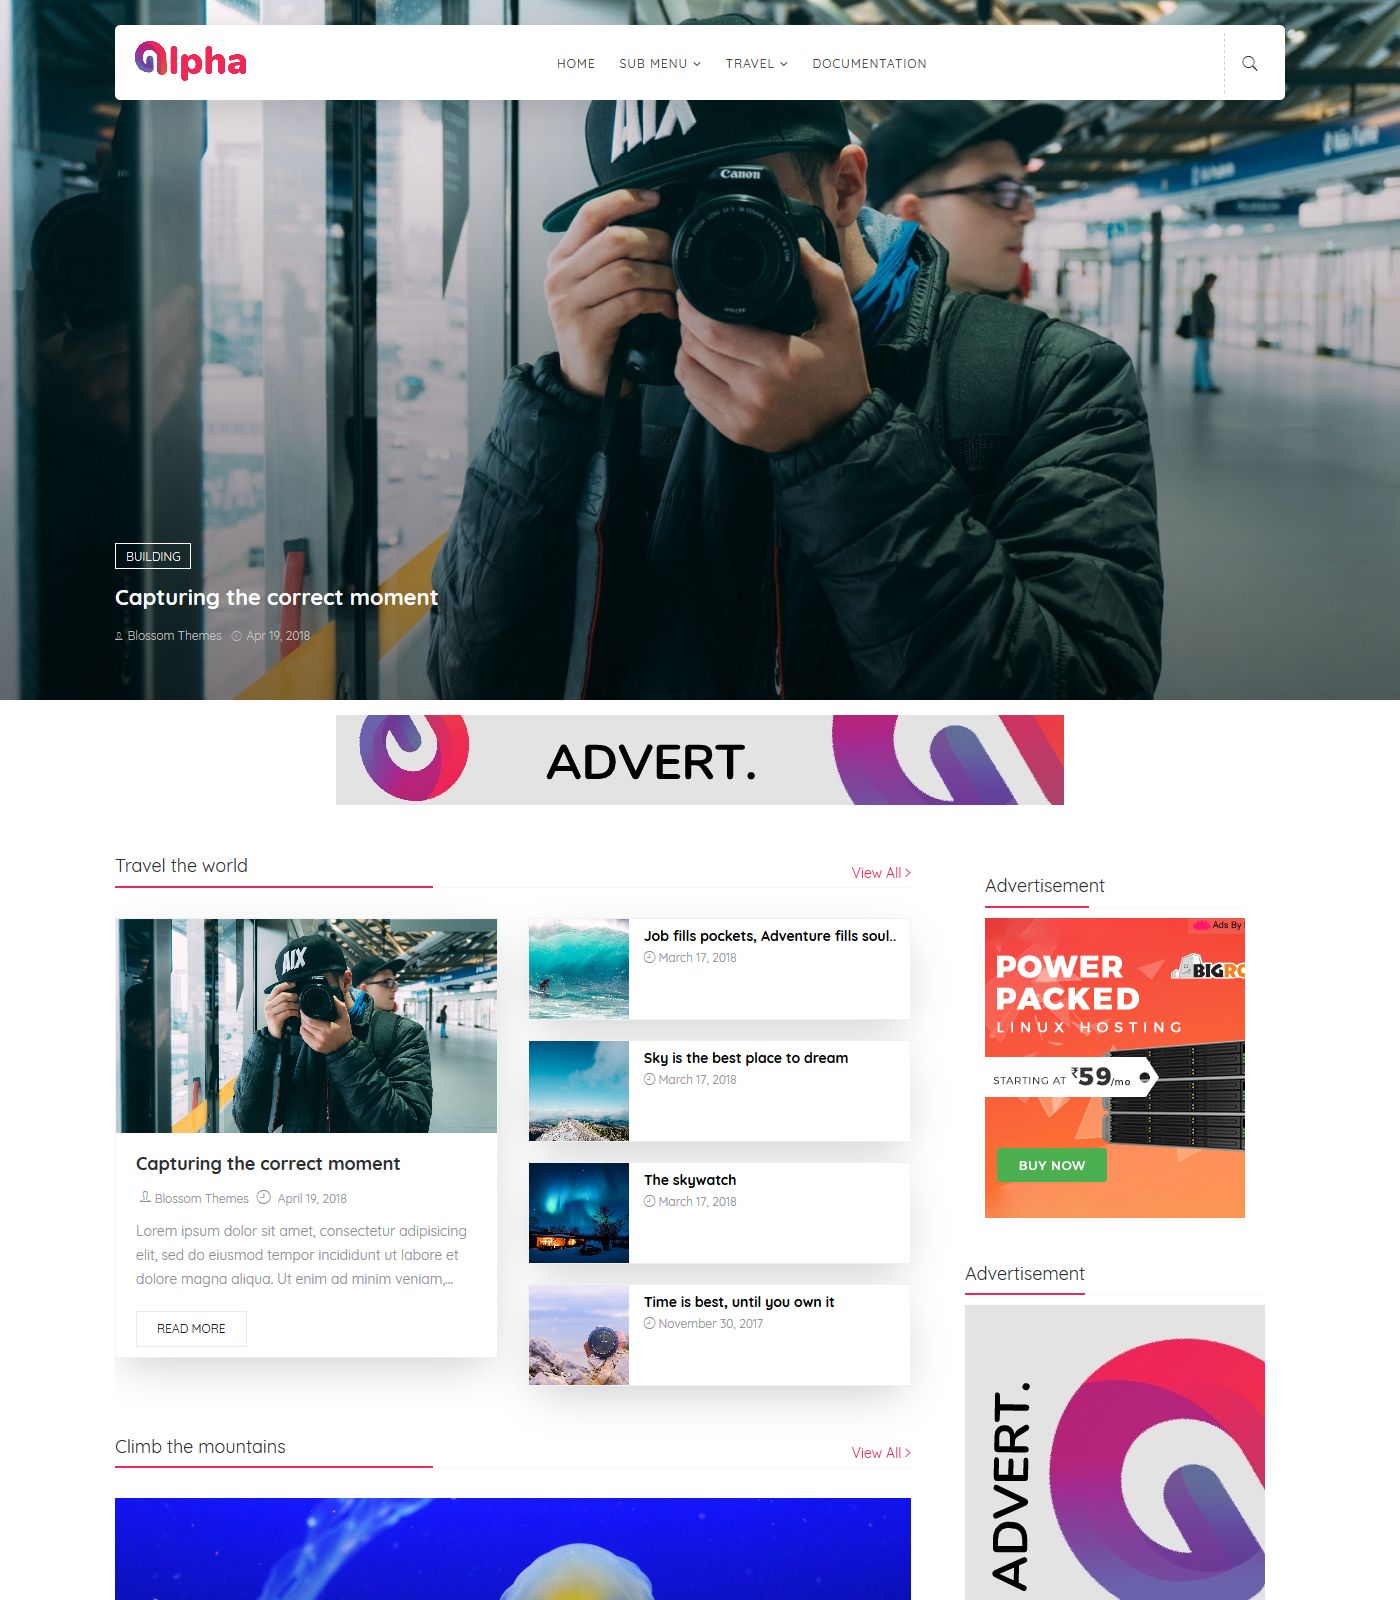
Alpha is the most advanced and best blogger template we have ever made. Alpha is full off features and widgets which will give your blog a stunning and professional look. Alpha magazine template is a clean, modern, user friendly, fast-loading, customizable, flexible, functional and fully responsive Blogger/Blogspot News, Magazine, Newspaper, and blog Theme. it is useful and powerful blogger Newspaper, Magazine and Blog template with great attention to details, incredible features, an intuitive user interface and everything else you need to create outstanding websites.
Customized blogger Template @ $25 : https://www.fiverr.com/s2/ceb7759ae8
Documentation
<style>h3.demo{font-weight:600;font-size: 26px;margin-top:50px;}</style>Summery
- Installing Template
- Setting up Logo
- Setting Footer Social Icons
- Setting Navigation Menu
- Setting Post Slider Widget
- Setting Customized Widget
- Setting Custom Sidebar Widget
- Setting Comment System
- Setting Author Description
- Setting Author Social Links
- Setting number of posts on each page
1. Installing Template
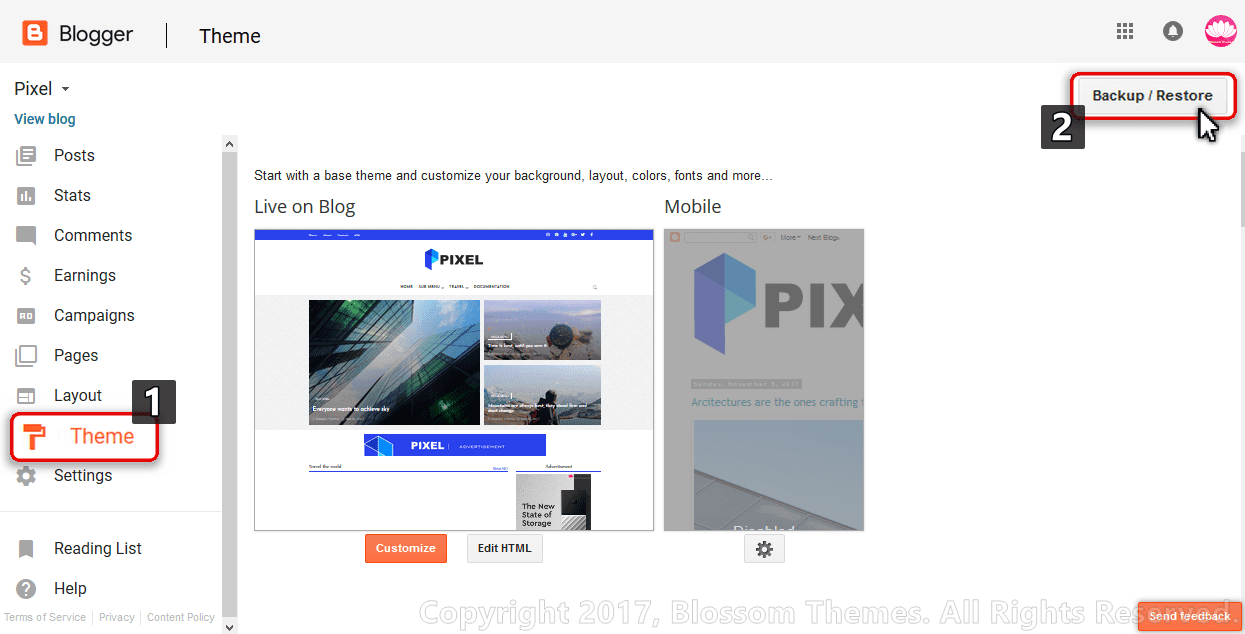
- Extract the obtained zip file and look for
Alpha Blogger Template.xml - Go to your blogger dashboard and inside the template tab click on
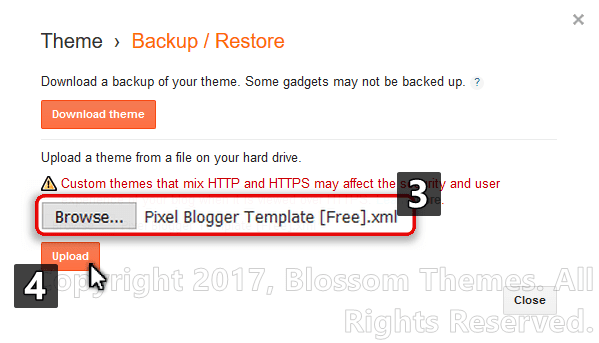
Backup/Restoreoption located at top right corner. - Now click on the browse button and select the extracted template file,
Alpha Blogger Template.xml. - Now click on the
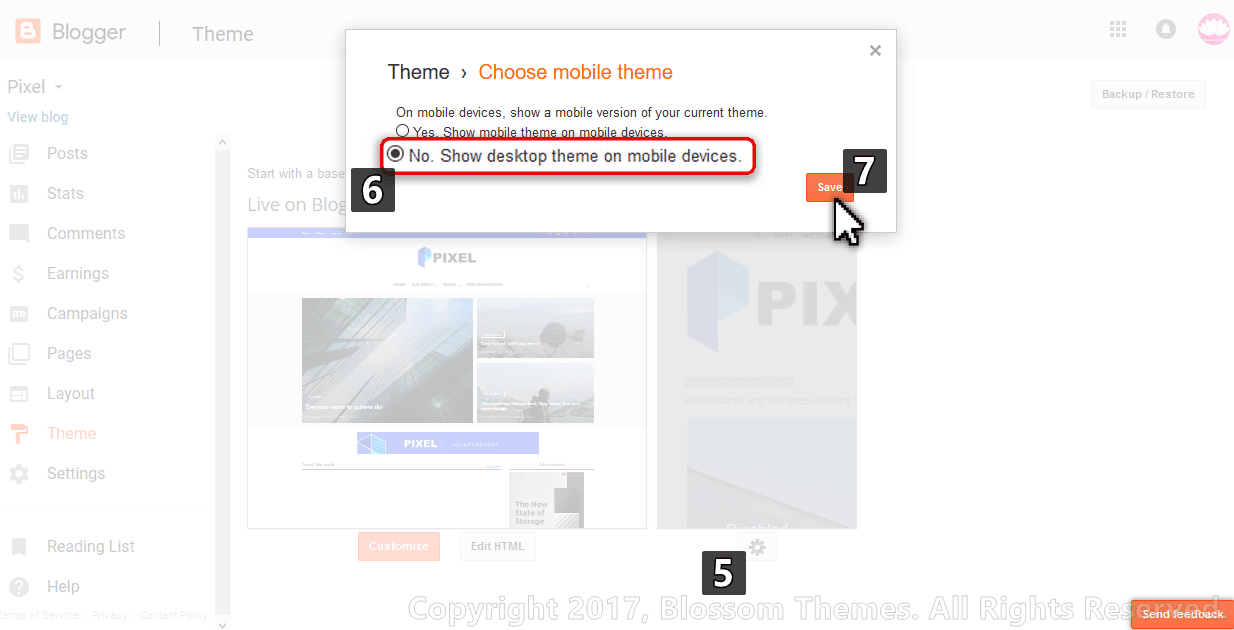
uploadbutton. - After installing click on the “
gear icon” in the theme section and select “No. Show desktop theme on mobile devices.” and click on save.
2. Setting up Logo
- Login to your blogger account and go to “
Layout” tab. - In the layout tab, look for the
Blog Logoand click on “Edit“. - Click on the “
Browse” button and select your respective logo. - Select the option ”
Instead of title and description” - Now click on the save button and also click on “
save arrangement” button at top right corner.
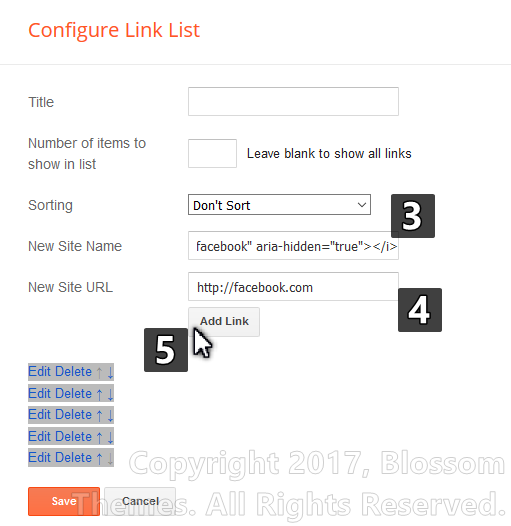
3. Footer Social Icons
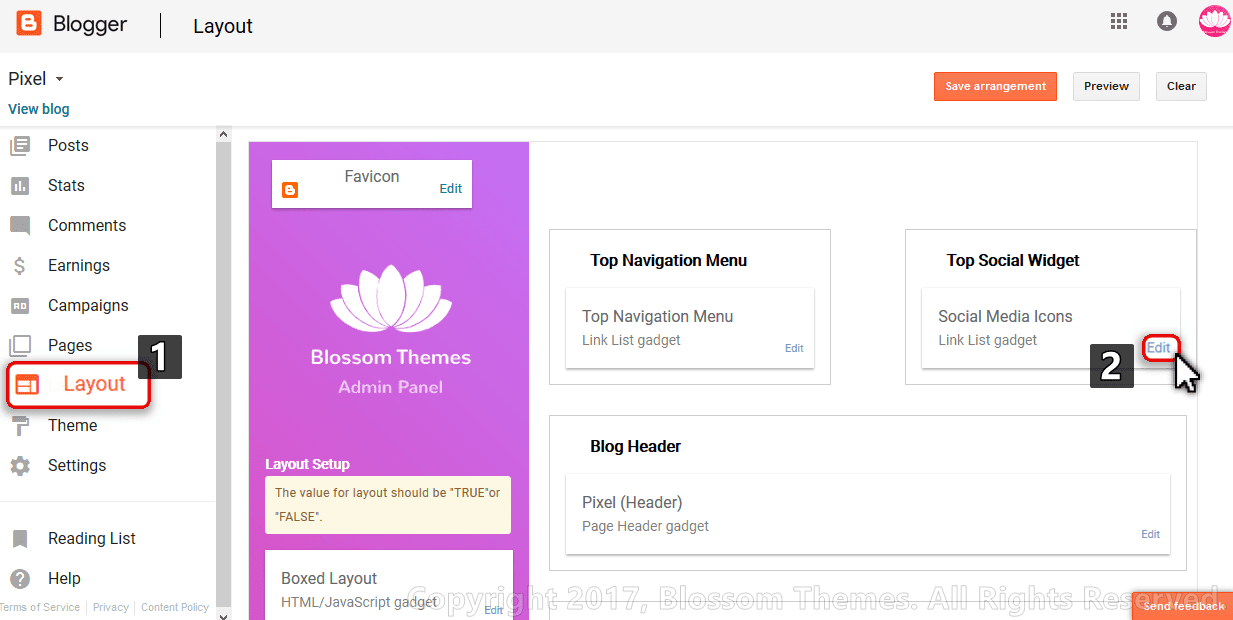
- Login to your blogger account and go to “
Layout” tab. - In the layot tab, look for the “
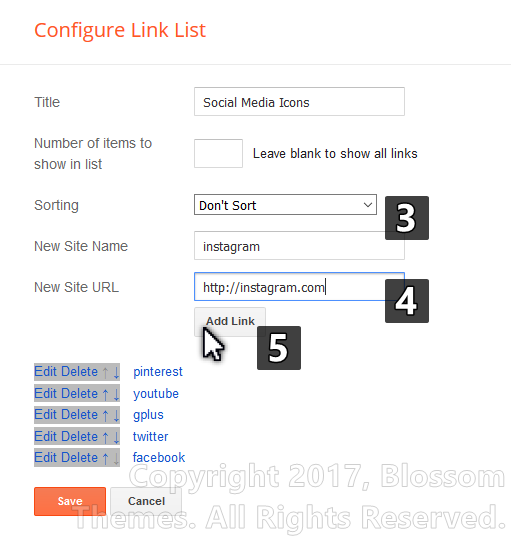
Top Social widget” and click on the “Edit“. - In the input for “
New site name” type the name of social media.
[facebook, twitter, gplus, youtube, pinterest, instagram, codepen, linkedin, skype, dropbox, wordpress, vimeo, slideshare, vk, tumblr, yahoo, stumbleupon, reddit, quora, yelp, weibo, phunt, hackernews, soundcloud, whatsapp, wechat, vine, slack, dribbble, flickr, foursquare, behance, rss, stack-overflow, digg, delicious] - In the input for “
New site url” type the location of your social media profile. - Now click on the “
Add link button” as shown in the image and click on save widget.
4. Setting Navigation Menu
- Login to your blogger account and go to the “
Layout” tab. - In the layout tab, look for the widget “
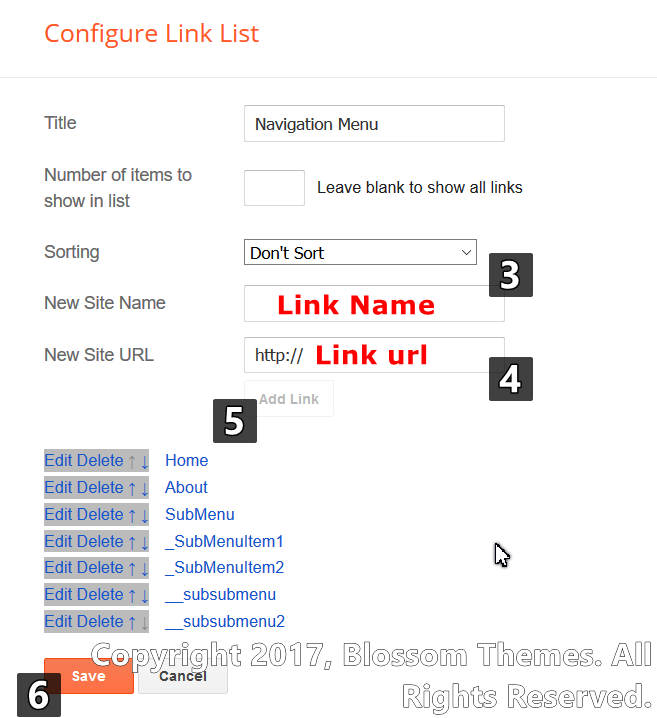
Main Menu” and click on “Edit“. - In the text input of new site name enter your Link name.
- In the text input for new site url, provide your link url.
- Now click on the add link button.
- For the SubMenu add “
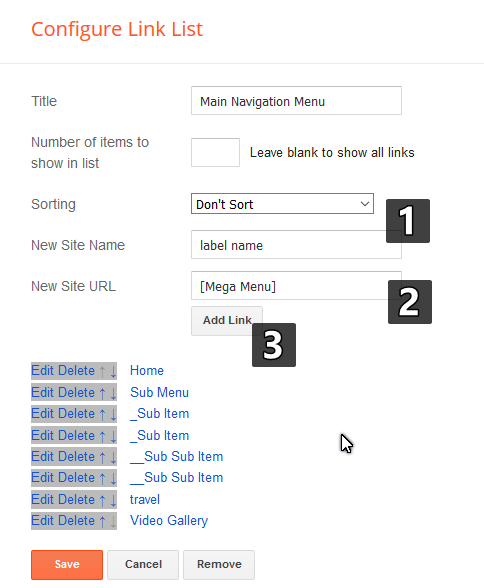
_” (One underscore) before the name of the link. For the Sub Sub menu add “__” (Double underscore) before the name of link. - For setting up the
Mega Menuin the input for new site name insert the label name for which you want to show the mega menu and in the input for url add “[Mega Menu]” as shown in image below. - Save the widget and the layout arrangements.
5. Setting Post Slider Widget
- Login to your blogger account and go to “
Layout” tab. - In the layout tab, look for the widget “
Featured” and click on “Edit“. - In the content area place
<span data-type="alphafeatured" data-slides="Number of slides" data-label="LABEL NAME"></span>
.
- Now click on save and save the arrangements.
6. Setting Customized Widget
- Alpha theme comes with the 2 customized widget, to setup them go to the “
Layout” tab. - In the layout area look for the “
customizing widget” section and add the “HTML/JavaScript” widget. - As per your layout decision add the respective code in the content area of the “
HTML” widget.
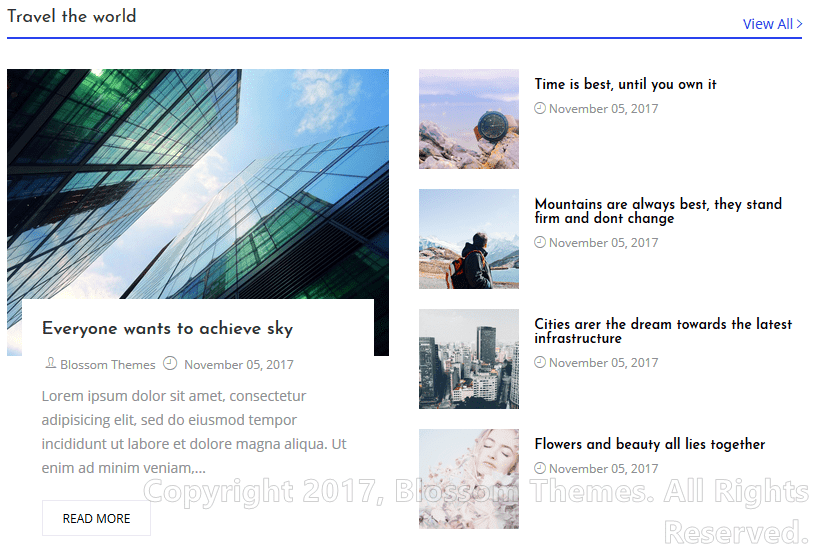
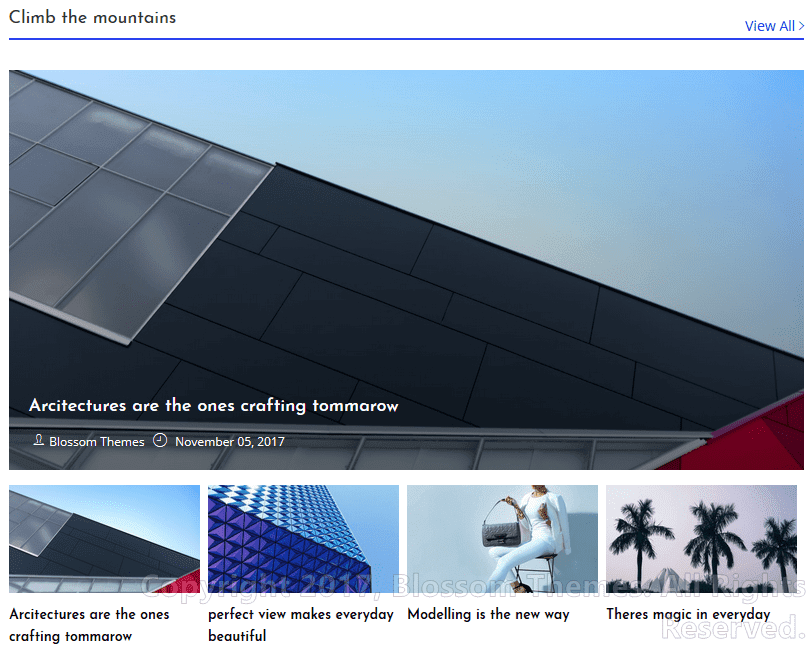
Widget Type Code <object class='alpha-widget' data-label='LABEL NAME' data-type='list'></object>
<object class='alpha-widget' data-label='LABEL NAME' data-type='gallery'></object>
- Change the text in red with your label and click on save widget.
7. Setting Custom Sidebar Widget
- Alpha Themes come with the different sidebar widget options. To setup them go to the “
Layout” tab. - In the layout tab look for the sidebar/tabs section and add the “
HTML/JavaScript” widget. - As per your requirement add the respective code shown in the table below.
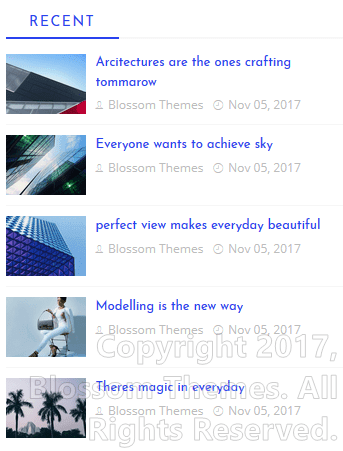
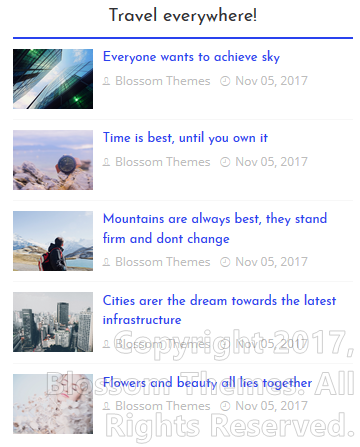
Widget Type Code <span class="alpha-recent" data-no="5"></span>
<span class="alpha-tagswid" data-no="5" data-label='LABEL NAME'></span>
<span class="alpha-cmnt" data-no="5"></span>
- Now click on save. [Note: If you are setting up the label post widget make sure you change the label name as per yours.]
8. Setting Comment System
- Login to your blogger account and go to “
Layout” tab. - In the layout tab, look for the widget “
Comment System” and click on “Edit“. - In the content area place the respective code for the combination of comment system from the following list.
[facebook]
[disqus]
[facebook][disqus]
[blogger][facebook]
[facebook][blogger]
[disqus][facebook][blogger]
[blogger][disqus][facebook] - Now click on save and save the arrangements.
9. Setting Author Description
- Login to your blogger account and go to “
Layout” tab. - In the layout tab, look for the widget in the admin bar, “
Author details” and click on “Edit“. - In the content area place the description about author which will be shown at bottom of post.
- Now click on save and save the arrangements.
12. Setting Author Social Links
- Login to your blogger account and go to “
Layout” tab. - In the layout tab, look for the widget in the admin bar, “
Post Author Social Profile” and click on “Edit“. - Now in another window open the link
http://fontawesome.io/icons/and search for your social media icon and click on them. - In the new window copy the code shown in the image below.
- Now go back to the window open earlier by clicking on edit button. In the input for “
New site name” place the code we just copied. - In the input for the “
New site url” place the location/profile url for the respected icon. - Now click on add link button. Once all icons are added click on save.
10. Setting number of posts on each page
- Login to your blogger account and go to “
Layout” tab. - In the layout tab, look for the widget in the admin bar, “
Posts per page” and click on “Edit“. - In the content area place the number of posts you want to show on each page.
- Now click on save and save the arrangements.
</div>
