Test the Armadillo PCB v0.4.1
The Armadillo PCB is an LED matrix with individually-addressable pixels and high refresh rate. It is controlled by serial (CLK and SIN pins) with latch (LAT pin). It has two operating modes: Dot Correction Mode and On/Off Mode (MOD pin).
- Flash Arduino with provided code
- Verify light pattern
- Computer (Linux, Windows, or Mac)
- Arduino Due
- Micro USB Cable
- 9v DC Power Supply
- Printer paper (2 sheets)
- The LEDs are very bright. Cover them with at least 2 sheets of printer paper to protect your eyes.
- Download and install Arduino IDE
- Use micro USB cable to connect the computer to the Arduino Due's programming port (located in the center, between USB peripheral port and barrel connector).
- Inside Arduino IDE...
- When prompted, install Arduino Due software
Arduino SAM Boards. - Open
armadillo-pcb-test.inofrom this repository. - Select Tools > Board >
Arduino Due (Programming Port). - Select Tools > Port > COM# (for example, COM3). Normally only one COM is shown.
- Click Upload. Make sure it is successful.
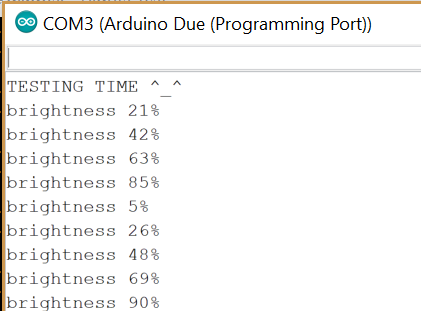
- Go to Tools > Serial Monitor. Expect output:

- When prompted, install Arduino Due software
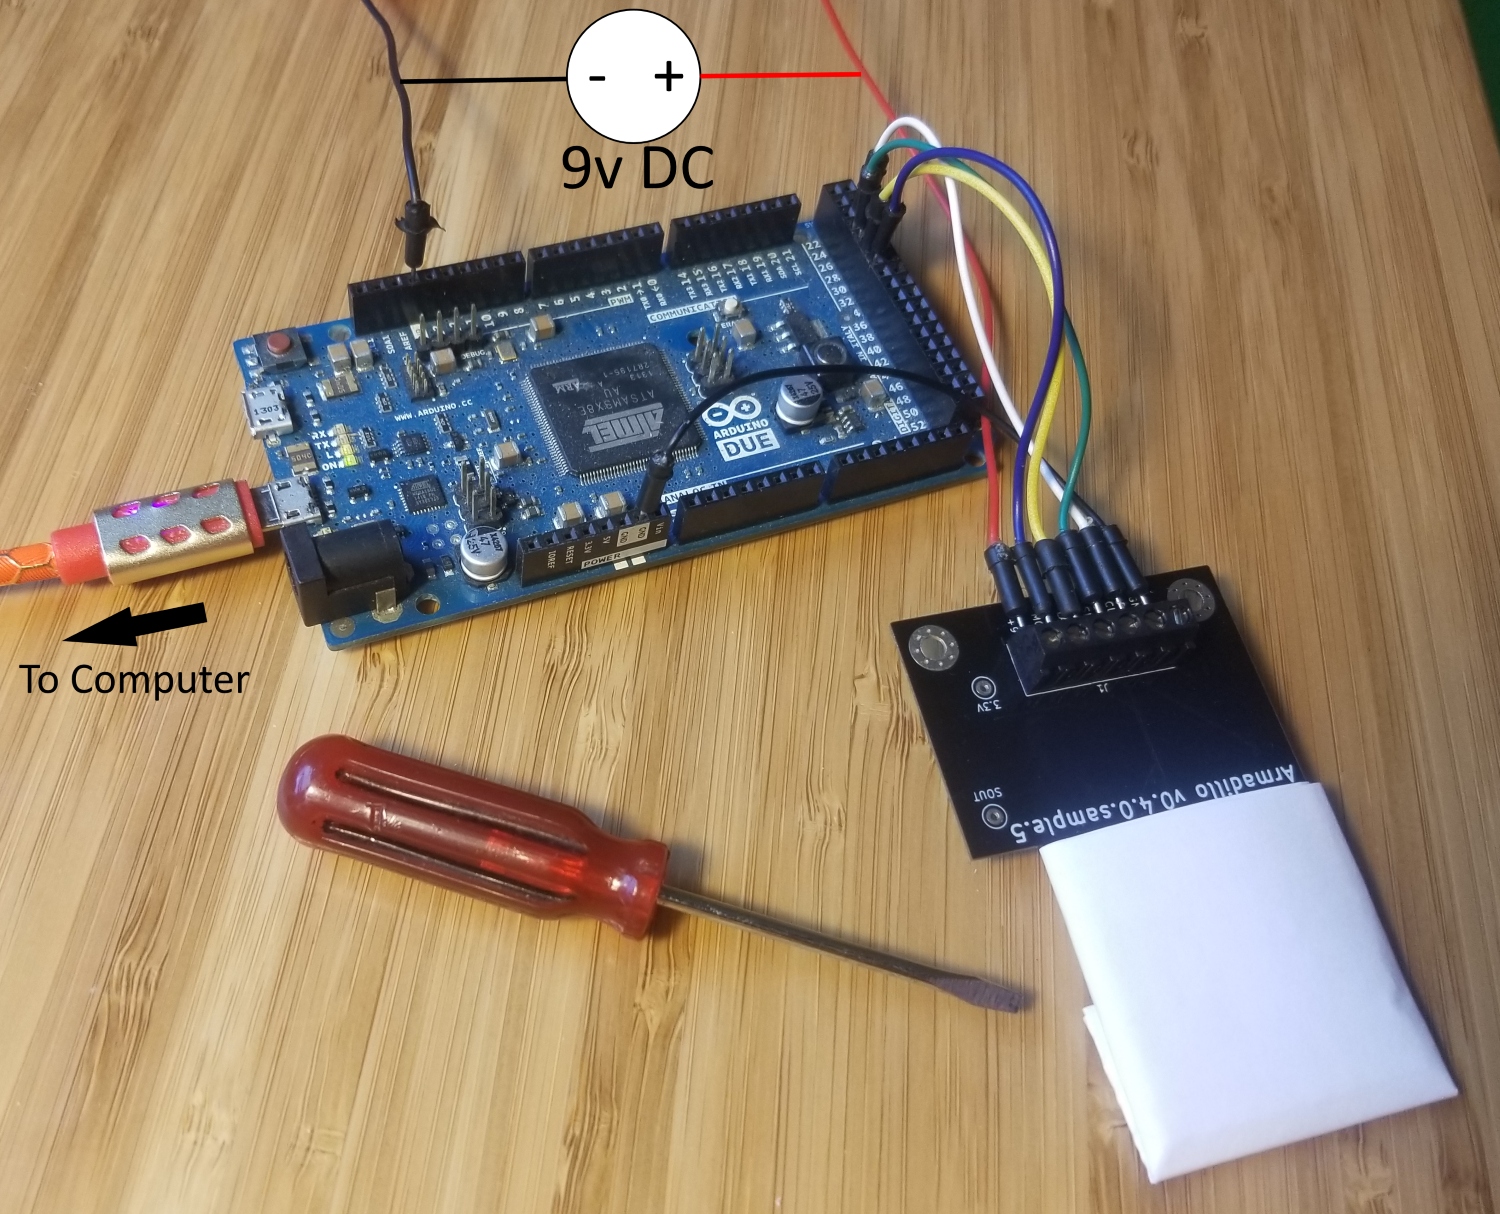
- Connect 9v DC power supply negative (-) to Arduino GND.
- Connect all 6 positions of PCB's J1 terminal block:
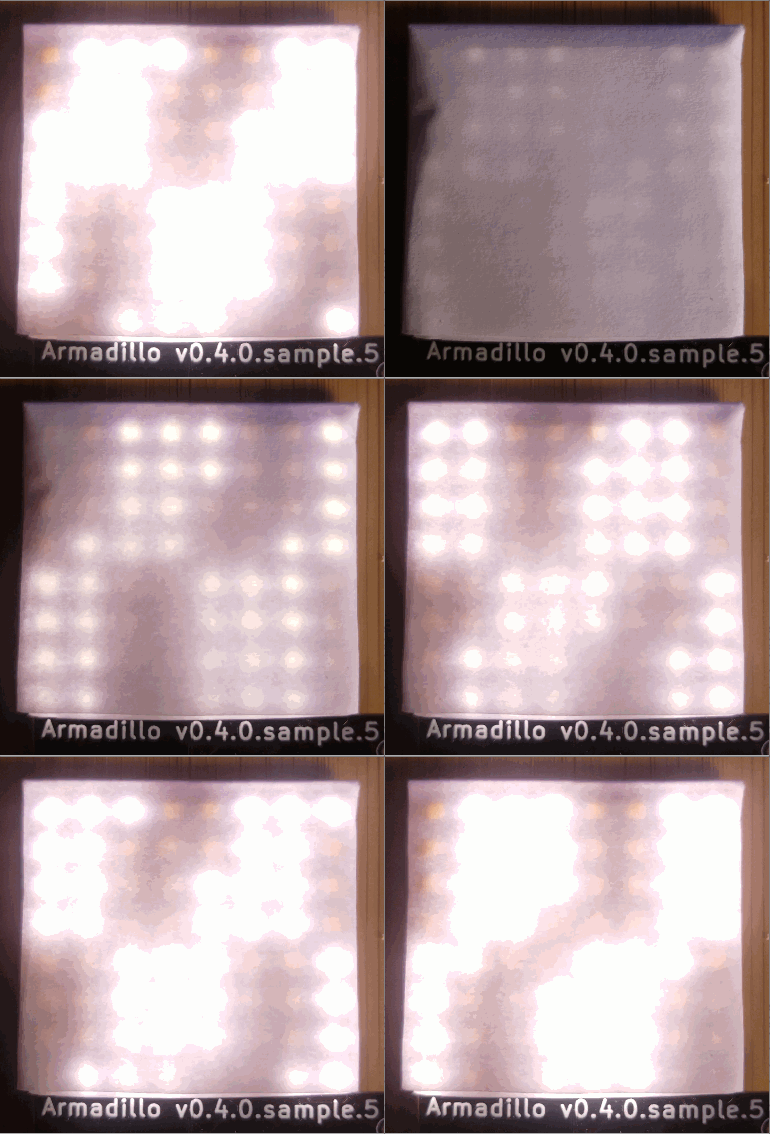
- Turn on 9v DC power supply. Look for the snake pattern across all LEDs. Expect brightness to cycle every second.

