Pytorch implementation of the paper PFGM++: Unlocking the Potential of Physics-Inspired Generative Models
by Yilun Xu, Ziming Liu, Yonglong Tian, Shangyuan Tong, Max Tegmark, Tommi S. Jaakkola
[Slide]
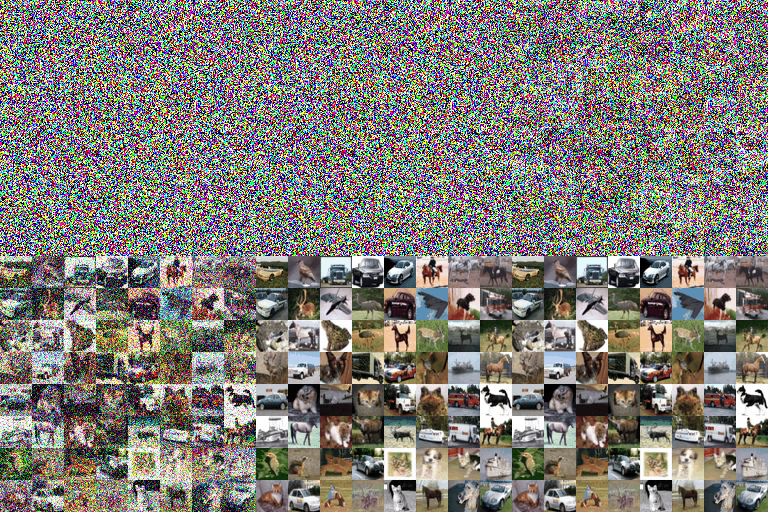
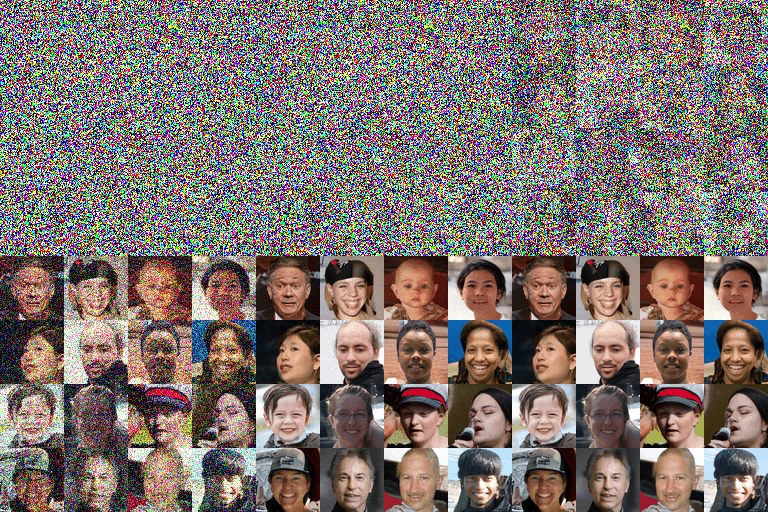
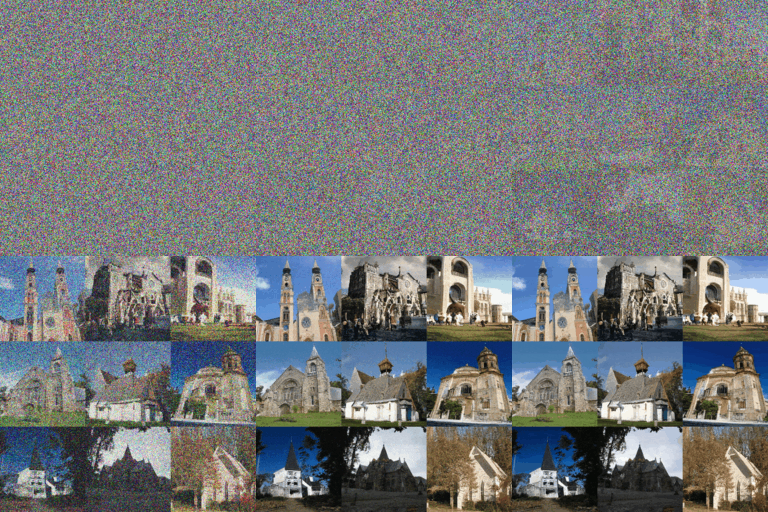
| CIFAR-10 | FFHQ-64 | LSUN-Church-256 |
|---|---|---|
 |
 |
 |
😇 Improvements over PFGM / Diffusion Models:
- No longer require the large batch training target in PFGM, thus enable flexible conditional generation and more efficient training!
- More general
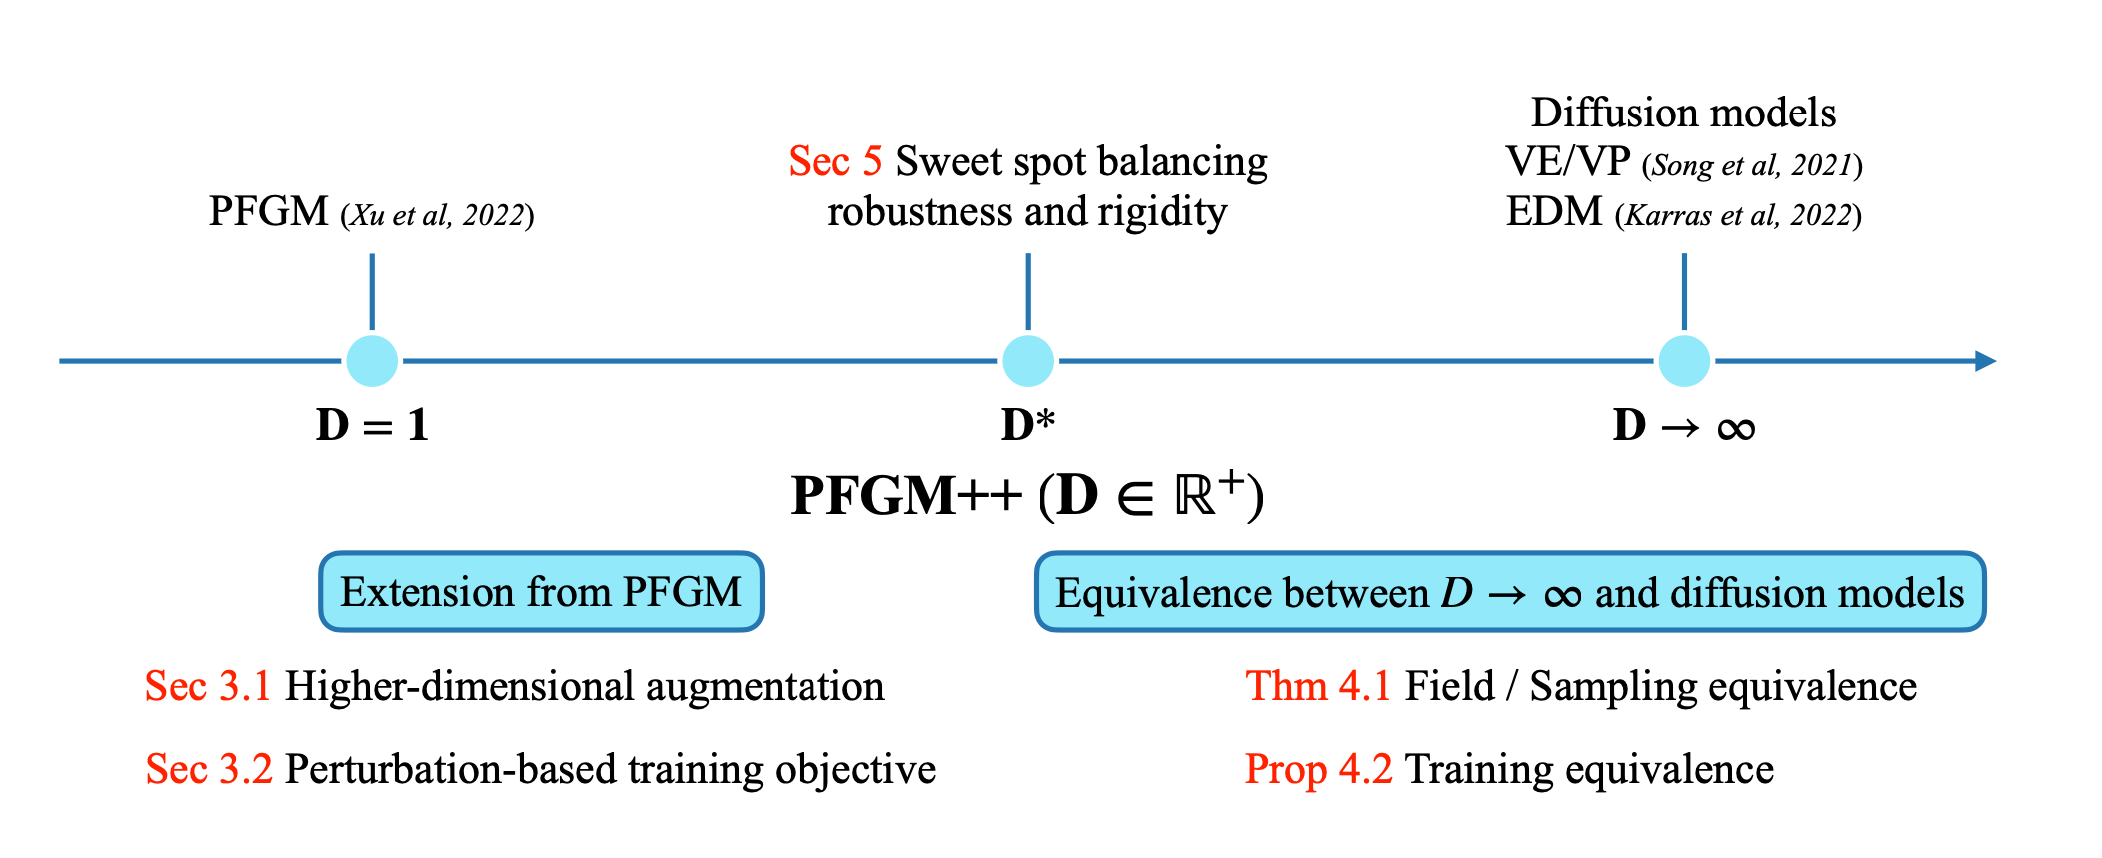
$D \in \mathbb{R}^+$ dimensional augmented variable. PFGM++ subsumes PFGM and Diffusion Models: PFGM correspond to$D=1$ and Diffusion Models correspond to$D\to \infty$ . - Existence of sweet spot
$D^*$ in the middle of$(1,\infty)$ ! - Smaller
$D$ more robust than Diffusion Models ($D\to \infty$ ) - Enable the adjustment for model robustness and rigidity!
- Enable direct transfer of well-tuned hyperparameters from any existing Diffusion Models (
$D\to \infty$ )
Abstract: We present a general framework termed PFGM++ that unifies diffusion models and Poisson Flow Generative Models (PFGM). These models realize generative trajectories for
Our implementation is built upon the EDM repo. We first provide an guidance on how to quickly transfer the hyperparameter from well-tuned diffusion models (
We also provide the original instruction for set-ups, such as environmental requirements and dataset preparation, from EDM repo.
Below we provide the guidance for how to quick transfer the well-tuned hyperparameters for diffusion models (
😀 Please adjust the augmented dimension
Training hyperparameter transfer. The example we provide is a simplified version of loss.py in this repo.
def train(y, N, D, pfgmpp):
  '''
  y: mini-batch clean images
  N: data dimension
  D: augmented dimension
  pfgmpp: use PFGM++ framework, otherwise diffusion models (D\to\infty case). options: 0 | 1
  '''

  if not pfgmpp:
    ###################### === Diffusion Model === ######################
    rnd_normal = torch.randn([images.shape[0], 1, 1, 1], device=images.device)
    sigma = (rnd_normal * self.P_std + self.P_mean).exp() # sample sigma from p(\sigma)
    n = torch.randn_like(y) * sigma
    D_yn = net(y + n, sigma)
    loss = (D_yn - y) ** 2
    ###################### === Diffusion Model === ######################
  else:
    ###################### === PFGM++ === ######################
    rnd_normal = torch.randn(images.shape[0], device=images.device)
    sigma = (rnd_normal * self.P_std + self.P_mean).exp() # sample sigma from p(\sigma)
    r = sigma.double() * np.sqrt(self.D).astype(np.float64) # r=sigma\sqrt{D} formula

    # = sample noise from perturbation kernel p_r = #
    # Sampling form inverse-beta distribution
    samples_norm = np.random.beta(a=self.N / 2., b=self.D / 2.,
                                 size=images.shape[0]).astype(np.double)
    inverse_beta = samples_norm / (1 - samples_norm +1e-8)
    inverse_beta = torch.from_numpy(inverse_beta).to(images.device).double()
    # Sampling from p_r(R) by change-of-variable (c.f. Appendix B)
    samples_norm = (r * torch.sqrt(inverse_beta +1e-8)).view(len(samples_norm), -1)
    # Uniformly sample the angle component
    gaussian = torch.randn(images.shape[0], self.N).to(samples_norm.device)
    unit_gaussian = gaussian / torch.norm(gaussian, p=2, dim=1, keepdim=True)
    # Construct the perturbation
    perturbation_x = (unit_gaussian * samples_norm).float()
    # = sample noise from perturbation kernel p_r = #

    sigma = sigma.reshape((len(sigma), 1, 1, 1))
    n = perturbation_x.view_as(y)
    D_yn = net(y + n, sigma)
    loss = (D_yn - y) ** 2
    ###################### === PFGM++ === ######################
Sampling hyperparameter transfer. The example we provide is a simplified version of generate.py in this repo. As shown in the figure below, the only modification is the prior sampling process. Hence we only include the comparison of prior sampling for diffusion models / PFGM++ in the code snippet.
def generate(sigma_max, N, D, pfgmpp)
  '''
  sigma_max: starting condition for diffusion models
  N: data dimension
  D: augmented dimension
  pfgmpp: use PFGM++ framework, otherwise diffusion models (D\to\infty case). options: 0 | 1
  '''
  if not pfgmpp:
    ###################### === Diffusion Model === ######################
    x = torch.randn_like(data_size) * sigma_max
    ###################### === Diffusion Model === ######################
  else:
    ###################### === PFGM++ === ######################
    # Sampling form inverse-beta distribution
    r = sigma_max * np.sqrt(self.D) # r=sigma\sqrt{D} formula
    samples_norm = np.random.beta(a=self.N / 2., b=self.D / 2.,
                                  size=data_size).astype(np.double)
    inverse_beta = samples_norm / (1 - samples_norm +1e-8)
    inverse_beta = torch.from_numpy(inverse_beta).to(images.device).double()
    # Sampling from p_r(R) by change-of-variable (c.f. Appendix B)
    samples_norm = (r * torch.sqrt(inverse_beta +1e-8)).view(len(samples_norm), -1)
    # Uniformly sample the angle component
    gaussian = torch.randn(images.shape[0], self.N).to(samples_norm.device)
    unit_gaussian = gaussian / torch.norm(gaussian, p=2, dim=1, keepdim=True)
    # Construct the perturbation
    x = (unit_gaussian * samples_norm).float().view(data_size)
    ###################### === PFGM++ === #######################


  ########################################################

  # Heun's 2nd order method (aka improved Euler method)  #

  ########################################################
Please refer to Appendix C.2 for detailed hyperparameter transfer procedures from EDM and DDPM.
You can train new models using train.py. For example:
torchrun --standalone --nproc_per_node=8 train.py --outdir=training-runs --name exp_name \
--data=datasets/cifar10-32x32.zip --cond=0 --arch=arch \
--pfgmpp=1 --batch 512 \
--aug_dim aug_dim (--resume resume_path)

exp_name: name of experiments
aug_dim: D (additional dimensions)
arch: model architectures. options: ncsnpp | ddpmpp
pfgmpp: use PFGM++ framework, otherwise diffusion models (D\to\infty case). options: 0 | 1
resume_path: path to the resuming checkpoint
The above example uses the default batch size of 512 images (controlled by --batch) that is divided evenly among 8 GPUs (controlled by --nproc_per_node) to yield 64 images per GPU. Training large models may run out of GPU memory; the best way to avoid this is to limit the per-GPU batch size, e.g., --batch-gpu=32. This employs gradient accumulation to yield the same results as using full per-GPU batches. See python train.py --help for the full list of options.
The results of each training run are saved to a newly created directory training-runs/exp_name . The training loop exports network snapshots training-state-*.pt) at regular intervals (controlled by --dump). The network snapshots can be used to generate images with generate.py, and the training states can be used to resume the training later on (--resume). Other useful information is recorded in log.txt and stats.jsonl. To monitor training convergence, we recommend looking at the training loss ("Loss/loss" in stats.jsonl) as well as periodically evaluating FID for training-state-*.pt using generate.py and fid.py.
For FFHQ dataset, replacing --data=datasets/cifar10-32x32.zip with --data=datasets/ffhq-64x64.zip
Sidenote: The original EDM repo provide more dataset: FFHQ, AFHQv2, ImageNet-64. We did not test the performance of PFGM++ on these datasets due to limited computational resources. However, we believe that the some finte $D$s (sweet spots) would beat the diffusion models (the
-
Generate 50k samples:
torchrun --standalone --nproc_per_node=8 generate.py \
--seeds=0-49999 --outdir=./training-runs/exp_name \
--pfgmpp=1 --aug_dim=aug_dim (--use_pickle=1)(--save_images)

exp_name: name of experiments
aug_dim: D (additional dimensions)
arch: model architectures. options: ncsnpp | ddpmpp
pfgmpp: use PFGM++ framework, otherwise diffusion models (D\to\infty case). options: 0 | 1. (default:0)
use_pickle: when the checkpoints are stored in pickle format (.pkl). (default:0)
Note that the numerical value of FID varies across different random seeds and is highly sensitive to the number of images. By default, fid.py will always use 50,000 generated images; providing fewer images will result in an error, whereas providing more will use a random subset. To reduce the effect of random variation, we recommend repeating the calculation multiple times with different seeds, e.g., --seeds=0-49999, --seeds=50000-99999, and --seeds=100000-149999. In the EDM paper, they calculated each FID three times and reported the minimum.
For the FID versus controlled generate_alpha.py/generate_steps.py/generate_quant.py for generation.
-
FID evaluation
torchrun --standalone --nproc_per_node=8 fid.py calc --images=training-runs/exp_name --ref=fid-refs/cifar10-32x32.npz --num 50000

exp_name: name of experiments
All checkpoints are provided in this Google drive folder. We borrow the dataset specific hyperparameters, e.g. batch size, learning rate, etc, from EDM repo. Please refer to that repo for hyperparameters if you wish to try more datasets, like ImageNet 64. Some of the checkpoints are in .pkl format (due to a historical reason), please the --use_pickle=1 flag when using the generate.py for image generation. Please download the checkpoint into the designated ./training-runs/exp_name folder before running the generation command above.
| Model | Checkpoint path | FID | Options | |
|---|---|---|---|---|
| cifar10-ncsnpp-D-128 | pfgmpp/cifar10_ncsnpp_D_128/ |
128 | 1.92 | --cond=0 --arch=ncsnpp --pfgmpp=1 --aug_dim=128 |
| cifar10-ncsnpp-D-2048 | pfgmpp/cifar10_ncsnpp_D_2048/ |
2048 | 1.91 | --cond=0 --arch=ncsnpp --pfgmpp=1 --aug_dim=2048 |
| cifar10-ncsnpp-D-2048-conditional | pfgmpp/cifar10_ncsnpp_D_2048_conditional/ |
2048 | 1.74 | --cond=1 --arch=ncsnpp --pfgmpp=1 --aug_dim=2048 |
| cifar10-ncsnpp-D-inf (EDM) | pfgmpp/cifar10_ncsnpp_D_inf/ |
1.98 | --cond=0 --arch=ncsnpp |
|
| ffhq-ddpm-D-128 | pfgmpp/ffhq_ddpm_D_128/ |
128 | 2.43 | --cond=0 --arch=ddpmpp --batch=256 --cres=1,2,2,2 --lr=2e-4 --dropout=0.05 --augment=0.15 --pfgmpp=1 --aug_dim=128 |
| ffhq-ddpm-D-inf (EDM) | pfgmpp/ffhq_ddpm_D_inf/ |
2.53 | --cond=0 --arch=ddpmpp --batch=256 --cres=1,2,2,2 --lr=2e-4 --dropout=0.05 --augment=0.15 |
- Python libraries: See
environment.ymlfor exact library dependencies. You can use the following commands with Miniconda3 to create and activate your Python environment:conda env create -f environment.yml -n edmconda activate edm
- Docker users:
- Ensure you have correctly installed the NVIDIA container runtime.
- Use the provided Dockerfile to build an image with the required library dependencies.
Datasets are stored in the same format as in StyleGAN: uncompressed ZIP archives containing uncompressed PNG files and a metadata file dataset.json for labels. Custom datasets can be created from a folder containing images; see python dataset_tool.py --help for more information.
CIFAR-10: Download the CIFAR-10 python version and convert to ZIP archive:
python dataset_tool.py --source=downloads/cifar10/cifar-10-python.tar.gz \
    --dest=datasets/cifar10-32x32.zip
python fid.py ref --data=datasets/cifar10-32x32.zip --dest=fid-refs/cifar10-32x32.npz
FFHQ: Download the Flickr-Faces-HQ dataset as 1024x1024 images and convert to ZIP archive at 64x64 resolution:
python dataset_tool.py --source=downloads/ffhq/images1024x1024 \
    --dest=datasets/ffhq-64x64.zip --resolution=64x64
python fid.py ref --data=datasets/ffhq-64x64.zip --dest=fid-refs/ffhq-64x64.npz
AFHQv2: Download the updated Animal Faces-HQ dataset (afhq-v2-dataset) and convert to ZIP archive at 64x64 resolution:
python dataset_tool.py --source=downloads/afhqv2 \
    --dest=datasets/afhqv2-64x64.zip --resolution=64x64
python fid.py ref --data=datasets/afhqv2-64x64.zip --dest=fid-refs/afhqv2-64x64.npz
ImageNet: Download the ImageNet Object Localization Challenge and convert to ZIP archive at 64x64 resolution:
python dataset_tool.py --source=downloads/imagenet/ILSVRC/Data/CLS-LOC/train \
    --dest=datasets/imagenet-64x64.zip --resolution=64x64 --transform=center-crop
python fid.py ref --data=datasets/imagenet-64x64.zip --dest=fid-refs/imagenet-64x64.npz


