CU Receiver System for Enforcing Drones via Remote ID (CURSED)
The module raspi-remoteid-receiver is intended to be run on a Raspberry Pi.
The folder lambda_src contains code for AWS Lambda functions.
The folder website_src contains code for the website https://cursedindustries.com.
Change to home directory, or whatever directory is desired.
cdInstall python3 virtual environment, you can skip this step if it is already installed.
sudo apt install python3-venvCreate a virtual environment
python3 -m venv remoteid-venvActivate the virtual environment
source remoteid-venv/bin/activateClone the repository.
git clone https://github.com/Nic0M/CURSED-RemoteID.gitMove into the repository and install the requirements with pip.
Make sure you have activated the virtual environment before running pip.
cd CURSED-RemoteID
pip install --upgrade pip
pip install -r requirements.txt
Install the command-line version of Wireshark tshark.
sudo apt install wiresharkSelect Yes to allow non-superusers to capture packets. Then add current user to wireshark and dialout group
sudo usermod -a -G wireshark $USER
sudo usermod -a -G dialout $USER
Make sure to reboot to apply these changes
sudo rebootsudo apt install tsharkNow copy the Open Drone ID .lua script from the git repository to the Wireshark plugins folder.
mkdir -p ~/.local/lib/wireshark/plugins
cp ~/CURSED-RemoteID/dependencies/opendroneid-dissector.lua ~/.local/lib/wireshark/plugins/
Install iw if not already installed with your Linux distribution.
sudo apt install iwInstall aircrack-ng, we specifically need airmon-ng from it.
sudo apt install aircrack-ngTo get the latest version of nRF Sniffer, follow the instructions for nRF Sniffer for Bluetooth LE. Otherwise, copy the extcap folder and profile folder into the personal wireshark folder.
mkdir ~/.config/wireshark/extcap/
# TODO FIX THIS COMMAND COPYING EXTRA DIRECTORY
cp -r ~/CURSED-RemoteID/dependencies/nrf_sniffer_for_bluetooth_le_4.1.1/extcap/ ~/.config/wireshark/extcap/
cp -r ~/CURSED-RemoteID/dependencies/nrf_sniffer_for_bluetooth_le_4.1.1/Profile_nRF_Sniffer_Bluetooth_LE ~/.local/lib/wireshark/
cd ~/CURSED-RemoteID/dependencies/nrf_sniffer_for_bluetooth_le_4.1.1/extcap
pip install -r requirements.txtSkip this step if saving files locally.
Create an S3 bucket. Create an IAM user group and assign it a policy to only allow it to write to that bucket. Create a user in that group and generate an AWS access key. Draw the rest of the owl.
Create the directory which boto3 will search for AWS credentials in
mkdir -p ~/.aws && cd ~/.awsCreate the credentials file and config file and give read and write access only to the file owner:
touch credentials && touch config
chmod 600 credentials config
With your favorite text editor, add your AWS secret access key.
credentials
[default]
aws_access_key_id = <key id goes here>
aws_secret_access_key = <secret access key goes here>
Make sure the region matches the region of the S3 bucket you created.
config
[default]
region = us-east-2
Create a new policy. In the JSON editor, paste these permissions.
Change <your-bucket-name> to the name of your bucket.
{
    "Version": "2012-10-17",
    "Statement": [
        {
            "Sid": "AllowS3Access",
            "Effect": "Allow",
            "Action": [
                "s3:GetObject",
                "s3:DeleteObject"
            ],
            "Resource": [
                "arn:aws:s3:::<your-bucket-name>/*"
            ]
        }
    ]
}
Create a role for an AWS Service, then choose Lambda. Add the policy you just created to the role.
Create a Python Lambda function and for the execution role, choose the role you just created.
Now select upload from a .zip file.
Choose the lambda_insert_into_database_deployment_package.zip located in the directory
~/CURSED-RemoteID/lambda_src/lambda_insert_into_database/.
Copy and paste the lambda_function.py file from that same directory into the lambda function code source.
Assign a trigger and create RDS database.
cd ~/CURSED-RemoteIDTo run all tests:
python -m raspi_remoteid_receiver.testsTo run a specific test suite:
python -m raspi-remoteid_receiver.tests.TEST_SUITE_NAME_GOES_HEREAvailable tests:
installation_testtests if utilities are installedaws_test
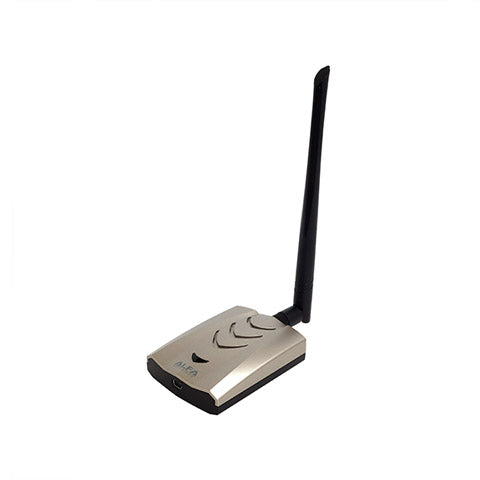
Ensure the USB network card is connected. The AFA AWUS036ACHM shown below has been used successfully with this script.
cd ~/CURSED-RemoteIDMake sure the virtual environment is activated and you have sudo permissions.
python -m raspi_remoteid_receiver.coreSet the -v or --verbose flag to show more information to the console.
python -m raspi_remoteid_receiver.core --verboseTo upload to AWS, include the flag --upload-to-aws.
You may also want to include the bucket name with --bucket-name <bucket name> (the default is 'cursed-remoteid-data').
python -m raspi_remoteid_receiver.core --upload-to-aws --bucket-name 'cursed-remoteid-data'To run without uploading, remove the --upload-to-aws flag or explicitly set --no-upload-to-aws flag after the upload flag.
python -m raspi_remoteid_receiver.core --no-upload-to-aws--disable-wifidisables Wi-Fi scanning--disable-btdisables Bluetooth scanning--upload-to-awsenables uploading to an Amazon S3 bucket--bucket-namespecifies an Amazon S3 bucket name (default is'cursed-remoteid-data')-v,--verboseenables verbose console output--debugenables debug logging--log-filespecifies a log file location (default is'logs/debug.log')
WIP
