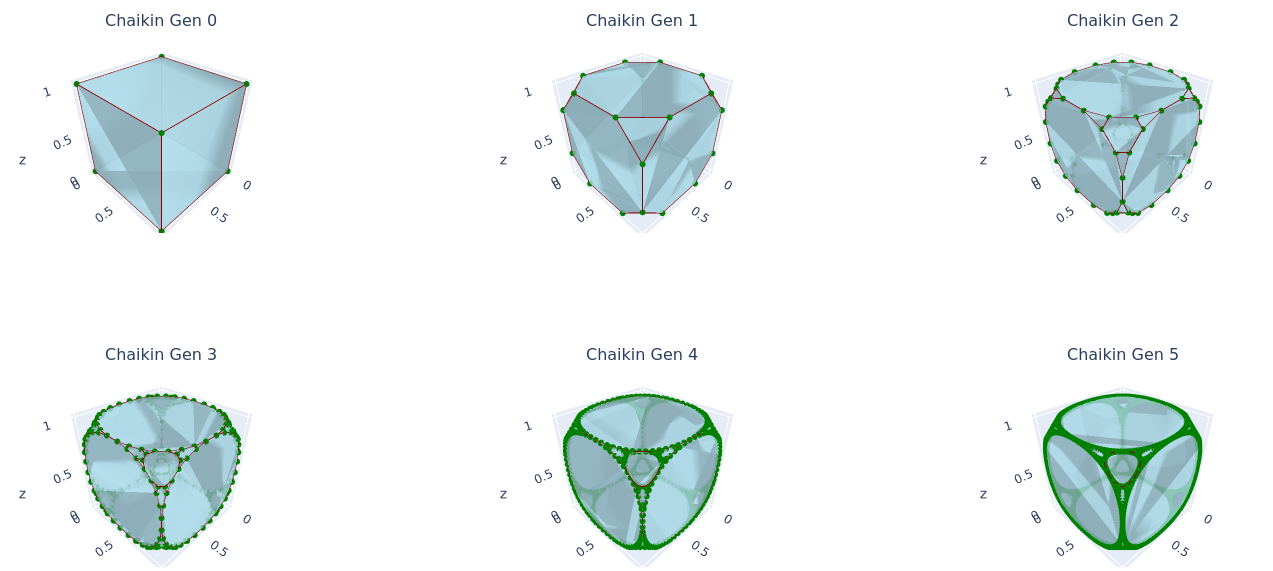
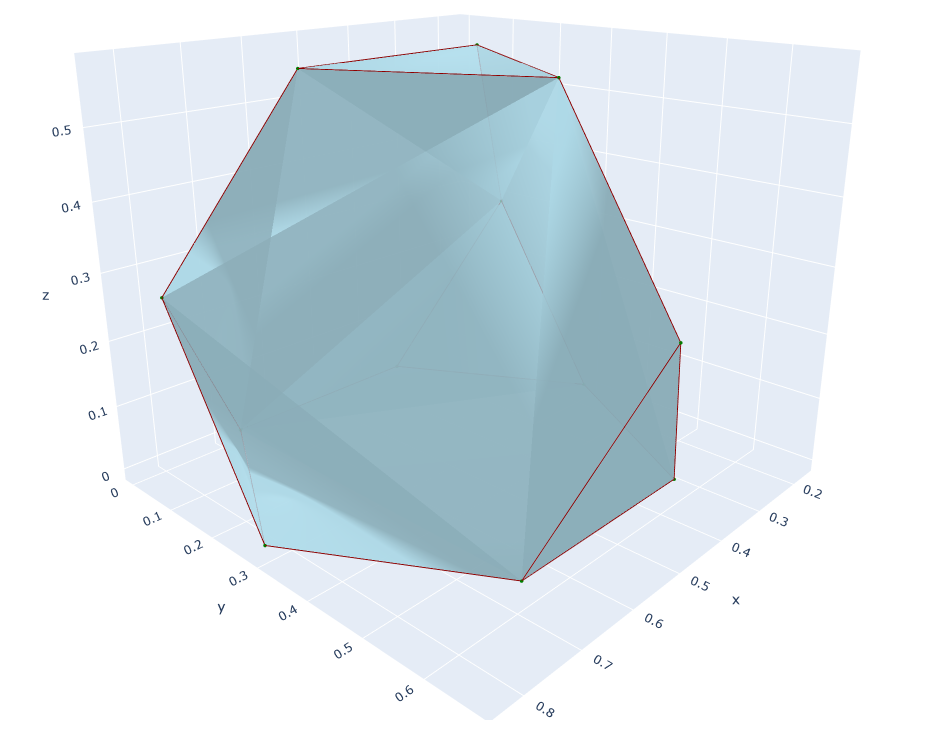
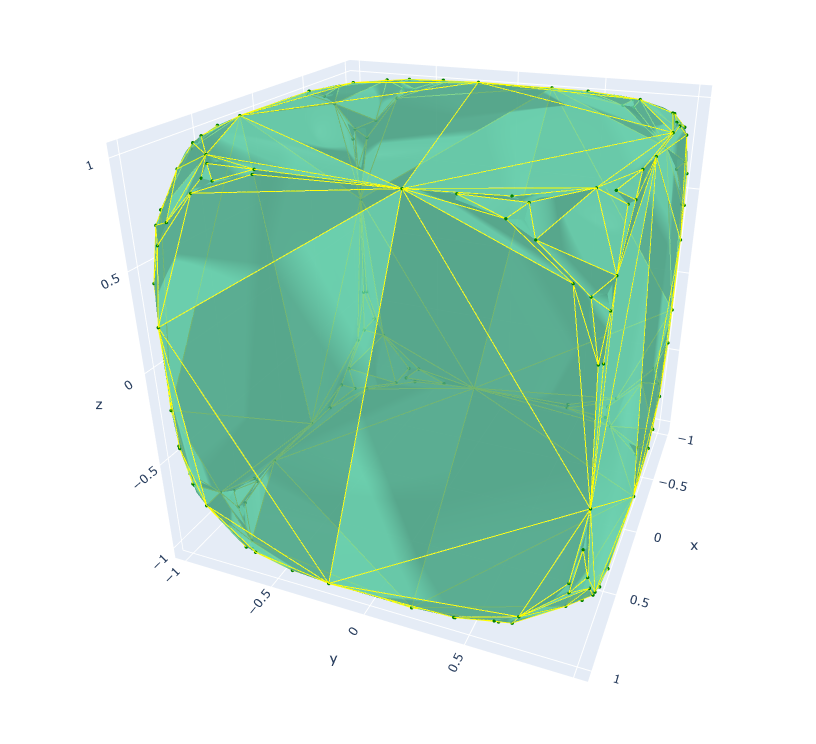
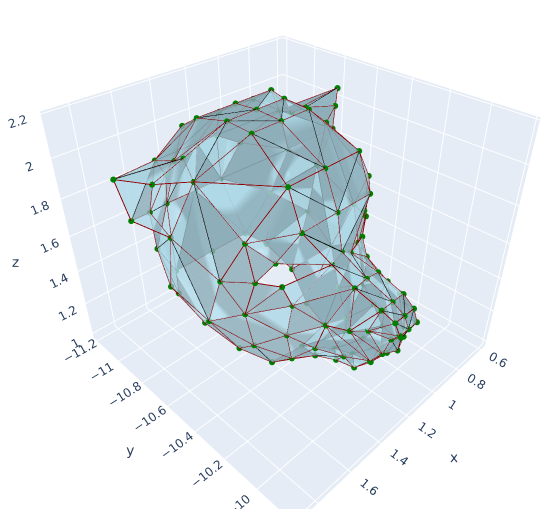
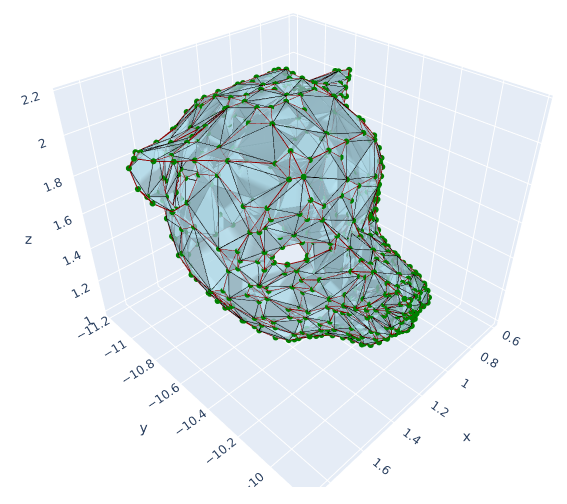
Expansion of the Chaikin Algorithm to 3D space (polyhedra).
The idea behind this project is to expand Chaikin's corner cutting algorithm to 3d polyhedra. Now you could argue (and you would be right) and tell me that Chaikin's algorithm is made for splines and lines, not for polygons, and even less for polyhedra. That might be true, but the algorithm implemented in this project is aimed at reproducing the effect it has on polygons ... on polyhedra. The corners should be cut. Sadly, this is not as easy in 3D space than it is on a 2D plane. In a polyhedron, the vertices can have a potentially infinite number of edges connected to them, whereas in a polygon on a 2D plane, a vertex would only have 2 edges connected to it (there are many more such hitches).
The results look like this :
You need to have python (version 3+) and pip installed.
Then, clone the repo :
git clone https://github.com/Nicolas-Reyland/Chaikin3D
Then you will need some python packages :
pip install -r requirements
To get full help, run python3 chaikin3d.py -h.
There are three simple steps :
- loading a mesh
- modifying the mesh
- rendering the results
Loading a polyhedron is the only thing you must do when using this program. You will get an error if you do not. The default action is to render the mesh you load.
-i/--input-rm/--rotate-mesh-oe/--order-edges
You will first have to select a polyhedron/mesh to render or use. You can load a .obj (only supported extension, for now) file using the -i (--input) option like this: python chaikin3d.py -i example-meshes/dog.obj (if you try this and the mesh is somehow rotated, please add this to your command line: -rm true).
Here is a link to lots of .obj files which you can download and test. You only need the .obj file. Only vertices and faces are read by the program.
Note: A -e argument was previously available, but was removed because of python compilations issues (see python compilation docs).
There are two mesh transformations that can be applied : -rm and -oe.
Use the -rm/--rotate-mesh to rotate meshes that look ... rotated on load (therefore, you can only use this option with the -i/--input option).
The -oe/--order-edges option applies the edge-ordering algorithm on the mesh when applying the Chaikin3D algorithm. There are three possible values for this option: none, for never applying the edge-orering algorithm, first, for only applying the edge-ordering before the first run of the Chaikin3D algorithm, and all, which will run the edge-ordering algorithm before any Chaikin3D run.
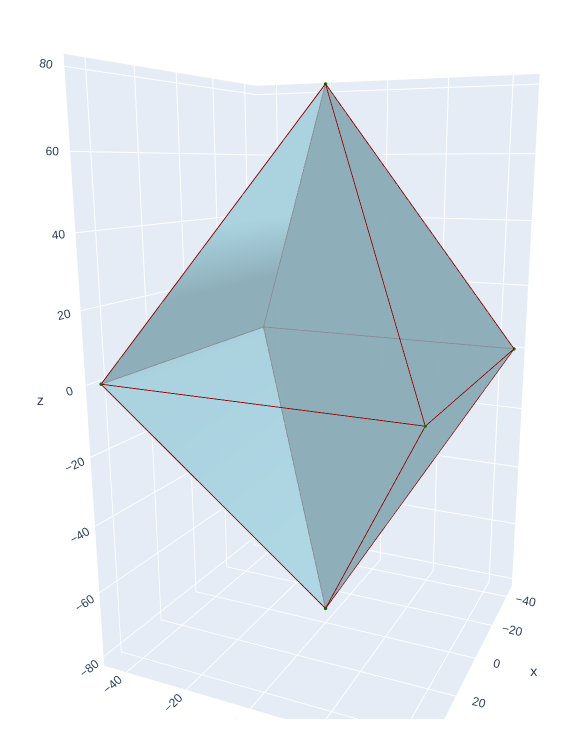
The edge-ordering algorithm comes in handy when your mesh data is not properly setup for the Chaikin3D algorithm (see this section). For example, if you load the diamond mesh and simply render it, you will see nothing wrong :
python chaikin3d.py -i example-meshes/diamond.obj
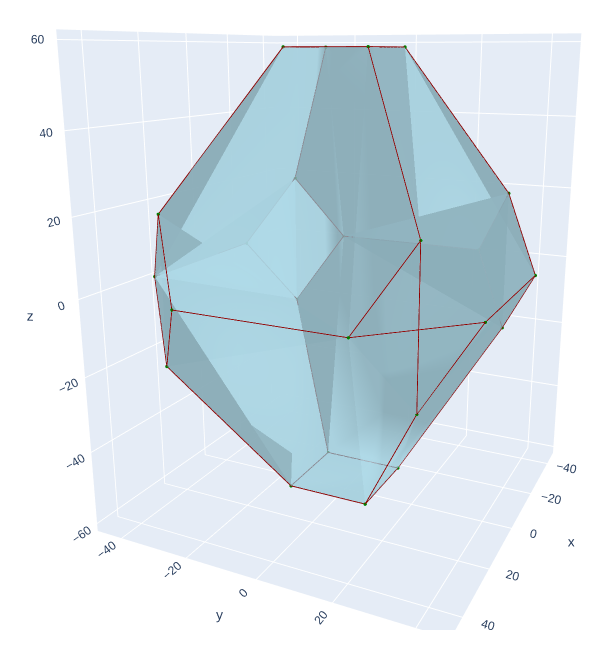
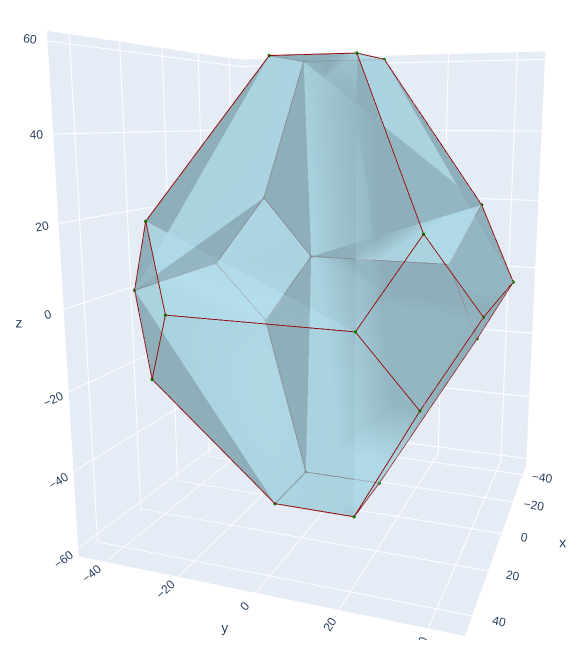
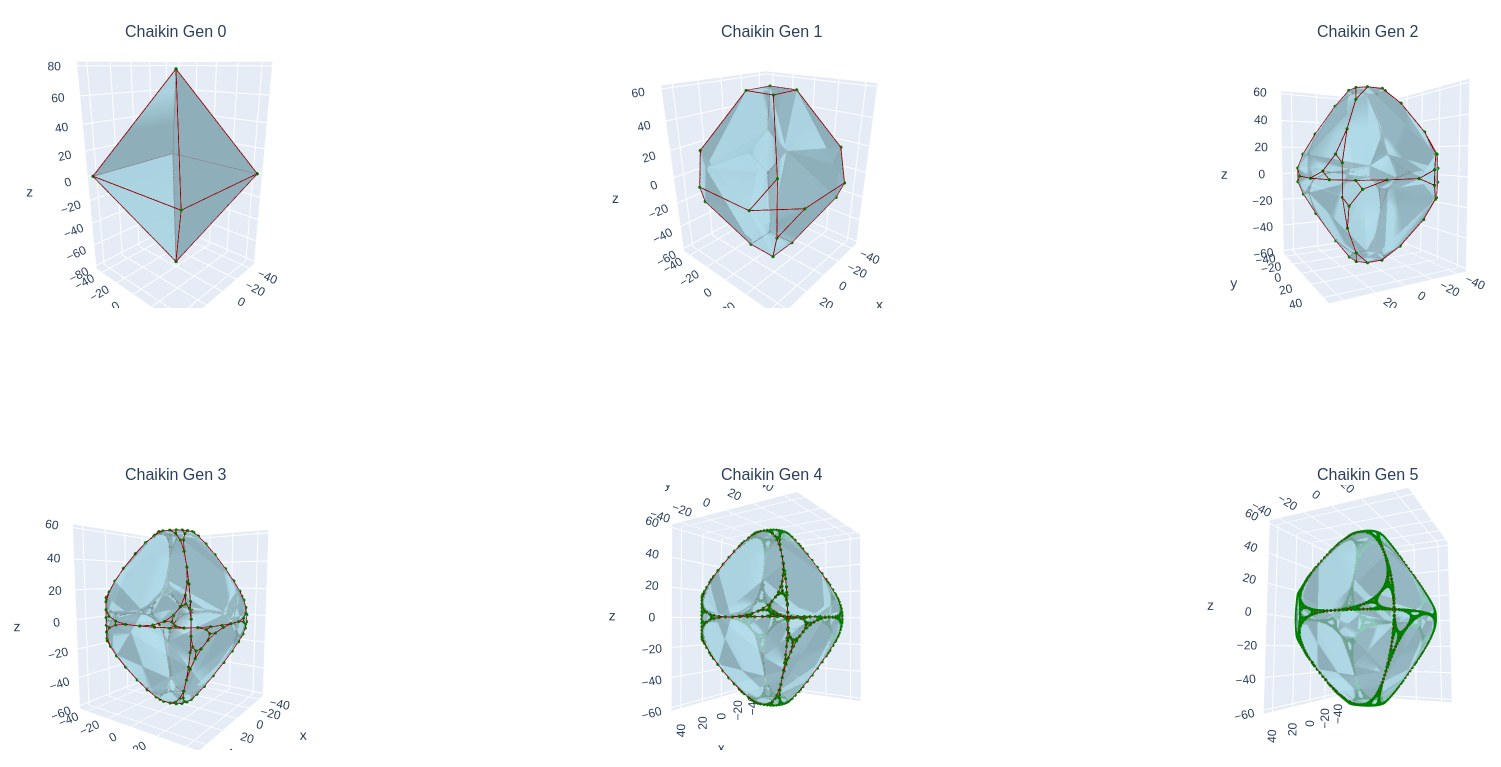
But when applying the Chaikin3D algorithm once (adding -cg 1), you will find the strange mesh from the second picture, when you would want the mesh fom the thrid picutre (adding -cg 1 -oe first) !
This error occured because the vertex-indices in the diamond mesh file were not ordered in such a way that they formed clock-wise or counter-clock-wise rotations around the vertices. There is no way this sentence makes sense, so just think about it that way: we are thinking of vertex-indices as a sorted array, when in fact they are an un-ordered, partially shuffled one. The edge-ordering algorithm sorts the edges in an arbitrary way, so that the Chaikin3D algorithm works.
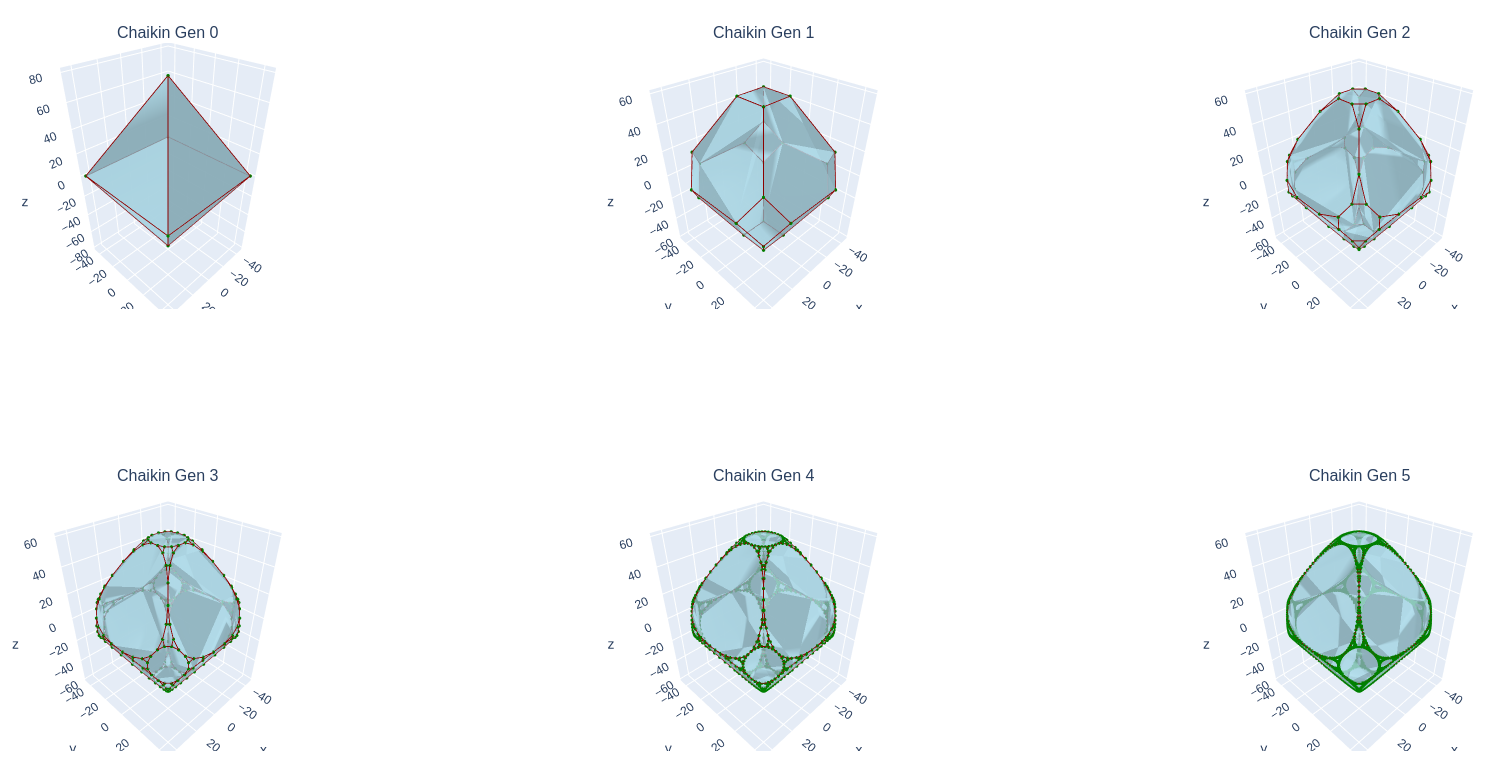
Here is an example of error-propagation due to a single unordered vertex-index line in the diamond.obj file (python chaikin3d.py -i example-meshes/diamond.obj -cg 5 -p evolution) :
When ordering the edges during the first Chaikin3D run only, all the errors are fixed, including those from future generations (python chaikin3d.py -i example-meshes/diamond.obj -cg 5 -p evolution -oe first) :
-cg/--chaikin-generations-cc/--chaikin-coef
To choose the number of Chaikin generations (or iterations) you want to run on the given polyhedron, you should be using the -cg/--chaikin-generations option. The default value is 0. To run one iteration, you could use -cg 1 (for 2 iterations : -cg 2, you got it).
You might also want to control the Chaikin coefficient. This is done using the -cc option. This value is used to cut the edges at 1/coef and (coef-1)/coef. George Chaikin chose "4" as the right coefficient. This cuts the edges into three parts: first 25%, 50%, 25% (2D Chaikin's Corner Cutting Algorithm).
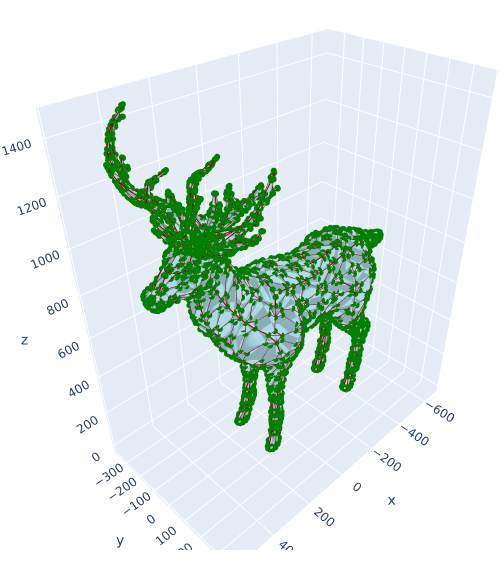
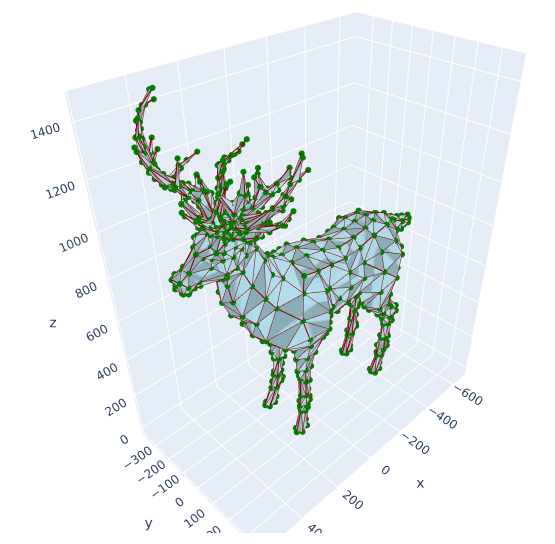
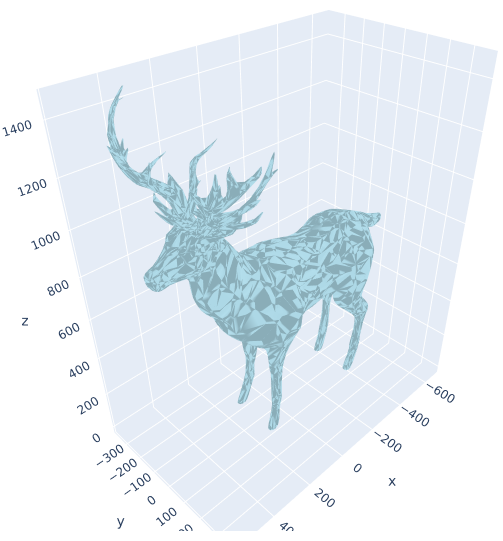
One iteration on a deer (yes, a deer)
python chaikin3d.py -i example-meshes/deer.obj -cg 1
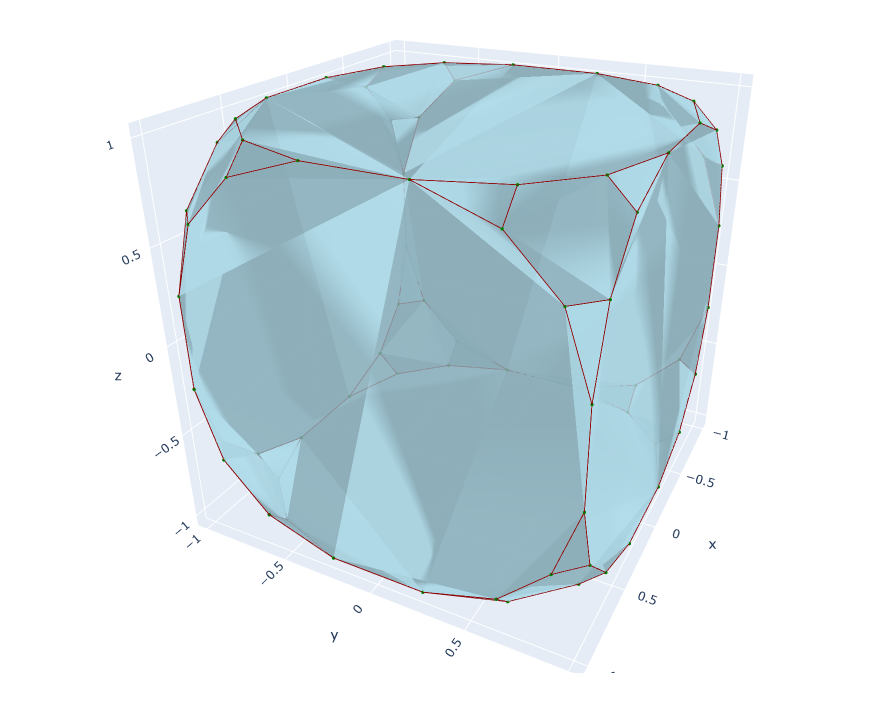
Two iterations on a cube
python chaikin3d.py -i example-meshes/cube.obj -cg 2
One iteration on a tetrahedron, with a coefficient of 3
python chaikin3d.py -i example-meshes/tetrahedron.obj -cg 1 -cc 3
Graphical options let you choose how you want to plot your mesh. You can customize most of the graphical aspects of your plots.
-p/--plot-a/--alpha-r/--renderer-sn/--show-nodes-hme/--hide-main-edges-sge/--show-graphical-edges-nc/--node-color-pc/-polygon-color-mec/--main-edge-color-gec/--graphical-edge-color
There are 5 types of plots (see examples below):
- none : when set to this value, the results will not be rendered. This is useful when you only want to save the 'result' mesh to a file, then render it using your own method.
- simple : this plot only draws your polyhedron to the screen
- full : this one draws a lot of data separately: your edges (by type, etc.), your vertices and different mesh representations. Useful for understanding how things work and debugging in general
- evolution : the evolution plot takes into account the number of chaikin generations that you want (
-cgoption). I will render one generation after another in a grid-format (like the "full" plot) - animation (do not use) : this plot should create an animation, rendering all the chaikin generations from 0 to the value given in the
-cgoption The default value is "simple"
The -a/--alpha switch allows you to change the alpha/opacity value (ranging from 0.0 to 1.0) of the faces in the "simple", "evolution" and "animation" plots (every plot except the "full" plot <- there are already alpha changes). Default value: 0.8
You should not mess with the -roption, but it exists. The mpl renderer is not really made for big meshes. You should really use the plotly (default) renderer. Default value: "plotly"
You can dis/en-able the rendering of nodes with the -sn/--show-nodes option. Default value: "true"
The -hme disables the rendering of the main edges for the "simple", "evolution" and "animation" plots.
The -sge enables the rendering of the graphical edges for the "simple", "evolution" and "animation" plots.
The -nc, -pc, -mec and -gec options let you customize the colors for the nodes (df. green), polygons (df. lightblue), main edges (df. darkred) and graphical edges (df. black). You can give color-names or colors with this format: #12ab34. The value random is valid and will generate a new random color for each node/polygon/main edge/graphical edge.
Show a cube with default alpha value and only (yellow) graphical edges.
python chaikin3d.py -i example-meshes/cube.obj -cg 3 -cc 5 -pc mediumaquamarine -hmc -sgc -gcc yellow
For saving the output mesh to a file, a '.obj' wavefront or '.html' format, you should specify the -o/--output argument. When saving the mesh itself ('.obj'), this option cannot be used with the "evolution" or "animation" plot types. For saving the plotly rendering to a '.html' file, you cannot use the "none" plot type.
For example, you could do this:
python chaikin3d.py -i example-meshes/cube.obj -cg 3 -p none -o new-cube.objOr this:
python chaikin3d.py -i example-meshes/cube.obj -cg 3 -p full -o render.htmlThen, you could re-use this 'new-cube.obj' file as input for new chaikin iterations, or render it using other rendering software (this website, for example).
-v/--verbose
-vv/--vverbose
The -v verbose shows info about the algorithm progress in the terminal. This might be useful for meshes with a lot of vertices or when having a lot of iterations. The -vv vverbose (very verbose) helps for debugging the algorithm.
Here is the full help message :
usage: chaikin3d.py [-h] -i INPUT [-rm] [-cg CHAIKIN_GENERATIONS] [-cc CHAIKIN_COEF] [-oe ORDER_EDGES] [-v] [-vv] [-r RENDERER] [-p PLOT] [-hme] [-sge] [-a ALPHA] [-pc POLYGON_COLOR] [-nc NODE_COLOR] [-mec MAIN_EDGE_COLOR]
                    [-gec GRAPHICAL_EDGE_COLOR] [-o OUTPUT]

Apply the Chaikin algorithm, expanded to the 3D space

options:
  -h, --help            show this help message and exit
  -i INPUT, --input INPUT
                        input file
  -rm, --rotate-mesh    Rotate the mesh when loading a file
  -cg CHAIKIN_GENERATIONS, --chaikin-generations CHAIKIN_GENERATIONS
                        number of chaikin generations
  -cc CHAIKIN_COEF, --chaikin-coef CHAIKIN_COEF
                        Chaikin coefficient
  -oe ORDER_EDGES, --order-edges ORDER_EDGES
                        Order edges ["none", "first", "all"]
  -v, --verbose         verbose mode
  -vv, --vverbose       very-verbose
  -r RENDERER, --renderer RENDERER
                        renderer ["plotly", "mpl"]
  -p PLOT, --plot PLOT  plot type ["none", "simple", "full", "evolution", "animation"]
  -hme, --hide-main-edges
                        Hide the main edges (for plots: "simple", "full" and "evolution")
  -sge, --show-graphical-edges
                        Show the graphical edges (for plots: "simple", "full" and "evolution")
  -a ALPHA, --alpha ALPHA
                        Alpha/Opacity value for mesh rendering
  -pc POLYGON_COLOR, --polygon-color POLYGON_COLOR
                        Polygon color
  -nc NODE_COLOR, --node-color NODE_COLOR
                        Node color
  -mec MAIN_EDGE_COLOR, --main-edge-color MAIN_EDGE_COLOR
                        Main edge color
  -gec GRAPHICAL_EDGE_COLOR, --graphical-edge-color GRAPHICAL_EDGE_COLOR
                        Graphical edge
  -o OUTPUT, --output OUTPUT
                        Output file path (wavefront format)
You can use the CSS color code (extended colors too) to specify a color. An rgb value can be passed through the format #rrggbb, or any valid VSS color value.
Here are some more examples of what can be done :
python chaikin3d.py -i example-meshes/dog.obj -rm -sgc
python chaikin3d.py -i example-meshes/dog.obj -rm -sgc -cg 1
python chaikin3d.py -i example-meshes/cube.obj -p evolution -cg 5
python chaikin3d.py -i example-meshes/tetrahedron.obj -p full -cg 1 -cc 3
The "solid" statement means that the alpha value of the triangles has been set to 1.0 (no transparency).
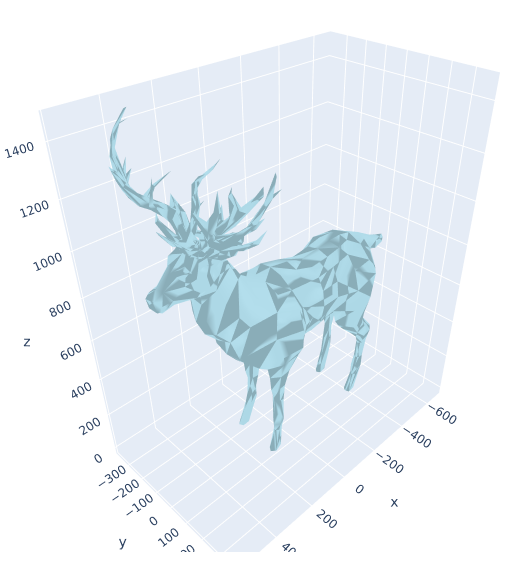
python chaikin3d.py -i example-meshes/deer.obj -rm -a 1.0
python chaikin3d.py -i example-meshes/deer.obj -rm -a 1.0 -hmc
python chaikin3d.py -i example-meshes/deer.obj -rm -a 1.0 -cg 1 -v 1
python chaikin3d.py -i example-meshes/deer.obj -rm -a 1.0 -cg 1 -v 1
Verbose switch (-v) not mandatory.
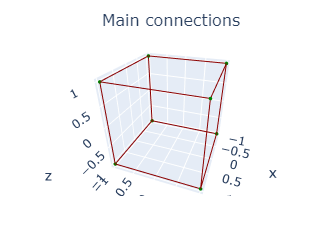
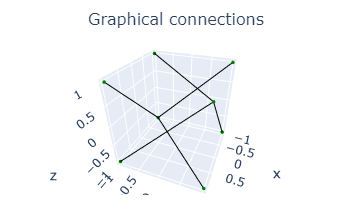
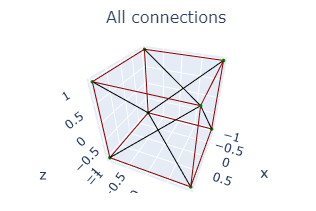
This project supports more "exotic" polyhedron (a polyhedron is a polygon in space/3D) types. In fact, since we are going to change the polyhedron, raw data of the vertices isn't sufficient. We need info about which edges are important, and which are not. For example, in a cube, the diagonal edges (to split the square into two triangles) are not important: their sole purpose is to bind two vertices together so that triangles can be drawn to the screen (will get clearer in a minute). That's why we need to distinguish main and graphical edges between our nodes (vertices).
That is why the polyhedral approximation of meshes that were loaded from (typically) .obj files are not always as wanted. Sometimes, there is no way to know if an edge between two nodes is really a part of the mesh or if its only purpose is to form triangles (you can normally only draw triangles). There is no distinction between main and graphical edges between two nodes in those meshes :(
But normally there are ways to go around that, no worries!
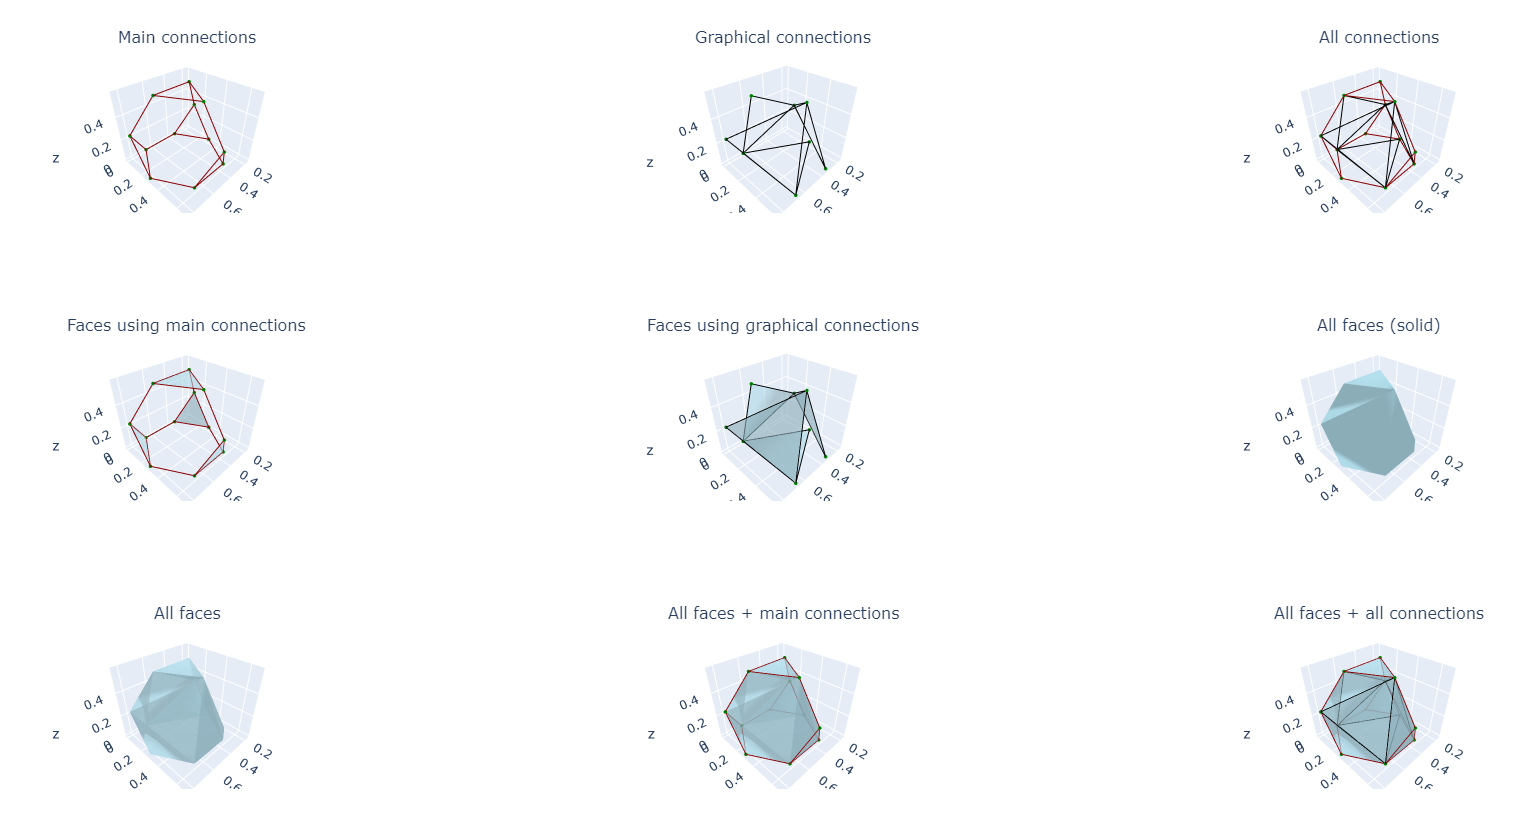
Here are the main edges of a cube:
Here are the graphical edges of the same cube:
Here are all the edges of a cube:
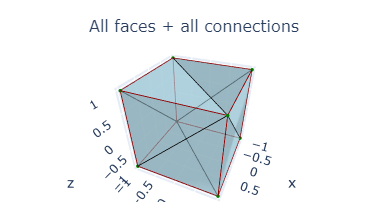
And when you draw all this:
To better understand what I mean with graphical edges, try these commands: python chaikin3d.py -s cube -p full -cg 0 and python chaikin3d.py -s cube -p full -cg 1. The graphical edges are the black lines, while the main edges are the red lines.
- Fix wrong mesh-approximation with un-ordered vertex-index lines in mesh file
- Fix group corruption for higher number of iterations (e.g. 4 iterations on cube)
- Load wavefront .obj files
- Save resulting polyhedron to .obj file
- Progress verbosity
- Code documentation (majority done)
- Get rid of the matrix module (now included in project)
- Finish animation plot
- Optimization of the Chaikin3D algorithm
- do pre-computations
- implement 3d-compute caching system
- port the still native-python parts of the computations to numpy
- threading and parallelism
- Fix the issues that show up when applying the algorithm on A LOT of nodes.
- Ability to rotate y/z axes when loading a .obj file
- Ability to scale up/down a single axis when plotting (e.g. example-meshes/cat.obj)
- Support for more mesh file formats
If you have any issues using this project or need any help, please feel free to tell me on github !
Feel free to do Pull Requests !
