🚨 This tuning process requires the use of an external library. This means that you must be using Android Studio. This tutorial will not work with OnBot Java or Blocks 🚨
You'll hear the term PID Controller used a lot in robotics. It's relatively simple and pretty effective at a lot of simple tasks. A PID controller is a form of "closed loop control." This basically just means you're altering an input to some "plant" based on feedback. This concept applies to a wide range of actions but we'll take a look at velocity PID control as that is what's relevant for this year's game.
So say you have a goBILDA 3:1 1620RPM motor powering a flywheel. You want that flywheel to spin at a constant speed to ensure consistency between your shots. So you run a `motor.setPower(0.5)`` which sends 50% of 12v to the motor. The motor is getting a 6v signal (technically not true because of PWM but that's another topic). The motor should be running at 810 RPM right? That's 50% of 1620RPM. Chances are, it's not actually running at this speed. There are a number of reasons why: motors have +- 10% tolerance between them, the voltage-torque curve isn't linear, or the motor is facing some resisting force(like the inertia of the flywheel) so it takes extra power to get it up to that speed. So how do we actually ensure that our motor is running at exactly 810RPM? Most FTC motors come with an encoder built it. This allows for us to measure the velocity of the output shaft. So with the encoder all hooked up, we know that our motor isn't spinning as fast as we want it to. But how do we actually correct for this? You slap a PID Controller on it. A PID controller is a pretty basic controller (despite the daunting equation when you look it up) that basically responds to your the difference between your measured velocity and desired velocity (error) and will add more or less power based on error. You just check the velocity every loop, feed the value in the controlled, and it gives you the power you want to set it to the desired velocity.
The Rev Hub's motor controller actually has it's own internal velocity PID! This means you don't
have to program any of the fancy math for it. The FTC SDK gives you a velocity controller per motor,
for free! The hub uses the internal velocity PID whenever you call
motor.setMode(DcMotor.RunMode.RUN_USING_ENCODER). Whenever you call setPower() while the motor
is in the RUN_USING_ENCODER, it actually pipes that into a setVelocity(ticks per second)
function. However, each motor comes with a set of default PID gains set in the FTC SDK. These gains
are probably not optimal. They're not tuned for your specific system in mind. They'll be okay for
most people. However, if you want the best response/behavior, you're going to want to set your own
PID gains. Finding the set of gains that works for you is called "tuning".
This tuning process utilizes three libraries: FTC Dashboard, Jotai, and Road Runner. FTC Dashboard allows us to live graph the target and set point, giving us a much more intuitive understanding of the tuning process. Jotai is a helper library that allows for simple Finite State Machine construction. You need not be concerned about this. We use Road Runner because it comes with a PIDF controller with the appropriate feedforward model for DC Motors. You may not wish to install the entire Road Runner library just for this controller. Feel free to replace the controller with one of equivalent functionality.
If you are starting from scratch, just download or clone this repo. You need not go through the following steps.
In your FtcRobotController/build.release.gradle file, insert the following: implementation 'com.acmerobotics.dashboard:dashboard:0.3.10'
Your file should look something like this:
/* FtcRobotController/build.release.gradle */

dependencies {
    implementation 'org.firstinspires.ftc:Inspection:6.1.1'
    implementation 'org.firstinspires.ftc:Blocks:6.1.1'
    implementation 'org.firstinspires.ftc:RobotCore:6.1.1'
    implementation 'org.firstinspires.ftc:RobotServer:6.1.1'
    implementation 'org.firstinspires.ftc:OnBotJava:6.1.1'
    implementation 'org.firstinspires.ftc:Hardware:6.1.1'
    implementation 'org.firstinspires.ftc:FtcCommon:6.1.1'
    implementation 'androidx.appcompat:appcompat:1.2.0'

    implementation 'com.acmerobotics.dashboard:dashboard:0.3.10'
}
Then, in your TeamCode/build.release.gradle file, insert the following:
implementation 'com.acmerobotics.roadrunner:core:0.5.3'
implementation 'com.acmerobotics.dashboard:dashboard:0.3.10'
implementation "com.noahbres.jotai:jotai:1.0.2"
Your file should look something like this:
/* TeamCode/build.release.gradle */

dependencies {
    implementation 'org.firstinspires.ftc:Inspection:6.1.1'
    implementation 'org.firstinspires.ftc:Blocks:6.1.1'
    implementation 'org.firstinspires.ftc:RobotCore:6.1.1'
    implementation 'org.firstinspires.ftc:RobotServer:6.1.1'
    implementation 'org.firstinspires.ftc:OnBotJava:6.1.1'
    implementation 'org.firstinspires.ftc:Hardware:6.1.1'
    implementation 'org.firstinspires.ftc:FtcCommon:6.1.1'
    implementation 'androidx.appcompat:appcompat:1.2.0'

    implementation 'org.apache.commons:commons-math3:3.6.1'

    implementation 'com.acmerobotics.roadrunner:core:0.5.3'

    implementation 'com.acmerobotics.dashboard:dashboard:0.3.10'

    implementation "com.noahbres.jotai:jotai:1.0.2"
}
To enable FTC Dashboard, you must copy paste the FtcRobotControllerActivity.java file from
https://github.com/acmerobotics/ftc-dashboard/blob/master/FtcRobotController/src/main/java/org/firstinspires/ftc/robotcontroller/internal/FtcRobotControllerActivity.java
into your own project. The file will be located under FtcRobotController/src/main/java/org/firstinspires/ftc/robotcontroller/internal/.
Alternatively, follow the official FTC Dashboard instructions.
If you're using the built-in PID, copy over the following files into your own TeamCode folder:
If you're using two mechanically linked motors, copy over the following files into your own
TeamCode folder:
- Open up the
TuningController.javafile. Adjust theMOTOR_TICKS_PER_REV,MOTOR_MAX_RPM, andMOTOR_GEAR_RATIOto match your setup. Your motor manufacturer should list these specs. - If you would like to change the max and minimum speed, adjust the
TESTING_MAX_SPEEDandTESTING_MIN_SPEEDaccordingly. - Before you begin tuning, start the RC phone and open up Dashboard. Connect to the RC phone's wifi network. The password to the network is located in the Program and Manage menu.
- In your browser, navigate to
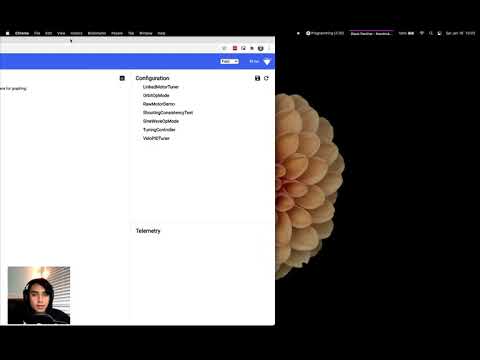
192.168.49.1:8080/dashwith a phone RC or192.168.43.1:8080/dashwith a Control Hub. - Run the
VeloPIDTuneropmode. This will command your flywheel to ramp up its velocity, coast, ramp it back down, and suddenly change to 3 different setpoints. - Adjust your PIDF gains to try and match
targetVelocitywithvelocity- Raise kF until
velocityreachestargetVelocity - Raise kP to reduce phase lag
- Raise kD to dampen oscillations
- Raise kF until
- Open up the
TuningController.javafile. Adjust theMOTOR_TICKS_PER_REV,MOTOR_MAX_RPM, andMOTOR_GEAR_RATIOto match your setup. Your motor manufacturer should list these specs. - If you would like to change the max and minimum speed, adjust the
TESTING_MAX_SPEEDandTESTING_MIN_SPEEDaccordingly. - Before you begin tuning, start the RC phone and open up Dashboard. Connect to the RC phone's wifi network. The password to the network is located in the Program and Manage menu.
- In your browser, navigate to
192.168.49.1:8080/dashwith a phone RC or192.168.43.1:8080/dashwith a Control Hub. - Run the
LinkedMotorTuneropmode. This will command your flywheel to ramp up its velocity, coast, ramp it back down, and suddenly change to 3 different setpoints. - Adjust your PIDF gains to try and match
targetVelocitywithvelocity- Raise kF until
velocityreachestargetVelocity - Raise kA to reduce the phase lag during acceleration
- Raise kP to turn on error correction and reduce any further error
- Raise kD to dampen any oscillations
- Raise kF until
If you're using the built-in PID:
If you're using mechanically linked motors:
These are informal videos. They're not edited and were improvised. Apologies for the poor quality. Hopefully, polished videos will be made in the future.