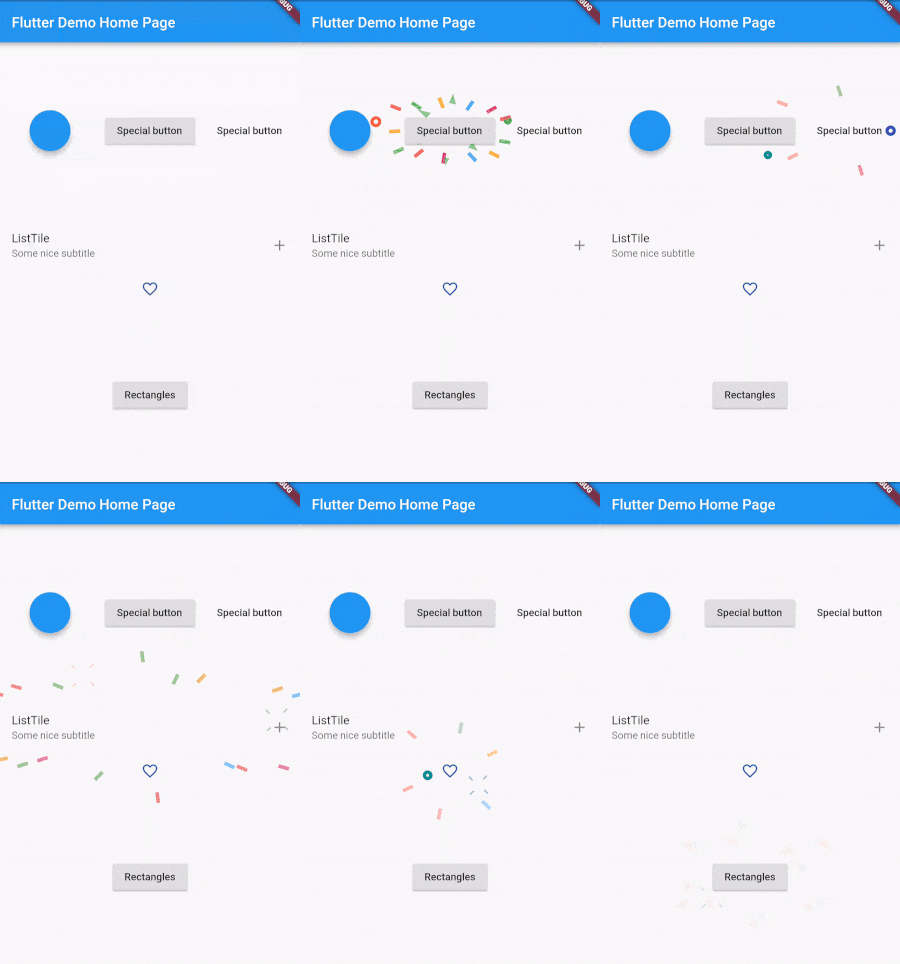
- Highly customizable (Don't like my particle effects? Make your own with little effort!)
- Very easy to use
- A lot of premade particles
I will publish this package on pub if people enjoy it. So leave a star if you do ;)
dependencies:
  pimp_my_button: ^1.0.0
run packages get and import it
import 'package:pimp_my_button/pimp_my_button.dart';
If you are not able to import it, restart your IDE see: flutter/flutter#17016
The basic setup looks like this:
PimpedButton(
  particle: DemoParticle(),
  pimpedWidgetBuilder: (context, controller) {
    return FloatingActionButton(onPressed: () {
      controller.forward(from: 0.0);
    },);
  },
);
The pimpedWidgetBuilder uses a builder which besides providing a new context and an AnimationController.
When your button is pressed call this code:
controller.forward(from: 0.0);It's important to include the from field because otherwise the animation won't play after the first tap.
The particle specified in the PimpedButton controlls what the animation looks like.
We'll walk through how to build a Particle yourself, step by step.
Here is what were are going to build:
Each particle has to extend Particle and override this method:
void paint(Canvas canvas, Size size, progress, seed)
- Canvas is the canvas you can paint on
- The size is the bounding box of the the enclosing widget
- Progress is a double between 0 and 1, it reflects the progress in the animation
- The seed is an int value generated once for every tap. When dealing with randoms, initialize your
Randomwith that seed (so every frame is synced)
CompositeParticle(
  children: []
).paint(canvas, size, progressm seed);
You have to paint atleast one Particle in the paint(.,.,.,) method. Usually this would be the CompositeParticle.
The CompositeParticle doesn't do much on its own. It only paints all of its children.
The next interesting particle is the CircleMirror and RectangeMirror.
    CircleMirror(
        numberOfParticles: 6,
        child: AnimatedPositionedParticle(
          begin: Offset(0.0, 20.0),
          end: Offset(0.0, 60.0),
          child: FadingRect(width: 5.0, height: 15.0, color: Colors.pink),
        ),
        initialRotation: -pi / randomMirrorOffset),
This mirrors its particle around the middle point in a circular shape.
In this case you provide one Particle which is going to be drawn multiple times, thus looking
identical. If you want different particles (or the same with randomized values), use the CircleMirror.builder.
At the bottom of the hierarchy is the FadingRect, all it does is drawing a rectangle which fades out over time.
To make it move, it's wrapped in an AnimatedPositionedParticle.
This is the full code:
class DemoParticle extends Particle {
  @override
  void paint(Canvas canvas, Size size, progress, seed) {
    Random random = Random(seed);
    int randomMirrorOffset = random.nextInt(8) + 1;
    CompositeParticle(children: [
      Firework(),
      CircleMirror(
          numberOfParticles: 6,
          child: AnimatedPositionedParticle(
            begin: Offset(0.0, 20.0),
            end: Offset(0.0, 60.0),
            child: FadingRect(width: 5.0, height: 15.0, color: Colors.pink),
          ),
          initialRotation: -pi / randomMirrorOffset),
      CircleMirror.builder(
          numberOfParticles: 6,
          particleBuilder: (index) {
            return IntervalParticle(
                child: AnimatedPositionedParticle(
                  begin: Offset(0.0, 30.0),
                  end: Offset(0.0, 50.0),
                  child: FadingTriangle(
                      baseSize: 6.0 + random.nextDouble() * 4.0,
                      heightToBaseFactor: 1.0 + random.nextDouble(),
                      variation: random.nextDouble(),
                      color: Colors.green),
                ),
                interval: Interval(
                  0.0,
                  0.8,
                ));
          },
          // division by 0 is not good ;)
          initialRotation: -pi / randomMirrorOffset + 8),
    ]).paint(canvas, size, progress, seed);
  }
}IntervalParticle, applies an interval and/or curve to the child.FourRandomSlotParticle, positions 4 children on the different sections.PoppingCircle, pretty popping circle
https://github.com/Norbert515/pimp_my_button/blob/master/lib/src/demo_particles.dart

