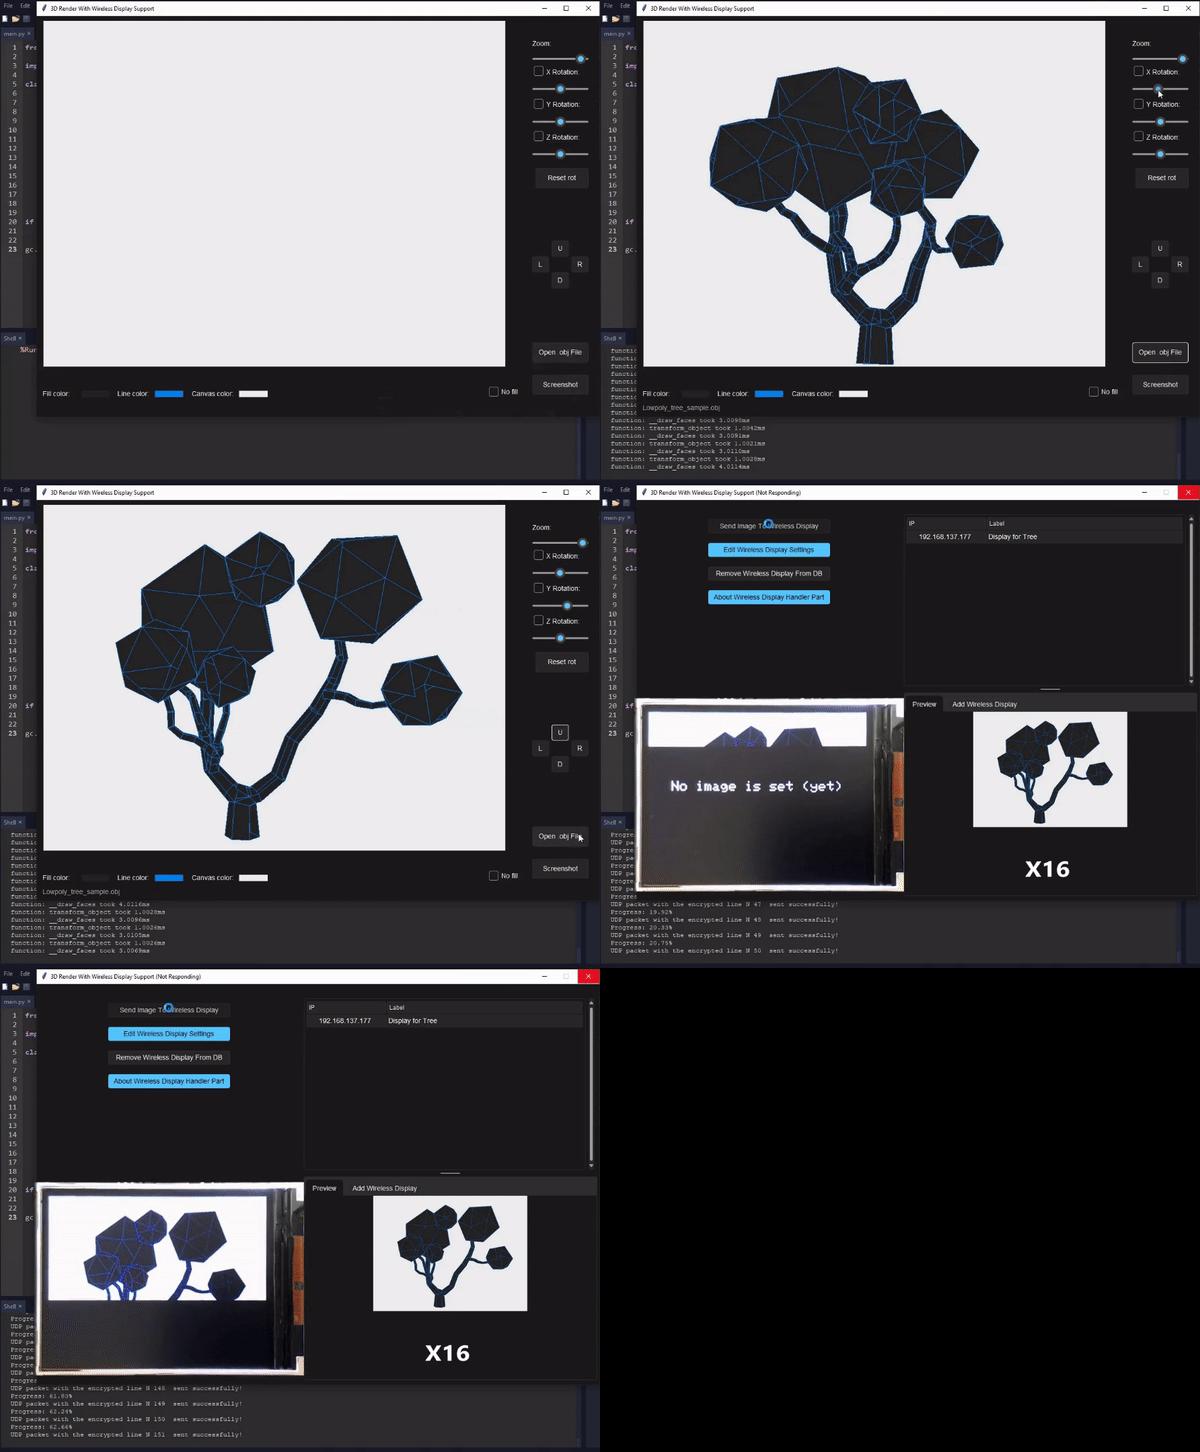
SorceForge page: https://sourceforge.net/projects/python-renderer-wireless-disp/
Update by Northstrix:
- Added the wireless display support
- Added the touchpad zoom handling
- Adjusted default theme
Used .obj file: https://free3d.com/3d-model/low_poly_tree-816203.html
This folder was changed as there was only 3 source files, now there exists V1_SOURCE and V2_SOURCE where the V1 contains the original files (not recommended to use), and the V2 the src contains the new version of the project that adapts an OOP approach and a cleaner code structure, as well as some enhancements along with some new features.
What's new?
- OOP approach
- The 3D model is only redrawn (rerendered) when there's a change
- Faces are now being drawn completely (no matter how many vetrecies)
- Points that aren't in the screen are no longer rendered
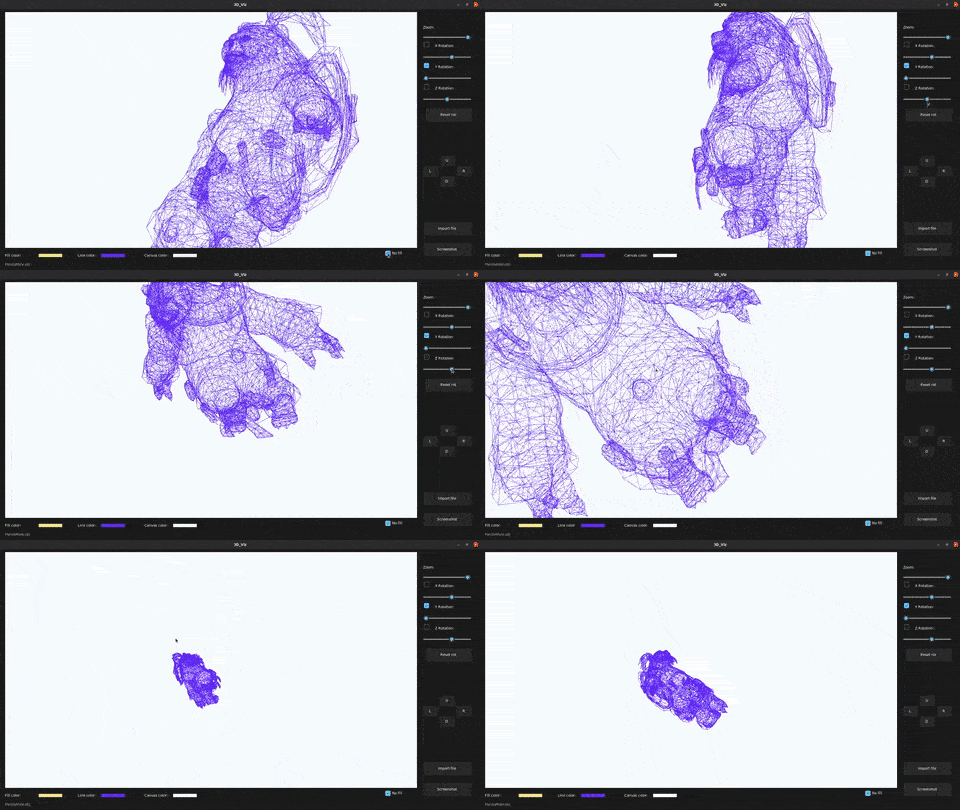
- Rotation
isn'tis either continous,insteador a custom degree on each axis - New controls for Line color, Filling color, canvas color
- Filling could be turned ON and OFF
- Scrolling inside the drawing canvas zooms in/out the object
This project was made as a practice for Python programming, Matrix manipulation, file processing, and general system engineering processes.
Also it was a way for me to explore an interesting field for me which is graphics (2D, and 3D).
It's a desktop app that takes in waveform files (.OBJ) and visualizes its triangulated form (no filliing, no shading, no texturing! just triangles)
The V2 (Legacy_versions/V2_SOURCE) of the project adds a filling option with control over the color of the filling as well as whether it's turned ON or OFF.
- Python: Numpy, Tkinter, re (regex), 3D graphics, Numba.
- Waveform files (.OBJ).
This article assumes having basic knowledge of Python, Tkinter, and Numpy, since these will not be covered here.
About waveform files (.OBJ), I recommend reading this article in Wikipedia.
Or if you're not into reading, watch this YouTube video
New contribution: Our friend @http-samc added requirements.txt to the project and made it easier to install all dependencies (this is the preferred way to do this) through running this command pip3 install -r requirements.txt.
You'll have to have these libraries along with Python in your PC pip3 install -r requirements.txt :
- Numpy
- Tkinter (if you're running Linux, you'll have to install it
sudo apt-get install python3-tk, otherwise, it comes with Python when installed) - Numba
- The 3 files provided in this repo located in the same folder.
- pyscreenshot (Only if you're running Linux, otherwise, you can use ImageGrab from the PIL lib)
- sv_ttk (for the theme)
- Run the main.py file
- This interface will open:
- You can load any .obj file you want, or you can choose from the files provided in the /Objects folder.
- After loading the 3D model, you can move it UP/DOWN/LEFT/RIGHT using the U/D/L/R buttons or using the arrow keys on your keyboard.
- You can zoom in and out (you can scroll insed the canvas to do this), or rotate the model in 3 axis.
- You can take screenshots too with the "Take screenshot" button.
- You can turn ON and OFF the filling.
- You can change the canvas color, the lines color, and the filling color.
- Inspiration for this project: Youtube Vid
- Some of my code was based on this work: Youtube Vid
- Best explanation of linear algebra ever: Youtube Playlist
- Get free waveform files online: Link


