Demo code for Raspberry Pi Pico Starter Kit
Raspberry Pi Pico Starter kit includes commonly used sensors, for example: LED lights, 9g servo, LCD1602 display module, resisters and buzzer, PIR sensor. You can build your own circuit on the breadboard kit, and DIY your own micro controller project through micropython or C, C++ programming.
- 1 x LCD1602 display module
- 1 x PIR sensor
- 1 x LED Pack(Red, Blue, Green)
- 1 x 9g 180 degree servo
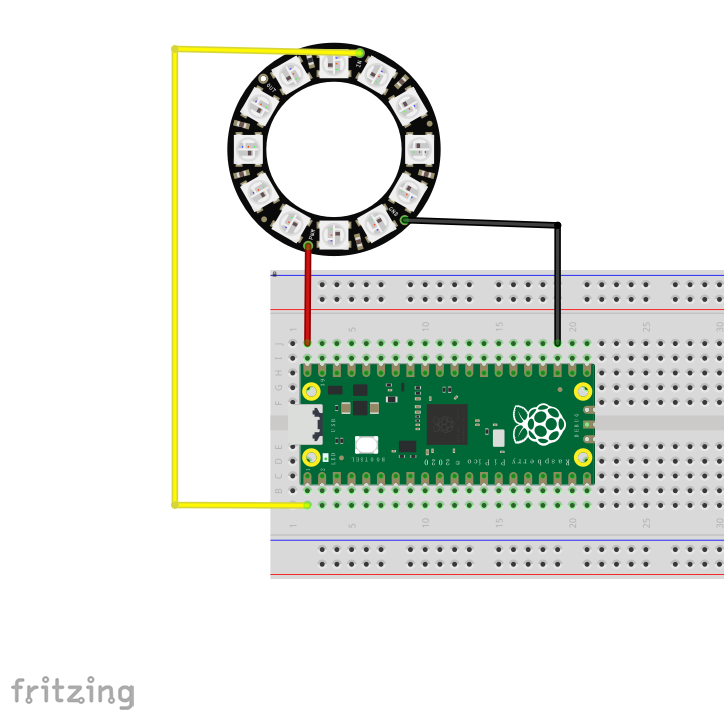
- 1 x 16 RGB WS2812 Light Ring
- 1 x Ultrasonic Sensor
- 1 x Resistor Pack
- 1 x Jumper wire Pack
Raspberry Pi Pico is a microcontroller board based on the Raspberry Pi RP2040 microcontroller chip.
Running on the Raspberry Pi Foundation’s in-house RP2040, it’s a very flexible MCU with plenty of I/O peripherals, including UART, SPI, I2C, ADC, and GPIO. In addition, the Raspberry Pi Pico’s headline feature, Programmable I/O, allows you to expand the computing possibilities on this tiny MCU by offshoring some processing loads to the 8 state machines on the Pico. the Raspberry Pi Pico can runs MicroPython or circuitPython as well. Arduino has also announced their official port of the Arduino Core to RP2040, which means you will soon be able to leverage the thousands of Arduino libraries and tutorials available.
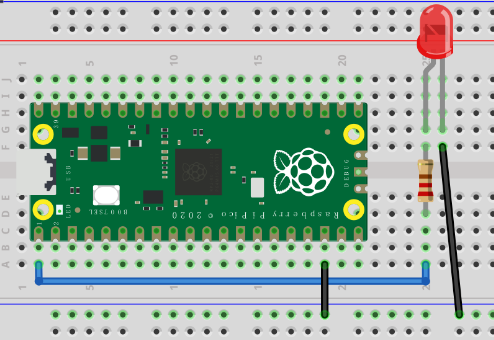
- LED indicator experiment
- Using Ultrasonic sensor and LCD1602 to build distance measuring tool
- Using LED with Buttons to build Morse code learning machine.
- Building super cool RGB ws2812 light Ring.
- Build a wearable device
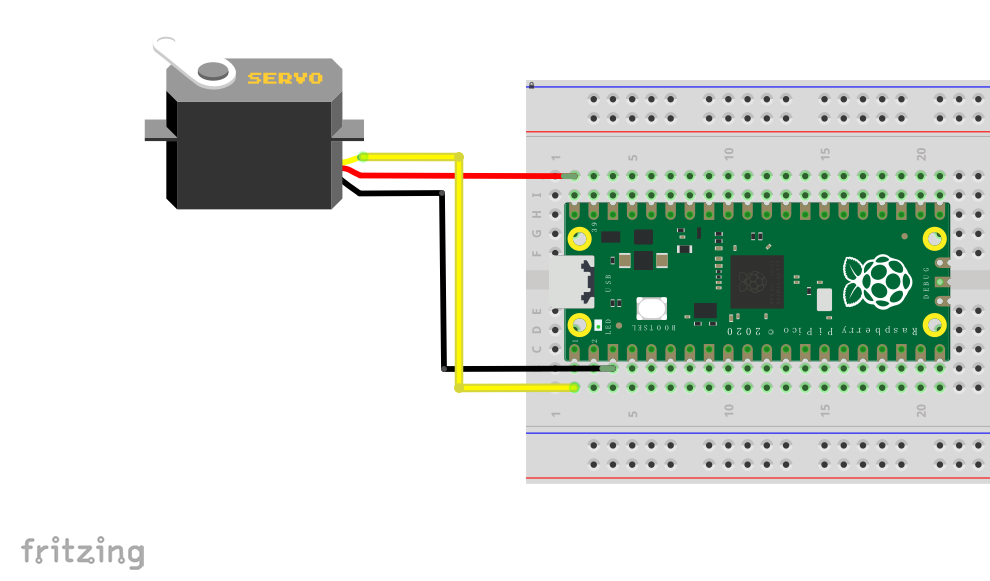
- Learn how to control a servo to finish some mechanical control.
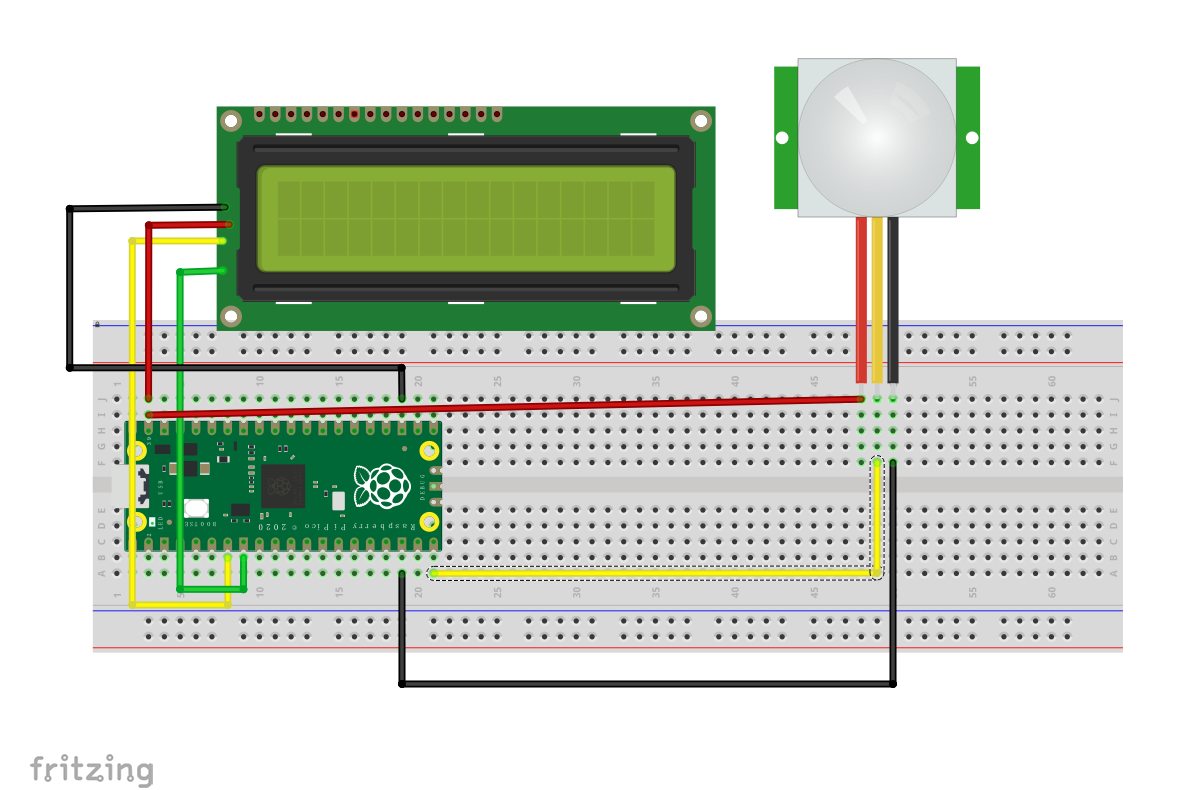
- Using PIR motion sensor to build home automation assistant.
- all kinds of sensor's combinations and so on...
- Stay creative...
All experimental environments are completed under the Raspberry Pi 4B hardware device and Raspberry Pi OS system. It will be very convenient if you use Raspberry Pi to perform the following operations.- First, solder the Pin header for your Raspberry Pi Pico.
- Download the MicroPython UF2 file from:
https://micropython.org/download/rp2-pico/rp2-pico-latest.uf2 - Push and hold the
BOOTSELbutton and plug your Pico into the USB port of your Raspberry Pi or other computer. Release theBOOTSELbutton after your Pico is connected. It will mount as a Mass Storage Device calledRPI-RP2. Drag and drop the MicroPython UF2 file onto the RPI-RP2 volume. Your Pico will reboot. You are now running MicroPython. if you have any problem with the steps, please refer to :https://datasheets.raspberrypi.org/pico/raspberry-pi-pico-python-sdk.pdf - Turn on your Raspberry Pi and Plug the Raspberry Pi Pico via MicroUSB cable to USB port.
- Reinstall
thonnyIDE on your Raspberry Pi by typing follwing command in terminal:
sudo apt-get update
sudo apt-get upgrade -y
sudo apt -y purge thonny
sudo apt -y install thonny
thonny- Open a new terminal and typing:
cd ~
git clone https://github.com/geeekpi/picokit
cd picokit
cd demo_code/
There are some demo codes in this warehouse, which can be opened by thonny, copied and pasted, and then saved to the main.py file in Pico.
-
Project 1 Blinking LED
-
Project 2 water flowing LED

-
Project 3 Control Servo via PWM
-
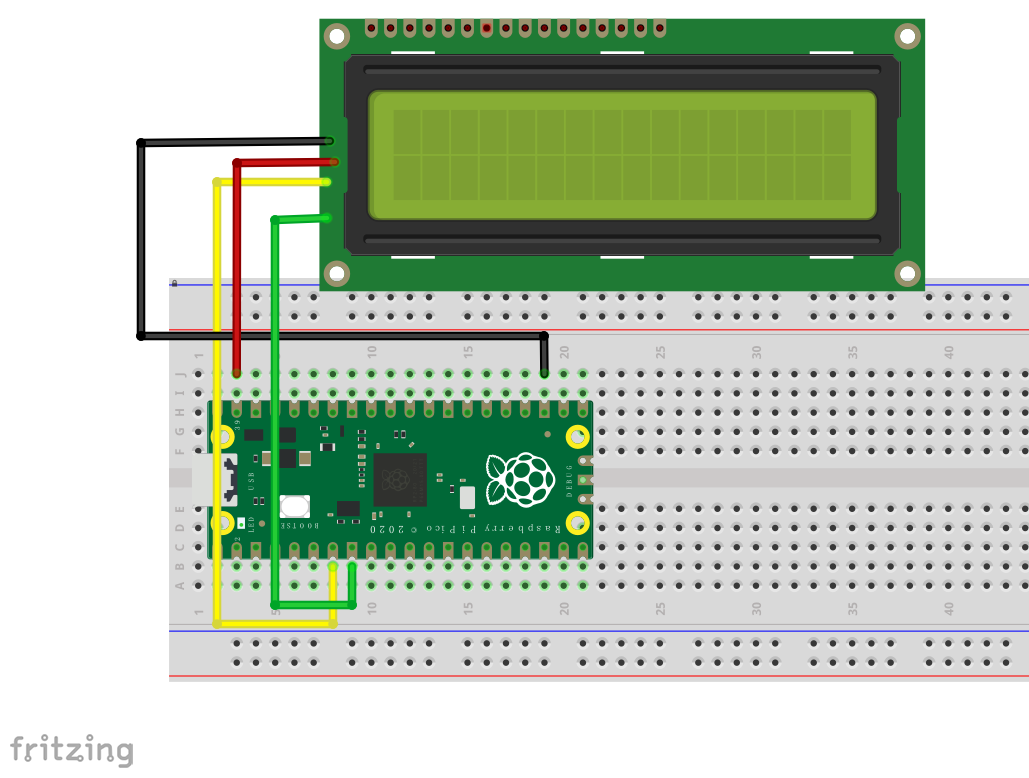
Project 4 Display CPU Temperature by Using LCD1602 Display Module
-
Project 5 Motion detect by using PIR Motion Sensor
-
Project 6 How to Light up ws2812 light Ring
-
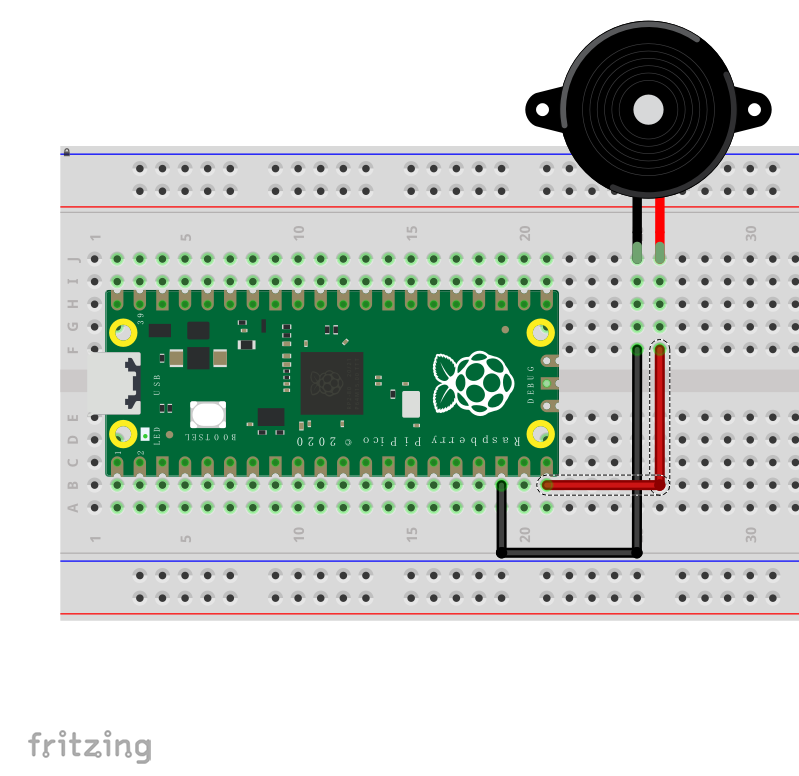
Project 7 How to Build Music Buzzer
YouTuBe Channel: https://youtu.be/7L_B2MNJl_o