(aka, "OSL")
--> INSTRUCTIONS & DOCUMENTATION AVAILABLE HERE <--
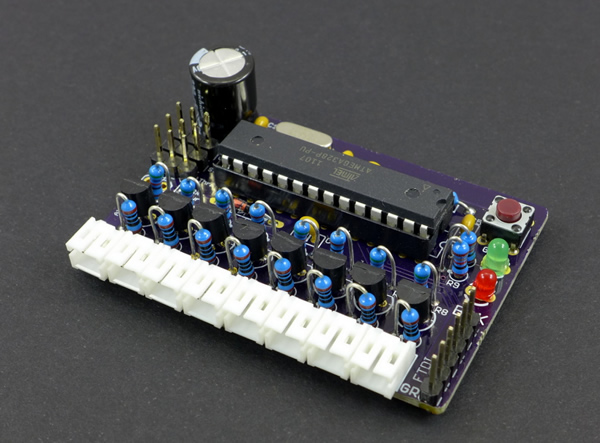
OSL is an Arduino-based, open source project for controlling lights in RC cars and trucks. It uses an ATmega328 as the processor and has 8 light outputs. All the components on the board are through-hole which makes it easy to assemble and solder.
Some features:
- Control up to 8 light circuits
- Accepts three channels of RC input (throttle, steering, and an optional 3rd channel)
- Each light can respond to various model States: forward, reverse, stopped, stopped after delay, braking, right turn, left turn, no turn, accelerating, decelerating, and any of up to 5 positions for the channel 3 switch if attached.
- For each light in each State the Setting defines the behavior of the light: on, off, fade on, fade off, blink, fast blink (and the alternate versions of blink and fast blink), soft blink, dim, xenon-on effect, or backfire effect.
- The collection of all Settings for all lights in all States is called a Scheme. Multiple schemes can be defined and you can switch between them from your transmitter.
- Schemes and other operating adjustments are made in the free Arduino IDE. Everything is well explained and you don't need to know how to write code.
- Works with both 5 and 6 volt RC systems
Board version 1.7
See the "hardware" folder in this repository for Eagle board files, schematic, and bill of materials.
First you will need to install the Arduino IDE on your computer, you can download it from here.
Next download the OSL source files (Arduino calls this a "sketch"). Click the green "Clone or Download" button at the top of this page, then select "Download ZIP."
-
Unzip the download and put the folder named “OpenSourceLights” into your Arduino “Sketches” folder. This may be a location you specified or it may be the default location that Arduino chose when you installed the IDE. If you are unsure where Arduino thinks your Sketches folder is:
- Open the Arduino IDE
- Go to File -> Preferences
- At the top of the popup screen that appears, look at the path under the heading "Sketchbook location". This shows you where your Sketches folder is.
-
Open the sketch through the IDE or just by clicking on any of the .ino files in the OpenSourceLights folder. Now let's make sure the IDE is setup to compile the project correctly:
- In the IDE, go to the Tools menu and select Board -> Arduino AVR Boards -> "Arduino Nano." In fact several boards would work, but "Nano" is the easiest to remember.
- Make sure we have the correct processor selected. Go to Tools -> Processor -> and select "ATmega328P". Note: Some users may need to select "Atmega328P (Old Bootloader)" if they have problems loading the sketch onto their device.
-
Compile. This is done by clicking the checkmark button at the top left of the IDE window, or by going to the Sketch menu and clicking "Verify/Compile." The IDE will run for a few moments then give you the results of the compilation at the bottom of the screen. If successful, you are ready to modify the sketch so that it does what you want! Read this page in the OSL Wiki for more information: Modifying the Sketch
