Suggest ticket response in Zammad using GPT4ALL
This is far from production ready. There is no authentication included, there can be issues with timing etc. This is not a finished version. This is a learning project for myself and hopefully gets you started on your project:)
This does not requires you to have GPT4All already installed, it will automatically download the model the script needs. If you are not familiar with GPT4All, I definitely suggest heading over to https://gpt4all.io/index.html and checking it out what they have built!
This assumes you are going to run two servers, one for GPT4All and the other running Zammad. You could combine them if you want to with a few tweaks to the files.
go to gpt_server/
setup environment: python3 -m venv venv (install venv if need, "sudo apt install python3-venv) source venv/bin/activate pip install "uvicorn[standard]" pip install -r requirements.txt
Run the GPT4All server run: uvicorn main:app --reload --host 0.0.0.0
go to zammad_server/ setup environment python3 -m venv venv source venv/bin/activate pip install "uvicorn[standard]" pip install -r requirements.txt
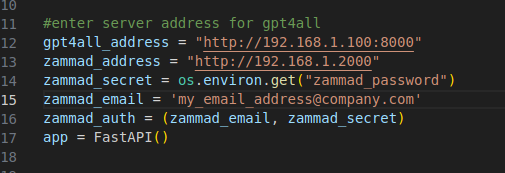
update main.py file to include the appropriate ip/hosts and email address for the admin/service account.
set os environment variable to the appropriate Zammad password gpt4all_address = "x.x.x.x:8000" zammad_address = "x.x.x.x" zammad_secret = os.environ.get("zammad_password") zammad_email = 'admin_email@forZammad.com' e.g. export zammad_password=mycomplexpassword123 gpt4all_address = "192.168.1.100:8000" zammad_address = "192.168.1.200" zammad_secret = os.environ.get("zammad_password") zammad_email = 'myemail@address.com'
run server: run: uvicorn main:app --reload --host 0.0.0.0
Some basic Zammad settings to make this work. Almost certainly your setup will need some nuance but here are some ideas
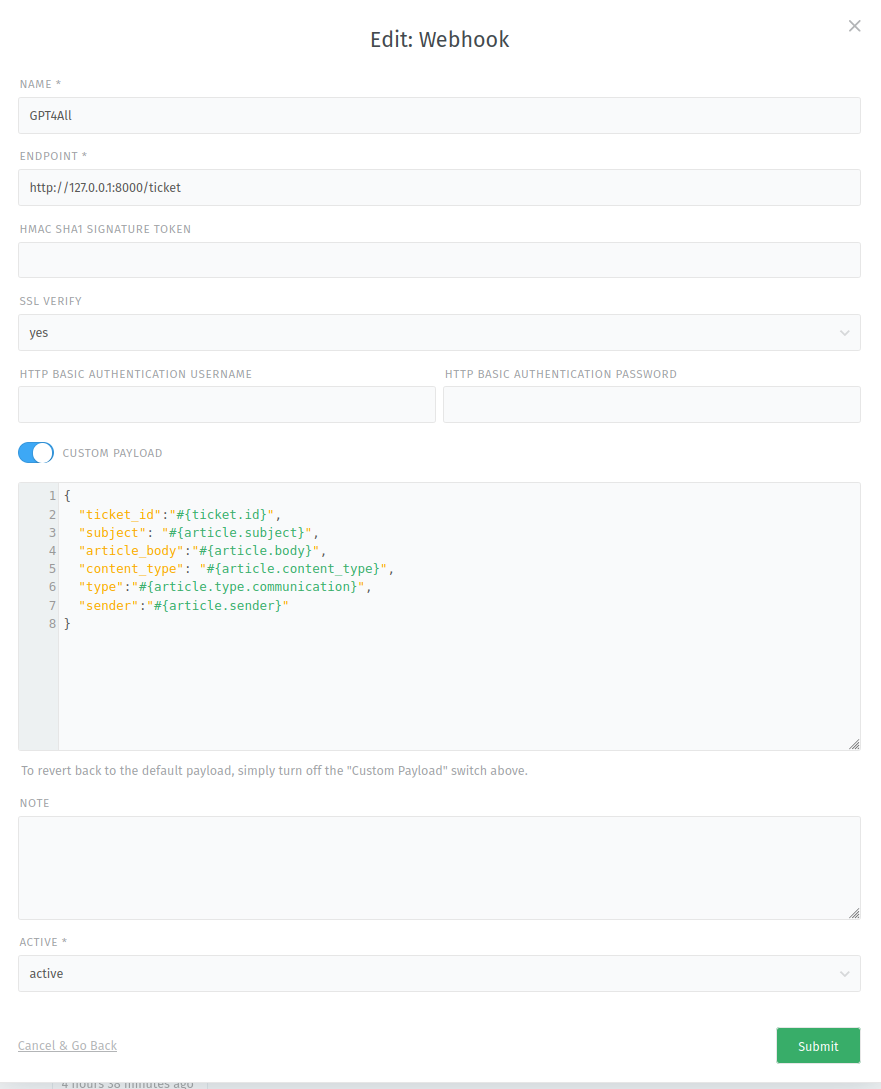
Setup the webhook:
Name the webhook Enter in the endpoint for the Zammad server. If its on the same machine as Zammad it will probably look like 127.00.0.1:8000/ticket
Select Custom Payload and use this:
{
  "ticket_id":"#{ticket.id}",
  "subject": "#{article.subject}",
  "article_body":"#{article.body}",
  "content_type": "#{article.content_type}",
  "type":"#{article.type.communication}",
  "sender":"#{article.sender}"
}
Set to active
For the trigger, we will create two of them. One to add a tag that ensures the trigger only fires once and prevents the trigger from repeatedly firing and another to remove that tag the next time the customer reaches out. The first trigger: Make sure to name it something like "Send message to GPT4All" so it is later in the trigger list.
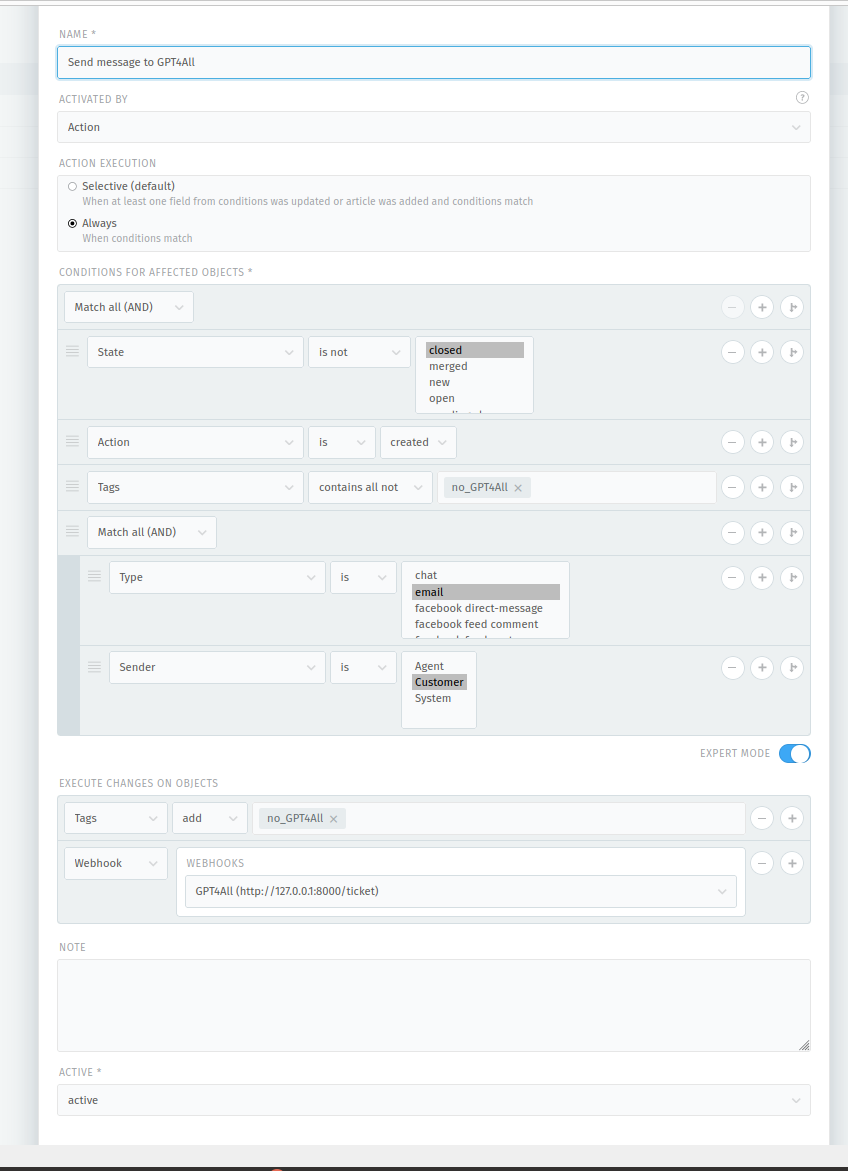
Set Ticket is not closed,
Article action = created
Tags do not contain no_GPT4All
Sender is Customer
Execute section
Then set it to add the tag no_GPT4All
And assign the webhook.
Create trigger to remove tag next time customer reaches out on the same ticket:
Make sure to name this one has a name starting with the number 1 or something else to ensure it fires before the above trigger (alphabetical order)
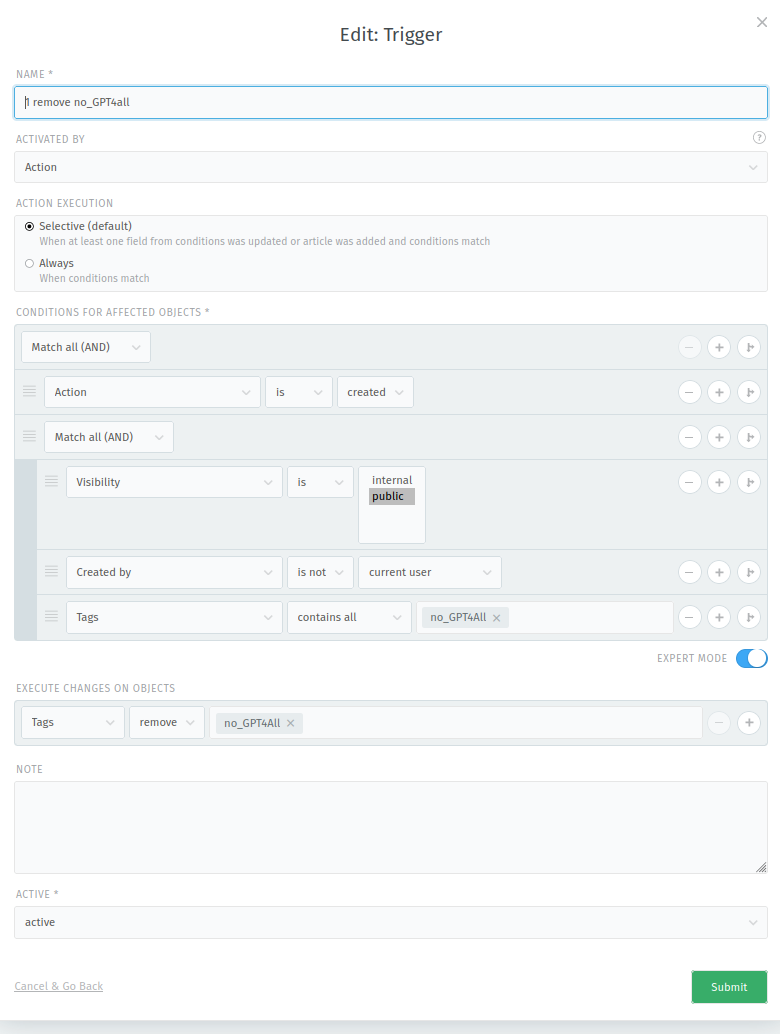 Matches all conditions
Article is created
Article is public (So no internal bot updates or something silly like that)
Article is not created by current user
Tags contains
Matches all conditions
Article is created
Article is public (So no internal bot updates or something silly like that)
Article is not created by current user
Tags contains no_GPT4All
Executes
Tags remove no_GPT4All
This sets us up for the next message