This project demonstrates how to enable flash encryption (Development Mode) on the ESP32 and how secure storage like eFuse is used to protect sensitive keys. First, we will see how devices without flash encryption are insecure. We will steal the WiFi credentials of a firmware running on the ESP32. Then we will enable flash encryption and show how an attacker cannot steal credentials when flash encryption is enabled. Finally, we will show how the user can upload additional firmware after flash encryption has been enabled, and how flash encryption can be disabled.
In flash encryption, firmware bootloader (i.e. second stage bootloader, which is loaded by the ROM bootloader) generates an AES-256 bit key and saves it in the flash_encryption eFuse, which is a secure storage. Software cannot access this key, which is used entirely by hardware for flash encryption. The reason why this AES-256 bit key is protected in the secure storage is if it is lost, an attacker can use it to decrypt a dumped firmware.
ESP32 has 4 eFuse blocks as secure key storage as the figure below shows. Each block is 256 bits. The figure shows the AES key storage (i.e. flash_encryption eFuse) in eFuses. Please note there are many other eFuses for different purposes.
For this project, we need to use a variety of ESP-IDF tools. For simplicity, we will utilize the ESP-IDF extension within VS Code and its terminal to use the tools.
Our new Ubuntu VM installed with ESP-IDF and Visual Studio Code with the ESP-IDF extension. If you do not want to install it yourself please download the VM from the specified website.
Otherwise, please follow this tutorial to install it within VS Code.
After installing ESP-IDF, download this repository into your VM:
git clone https://github.com/PBearson/ESP32_Flash_Encryption_Tutorial.gitNote: By default, this project is already located in the ~/esp/IoT-Examples/ directory of the Ubuntu VM.
Use File -> Open Folder ... to load the project into VS Code
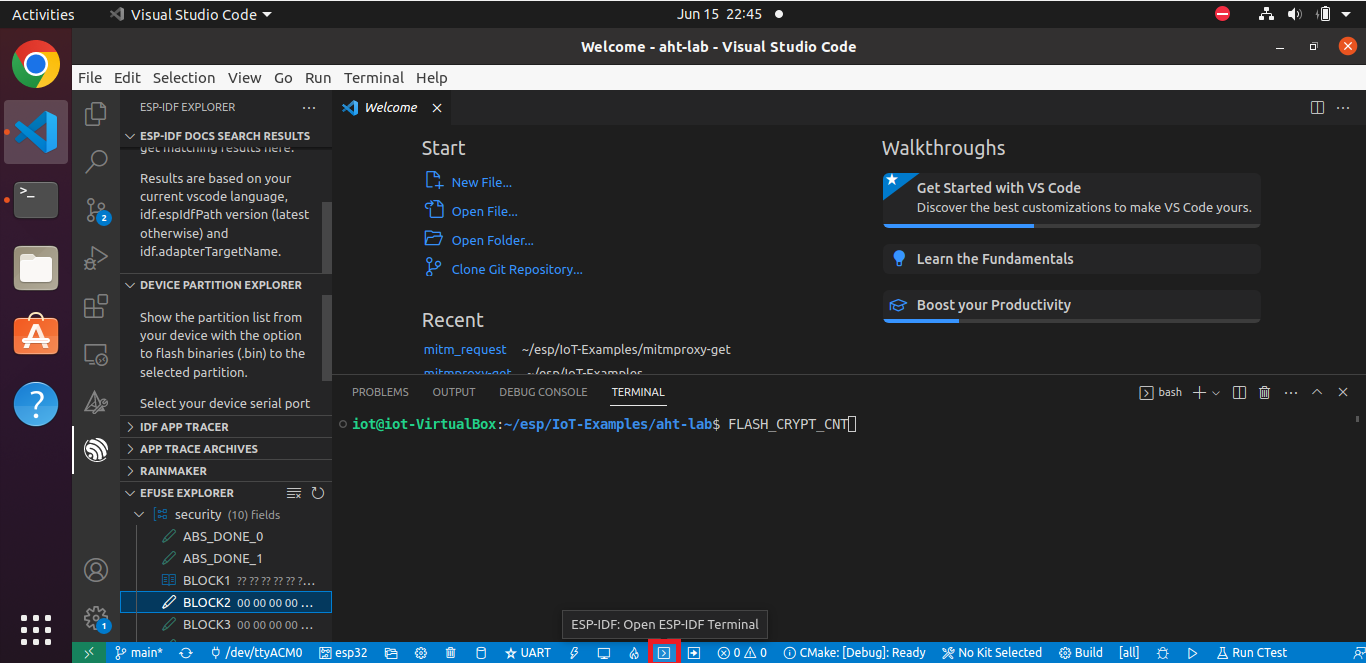
We will start the ESP-IDF terminal within VS Code (not the Linux terminal) using the button at the bottom of VS Code.
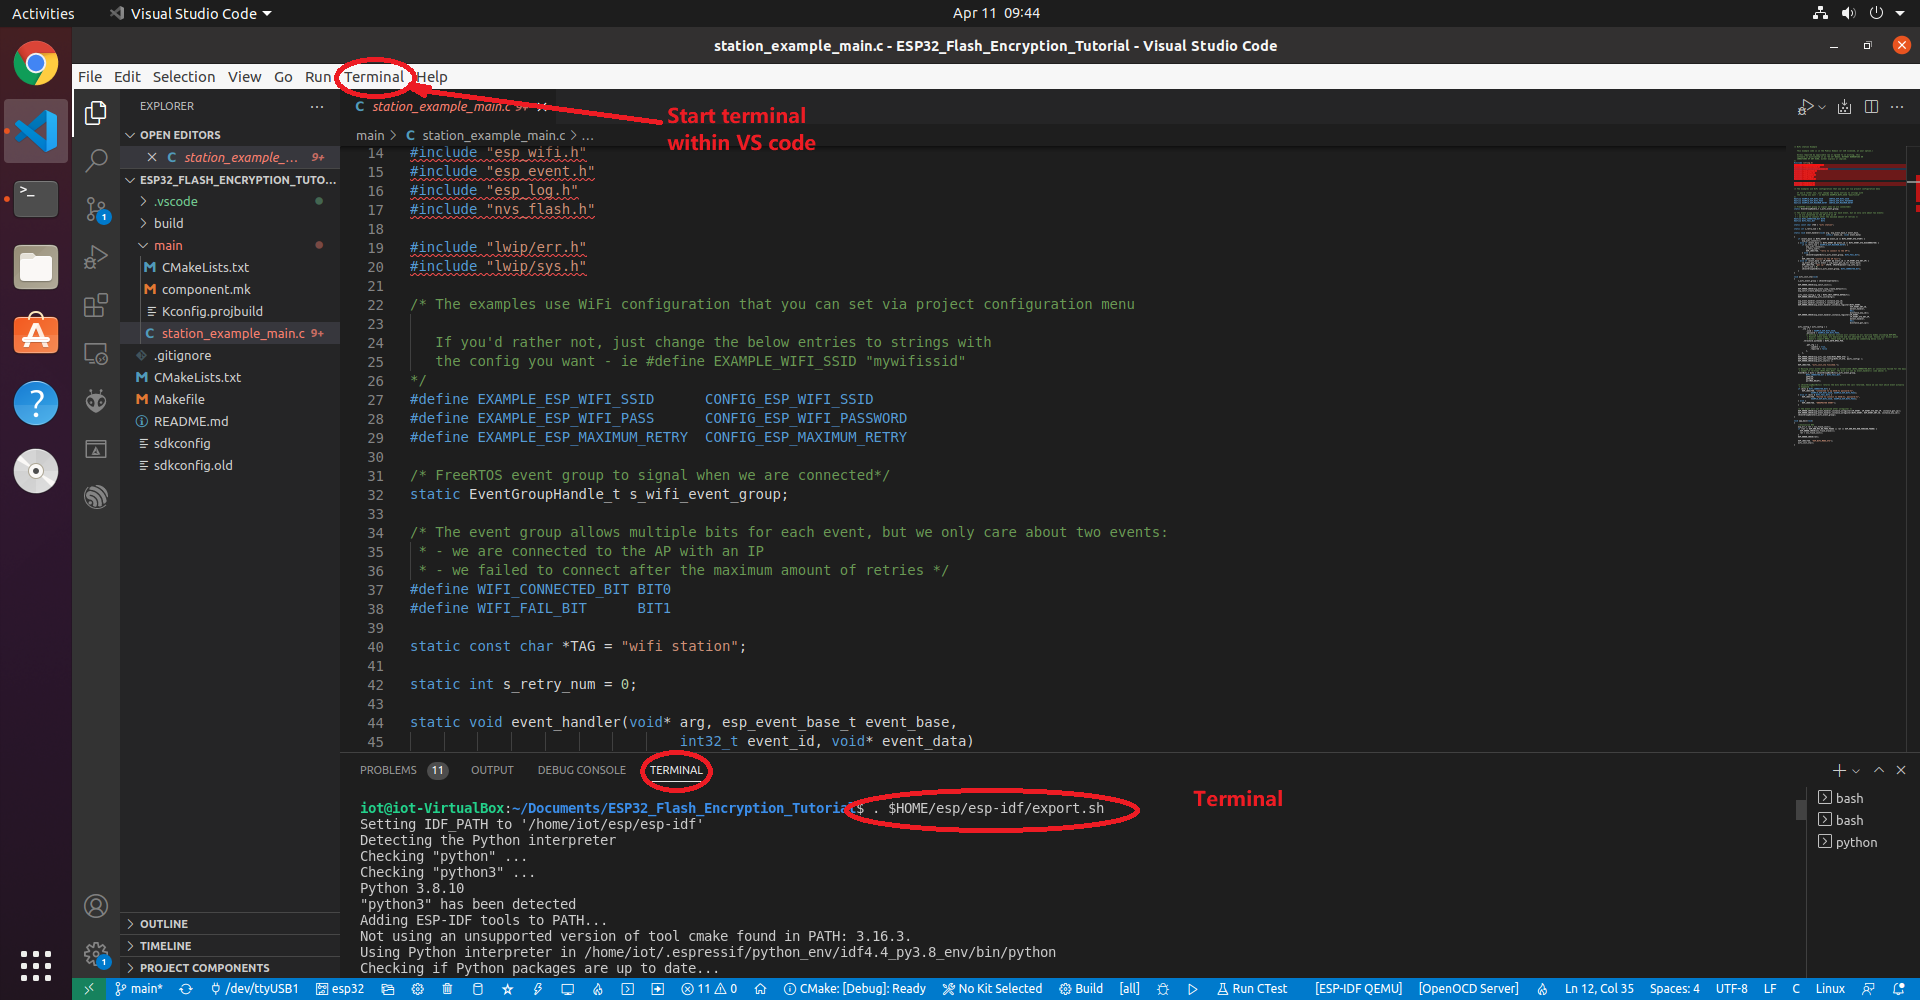
Otherwise Within a Linux terminal, we will need to set up the environment variables so that we can use all the tools without inputting the full path names. This can be done with the export.sh script as shown below.
. $HOME/esp/esp-idf/export.shAll later commands shall be entered in the same terminal.
First, we will see how an attacker can steal the credentials from a plaintext firmware.
Within the terminal with the configured environment, navigate to the root directory of this project if needed. Open the project configuration menu:
idf.py menuconfigUsing the up/down arrow keys, navigate to the Example Configuration menu, press enter to enter into the menu, then press enter to begin typing your WiFi SSID. When you are done, do the same for the WiFi Password. After you are done, press ESC several times until you are prompted to save. Press Y to save and exit.
Now build, upload, and monitor the app. NOTE: If using the Hiletgo ESP-WROOM-32 development board, you may need to hold down the IO0 button on the ESP32 when the build system tries to connect to the ESP32's serial port. If you do not hold down the IO0 button during this step, the build system may fail to detect the serial port.
idf.py build flash monitorCTRL+] is used to terminate the serial monitor when needed.
After a few minutes of compiling, the project will be flashed to the board, and the serial terminal will connect to the ESP32. You should see the application successfully connect to your WiFi:
Now we will attempt to steal the WiFi credentials by reading the flash contents of the ESP32 directly. Download the first 65536 bytes of the firmware from the ESP32 using the following command:
esptool.py read_flash 0x10000 0x10000 flash.binThis command reads the contents from the flash chip in the address range 0x10000 - 0x20000. The output is written to the file flash.bin.
Now locate the WiFi credentials in the firmware with the following command:
strings flash.bin | grep -A1 <SSID> # Replace <SSID> with your WiFi SSIDNow we will enable flash encryption, a security mechanism supported by the ESP32 that defeats attacks like the one demonstrated above. The ESP32 supports two kinds of flash encryption modes: Release, and Development:
- In Release Mode, flash encryption is permanently enabled, and the DISABLE_DL_ENCRYPT eFuse is burned. This means the user cannot upload anymore plaintext firmware to the board via UART any more, and the firmware can only be updated via OTA in the release mode.
- In Development Mode, flash encryption can be disabled a limited number of times, and the DISABLE_DL_ENCRYPT eFuse is not burned. This allows the user to upload new plaintext firmware.
For this project, we will only use Development Mode.
Open the configuration menu again:
idf.py menuconfigNavigate to the menu Security features. Select the option Enable flash encryption on boot. By default, the usage mode should be selected as Developmeent (NOT SECURE). Do not change this setting.
Press ESC and change to the Partition Table menu. We need to change the offset of the partition table because the bootloader (which is stored in flash before the partition table) will grow in size. Change the offset of the partition table from 0x8000 to 0x10000.
Press ESC and change to the Component config menu. From here, navigate to the NVS menu. Disable the option Enable NVS encryption, since we are not interested in encrypting the NVS (non-volatile storage) partition.
Do not touch other configurations. Now leave and save the configuration.
Build, flash, and monitor the application just as before. Hold down the IO0 button whenever needed.
idf.py build flash monitorWhen the serial terminal connects to the ESP32, you should see that the bootloader, partition table, and firmware are all encrypted. If you see errors, continue to read.
If errors like "flash read err, 1000" as follows occur after running idf.py build flash monitor, use the following two commands to solve the problems
espefuse.py burn_efuse FLASH_CRYPT_CNT
idf.py encrypted-flash
Now we will download the firmware and try to steal the WiFi credentials, just as before. Since we changed the partition table offset, the firmware was actually flashed at offset 0x20000 instead of 0x10000. Therefore, to download the first 65536 bytes of the firmware, use the following command:
esptool.py read_flash 0x20000 0x10000 flash_encrypted.binNow try to read the credentials just like before:
strings flash_encrypted.bin | grep -A1 <SSID> # Replace <SSID> with your WiFi SSIDYou will see that nothing is returned. This indicates that flash encryption is enabled and the WiFi credentials can no longer be recovered.
To disable flash encryption, please follow the steps below.
CAUTION: The following procedure can only be performed 3 times, due to the limited size of the FLASH_CRYPT_CNT eFuse.
First, open the configuration menu, navigate to Security features, and disable the option Enable flash encryption on boot.
Next, build and flash the application:
idf.py build flashFinally, set the next bit in the FLASH_CRYPT_CNT eFuse to disable flash encryption:
espefuse.py burn_efuse FLASH_CRYPT_CNTFollow the instructions and type BURN to finish setting the eFuse.
NOTE: This may throw an error A fatal error occurred: New value required for efuse 'FLASH_CRYPT_CNT' (given None) in this case we need to provide the bit value to set. This needs to be some binary value with an even number of bits, the first value in my case was 3 and this worked.
espefuse.py burn_efuse FLASH_CRYPT_CNTWe can use the command below to see the current efuse state. This will be after the = sign.
espefuse.py summary | grep -A 3 -B 3 "FLASH_CRYPT"Now use the serial monitor to observe the output from the ESP32. There is no more flash encyption information being printed any more. Preset the reset button of the ESP32 and restart it if there is no output from the ESP32.
idf.py monitorAs long as the DISABLE_DL_ENCRYPT eFuse remains 0, the user can always upload plaintext firmware to the board, even after flash encryption is enabled. The firmware will be encrypted by the ESP32's UART bootloader when the user uploads new firmware. To upload new firmware after flash encryption is enabled, simply replace all idf.py flash commands with idf.py encrypted-flash.
To re-enable flash encryption, enable the option Enable flash encryption on boot in the configuration menu, and build and flash the application. The bootloader will automatically set the next bit in the FLASH_CRYPT_CNT eFuse to enable flash encryption; there is no need for the user to manually burn the efuse.
You can follow this procedure to enable secure boot even after flash encryption already enabled. There is no need to disable flash encryption as long as the DISABLE_DL_ENCRYPT eFuse is set to 0.
espefuse.py summary


