This guide assumes your VM network connection is set to NAT. If you're not sure, check:
Player ▼
└─── 🔧 Manage
     └─── 🔧 Virtual Machine Settings
          └── 🖥️🖥️ Network Adapter

-
1: Install PuTTY on Windows
-
2: Download
vmnetcfg.exe, and place it in the VMware Player installation folder (usually it'sC:\Program Files (x86)\VMware\VMware Player) -
3: Run
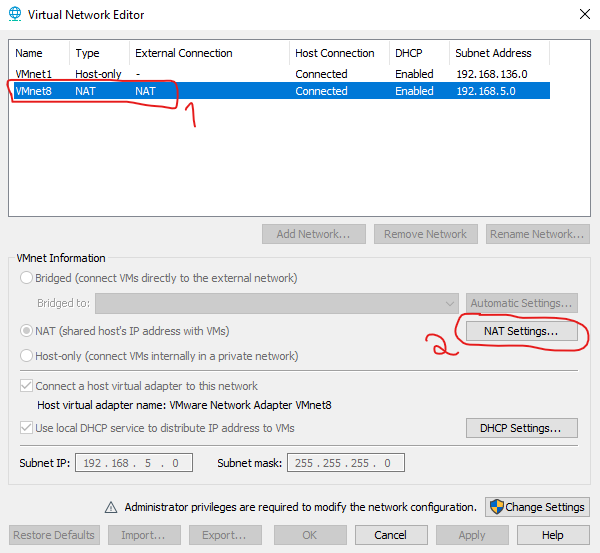
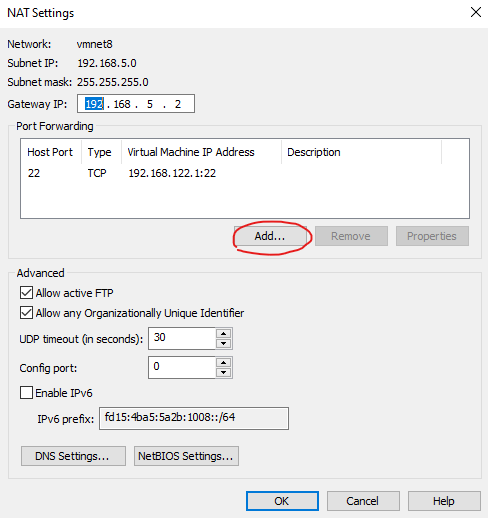
vmmnetcfg.exeas administrator and:- Select "VMNET8" and click on "NAT Settings":
- Click "Add..."
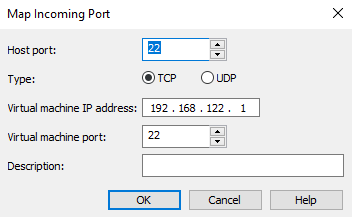
- Set the connection settings. In this case:
- Host Port: Let's use
22 - Virtual Machine IP Address: The VM's IP address. In my case it's
192.168.122.1, but you need to check yours - Virtual Machine Port: Let's use
22 - Description: Anything you want
- Host Port: Let's use
-
4: Go to the VM and install openssh by running
sudo yum install openssh-server(for CentOS/RedHat) in the terminal -
5: Enable X11 forwarding in
/etc/ssh/ssh_configby removing the#character in the line saying "ForwardX11 yes", so that it looks like this: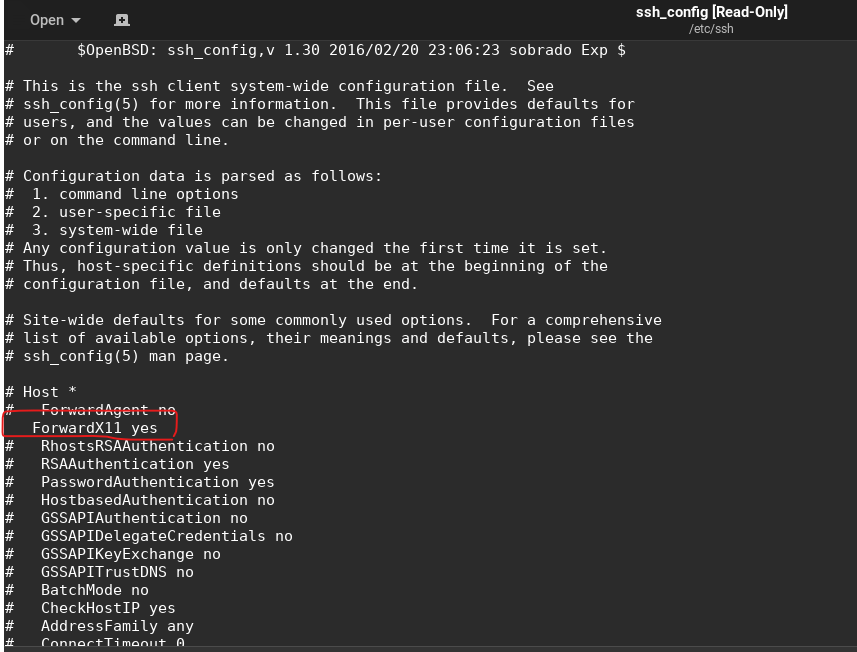
-
6: Restart the VM


Now, on Windows:
-
1: Install Xming X Server for Windows and use the config.xlaunch file to launch it.
- Tip: Place the file on the Startup folder of Windows (Win+R ->
shell:startup) so it starts in the background everytime you log in
- Tip: Place the file on the Startup folder of Windows (Win+R ->
-
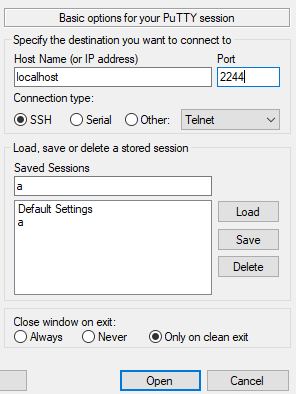
2: Configure PUTTY:
-
Set the connection settings by:
- Host: localhost
- Port: 2244
-
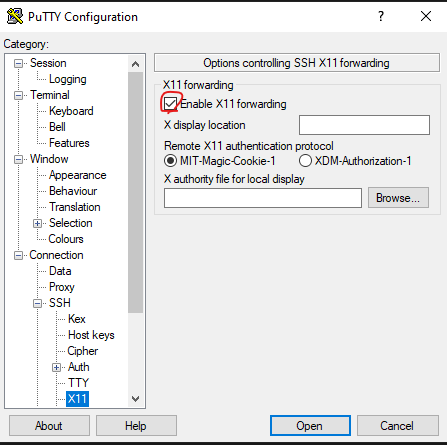
Enable X11 Forwarding:
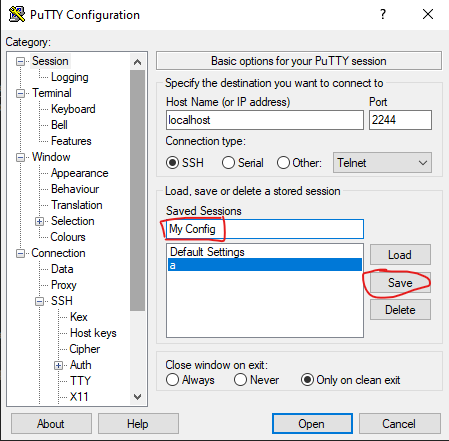
- Save the configuration by giving it a name and pressing Save:
-
-
3: Try the connection by pressing Open. If it works, we're good to go!


You can now also create a shortcut on your desktop to make it easier to launch the PuTTY session.
Create a shortcut with this path, and replace the relevant params:
"C:\Program Files\PuTTY\putty.exe" -load {CONFIG_NAME} -pw {YOUR_USER_PASSWORD} -t
So for example:
"C:\Program Files\PuTTY\putty.exe" -load MyConfigName -pw MySuperSecurePassword -t
If the mouse cursor looks too big, set the cursor size environment variable like this:
export XCURSOR_SIZE=16
For convinience sake, it's probably a good idea to add this line to the ~/.bashrc file
- 1: Execute the
ip addrcommand in the VM's terminal - 2: IP should be located in the
virbr0entry, like so:
