- Bubble Paystack plugin
Bubble.io is a no-code app development framework that lets you design, develop, host, and scale applications without a single line of code. Bubble can be used to build any kind of application whether it’s just a hobby app for personal use, or a complex piece of software built to run an entire large-scale business.
With the Paystack plugin, you can now accept seamless and secure payments in your Bubble applications. Here’s how to get started!
💡 If you don’t have a Paystack account, start by creating one [here](https://dashboard.paystack.com/signup)- Open your application project, and click on the Plugins menu on the left bar.

- Click “Add Plugins”, then search for Paystack
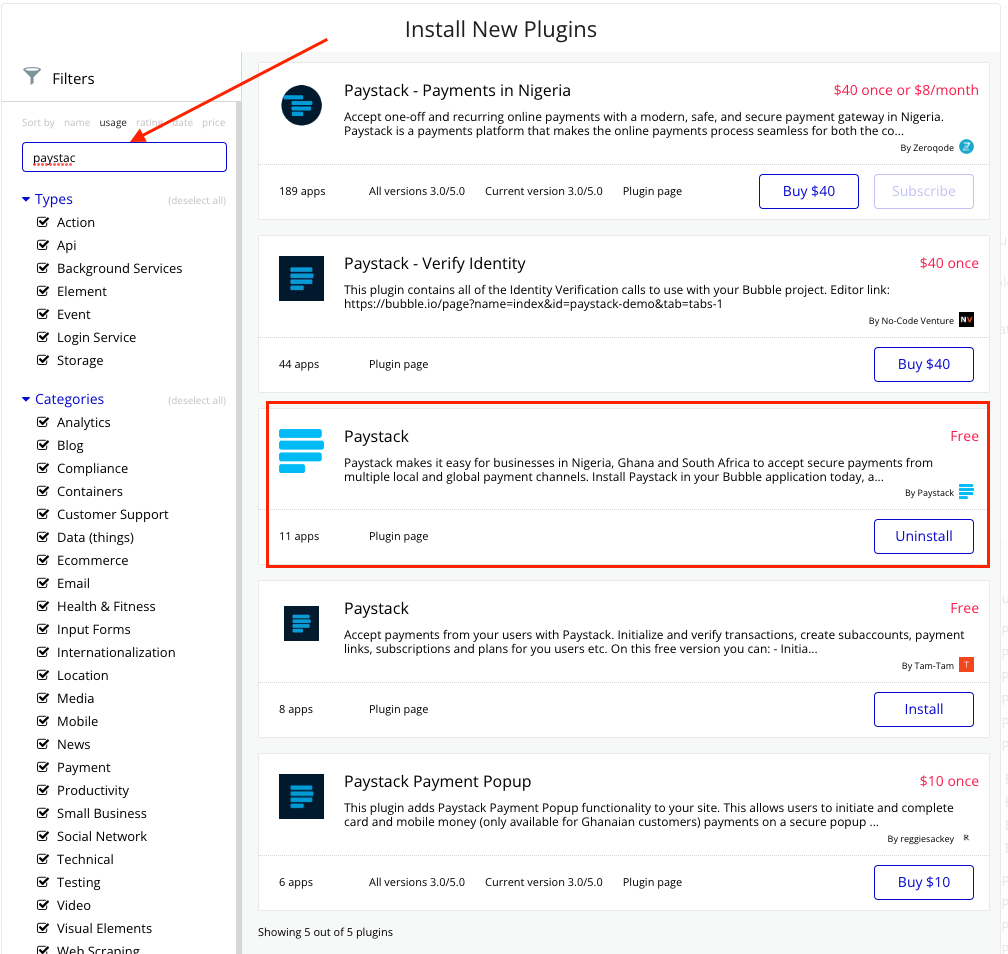
- Click to install, then close the modal.
You should now have Paystack listed under your installed plugins. Click on Paystack to open up the configuration panel. To proceed, you will need to grab your API keys from the Paystack dashboard. First with the public key, add your live public key from the Paystack dashboard to the Public key field in Bubble, and the test public key to Public key - dev.
Up next, copy your live secret key from the dashboard and add it to the API key field in this format Bearer sk_live_84fjsk********90, and do the same for the test API key.
💡 Ensure your include the preceding “ Bearer “ in the *API Key* and *API Key - dev.* fields for the plugin to work properly.Done? Amazing. Settings are auto-saved in Bubble and we’re good to start accepting payments!
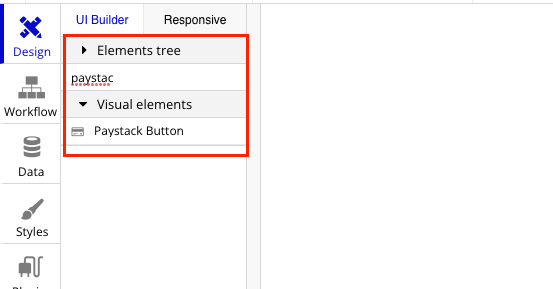
This plugin provides a Pay Button component that allows you to seamlessly and securely accept payments on your application. When the button is clicked, the customer is presented with a popup checkout UI where they can enter their payment information.
The component is available in the Design —> Visual Elements section of your application.
The component can be configured with the parameters below.
| Parameter | Description | Required |
|---|---|---|
| Email Address | The customer’s email address | Yes |
| Amount | The amount of the transaction in the smallest currency unit, i.e kobo for Naira transactions, pesewas for Cedis transactions, cents for Rands, etc. | Yes |
| Reference | Unique case sensitive transaction reference. Only -,., = and alphanumeric characters allowed. If not specified, a reference will be auto-generated for the transaction | No |
| Currency | Defaults to your dashboard currency | No |
| Channel | Payment channel for the transaction. Choose between Cards, Bank transfer, EFT, Pay with Bank, USSD or Apple Pay. If not specified, the options set on the dashboard preferences will apply. | No |
| Label | String of text to show in place of customer's email on checkout | No |
| Plan code | If transaction is to create a subscription to a predefined plan, provide valid Paystack plan code here e.g PLN_093nkdt8. This would invalidate the value provided in amount | No |
| Split code | If you want to split the transaction with multiple partners, add a valid Paystack split code here. e.g. SPL_98WF13Eb3w | No |
| Subaccount | If you want to split the transaction with one partner, add a valid Paystack subaccount code here. e.g. SUB_57RT4kf0 | No |
| Show badge | Choose whether to show the Secured By Paystack badge beneath the Paystack Button. Defaults to true. | Yes |
| Button text | Text to show on the Paystack Button. Defaults to “Pay with Paystack” | Yes |
| Background color | Background color for the Paystack Button defaults to green | Yes |
| Text color | Text color for the Paystack Button. Defaults to white. | Yes |
The button configuration fields are flexible and accept dynamic values, for example, the email address can be set to the email of the currently signed-in user or a value from an input field on your page. Likewise, the plan code can be copied from the dashboard and hardcoded or fetched from the plugins’ data API calls.
These parameters should be set according to your application use case.
After configuring the Paystack Button, you can use the component’s events and states to control the experience and what happens after the button is clicked.
An event can be used as a trigger that starts a workflow, and there are four different events you can listen for on the component. The events are;
- When a Paystack Button checkout is loaded
- When a Paystack Button transaction is successful
- When a Paystack Button checkout is closed
- When a Paystack Button checkout fails to load
The component also exposes states with parameters related to the transaction created by the button.
| State | Description |
|---|---|
| Disabled | Whether the button is disabled or not. It is disabled when the required parameters are not provided. |
| Customer’s email address | |
| Amount | Transaction amount in the smallest monetary unit |
| Reference | Unique transaction reference |
| Status | Transaction status |
| Message | Human readable response message on transaction status |
| Transaction ID | Unique numberic transaction identifier |
| Error | Error message if checkout fails to load |
These states are updated at different points in the lifecycle of a transaction in sync with the events triggered by the plugin. Here’s how the states and events relate to each other;
When a Paystack Button checkout is loaded;
email,amount, andtransaction_idare set to their respective valuesstatusis set toongoing
When a Paystack Button transaction is successful;
referenceandmessageare updated to their respective valuesstatusis set tosuccess
When a Paystack Button checkout is closed;
statusis set toabandoned
When a Paystack Button checkout fails to load
erroris set to the failure reasonstatusis set toerror
You can combine these to build interesting workflows to control during and post payment experience. Here’s a sample workflow you can build
When a Paystack Button transaction is successful —> Create a new transaction record —> Redirect user to thank you page.

The plugin provides API calls for fetching data from your Paystack business. The response from these calls can be used as data sources to configure the Paystack Button, input fields, or any other elements on your page that accepts dynamic values.
When you choose “Get Data from an external API”, you will find these options available under the Paystack plugin;
List Transactions 🔗
List transactions carried out on your integration
Input Parameters
| Parameter | Description | Required |
|---|---|---|
| status | Filter transactions by status ('failed', 'success', 'abandoned') | No |
| customer | Specify an ID for the customer whose transactions you want to retrieve | No |
| amount | Filter transactions by amount. Specify the amount (in kobo if the currency is NGN, pesewas, if the currency is GHS, and cents if the currency is ZAR) | No |
List Plans 🔗
List subscription plans available on your integration.
Input Parameters
| Parameter | Description | Required |
|---|---|---|
| interval | Interval for the plan. Valid intervals are daily, weekly, monthly, and annually. | No |
List Customers 🔗
List customers available on your integration
Fetch Customer 🔗
Get details of a customer on your integration.
Input Parameters
| Parameter | Description | Required |
|---|---|---|
| Customer’s email address | Yes |
List Subaccounts 🔗
List subaccounts available on your integration.
List Splits 🔗
List splits available on your integration
Fetch Subscription 🔗
Get details of a subscription on your integration.
Input Parameters
| Parameter | Description | Required |
|---|---|---|
| id_or_code | The subscription ID or code you want to fetch | Yes |
Generate Update Subscription Link 🔗
Generate a link for cancelling or updating the card on a subscription.
Input Parameters
| Parameter | Description | Required |
|---|---|---|
| code | Subscription code | Yes |
List Banks 🔗
Get a list of all supported banks and their properties
| Parameter | Description | Required |
|---|---|---|
| country | The country from which to obtain the list of supported banks. e.g country=ghana or country=nigeria | Yes |
| pay_with_bank_transfer | A flag to filter for available banks a customer can make a transfer to complete a payment | No |
| pay_with_bank | A flag to filter for banks a customer can pay directly from | No |
| gateway | The gateway type of the bank. It can be one of these: [emandate, digitalbankmandate] | No |
| type | Type of financial channel. For Ghanaian channels, please use either mobile_money for mobile money channels OR ghipps for bank channels | No |
| currency | One of the supported currency | No |
Initialize a transaction 🔗
This action creates a new transaction and returns a hosted checkout URL that you can redirect users to so they can complete the payment. The response can be from Paystack including the authorization URL, and the transaction reference can be accessed in the subsequent actions as 'Result of previous step.’
☝🏻 Add the **callback_url** parameter to ensure the customer is redirected back to your app after payment is complete.Verify transaction 🔗
This action can be used to fetch the details of a transaction using the reference. The response includes the transaction status, customer, payment channel information, etc. These are available for subsequent actions as 'Result of previous step.’
Charge an Authorization code 🔗
This action is used to charge a customer using a previously used card, i.e authorization code. The authorization code is a representational token for the card e.g AUTH_89ikm4b It can be gotten from the verify transaction or fetch customer API call. All authorizations marked as reusable can be charged with this action whenever you need to receive payments.
The response from Paystack including the status of the transaction can be accessed in the subsequent actions as 'Result of previous step.’
Create plan 🔗
This action allows you to create a subscription plan on your integration by specifying an amount, interval, and name for the plan. The response includes a plan_code which can be accessed in the subsequent actions as 'Result of previous step.’
Subscribe a customer to a plan 🔗
This action can be used to subscribe a customer to an existing plan. You’d need to provide the customer's email address, plan code, and a reusable authorization code. The response including the status and subscription code can be accessed in the subsequent actions as 'Result of previous step.’
Create Refund 🔗
This action can be used to refund a customer partially or fully for a transaction. You’d be required to provide at least the transaction reference and if you want to process a partial refund, the amount. The response including the status and amount can be accessed in the subsequent actions as 'Result of previous step.’
Create Subaccount 🔗
This action can be used to add a bank account for a partner you want to split payments with. You’d need to provide the business name, bank code which can be gotten from the list banks API call, bank account name and the percentage charge that should be paid to your business. The response includes the subaccount code which can be accessed in the subsequent actions as 'Result of previous step.’
Create Customer 🔗
This action can be used to create a customer in your integration. You’d need to provide the customer's email address, first name and last name. The response includes the customer code which can be accessed in the subsequent actions as 'Result of previous step.’
In this video, you'll learn how to set up Paystack on your Bubble application and accept payments using the popup checkout.