Abandonment Notice: I'm afraid I simply don't have the time to maintain my Grav themes and plugins. Those interested in taking over should refer to the "Abandoned Resource Protocol". Feel free to fork and replace. So long, and thanks for all the fish.
The Tagcloud Plugin is for Grav CMS. It creates a rudimentary tag cloud that can be easily styled to fit your needs.
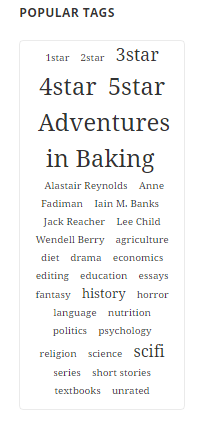
NOTE: The appearance will differ from the screen capture depending on your base theme. See the Customization section for instructions on how to change the styling.
Installing the Tag Cloud plugin can be done in one of two ways. The GPM (Grav Package Manager) installation method enables you to quickly and easily install the plugin with a simple terminal command, while the manual method enables you to do so via a zip file.
The simplest way to install this plugin is via the Grav Package Manager (GPM) through your system's terminal (also called the command line). From the root of your Grav install type:
bin/gpm install tagcloud
This will install the Tag Cloud plugin into your /user/plugins directory within Grav. Its files can be found under /your/site/grav/user/plugins/tagcloud.
To install this plugin, just download the zip version of this repository and unzip it under /your/site/grav/user/plugins. Then, rename the folder to tagcloud. You can find these files on GitHub or via GetGrav.org.
You should now have all the plugin files under
/your/site/grav/user/plugins/tagcloud
NOTE: This plugin is a modular component for Grav which requires Grav; the Error, Problems and Taxonomy List plugins; and a theme to be installed in order to operate.
To use tagcloud you need to set your pages header with at least a taxonomy tag:
taxonomy:
    tag: [tag1, tag2]
Then include the twig file somewhere in your theme skeleton (usually in sidebar.html.twig) along the following lines:
```
{% if config.plugins.tagcloud.enabled %}
  <aside class="widget widget_meta">
    <h2 class="widget-title">{{'POPULAR TAGS'|t}}</h2>
    {% include 'partials/tagcloud.html.twig' %}
    </aside>
{% endif %}
```
If you're using the Blog Injector plug-in, use the following:
{% include 'partials/tagcloud.html.twig' with {'base_url':new_base_url, 'taxonomy':'tag'} %}
Remember that the plugin
taxonomylistmust be installed and enabled!
enabled: true
threshold: 0
built_in_css: true
To change the defaults, copy tagcloud.yaml to your user/config/plugins folder and edit it there.
-
Use the
enabledfield to activate or deactivate the plugin. -
The
built_in_cssfield tells the plugin to use the included CSS. To customize, set this tofalseand see the Customization section for further instructions. -
The
thresholdfield takes a little explaining.The tags are sized based on how frequently they appear. This is done by first determining the number of times the most frequent tag appears (
max) and then comparing each tag's count (count) against it, forming a percentage:percent = (count/max) * 100. Thatpercentnumber is then compared against the different tiers in the twig file to determine how it should be sized.The
thresholdin the config determines the minimumpercenta tag must be to even be displayed. A value of 0 shows all tags. A value of 100 only shows the tags whosecountsequal themax. Any value between that will show some subset of your tags. You'll need to do some trial and error to find the right number. It really depends on how many different tags your blog uses and how frequently you use them.
NOTE: I don't personally use the Admin plugin, so please let me know if it does not work as expected. The
blueprints.yamlfile should support it.
You can customize both the CSS and the twig file.
To customize the CSS, do the following:
- Disable
built_in_css. - Copy
tagcloud.cssfrom the plugin'sassetsfolder into theassetsfolder of your theme. - Edit as you see fit.
To customize the twig file (including changing the way the various levels are differentiated), do the following:
- Copy
tagcloud.html.twigfrom the plugin'stemplates/partialsfolder into your theme'stemplates/partialsfolder. - Edit as you see fit.
The general approach was inspired by a blog post by Steve Thomas.
