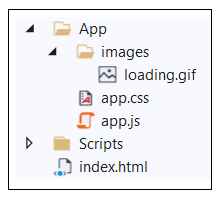
This sample project named SalesforceUserOwnsDataApp consists of a very simple Single Page Application (SPA) that implements User-Owns-Data embedding with Power BI reports. The solution is built using three essential files which include index.html, app.css and app.js. This solution contains an option fourth file named loading.gif which is used to demonstrate a white-label loading technique in which the developer can display a custom loading image instead of the standard Power BI branded loading image.
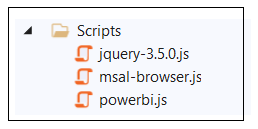
The SalesforceUserOwnsDataApp project uses three different JavaScript libraries which include jQuery, Microsoft Authentication Library for JavaScript v2 (msal-browser.js) and the Power BI JavaScript library (powerbi.js).
Once this SPA application has been deployed and configured, you can integrated it into a Salesforce environment using iFrame tags. This techniques makes it possible to embed Power BI report in VisualForce pages, Lighting Applications and Lighting Aura components.
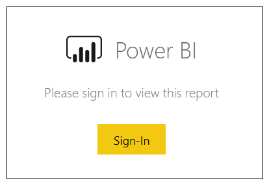
A central motivation for this project is to provide a User-Owns-Data embedding experience in the Salesforce environment with more flexibility than the out-of-the-box Secure Embed feature. In particular, when embedding a Power BI report using an iFrame generated for the Secure Embed feature, the user must click the Sign-in button each time they begin a new browser session.
This continual requirement for user interaction to load a Power BI report has the potential to make our end users a bit cranky. A embedding solution using SalesforceUserOwnsDataApp provides the following advantages over implementing User-Owns-Data embedding using the Secure Embed feature.
-
When users log in the first time, their credentials are cached in the browser using refresh tokens.
-
Once user credentials are cached, embed reports will automatically load without requiring interaction.
-
This app uses a white-labelling technique to hide the Power BI logo which is exchanged for an animated GIF with a custom loading image.
To configure the SalesforceUserOwnsDataApp sample, you must follow these steps.
-
Find a place to publish the application files where they're accessible through HTTPS.
-
Create an Azure AD application for a Single Page Application
-
Download the application files and configure app.js to use your application ID and tenant.
-
Upload the application files to the publish location where they're accessible through an HTTPS URL.
-
Update the Azure AD application with the URL for the domain where you published application files.
-
Test embedding a Power BI report by going directly to the application's URL.
-
Embed the report in Salesforce by adding iFrames to a VisualForce page.
There are many different places you can publish the application files where they are accessible through a URL that uses the HTTPS protocol. For example, let's say you create a new Azure App Service which has a base URL of https://salesforceuserownsdataapp.azurewebsites.net. Once you upload the application files to this location, the index.html file should then be accessible through the following URL.
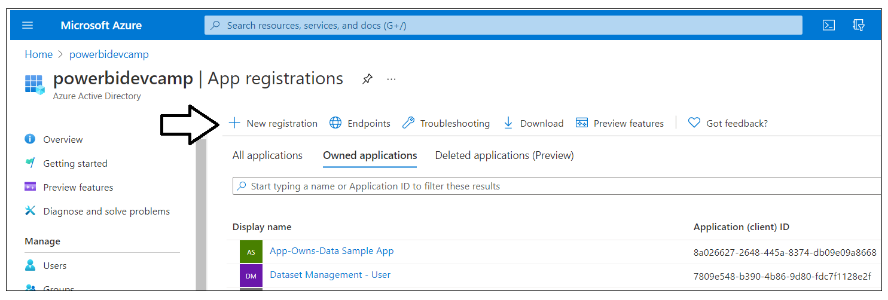
The setup process includes creating a new Azure AD application in the same tenant which contains the Power BI reports you'd like to embed. Begin by navigating to the App registration page in the Azure portal and click the New registration link.
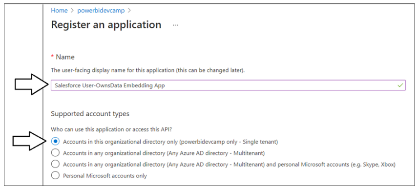
On the Register an application page, enter an application name such as Salesforce User-OwnsData Embedding App and accept the default selection for Supported account types to restrict users to a single tenant.
In the Redirect URL (optional) section, select Single Page Application (SPA) from the dropdown list on the left and enter the base URL where you will publish your application files followed by the HTML page name of index.html as shown in the following screenshot. Next, click the Register button to create the new Azure AD application.
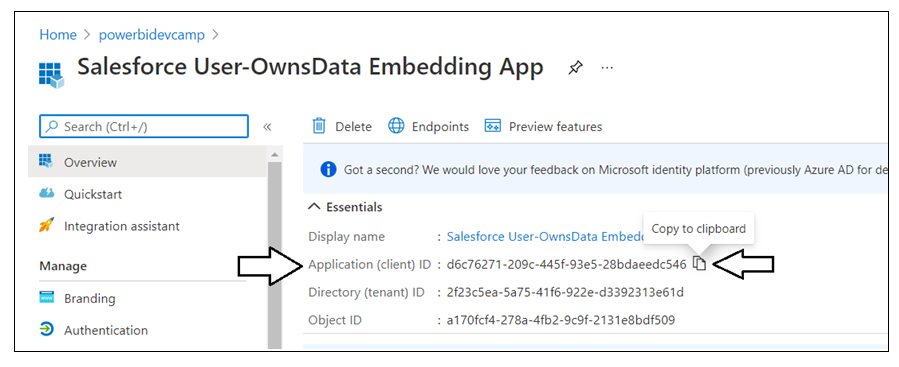
When you create the new Azure AD application, the Azure portal should navigate to the application overview page which displays the Application ID. You will need to copy this Application ID and paste it into app.js. At this point, copy the Application ID and paste it into a new Notepad document so you can paste it into app.js later.
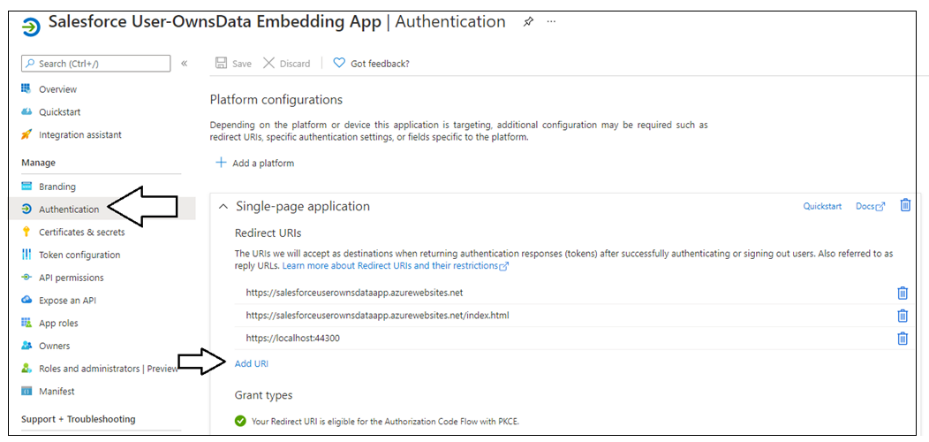
An Azure AD application can optionally be configured with multiple Redirect URIs. In some scenarios you might want to add additional Redirect URIs which can be accomplished by click the Authentication link in the left navigation and then clicking Add URI. For example, you can add a second Redirect URI of https://localhost:44300 so that you can run and test the SalesforceUserOwnsDataApp sample project in Visual Studio 2019.
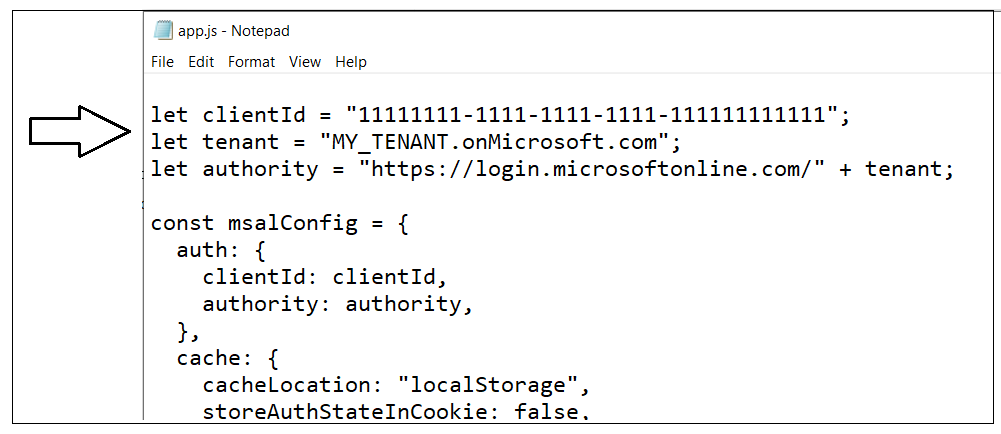
Now that you have created the Azure AD application, it's time to modify app.js with the Application ID and the Tenant Name. If you open app.js, you will see two variables named clientId and tenant. Update the clientId variable with the Application ID of the new Azure AD application. Update the tenant variable with the name of your Azure AD tenant.
Once you have made these changes to app.js, upload all four application files to the publishing location. At this point, you should be able to access the index.html file through the HTTPS protocol.
Now you are ready to test the application. But first you to find the report ID of the report you want to embed. In a separate browser tab, open a Power BI report and copy the Report ID from the URL in the browser address bar.
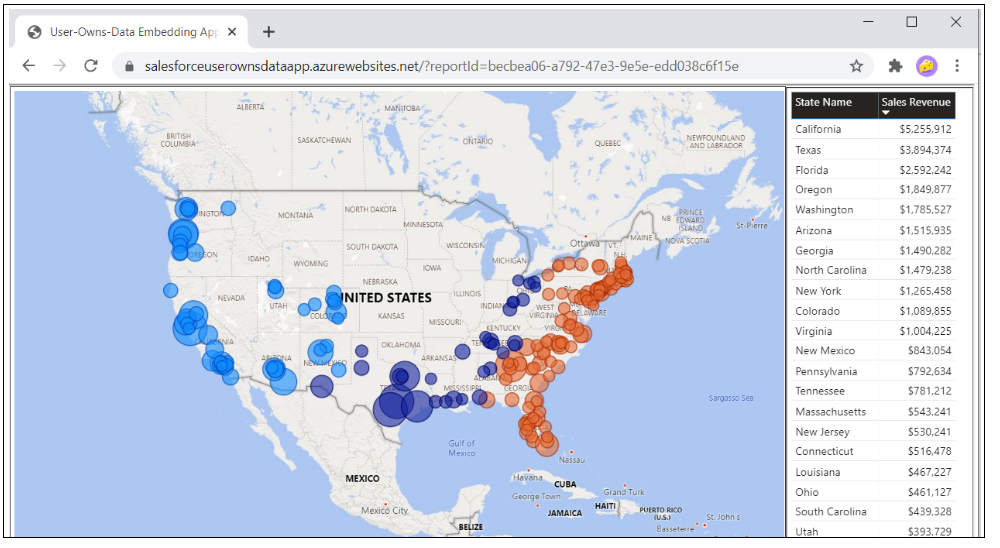
Now return to the application page and add a query string parameter named reportId with the value set to the report Id. After configuring the reportId query string parameter, resubmit the page.
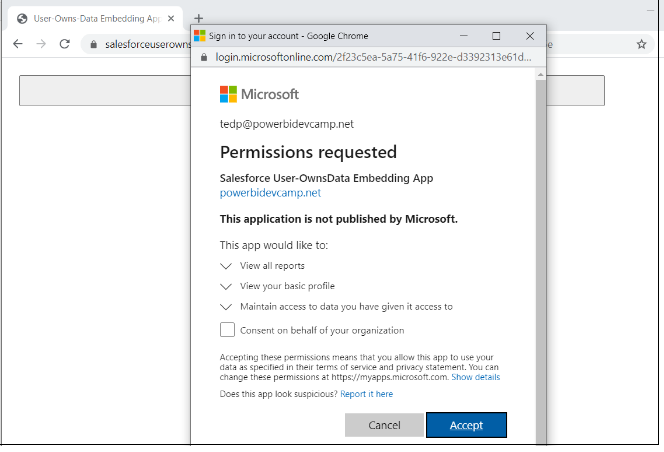
When you refresh the page with the reportId parameter, the application should begin the login sequence. After logging in the first time, each user should be prompted with a standard Azure AD dialog which prompts the user to accept the permissions requested by the application. Click the Accept button to continue.
At this point, the report should be displayed in the browser. The application has now been set up and configured and you can begin using it in Salesforce.
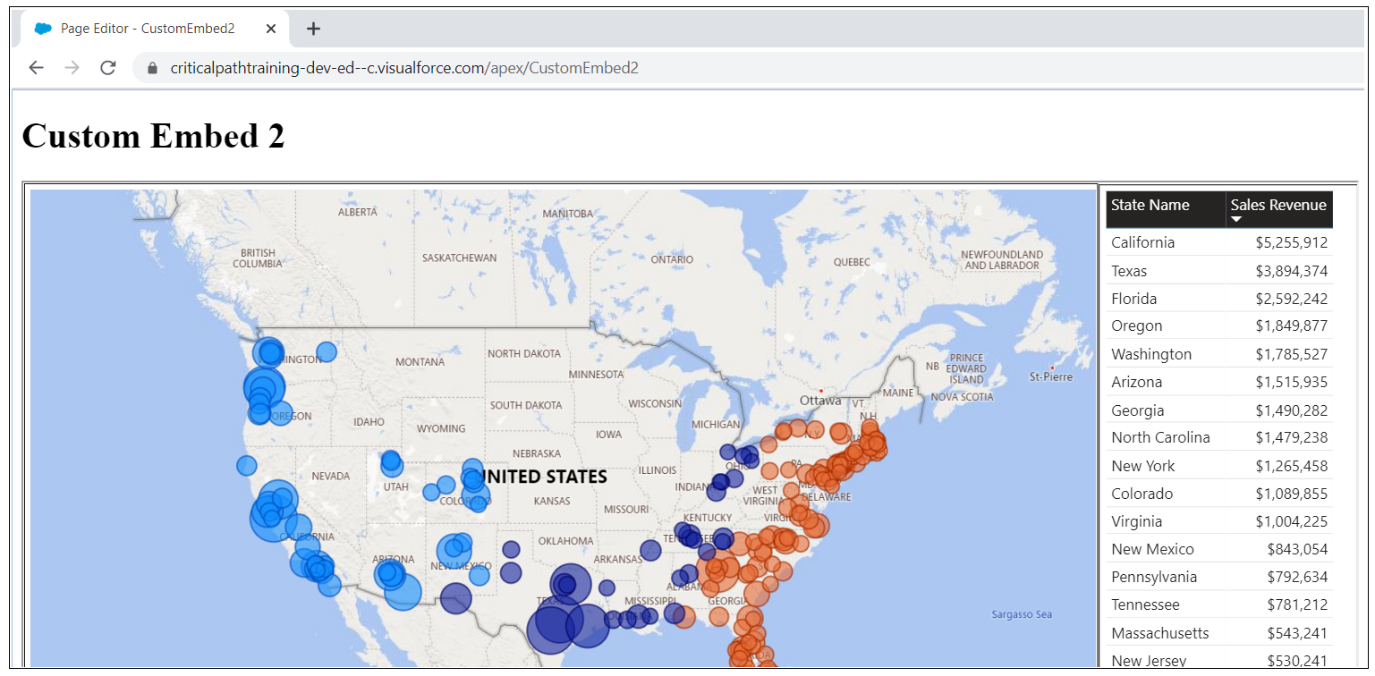
Now it's time to embed things in a Salesforce page. For example, you can create an VisualForce page with the following code to embed a report.
<apex:page showHeader="true" standardStylesheets="false"  >

  <h1>Custom Embed 2</h1>

  <iframe
    width="1200"
    height="720"
    src="https://salesforceuserownsdataapp.azurewebsites.net/index.html?reportId=YOUR_REPORT_ID"
    frameborder="0"
    allowFullScreen="true">
  </iframe>

</apex:page>
This should result in a Salesforce page that embed a Power BI report.
