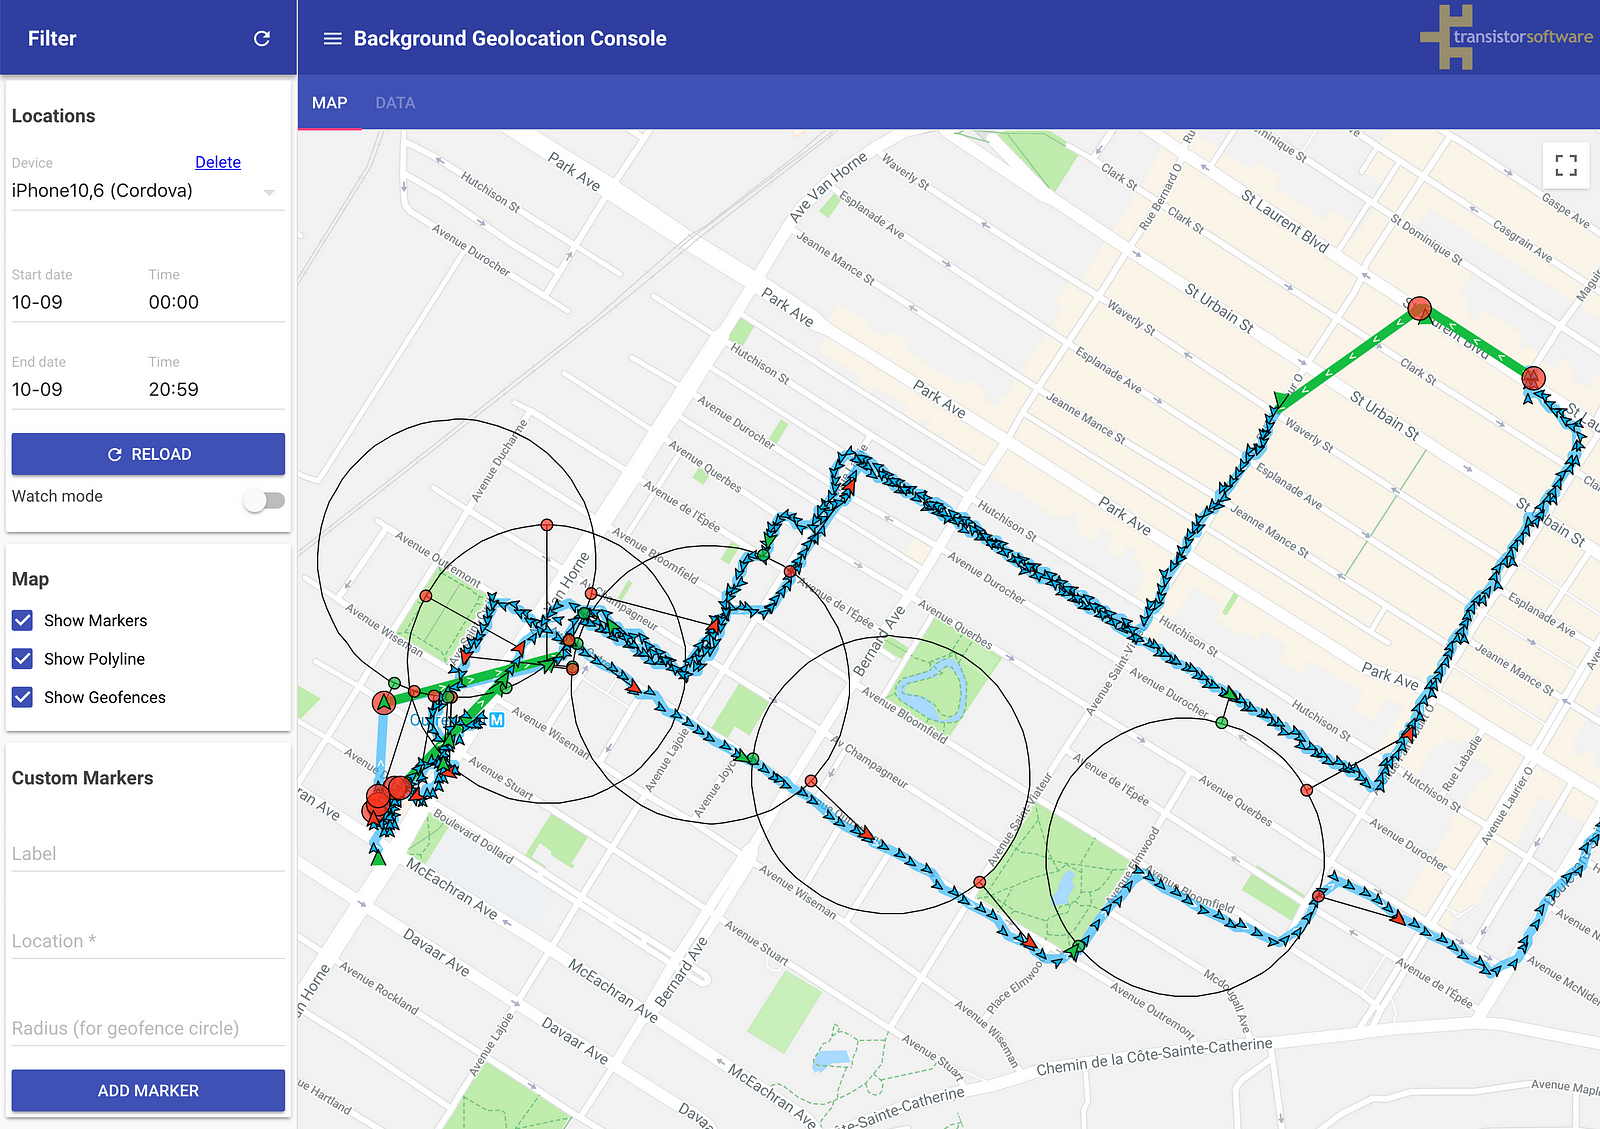
A simple Node server & web app with SQLite database for field-testing & analysis of the Background Geolocation plugin.
You may read the news about this application in our article on Medium.
You must have node.js 14.5.0 or later and npm installed on your computer. From the root project directory run these commands from the command line:
npm installEnvironment variables:
export DATABASE_URL=postgres://postgres:password@localhost:5432/geolocation # or skip this line to use sqlite
export GOOGLE_MAPS_API_KEY=AIz...vNkg # or skip this line
# Do you use it for a lot of organisation or users?
export SHARED_DASHBOARD=1      # with auth,
# export SHARED_DASHBOARD=1    # empty - without auth,
# Manage them in one account?  http://localhost:8080/admin
export ADMIN_TOKEN=admin256    # admin login
# Do you need auth?
export PASSWORD=test           # admin password
For production version please do not forget add your own JWT keys
export JWT_PRIVATE_KEY=-----BEGIN RSA PRIVATE KEY-----\n...\n-----END RSA PRIVATE KEY-----\n
export JWT_PUBLIC_KEY=-----BEGIN RSA PUBLIC KEY-----\n...-----END RSA PUBLIC KEY-----\n
Please use set and 8080 port for dev.
export FIREBASE_URL=https://YOUR-PROJECT-DATABASE.firebaseio.com
export FIREBASE_PRIVATE_KEY=-----BEGIN PRIVATE KEY-----\nMII...=\n-----END PRIVATE KEY-----\nDatabase will create automaticaly in non production.
npm startproduction version will available on:
npm starthot reload version will available on:
Application have a jest api tests
npm testIf you are in an environment that supports opening a web browser, a browser window will automatically launch the front-end web app at the end of the server startup procedure.
The Background Geolocation Sample App is perfect for use with this web-application. To configure the app, determine your IP address and pick a unique console username, then simply edit Settings->url and set it to http://<your.ip.ad.dress>:9000/locations/<your-console-username>.
You may also want to configure Settings->autoSync to false while out field-testing as well, so that the app doesn't try syncing each recorded location to a possibly unreachable server running on your localhost. Once you return after a test and you're back on your office Wifi, click the [Sync] button on the Settings screen to upload the cached locations to the Background Geolocation Console server.
As you integrate the background-geolocation plugin with your app, you may find it useful to post locations to the test console to verify your integration.
If you want to post to the tracking console in your own app, it’s very easy: The plugin contains a helper method #transistorTrackerParams to compose a params config suitable for consumption by the server. It's up to you to provide the device plugin instance (Cordova: cordova-plugin-device, React Native: react-native-device-info, Flutter
//
// Configure the BackgroundGeolocation plugin to post to this console
// after modifying the #url / #params below, visit in your browser:
// http://<your.ip.ad.dress>:9000
//

let username = 'your-custom-username';
BackgroundGeolocation.ready({
  url: 'http://<your-ip-address>:9000/locations',
  params: BackgroundGeolocation.transistorTrackerParams(device) // <-- device plugin instance.
}, (state) => {
  BackgroundGeolocation.start();
});Map deviceParams = await Config.deviceParams;
BackgroundGeolocation.ready(Config(
url: 'http://<your.ip.address>:9000/locations',
params: deviceParams
));You can deploy easily the app on Heroku by pushing the code to your heroku git repository.
Before this, you will need to create 2 environment variables (either in the heroku dashboard, or by executing heroku config:set <VARIABLE_NAME>=<VARIABLE_VALUE>) :
NPM_CONFIG_PRODUCTION = false: It will tell heroku to installdevDependencies(and not onlydependencies), required to build browserify'sbundle.min.jsfileGOOGLE_MAPS_API_KEY = <PUT YOUR KEY HERE>: A Google Maps API v3 allowed for your heroku domain (see https://console.developers.google.com)- Optionally,
DB_CONNECTION_URL = postgres://<username>:<password>@<hostname>:<port>/<dbname>if you want to persist locations into a postgresql db (instead of a sqlite db which will be deleted after every heroku shutdown)
And to reference heroku/nodejs buildpack (either in the heroku dashboard, or by executing heroku buildpacks:add --index 1 heroku/nodejs)
By default console will use SqlLite file storage
NB!: It will clean on conatiner re-creation
Please add volume to store it or setup Postgres/Firebase storage
- Configurate you own build in Dockerfile
docker build -t background-geolocation-console .docker run -p 9000:9000 -v /<rootpath>/src/server/database/db:/usr/src/server/database/db -d background-geolocation-console
Now it available by http://<docker-machine-ip>:9000/
You can run docker-machine ls for ip investigation.
- Do not forget create machine
docker-machine create -d "virtualbox" local.geolocation - Setup vars
eval $(docker-machine env local.geolocation) docker-compose upin root dir
Now it available by http://<docker-machine-ip>/
You can run docker-machine ls for ip investigation.
Please do not forget set up GOOGLE_MAPS_API_KEY too.
Chris Scott of Transistor Software
Copyright 2021, Transistor Software
Permission is hereby granted, free of charge, to any person obtaining a copy of this software and associated documentation files (the "Software"), to deal in the Software without restriction, including without limitation the rights to use, copy, modify, merge, publish, distribute, sublicense, and/or sell copies of the Software, and to permit persons to whom the Software is furnished to do so, subject to the following conditions:
The above copyright notice and this permission notice shall be included in all copies or substantial portions of the Software.
THE SOFTWARE IS PROVIDED "AS IS", WITHOUT WARRANTY OF ANY KIND, EXPRESS OR IMPLIED, INCLUDING BUT NOT LIMITED TO THE WARRANTIES OF MERCHANTABILITY, FITNESS FOR A PARTICULAR PURPOSE AND NONINFRINGEMENT. IN NO EVENT SHALL THE AUTHORS OR COPYRIGHT HOLDERS BE LIABLE FOR ANY CLAIM, DAMAGES OR OTHER LIABILITY, WHETHER IN AN ACTION OF CONTRACT, TORT OR OTHERWISE, ARISING FROM, OUT OF OR IN CONNECTION WITH THE SOFTWARE OR THE USE OR OTHER DEALINGS IN THE SOFTWARE.
