Embedded Test (ET) is a super-simple, no-nonsense unit test framework in C for bare metal embedded systems without any dependencies on standard libraries or header files. ET is as simple as possible, but not simpler.
- no
printf()/sprintf(),malloc(),longjmp() - no
<stdio.h>or any other standard header files - no "test runners" or code-generating scripts to run in order to test code
- no myriads of various "test assertions" (just common
VERIFY())
NOTE
In spite of the completely bare-metal design, ET can execute most tests (those without "mocking") from the Unity framework as well as from the book "Test-Driven Development for Embedded C" by James W. Grenning. For instance, the LedDriver example demonstrates some tests from the Embedded-TDD book.
ET code and examples are released under the terms of the permissive MIT open source license. Please note that the attribution clause in the MIT license requires you to preserve the original copyright notice in all changes and derivate works.
On embedded targets, ET requires a serial port to output test results to the host. (The host computer must be running a serial utility to visualize the output from the embedded target.) ET provides a simple adaptation layer for any UART/USART in polling mode without interrupts. Please also see Running on Embedded Board.
ET can also run on host computers (Windws, Lunux, macOS) in console mode (in that case, ET takes advantage of <stdio.h>).
ET consists of one small header file (et.h) and one small source file (et.c), which are both located in the root directory of the ET distribution. Additionally, the ET ditro contains examples and embedded code for the STM32 NUCLEO-C031C6 board (other boards can be added following that simple example).
Embedded-Test/     - root of the Embedded Test distribution
|
+---et/            - ET code (the only part of ET needed for external projects)
|   et.h           - ET header file
|   et.c           - ET source file
|   et_host.c      - ET implementation for host computers
|
+---examples/      - ET examples
|   +---basic/     - basic example in C
|   |   +---src/   - CUT (Code Under Test) sources
|   |   |      sum.h
|   |   |      sum.c
|   |   \---test/  - test code
|   |          test.c    - text fixture (see below)
|   |          Makefile  - makefile for testing on the host
|   |          ek-tm4c123gxl.mak  - makefile for EK-TM4C123GXL board (GNU-ARM)
|   |          nucleo-c031c6.mak  - makefile for NUCLEO-C031C6 board (GNU-ARM)
|   |          ek-tm4c123gxl.uvprojx - Keil-MDK project for EK-TM4C123GXL board
|   |          bsp_nucleo-c031c6.c - BSP for NUCLEO-C031C6
|   |
|   +---basic_cpp/ - basic example of testing C++ CUT
|   |          ...
|   |
|   \---leddriver/ - the LedDriver example from the "TDD in C" book
|   |          ...
|
+---3rd_party/     - 3rd-party code needed for embedded examples
|   +---ek-tm4c123gxl/ - code for the EK-TM4C123GXL (TivaC LaunchPad) board
|   +---nucleo-c031c6  - code for the STM32 NUCLEO-C031C6 board
NOTE
The example code is organized in the standard way for unit testing, into thesrcdirectory with the CUT andtestdirectory with test-fixture and makefiles to build and run the tests.
Here is the basic test fixture (see examples/basic/test/test.c), which tests a simple sum(x,y) function that returns x+y. The explanation section following the listing highlights the main points:
 [1] #include "sum.h" /* Code Under Test (CUT) */
 [2] #include "et.h"  /* ET: Embedded Test */

 [3] void setup(void) { ... }
 [4] void teardown(void) { ... }

     /* test group -------------------------------------------------*/
 [5] TEST_GROUP("Basic") {

 [6] TEST("CUT test (passing)") {
 [7]    VERIFY(5 == sum(2, 3));
 [8]    VERIFY(5 == sum(3, 2));
     }

 [9] SKIP_TEST("test (skipped)") {
[10]    VERIFY(3 == 2*2); /* this would fail, but it's not checked */
     }

[11] TEST("CUT test (failing)") {
         VERIFY(5 == sum(2, 3));
[12]     VERIFY(4 == sum(3, 2)); /* <--- fails */
     }

[13] TEST("simple test (passing)") {
         VERIFY(4 == 2*2);
     }

[14] } /* TEST_GROUP() */

     /* dependencies for the CUT -----------------------------------*/
[15] . . .
[1] Test fixture must include the CUT (sum.h in this case)
[2] Test fixture must include the ET header file (et.h)
[3] ET supports the setup() function, which is invoked before every non-skipped test. If a test group does not need to setup tests, an empty setup() function needs to be provided.
[4] ET supports the teardown() function, which is invoked after every non-skipped and non-failing test. If a test group does not need to tear down after tests, an empty teardown() function needs to be provided.
[5] The ET macro TEST_GROUP() defines a single "test group" to enclose all tests. The macro takes the name of the group, which is an arbitrary string. You can define it also as __FILE__.
NOTE
The "test group" in ET is the "test runner" function (ET_run()), which executes tests specified as the body of this function.
[6] The ET macro TEST() defines a single test. The macro takes the test name, which is arbitary string to be output to identify the test.
[7] The ET macro VERIFY() verifies the "test assertion". The macro takes a Boolean expression, which must evaluate to 'true'. If the expression evaluates to 'false' the test fails and ET will print the group-name and line number of the failing VERIFY().
[8] A test can use VERIFY() multiple times.
[9] The ET macro SKIP_TEST() is for tests that are still under development and should be skipped for now. The macro has exactly the same form as TEST() to enable easy conversion of "skipped tests" into regular ones.
[10] The body of a "skipped" test is not executed. Neither are the setup() and teardown() callbacks for that test. This means that the VERIFY() "test assertion" is not evaluated, so it does not matter whether it evaluates to 'true' or 'false'.
[11] This is an example of a failing "test.
[12] Typically a test fails because one of the VERIFY() macros evaluates to 'false', which causes the whole test to fail. (A test can be also forced to fail by calling the FAIL() macro, which provides opportunity to output a "note" as to why a test was forced to fail.)
NOTE
In ET, a failing test stopps the whole run and causes an "exit" from the test-fixture (please see Running on Embedded Board for discussion of what "exit" means on embedded targets). The rationale is that a failing test means that the following code is not to be trusted, so continuaiton makes no sense. This aligns with the TDD workflow, which requires fixing any failing test before continuing with other tests.
[13] Any TEST() following a failing test is not executed.
[14] The test group (see [5]) needs to be closed by a closing-brace }.
[15] The test group can be foolowed by any additional code, typically implementing some dependencies of the CUT.
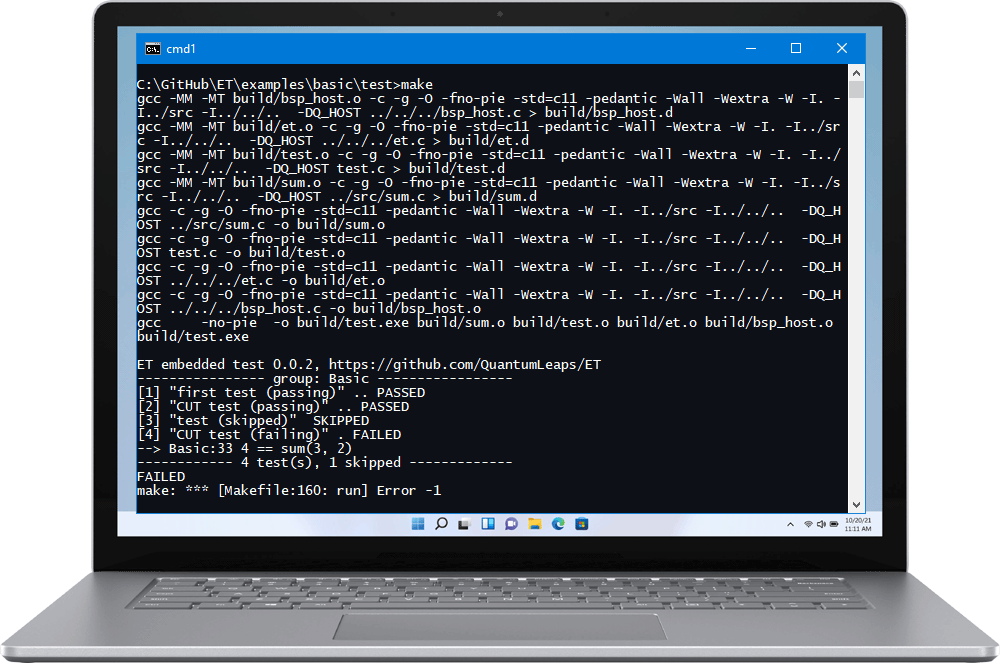
The ET examples provide a simple [Makefile](examples to build the tests and run them on a host (Windows, Linux, or macOS). Here is an example of running the basic test on the host (Windows command prompt in this case.)
C:\GitHub\ET\examples\basic\test>make
gcc -MM -MT build/bsp_host.o -c -g -O -fno-pie -std=c11 -pedantic -Wall -Wextra -W -I. -I../src -I../../..  -DQ_HOST ../../../bsp_host.c > build/bsp_host.d
gcc -MM -MT build/et.o -c -g -O -fno-pie -std=c11 -pedantic -Wall -Wextra -W -I. -I../src -I../../..  -DQ_HOST ../../../et.c > build/et.d
gcc -MM -MT build/test.o -c -g -O -fno-pie -std=c11 -pedantic -Wall -Wextra -W -I. -I../src -I../../..  -DQ_HOST test.c > build/test.d
gcc -MM -MT build/sum.o -c -g -O -fno-pie -std=c11 -pedantic -Wall -Wextra -W -I. -I../src -I../../..  -DQ_HOST ../src/sum.c > build/sum.d
gcc -c -g -O -fno-pie -std=c11 -pedantic -Wall -Wextra -W -I. -I../src -I../../..  -DQ_HOST ../src/sum.c -o build/sum.o
gcc -c -g -O -fno-pie -std=c11 -pedantic -Wall -Wextra -W -I. -I../src -I../../..  -DQ_HOST test.c -o build/test.o
gcc -c -g -O -fno-pie -std=c11 -pedantic -Wall -Wextra -W -I. -I../src -I../../..  -DQ_HOST ../../../et.c -o build/et.o
gcc -c -g -O -fno-pie -std=c11 -pedantic -Wall -Wextra -W -I. -I../src -I../../..  -DQ_HOST ../../../bsp_host.c -o build/bsp_host.o
gcc     -no-pie  -o build/test.exe build/sum.o build/test.o build/et.o build/bsp_host.o
build/test.exe

ET embedded test 0.0.2, https://github.com/QuantumLeaps/ET
---------------- group: Basic -----------------
[1] "first test (passing)" .. PASSED
[2] "CUT test (passing)" .. PASSED
[3] "test (skipped)"  SKIPPED
[4] "CUT test (failing)" . FAILED
--> Basic:33 4 == sum(3, 2)
------------ 4 test(s), 1 skipped -------------
FAILED
make: *** [Makefile:160: run] Error -1
NOTE
To run the tests on Windows you need the GCC C/C++ compiler accessible in your PATH as well as themakeutility. Both are available in the QTools collection for Windows.
The ET adaptation layer for running tests on the host is very simply implemented in the file bsp_host.c:
#include "et.h" /* ET: embedded test */

#include <stdio.h>  /* for fputc() and stdout */
#include <stdlib.h> /* for exit() */

/*..........................................................................*/
void ET_onInit(int argc, char *argv[]) {
    (void)argc;
    (void)argv;
}
/*..........................................................................*/
void ET_onPrintChar(char const ch) {
    fputc(ch, stdout);
}
/*..........................................................................*/
void ET_onExit(int err) {
    exit(err);
}
This adaptation uses <stdio.h> for output to the console and <stdlib.h> for exiting after running the tests.
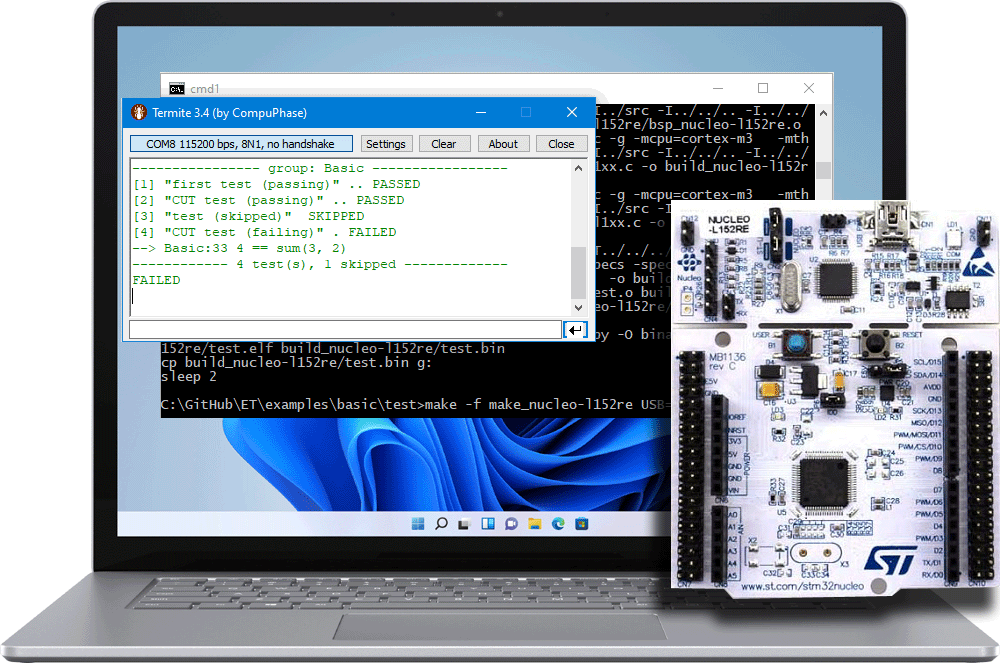
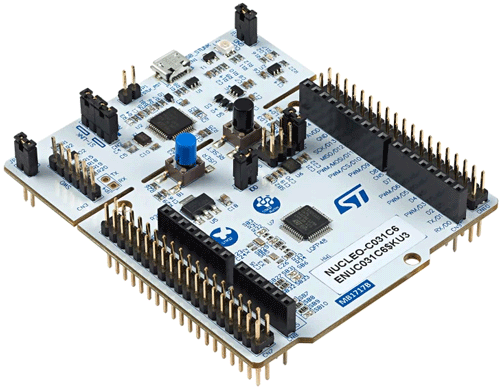
The ET examples provide a simple makefile (see nucleo-c031c6.mak) to build the tests for the STM32 NUCLEO-C031C6 shown below.
REMARK
The STM32 NUCLEO board has been selected because it can to be programmed by simply copying the binary image to the board enumerated as a USB drive.
The ET distribution contains all files requried to build the binary image for the NUCLEO-C031C6 board. However, you still need to provide the GCC-ARM compiler and the serial terminal utility to receive the output produced by the board. To run the test on the STM32 NUCLEO-C031C6, you open a terminal window and type:
NOTE
The GCC-ARM cross-compiler for Windows as well as themakeutility are available in the QTools collection for Windows.
cd ET\examples\basic\test

make -f make_nucleo-c031c6 USB=g:
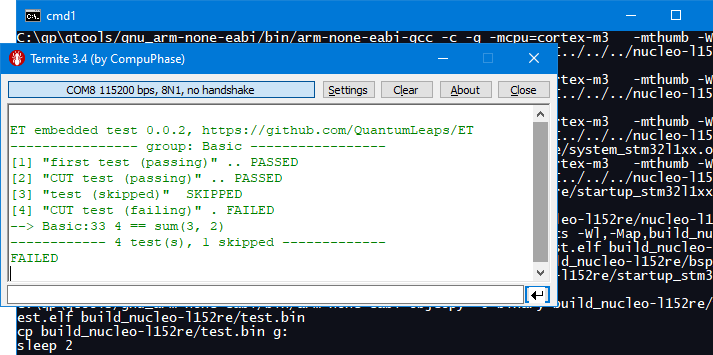
The follwing screen shot shows the build process, programming the board (by copying the binary image) and the test output on the Termite serial terminal.
The ET adaptation layer for running tests on embedded targets implements exactly the same callback functions as the adaptation layer for the host, but is of course more complex because it uses the embedded UART. An example of adaptation layer is included in the file examples/basic/test/bsp_nucleo-c031c6.c:
#include "et.h" /* ET: embedded test */

#include "stm32c0xx.h"  /* CMSIS-compliant header file for the MCU used */
/* add other drivers if necessary... */

. . .
/*..........................................................................*/
void ET_onInit(int argc, char *argv[]) {
    . . .
    /* enable peripheral clock for USART2 */
    RCC->APBENR1  |= (1U << 17U); /* enable USART#2 clock */
    RCC->IOPENR   |= (1U << 0U);  /* enable GPIOA clock for UART pins */

    /* Configure PA3 to USART2_RX, PA2 to USART2_TX */
    GPIOA->AFR[0] &= ~((15U << 4U*USART2_RX_PIN) | (15U << 4U*USART2_TX_PIN));
    GPIOA->AFR[0] |=  (( 1U << 4U*USART2_RX_PIN) | ( 1U << 4U*USART2_TX_PIN));
    GPIOA->MODER  &= ~(( 3U << 2U*USART2_RX_PIN) | ( 3U << 2U*USART2_TX_PIN));
    GPIOA->MODER  |=  (( 2U << 2U*USART2_RX_PIN) | ( 2U << 2U*USART2_TX_PIN));
    GPIOA->OSPEEDR&= ~(( 3U << 2U*USART2_RX_PIN) | ( 3U << 2U*USART2_TX_PIN));
    GPIOA->OTYPER &= ~(( 1U <<    USART2_RX_PIN) | ( 1U <<    USART2_TX_PIN));
    GPIOA->PUPDR  &= ~(( 3U << 2U*USART2_RX_PIN) | ( 3U << 2U*USART2_TX_PIN));
    GPIOA->PUPDR  |=  (( 1U << 2U*USART2_RX_PIN) | ( 1U << 2U*USART2_TX_PIN));

    USART2->BRR  = UART_DIV_SAMPLING16(SystemCoreClock, 115200U, 0U);
    USART2->CR1  = USART_CR1_TE_Msk | USART_CR1_RE_Msk
                   | USART_CR1_RXNEIE_RXFNEIE_Msk
                   | USART_CR1_UE_Msk;
    USART2->CR2  = 0x00000000U;
    USART2->CR3  = 0x00000000U;
}
/*..........................................................................*/
void ET_onPrintChar(char const ch) {
    while ((USART2->ISR & (1U << 7U)) == 0U) { /* while TXE not empty */
    }
    USART2->TDR = ch; /* put ch into the DR register */
}
/*..........................................................................*/
void ET_onExit(int err) {
    (void)err;
    /* blink the on-board LED2... */
    for (;;) {
        unsigned volatile ctr;
        GPIOA->BSRR = (1U << LD4_PIN); /* LED2 on */
        for (ctr = 100000U; ctr != 0U; --ctr) {}
        GPIOA->BSRR = (1U << (LD4_PIN + 16U)); /* LED2 off */
        for (ctr = 200000U; ctr != 0U; --ctr) {}
    }
}
A test fixture running on bare-metal embedded target does not have anything to "exit" to, so for such targets the ET_onExit() callback is implemented as an infinite loop that ties the CPU. The loop might blink an LED to show some activity, but this is not strictly necessary.
Please feel free to clone, fork, and make pull requests to improve ET. If you like this project, please give it a star (in the upper-right corner of your browser window):


