First off, Pi-hole rocks! Big thanks and shout out to the developers.
Second of all, Pi-hole is great for protecting your local network, and benefiting from faster DNS resolution than is possible with any upstream configuration (at least in the mid to long term, once the cache is built).
DNS is often trusted to practically random third parties, which can mean slow resolution, leading to increased page load times online (for example). Even if you use a solid provider like Cloudflare or Google and experience little performance impact, there are privacy concerns.
Pi-hole is designed to be installed on a Raspberry Pi running the Raspberry Pi OS primarily. This tool makes running a virtual container easy on your desktop, too.
Among other things, it can filter URLs which are not favourable to your experience of the internet across your entire network. It's also useful for blocking known malicious domains. (More on this later.)
A simple CLI tool designed to be able to deploy Pi-hole instances (possibly several) easily on a desktop or Pi environment.
Kubernetes brings some additional benefits over a Docker container because it can do things like automatically restart the "Pod" (Kubernetes container instance) that is running and makes it easy to run multiple similar but differently configured instances with proper resource management for optimal performance.
If you're not already using kubectl/Kubernetes on your local machine, check this little guide out.
This is useful for:
- If you want to always protect your DNS + block nasty links on the go
Simply open a terminal in this root of the repository, and execute:
export KUBE_DESKTOP=true
./kube-pihole deploy
The script should handle everything automatically. It will generate configuration files based off of environment variables set inside ./kube-pihole (which you can edit to your liking, with improvements on the way).
If the script outputs successfully, you should now have a Running Pi-hole instance which can be set up for us in your machine's DNS config.
On a Mac:
- open Network -> Advanced -> DNS
- select the '+' sign
- type '127.0.0.1'
- hit 'OK'
- hit 'Apply'
From terminal:
dig google.com
nslookup google.com # | grep NOERROR
The above commands should complete successfully and both contain 127.0.0.1.
Set the $POD_NAME variable up for subsequent commands.
Step 1)
when running this command:
kubectl get pods -A | grep piholeStep 2)
Set the pod name value in terminal:
POD_NAME="replace with value from previous output"Step 3)
Check the DNS service is working as expected:
# test DNS is working
dig sigfail.verteiltesysteme.net @localhost -p 53 # should return SERVFAIL and no IP
dig sigok.verteiltesysteme.net @localhost -p 53 # should return NOERROR and an IPThen a useful debug command is:
kubectl describe pod -n $PIHOLE_KUBE_NS $POD_NAME # replace POD_NAME value with output from Step 1This should provide some useful insights.
If the pod is running and you want to gather logs:
kubectl logs -n $PIHOLE_KUBE_NS $POD_NAMESince I'm sure it can be a bit daunting at first with Pi-hole if you're not very technical, I want to provide a complete guide for doing this so hopefully almost anyone can do this if they're willing to spend 30 minutes setting things up!
To get started, here's what you'll need:
- 1x Raspberry Pi (model 3 or above, since they support 64 bit)
- 1x SD card
- 1x Computer with SD card reader
Plug the SD card into your computer.
Then, visit the official Raspberry Pi website here:
- Raspberry Pi Official "Pi Imager" https://www.raspberrypi.com/software/
- Download the appropriate version for the system you are doing this from (Mac, Windows etc)
- Install it and open it
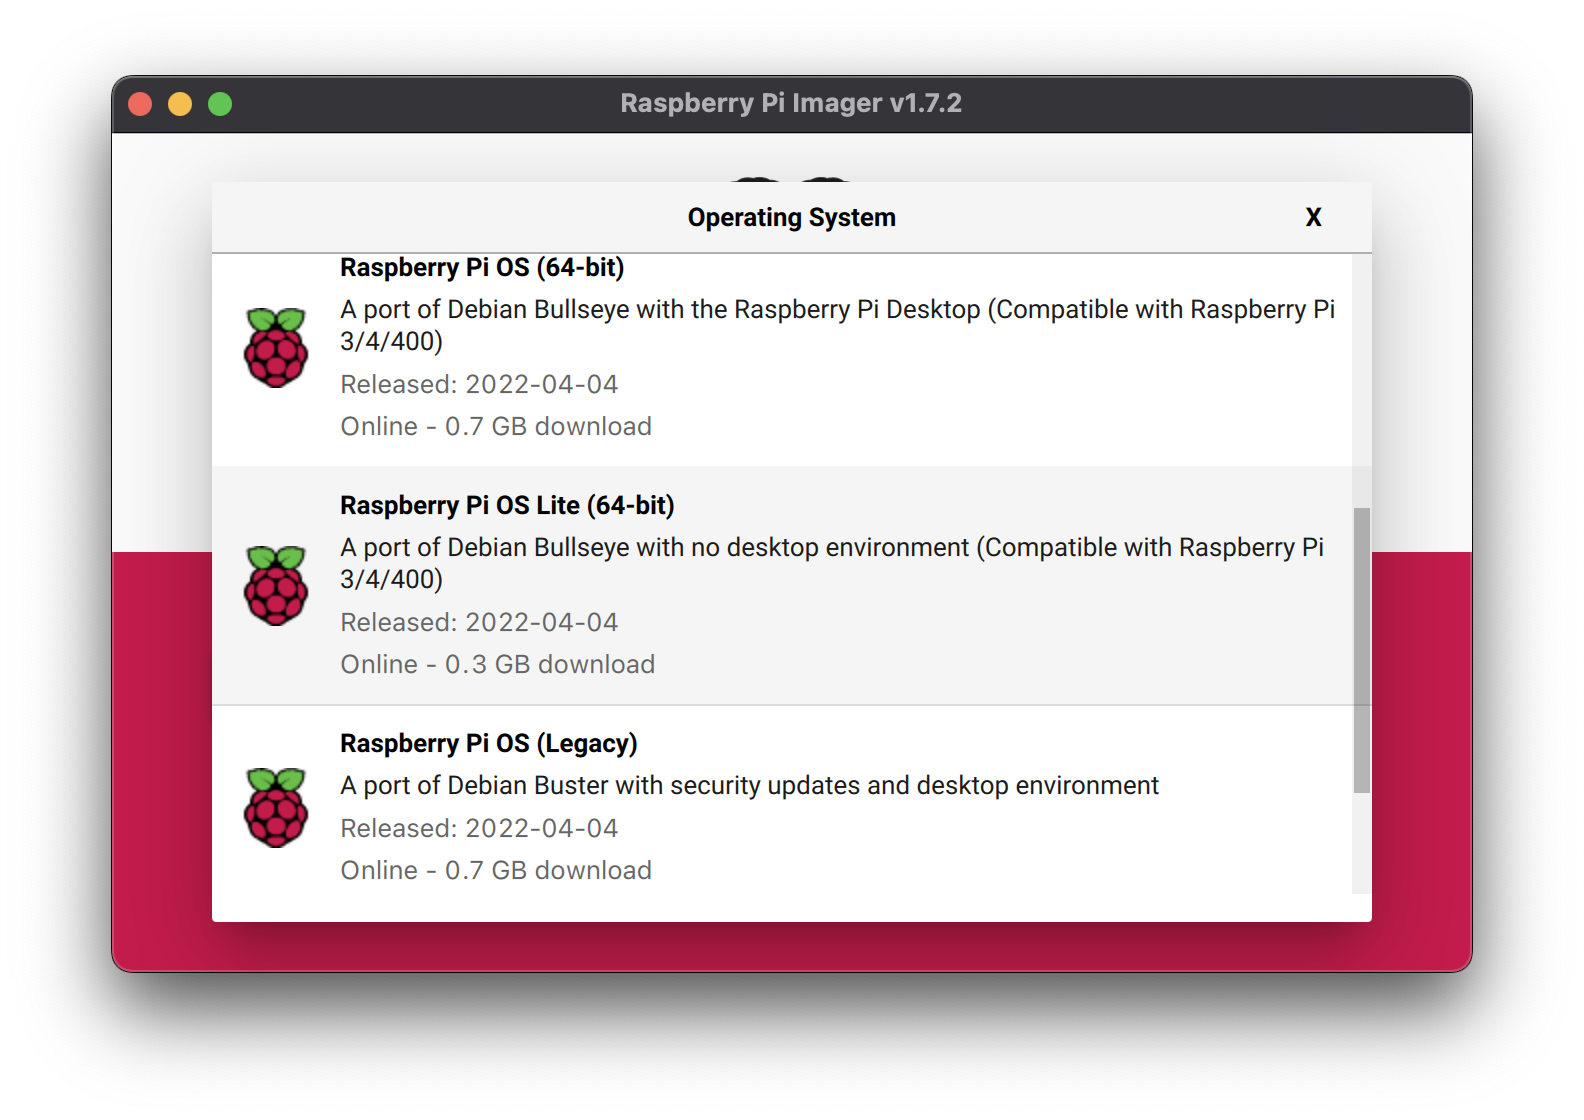
Click the left hand side button "CHOOSE OS" (under "Operating System").
You should see a list, select the Lite version in either 64 bit (Raspberry Pi 3 and above) or 32 bit (Raspberry Pi 2 and below).
Note: support for 2 and below is not currently planned for support, though I have already made progress and it is almost working, the specs are a bit limited for it to make lots of sense. However the ability to automatically relaunch the instance if it fails could be reason enough.
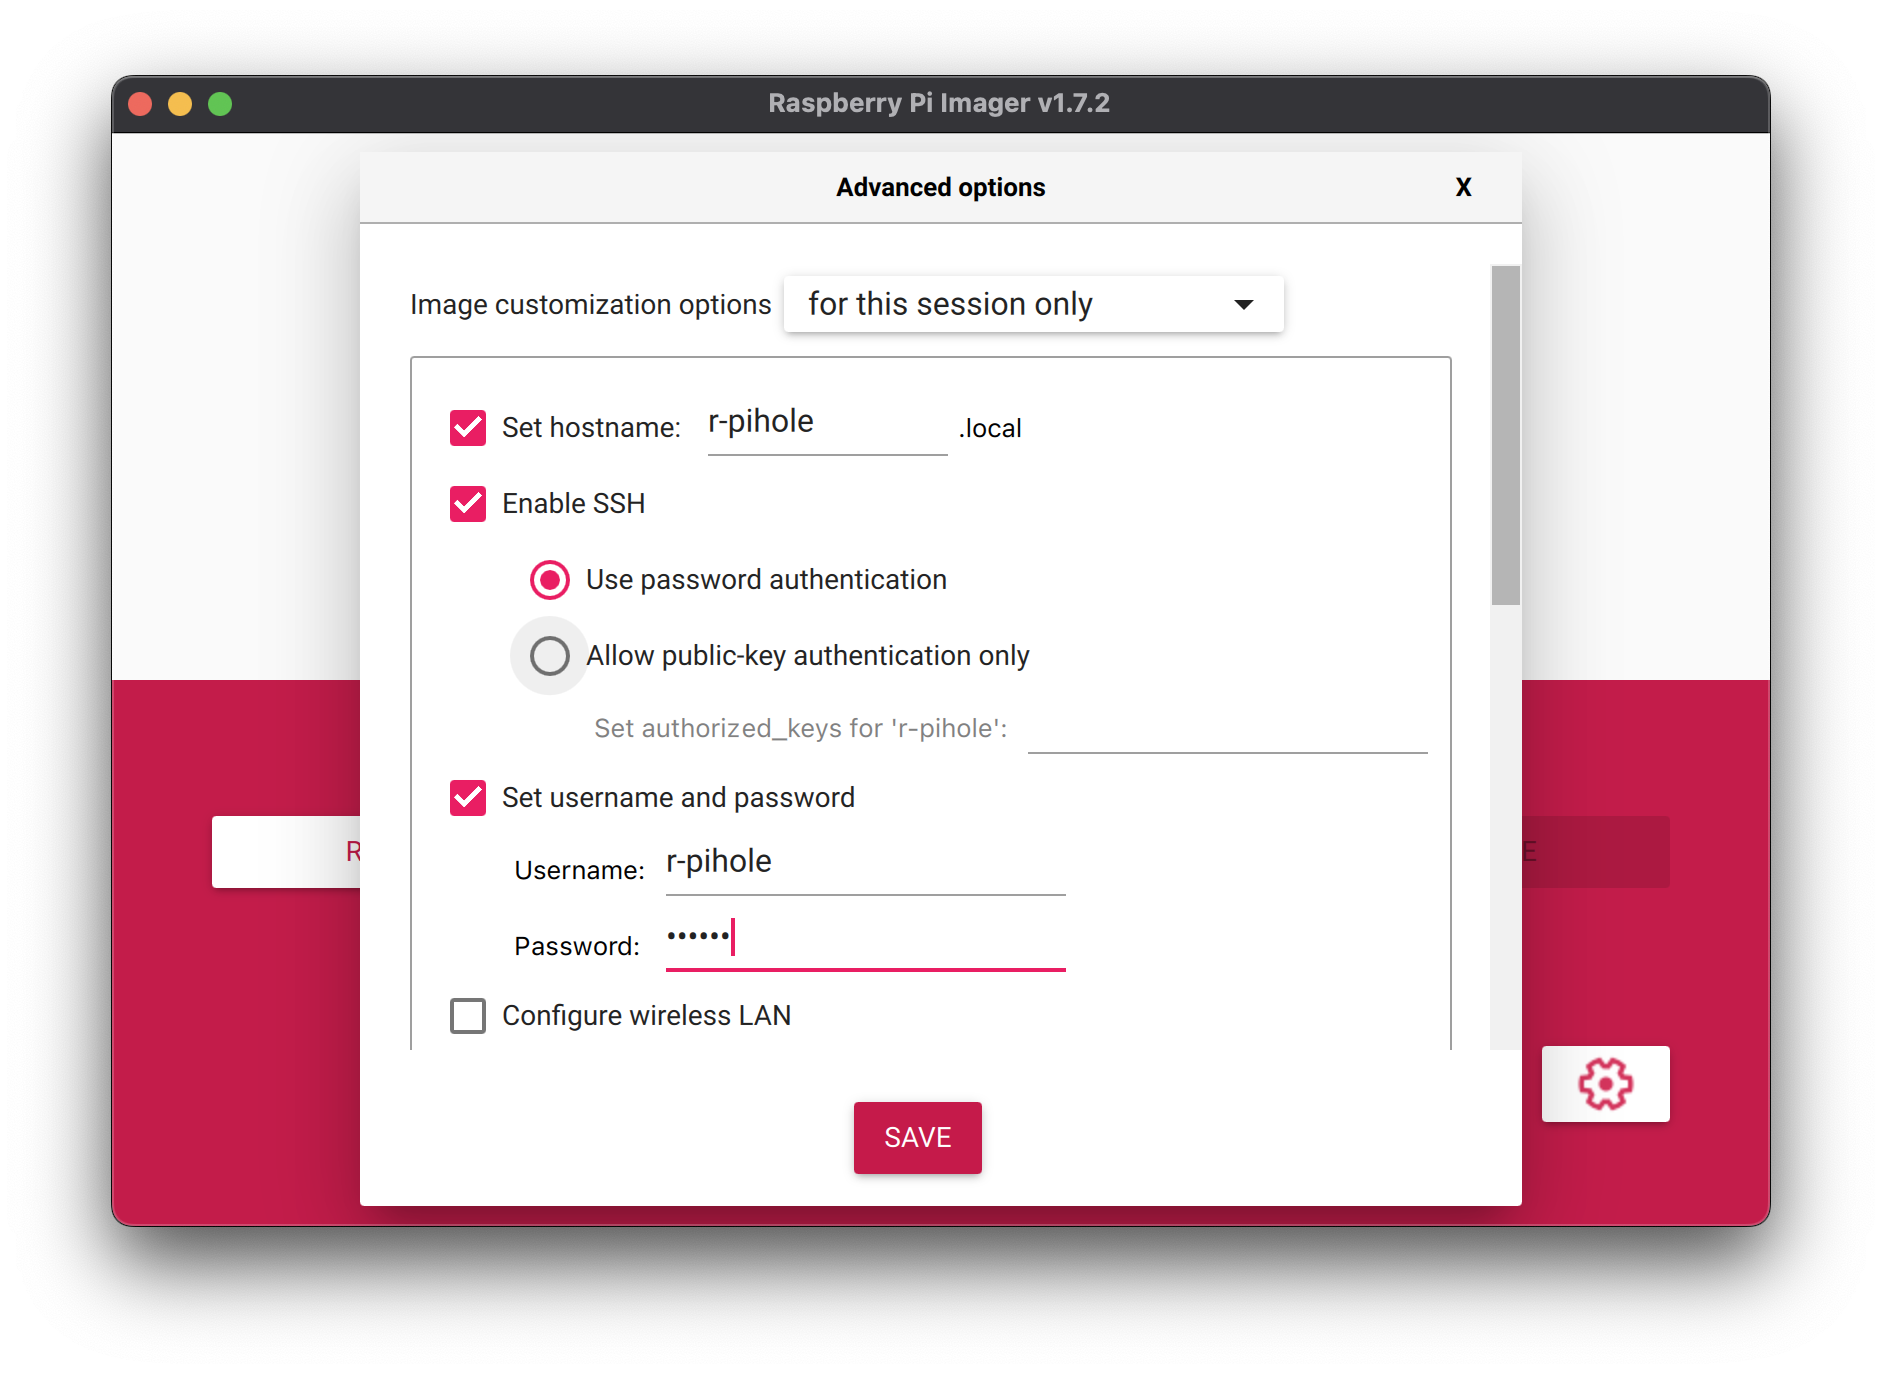
Like so (set your own secure password for SSH, or if you know how, use keys):
Next, click the "CHOOSE STORAGE" button and select your SD card (you may need to format it first, if it's not there).
Once storage is selected a new cog icon button should appear in the bottom right hand corner, click it and enable SSH for the rest of the configuration:
Note: it's recommended to set your Pi's hostname and SSH username to kube-pihole NOT r-pihole!
"SAVE".
Then select "WRITE", it will take a few minutes.
Unplug your SD card and stick it in your Raspberry Pi. Ideally, connect the Raspberry Pi via Ethernet to your home router.
This part is mostly up to you, whatever router you run figure out how to identify your connected and powered up Pi and then set a static IP of your choosing for it.
Set an environment variable for the PI IP you set up as static on your local network (e.g. 192.1.1.100):
MY_PI_USERNAME=kube-pihole
MY_PI_IP=192.1.1.100 # replace with your static IP!
From your preferred computer, open a terminal and connect to your Raspberry Pi via SSH:
ssh $MY_PI_USERNAME@$MY_PI_IPEnter the password you chose earlier, and you should now have a live "shell" on your Raspberry Pi.
The goal is for this to be as simple as possible to launch, so the only package we must install on a fresh Raspberry Pi OS Lite install is git (to clone this repo).
From the new SSH shell:
sudo apt-get install git -y # -y skips the prompt and just installs what it needs toIf you're used to git, you probably already know how to do this since you're likely on the repo homepage now.
Just run:
git clone https://github.com/Quasso/KubePiHole.git
cd KubePiHole
chmod +x kube-pihole # allows the CLI tool to runWe should be ready to rock now!
First of all, let's make using the CLI tool more convenient by creating a basic alias (we must run this command from the root directory where this README is stored on your Pi):
alias kube-pihole="$HOME/KubePiHole/kube-pihole" # makes it a bit nicer to run the CLI from now onThe first CLI command we run installs all the required dependencies (kubectl, docker etc):
kube-pihole install-dependencies
