This project acts as a Bluetooth Mesh - LTE gateway. This project also has UART shell interface that supports Bluetooth Mesh operations.
-
Review the project's west.yml file for NCS and Zephyr versions
-
nRF 9160DK PCA10090
-
onboard nRF52840 (board controller) programmed with ncs/zephyr/samples/bluetooth/hci_uart project
Currently LTE support includes:
-
Unprovisioned device beacon interfaceing.
-
Provisioning of devices.
-
Retrieving a list of network nodes.
-
Node configuration interfacing.
-
Mesh model message subscribption.
-
Mesh model message sending.
Currently UART Shell support includes:
-
Unprovisioned device beacon interfacing.
-
Provisioning of devices.
-
Retrieving a list of network nodes.
-
Node configuration interfacing.
-
Mesh model message subscription.
-
Mesh model message sending.
-
Install the latest version of Nordic Connect SDK (NCS) [these instructions have been tested with NCS v1.7.0] by installing the nRF Connect for Desktop application on your PC, and launching the Toolchain Manager applet. Then launch the Git Bash shell by clicking on the triangle and clicking on Open bash.
-
Go to the root directory of the SDK's installation directory (e.g. c:/ncs/v1.7.0/) and clone this repo in that directory. You should see a nrf-mesh-gateway/ directory now.
-
Go into the nrf-mesh-gateway/ directory and update the code using this command:
west update -
The BLE HCI Host runs on the nRF9160 SoC on the nRF9160-DK and the BLE HCI Controller runs on the nRF52840 SoC on the same nRF9160-DK. They communicate over a dedicated UART at 1 Megabaud with hardware handshaking required. A second UART carries USB logging output and user shell input at 115200 baud. Therefore, first, the DK's nRF52840 SoC needs to be programmed with an image built this way:
west build -p auto -b nrf9160dk_nrf52840 ../nrf/samples/bluetooth/hci_lpuart -d build_hci -
Switch SW10 on the DK to nRF52. This will allow flashing of the onboard nRF52840 SoC.
-
Change to the build_hci/ directory and issue command to flash the chip:
west flash -
Switch SW10 on the DK back to nRF91.
-
Switch back to nrf-mesh-gateway/ directory and issue following command to build:
west build -b nrf9160dk_nrf9160_ns -p -
Issue command to flash the nRF9160 chip:
west flash -
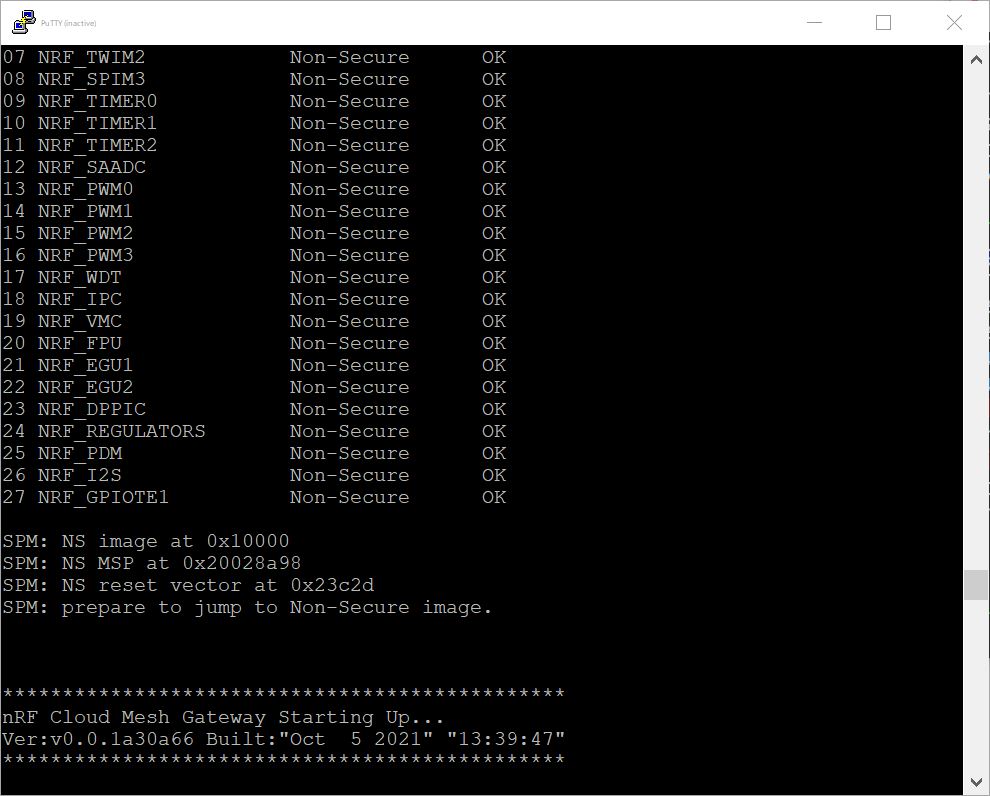
Open terminal windows to all COM ports exported by the DK; one should display the interactive shell:
-
Install the repo https://github.com/nRFCloud/utils. In this example, it is cloned one directory above nrf-mesh-gateway/.
-
Create the device certificates using the instructions provided here. For reference, the command line used was:
python ./create_ca_cert.py -c US -st CA -l 90016 -o "Nordic Semiconductor" -ou "S" -cn nordicsemi.com -e my_email@somesite.com -p ./my_ca -f nordic-semi. This will create a directory called my_ca/ with the certificates inside. -
Now we must install the credentials to the device. Currently, the AT Client software must be flashed to the DK.
-
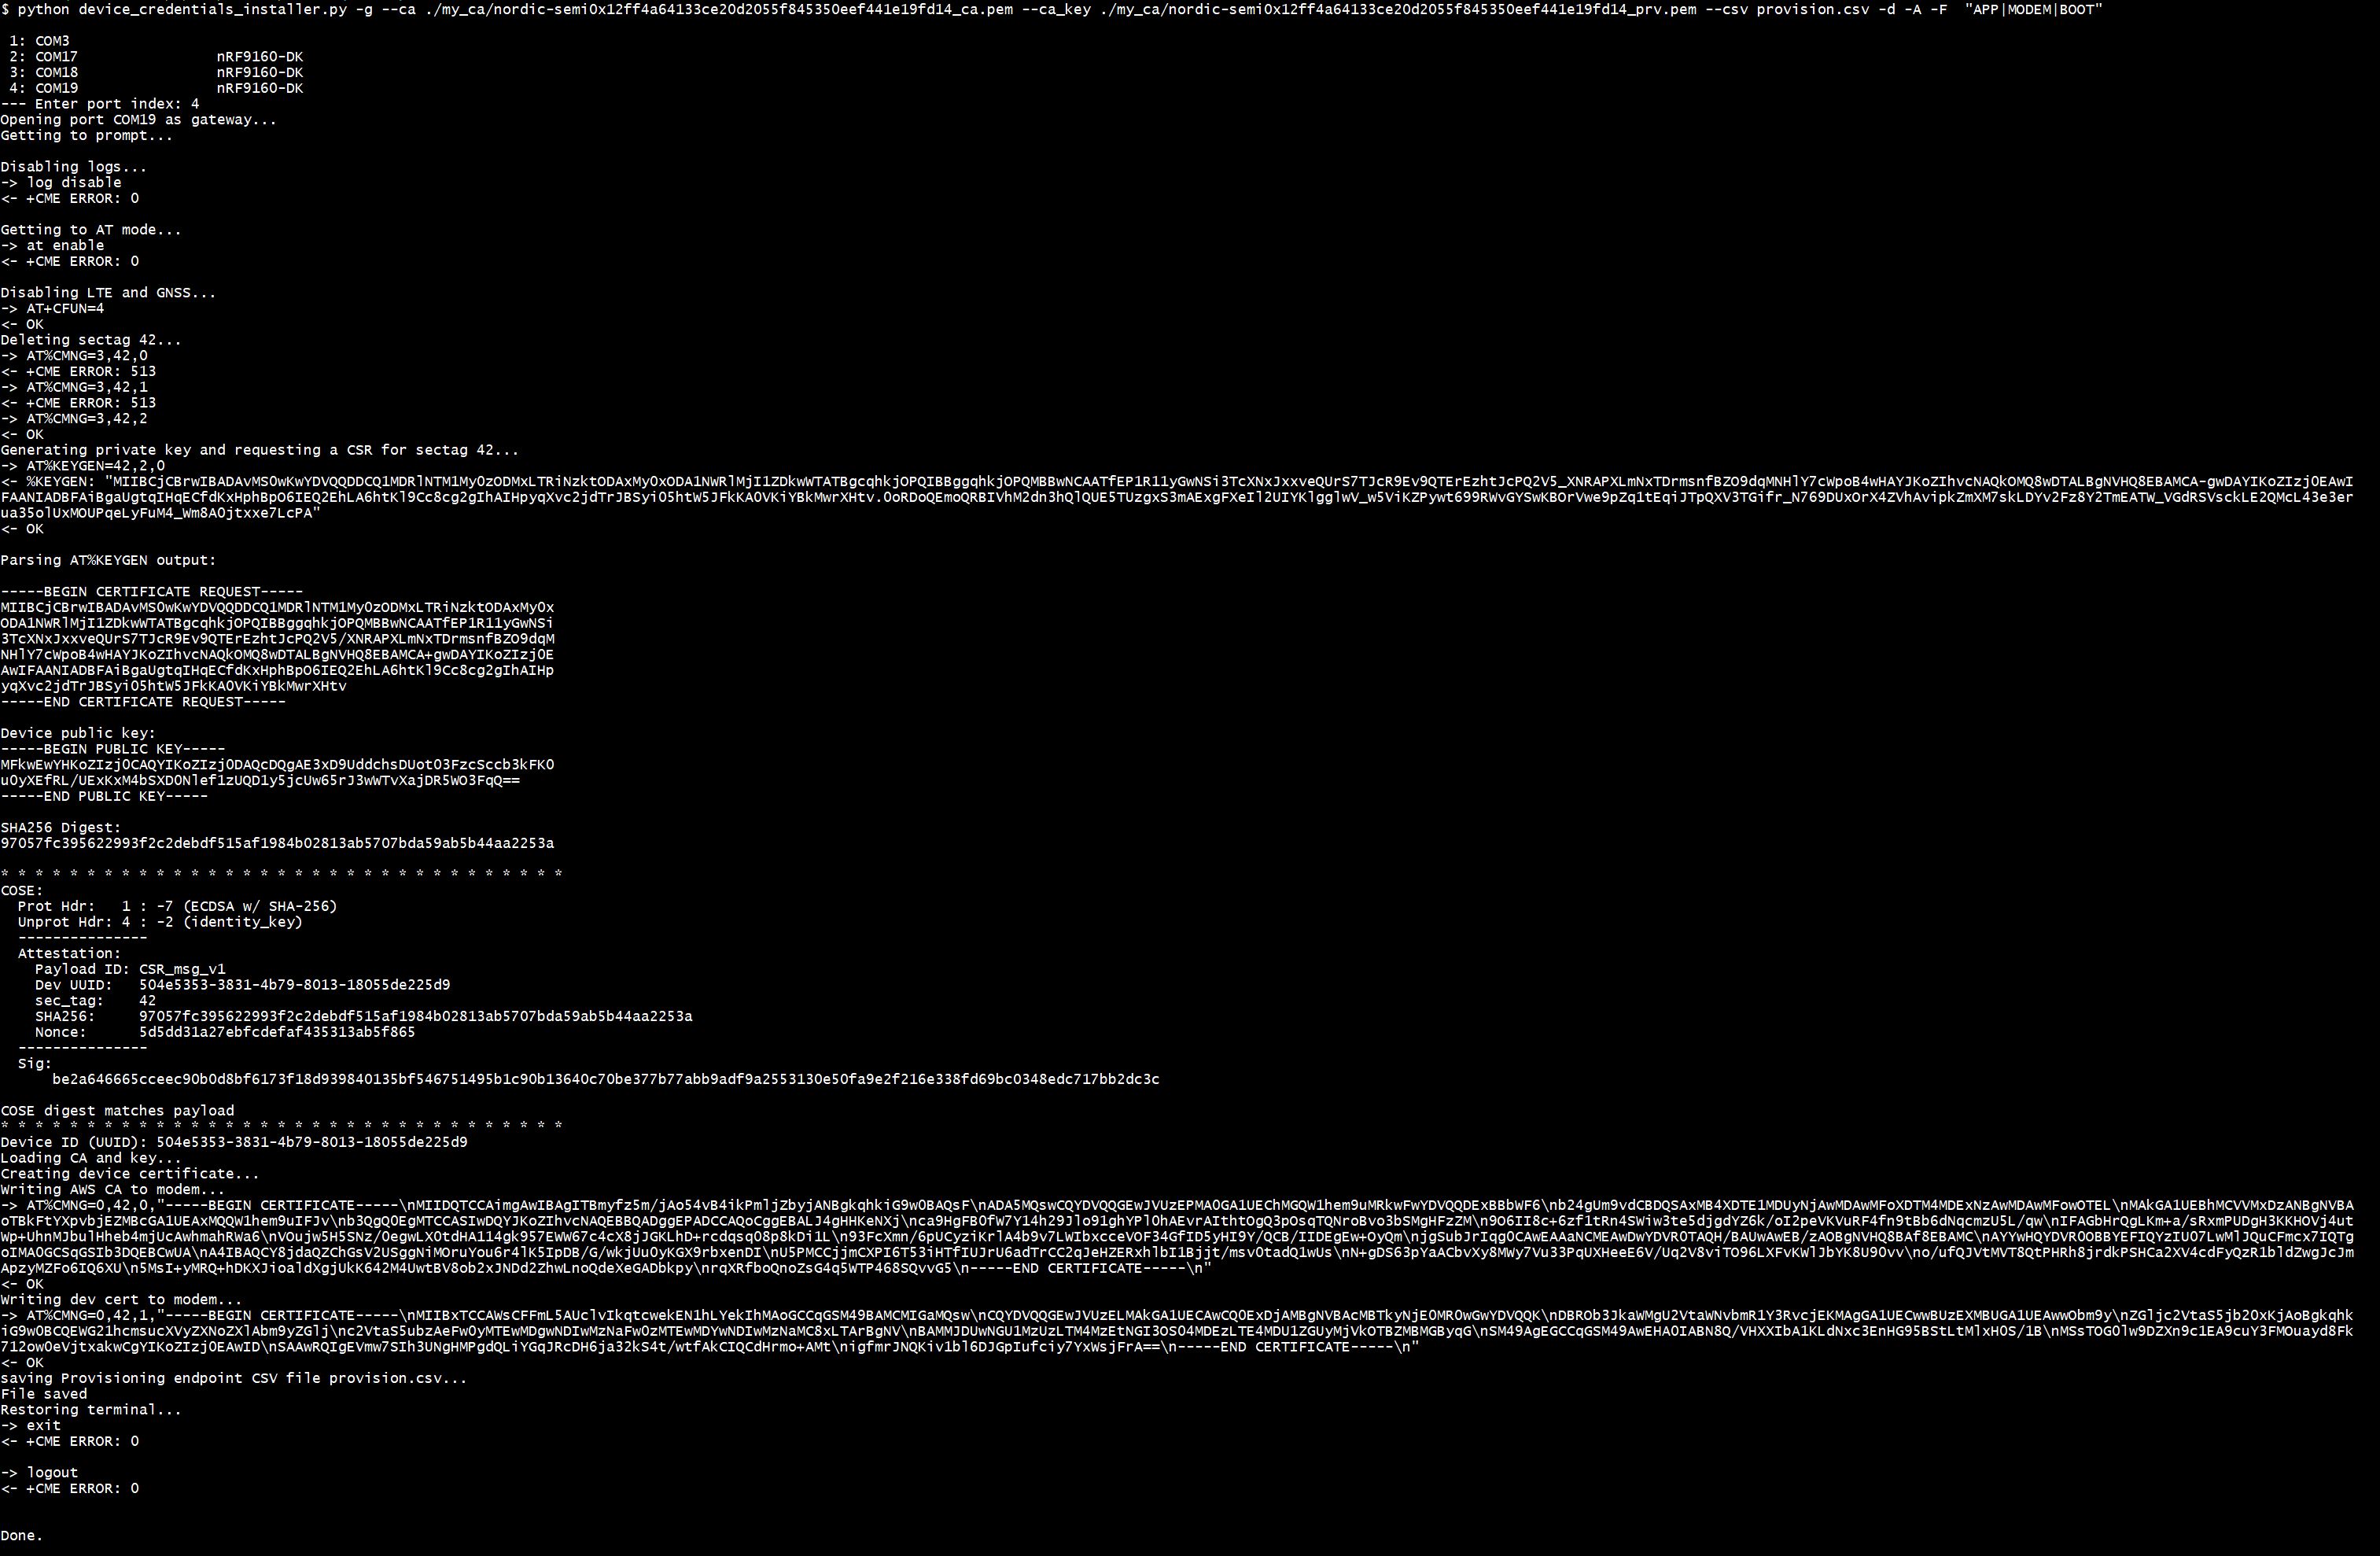
Now we must install the certificates to the nRF9160:
python device_credentials_installer.py -g --ca ./my_ca/nordic-semi0x12ff4a64133ce20d2055f845350eef441e19fd14_ca.pem --ca_key ./my_ca/nordic-semi0x12ff4a64133ce20d2055f845350eef441e19fd14_prv.pem --csv provision.csv -d -A -F "APP|MODEM|BOOT". You will have to pick the correct COM port with some trial & error. Expected output:
- Transitionary steps: some of the following steps will be removed in the future but, for now, must be implemented. Edit the provision.csv, replace the first field (prior to the first comma) with a random unique string, and remove the term 'gateway' in the second field (before the second comma). For example, the file should look like this:
nrd-816854,,,APP|MODEM|BOOT,"-----BEGIN CERTIFICATE----- MIIBxTCCAWsCFFmL5AUclvIkqtcwekEN1hLYekIhMAoGCCqGSM49BAMCMIGaMQsw CQYDVQQGEwJVUzELMAkGA1UECAwCQ0ExDjAMBgNVBAcMBTkyNjE0MR0wGwYDVQQK DBROb3JkaWMgU2VtaWNvbmR1Y3RvcjEKMAgGA1UECwwBUzEXMBUGA1UEAwwObm9y ZGljc2VtaS5jb20xKjAoBgkqhkiG9w0BCQEWG21hcmsucXVyZXNoZXlAbm9yZGlj c2VtaS5ubzAeFw0yMTEwMDgwNDIwMzNaFw0zMTEwMDYwNDIwMzNaMC8xLTArBgNV BAMMJDUwNGU1MzUzLTM4MzEtNGI3oS04MDEzLTE4MDU1ZGUyMjVkOTBZMBMGByqG SM49AgEGCCqGSM49AwEHA0IABN8Q/VHXXIbA1KLdNxc3EnHG95BStLtMlxH0S/1B MSsTOG0lw9DZXn9c1EA9cuY3FMOuayd8Fk712ow0eVjtxakwCgYIKoZIzj0EAwID SAAwRQIgEVmw7SIh3UNgHMPgdQLiYGqJRcDH6ja32kS4t/wtfAkCIQCdHrmo+AMt igfmrJNQKiv1bl6DJGpIufciy7YxWsjFrA== -----END CERTIFICATE----- "
-
Now we must upload the provision.csv file to nRF Cloud. You will need to find your nRF Cloud account API Key on your account settings page, and use it in place of <API_KEY> below:
curl --location --request POST 'https://api.nrfcloud.com/v1/devices' --header 'Authorization: Bearer <API_KEY>' --header 'Content-Type: text/csv' --data-binary '@provision.csv' -
Note the return value of the above command and use it to verify if the operation succeeded, replacing <BULK_OPS> with this value and API_KEY with your nRF Cloud account API key:
curl --location --request GET 'https://api.nrfcloud.com/v1/bulk-ops-requests/<BULK_OPS>' --header 'Authorization: Bearer <API_KEY>'The return string should indicate success. -
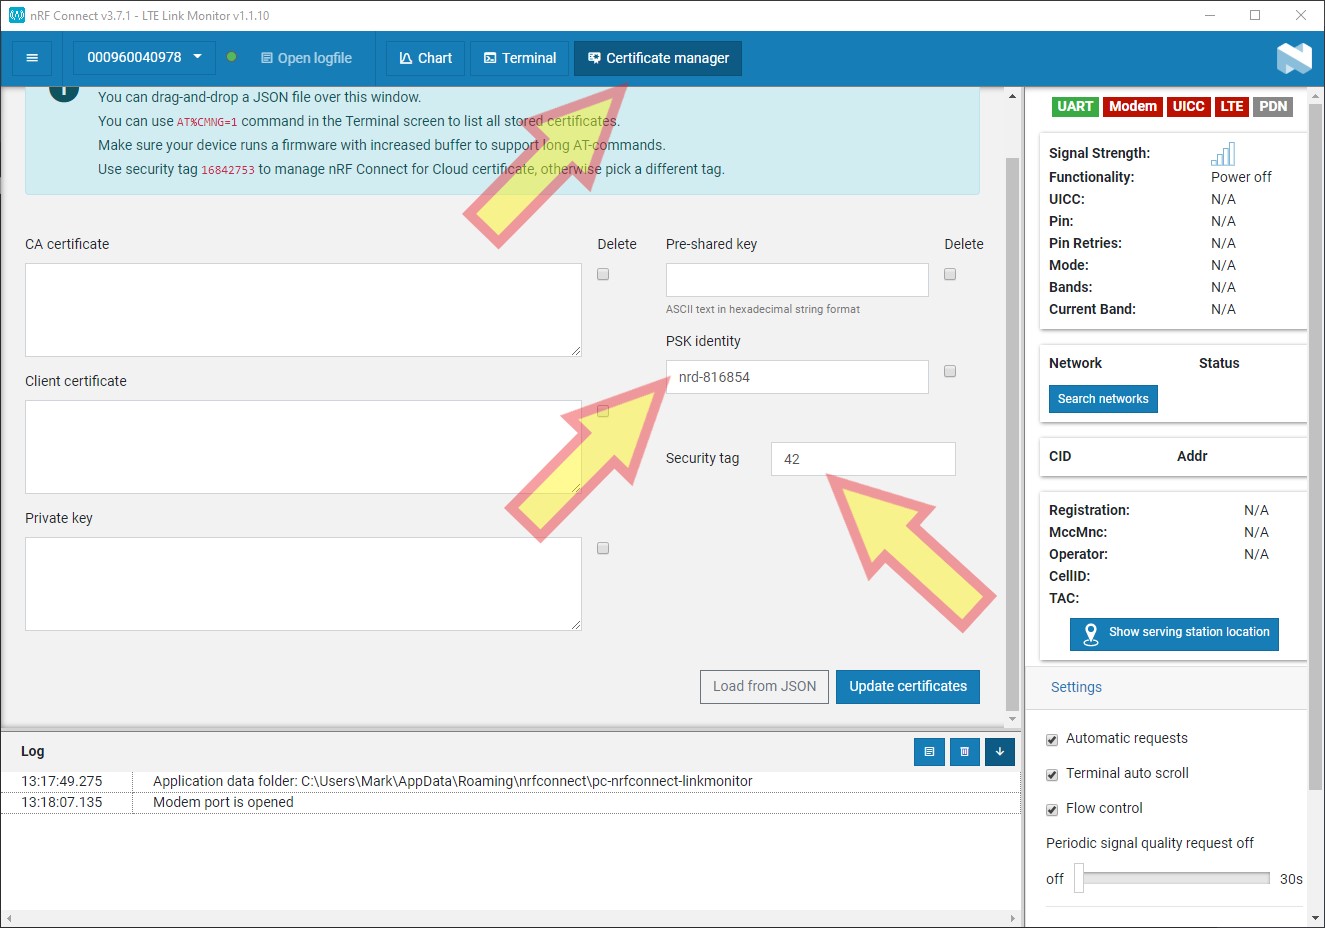
With the at_client firmware still running on the DK, launch the LTE Link Monitor applet for the nRF Connect for Desktop application.
-
Connect to the board and type
AT+CFUN=4and click on Send to bring the modem into offline mode. -
Click on Certificate manager and type 42 in the Security tag box.
-
Click on PSK identity and type in the random string that was saved in the first field of the provision.csv file.
-
Click on Update certificates to effect the changes:
The process for configuring Bluetooth mesh devices so that they can participate in a mesh network is as follows:
-
Provision a device which is actively sending an unprovisioned device beacon.
-
Add or generate an application key on the gateway if none currently exist.
-
Bind the application key to the desired model on the node.
-
Set a publish context for the model.
-
Add subscription addresses to the model.
The node's model will now publish data within the parameters of the publish context you set. The node's model will now receive mesh messages which are published to you chosen subscribe addresses. The gateway can be used to interface with node's model with the following process:
-
Subscribe the gateway to mesh address for which you'd like to receive.
-
Receive mesh model messages.
-
Send mesh model messages to the remote node's model.
Note: The following commands and others are defined in detail in cli_cmd_def.md. This process can also be followed with a remote gateway via nRF Cloud by using the JSON messages defined json_msg_def.md.
- Ensure that the new device is broadcasting an unprovisioned device beacon:
beacon list
You should see the UUID of the new device listed.
- Provision the new device (use the
tabbutton to autofill the device UUID):
provision <device UUID>
- Ensure that the device is now a node:
node list
You should see the newly provisioned node listed. *Note the address.
- Generate a new application key under the primary network index:
appkey generate 0x0000
You should see the generated application details listed. *Note the applicaiton index.
- Bind the newly generated application key to a model of your choosing. In this example, the following arguments are used:
-
Node Address : 0x0002
-
Application Index: 0x0000
-
Element Address : 0x0002
-
Model ID : 0x1000
model appkey bind 0x0002 0x0000 0x0002 0x1000
- Add a subscribe address to the model so that it can receive messages. In this example, the following arguments are used:
-
Node Address : 0x0002
-
Element Address : 0x0002
-
Model ID : 0x1000
-
Subscribe Address: 0xC000
model subscribe add 0x0002 0x0002 0x1000 0xC000
- Set the publish parameter of the model so that it can send messages. In this example, the following arguments are used:
-
Node Address : 0x0002
-
Element Address : 0x0002
-
Model ID : 0x1000
-
Publish Address : 0xC000
-
Publish Application Index: 0x0000
-
Friend Credential Flag : false
-
Time-to-Live : 7
-
Period Key : 100ms
-
Period : 0
-
TX Count : 0
-
TX Interval : 0
model publish set 0x0002 0x0002 0x1000 0xC000 0x0000 false 7 100ms 0 0 0
Now, other models that are subscribed to the group address 0xC000 will receive all messages published by this model. Likewise, any messages published to the group address 0xC000 by other models will be received by this model.
In order to receive mesh model messages published by the newly configured node:
- Subscribe the gateway to same publish address used in step 7 to receive mesh model messages from the node:
- Address: 0xC000
message subscribe 0xC000
- Subscribe the gateway to its own unicast address:
- Address: 0x0001
message subscribe 0x0001
Now the gateway will receive and present messages published to the group address 0xC000 and messages published published directly to the gateway.
To send mesh model messages to the node using the gateway:
- Send Generic OnOff Set Message:
-
Net Index. : 0x0000
-
Application Index: 0x0000
-
Address : 0xC000
-
Opcode : 0x8202
-
Payload : 01
message send 0x0000 0x0000 0xC000 0x8202 01
Notice that the gateway will receive a Generic OnOff Status message twice: once with destination address 0xC000 and again with destination address 0x0001. This is because the Generic OnOff Set message is an acknowledged message where the acknowledgement is sent directly to the original sender, in this case, the gateway itself. In order to receive only one Generic OnOff Status message, the gateway can either unsubscribe from one of the subscribed address: 0xC000 or 0x0001, or send a Generic OnOff Set Unacknowledged message with opcode 0x8203.


