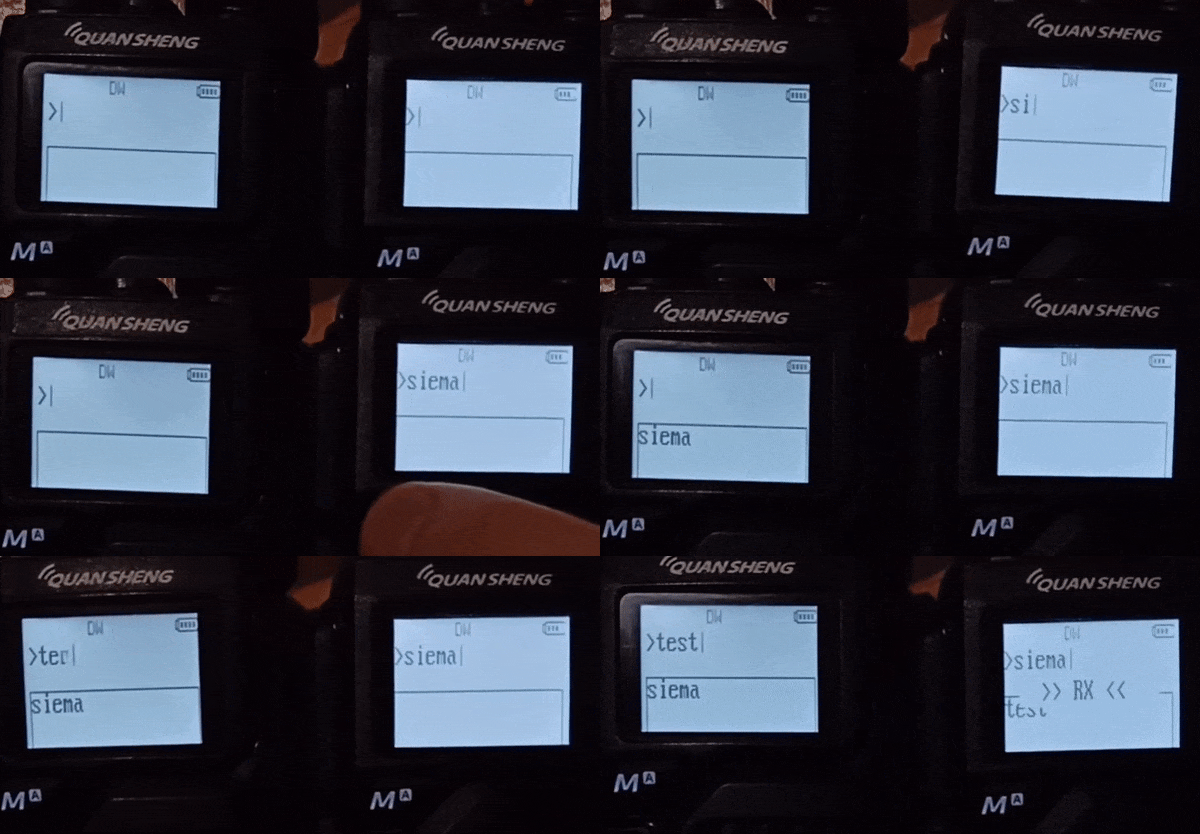
AFSK messenger with T9 typing support
- download mod uv_k5_01_26_cold_messenger_encoded.bin
- to enable messenger view press flash light button
- use keyboard to type message
- press MENU to send message
- press EXIT to clear message
- if message is cleared use EXIT to exit messenger view
- There is no timeout for the button. If you want to type letters located on the same button in a row, use an asterisk (*) to confirm the selected character
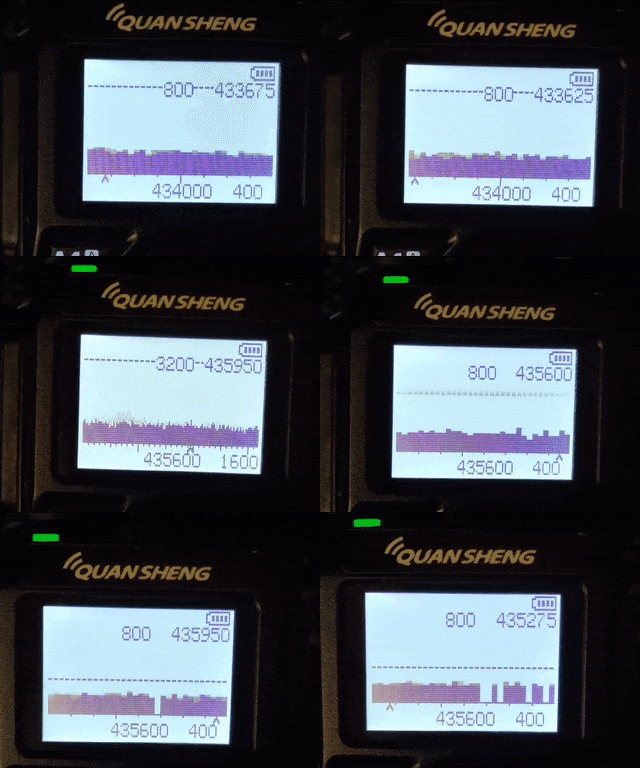
Spectrum scanner by @fagci
Features:
- no scan sound
- squelch by user input level
- 0.1 .. 3.2MHz frequency ranges
- ticks by frequency (100,500,1000KHz)
- catch signal peak frequency
- automatic frequency change step
- automatic scan step
- frequency blacklist to remove unwanted signals
- backlight control
How to start:
- set squelch level to 0 or go into monitor mode before enabling mod
- to enable spectum view press flash light button
How to operate:
- press UP / DOWN key to change frequency
- press 1 / 7 to control measurement time (increasing "sensitivity")
- press 2 / 8 to to set frequency change step
- press 9 / 3 for zoom in / zoom out
- press and hold * / F to set squelch level
- press 5 to toggle backlight
- press 0 to remove frequency from sspectrum to scan
- press EXIT to disable spectrum view
update
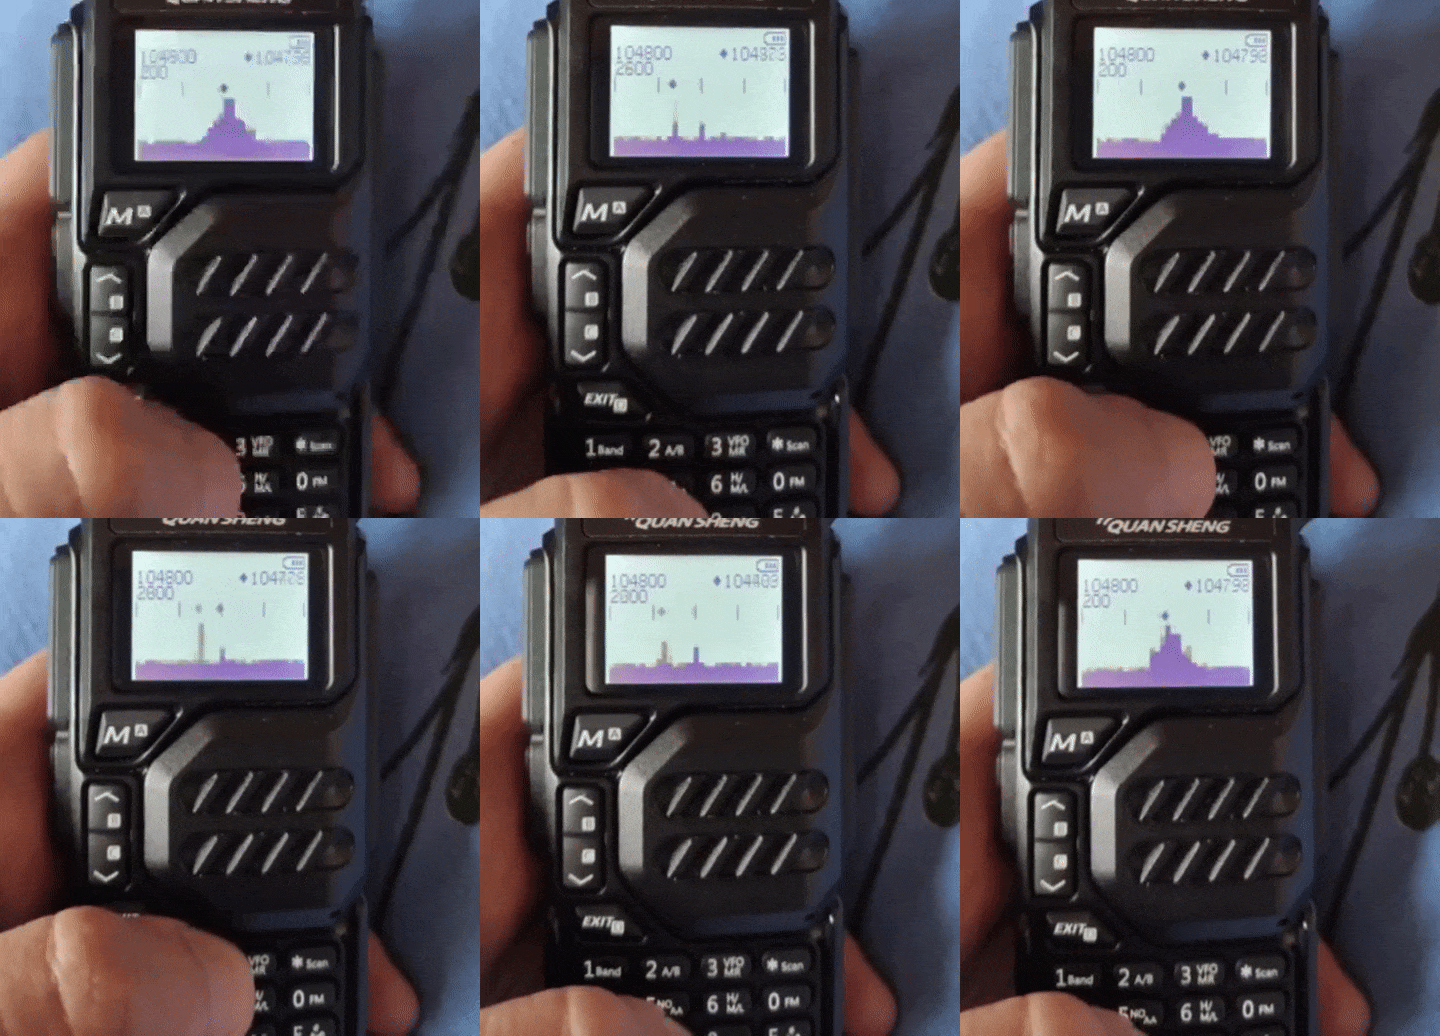
Spectrum scanner. It prints a spectrum graph. Zoom in well as resolution can be controled via keyboard.
- download mod uv_k5_01_26_spectrum_2MHz_encoded.bin
- to enable spectum view press flash light button
- hold up or down key to change center frequency
- press 8 / 2 for zoom in / zoom out
- press 1 / 7 to increase / decrease resolution (smaller resolution == faster update rate)
- press PTT or EXIT to disable spectrum view
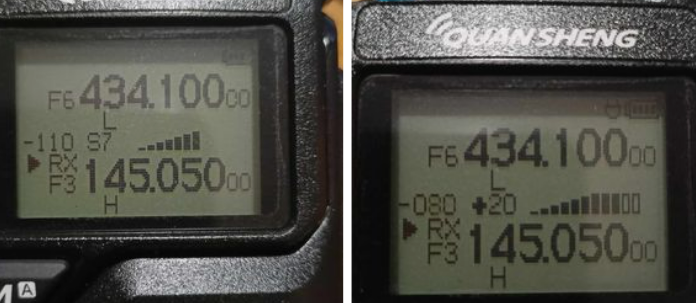
sbar with calibrated S steps, on TX prints mic in amplitude
- download mod uv_k5_01_26_rssi_sbar_encoded.bin
- flash with original quansheng update tool
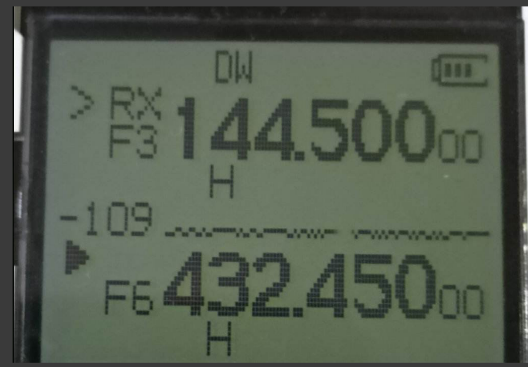
mod for printing rx signal level (RSSI) in numerical format, also includes small signal level chart.
- download mod uv_k5_01_26_rssi_printer_encoded.bin
- upload it through original firmware update tool:
Quancheng website
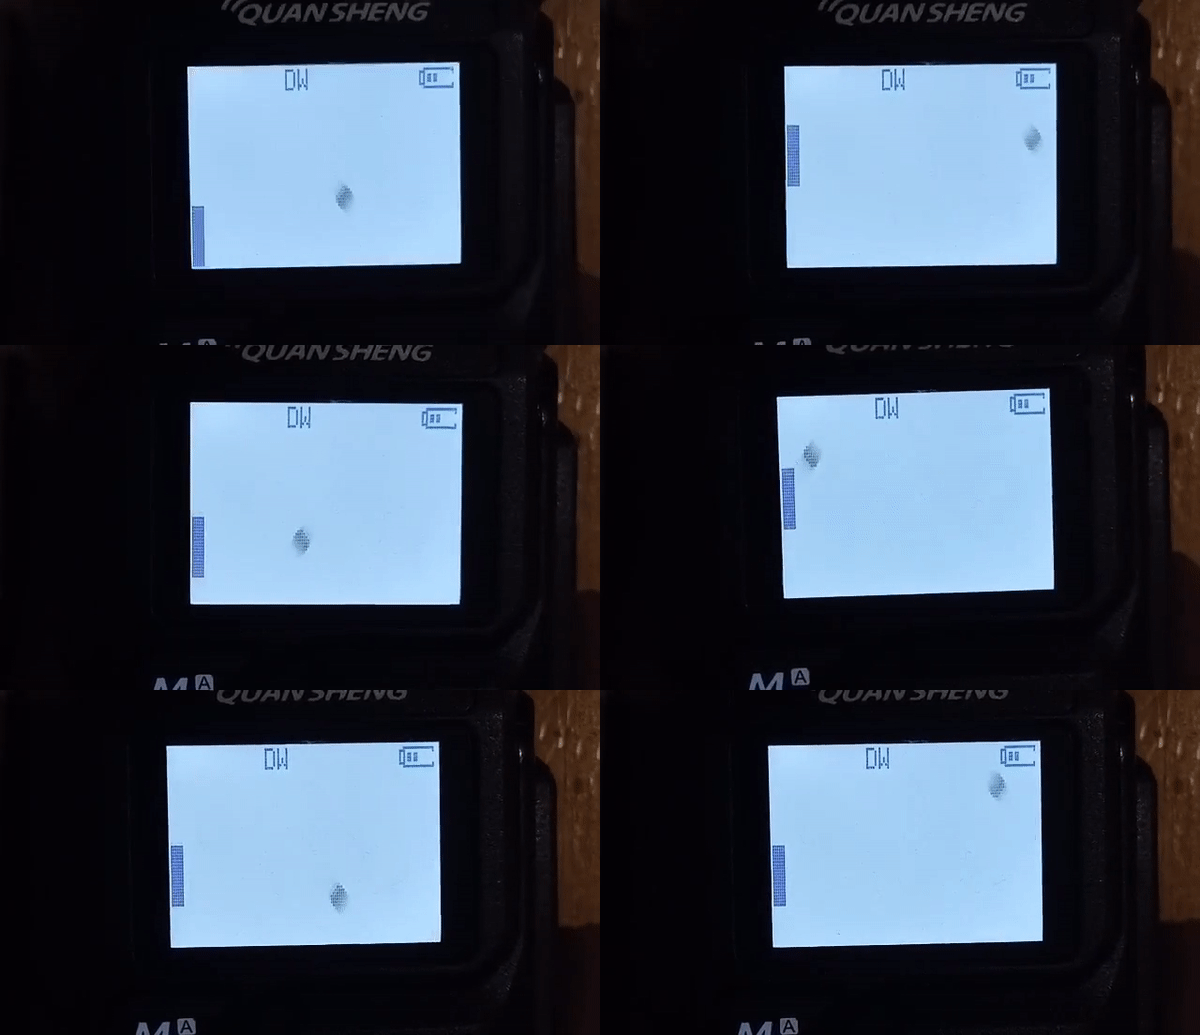
- download mod uv_k5_01_26_pong_game_encoded.bin
Chinese mcu DP32G030 has feature called flash masking, here is how it works:
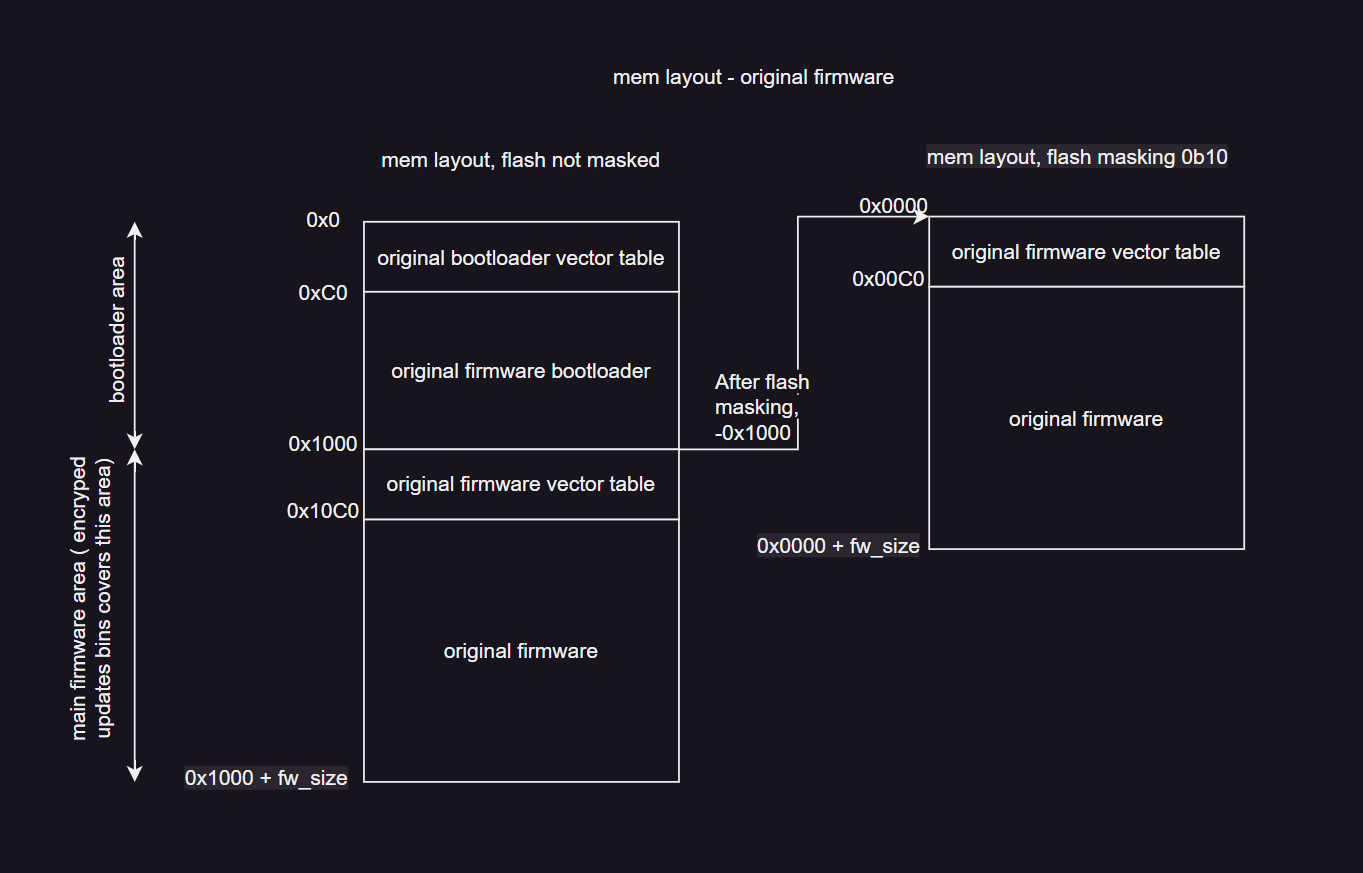
The idea is to run this firmware 'parallel' with the original Quencheng firmware. This can be achieved by relocating the original vector table to the end of the original firmware, and placing a new vector table at the beginning, with entities pointing to the par_runner functions that wrap the original firmware handlers.
Every interrupt is first processed by the par_runner handlers, which can perform some tasks, before invoking the original firmware handler
When building the "par_runner" target automaticly "bootloader" target will be build
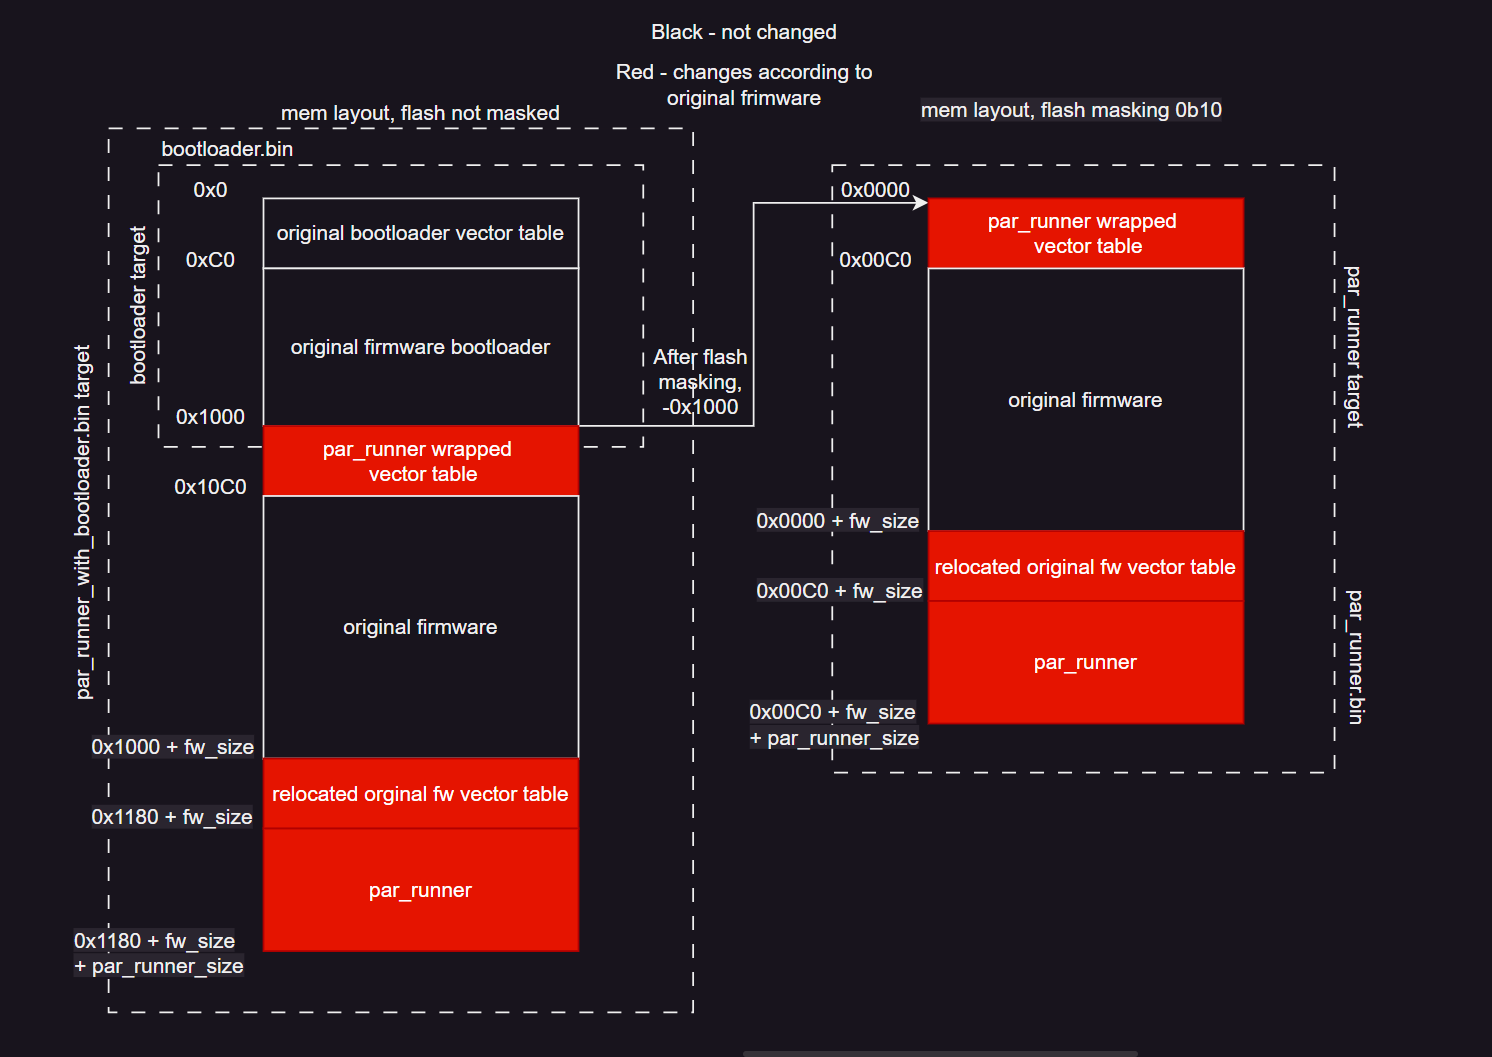 building UV_K5_Playground target will result in following outputs:
- target.bin / .hex - right part of image, can be used to generate encrypted firmware compatible with orginal Quescheng update tool
- bootloader.bin - stripped bootloader from orginal firmware
- target_with_bootloader.bin - complete firmware image
- target_encoded.bin - encrypted binary that can be uploaded through quancheng upload tool
To change the original firmware that will be wrapped and placed into the original firmware section, replace ./original_fw/original_fw.bin or set the variable
CMakeLists.txt set(ORGINAL_FW_BIN orginal_fw.bin)
in ./orginal_fw/CMakeLists.txt
and rebuild par_runner
currently tested on windows, requred:
- arm-none-eabi-gcc
- python (i have newest version)
- cmake
- ninja
- open-ocd
All folders with executables of the above programs should be added to the PATH environment variable.
After cloning repo init submodules:
$ git submodule update --init --recursive
install dependencies needed by fw_pack.py
$ pip install pyserial
for debugging:
- vs code
- Cortex-Debug plugin
- CMake plugin
$ mkdir build
$ cd build
$ cmake ../ -G Ninja
for all targets:
$ ninja
for specific target:
$ ninja target_name
current targets: pong, rssi_printer, rssi_sbar, messenger, most_useless_mod, spectrum
to build binary that can be uploaded by quancheng fw update tool use _encoded suffix for example:
$ ninja rssi_sbar_encoded
$ ninja rssi_sbar_flash
Select the specific build target in the bottom bar and press build.
Enter the 'Run & Debug' tab, select 'kwaczek DBG', and press run.
- ALL COMMANDS ARE RUN IN THE CODESPACE, nothing modifies you pc, don't run any command on your local pc
- you need a github account
- open your codespaces: https://github.com/codespaces
- click on "New codespace"
- Repository: piotr022/UV_K5_playground
- Branch: main
- Region/Machine type: Doesn't matter
- click on "New codespace"
- execute
sh -c "$(curl -fsSL https://raw.githubusercontent.com/manujedi/UV_K5-Tools/main/TutOnlineEnv/SetupGCC.sh)"in the Terminal (or run the commands by hand to see what they do)
- Build the FW (do not use
ninja, replaceninjawithmake. Commands are similar to the ones in the README):mkdir buildcd buildcmake ..makemake rssi_sbar_encoded
You should have now a full development environment

AM_TX
- Submenu AM TX, push side button 2 (flashlight)
- amplituden modulation with remaining bug
- PTT sendet kein Träger Signal für Amplituden Modulation. Eher wie SSB Modulations bedingter Träger zumindest beim Rogerbeep. Mic Audio Input?
RSSI_SBAR_HOT
- To go into the submenu, push side button 2 (flashlight) *Settings Options:
- Heater: on/off
- AM RX: 0/1/2
- S-metr: normal/59

Full Changelog: https://github.com/piotr022/UV_K5_playground/releases
Latest Releases Mods for UV-K6 UV-5R Plus
- currently firmare that is wrapped by par_runner comes from Tunas1337 mod k5_26_encrypted_18to1300MHz.bin UV-K5-Modded-Firmwares
- crypting/encrypting/modding py tools amnemonic repo
I'm not responsible for radios bricked by this trojan xD
