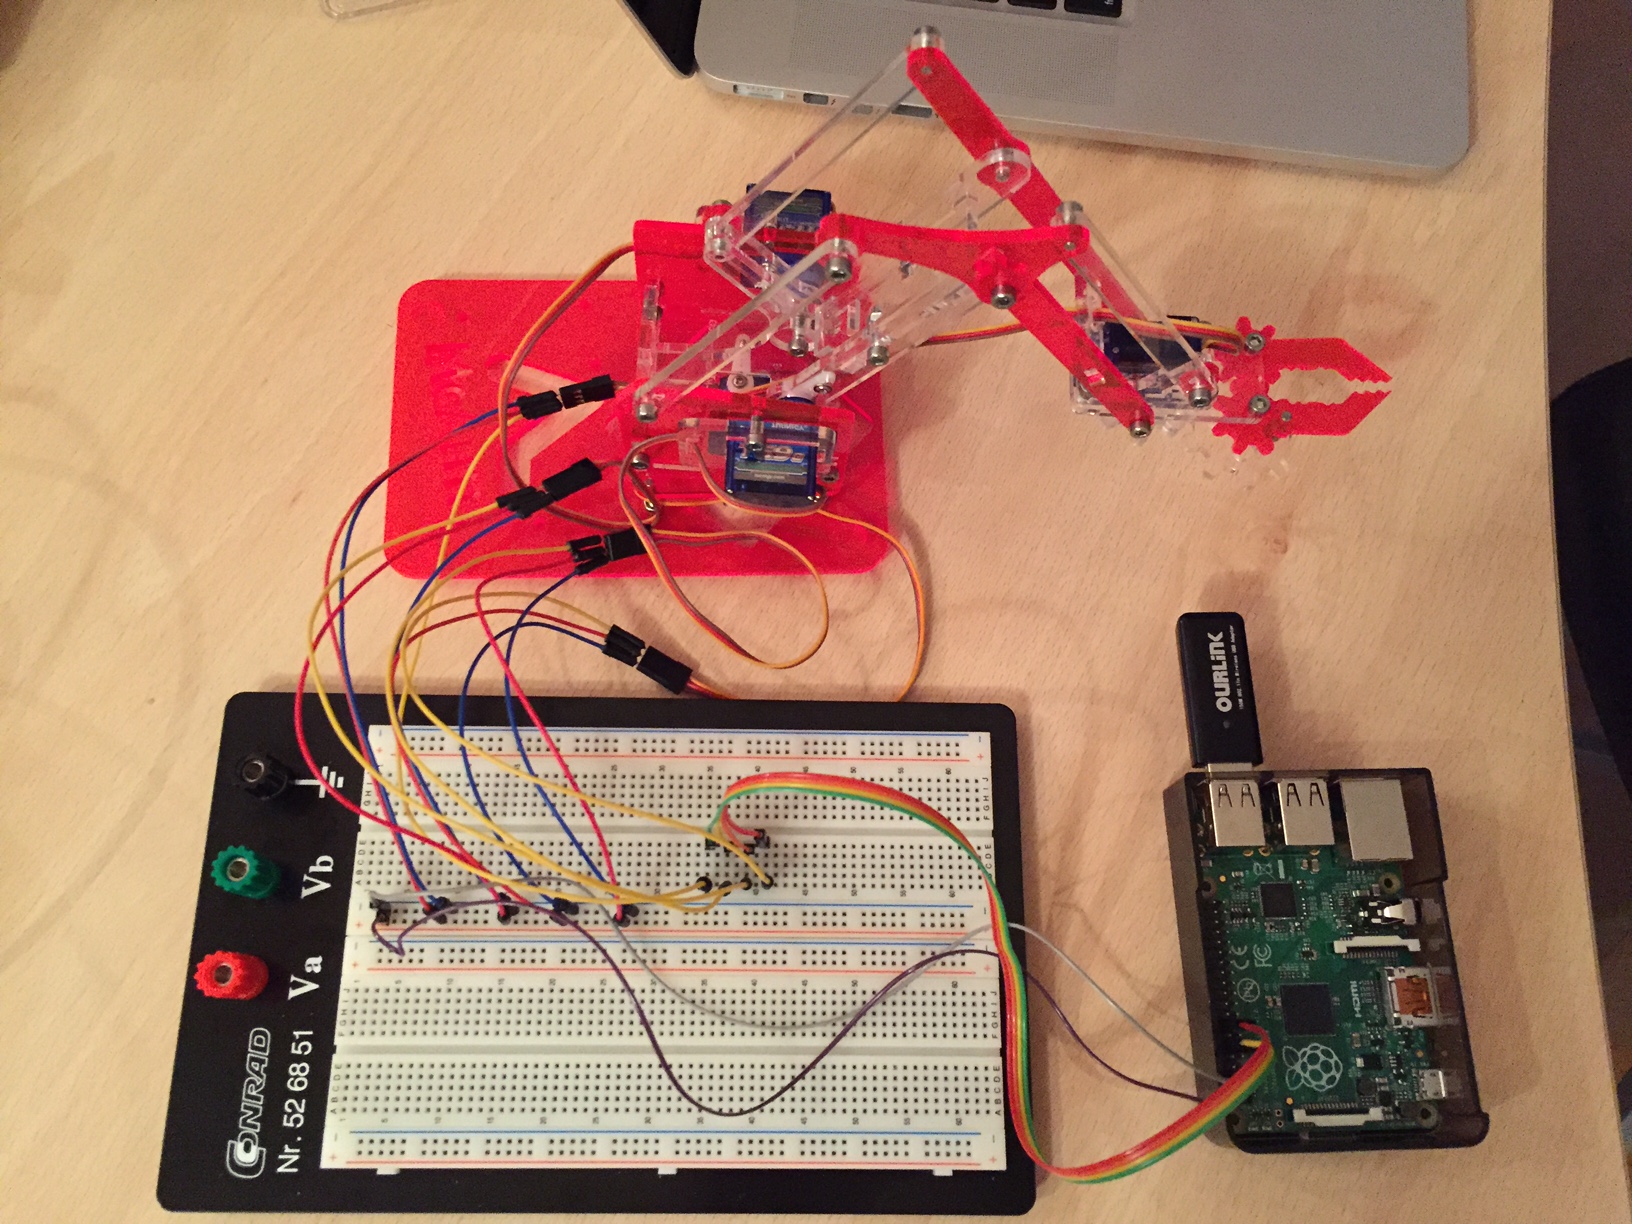
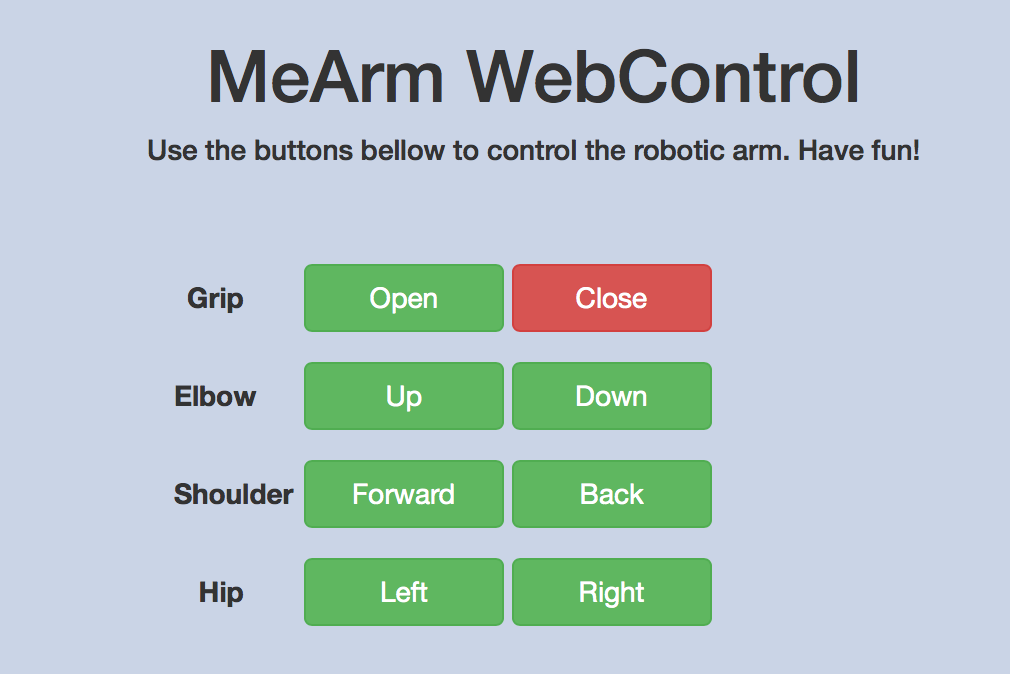
MeArm, a little robotic arm, is controlled via a web interface on a Raspberry Pi.
A Python (Flask) web server runs in a Docker container on the Raspberry Pi. The Raspberry should preferably have HypriotOS. The arm's servos are directly connected to the 5V, Ground (GND) and GPIO pins of the Raspberry board.
The next sections go over the details on how the MeArm, Raspberry and software must be configured. I assume you know already the basics of the Raspberry and Docker.
First, we must wire up MeArm's servos with the Raspberry Pi. There exists different ways to do it, but here we will simply wire everything directly on the Raspberry Pi.
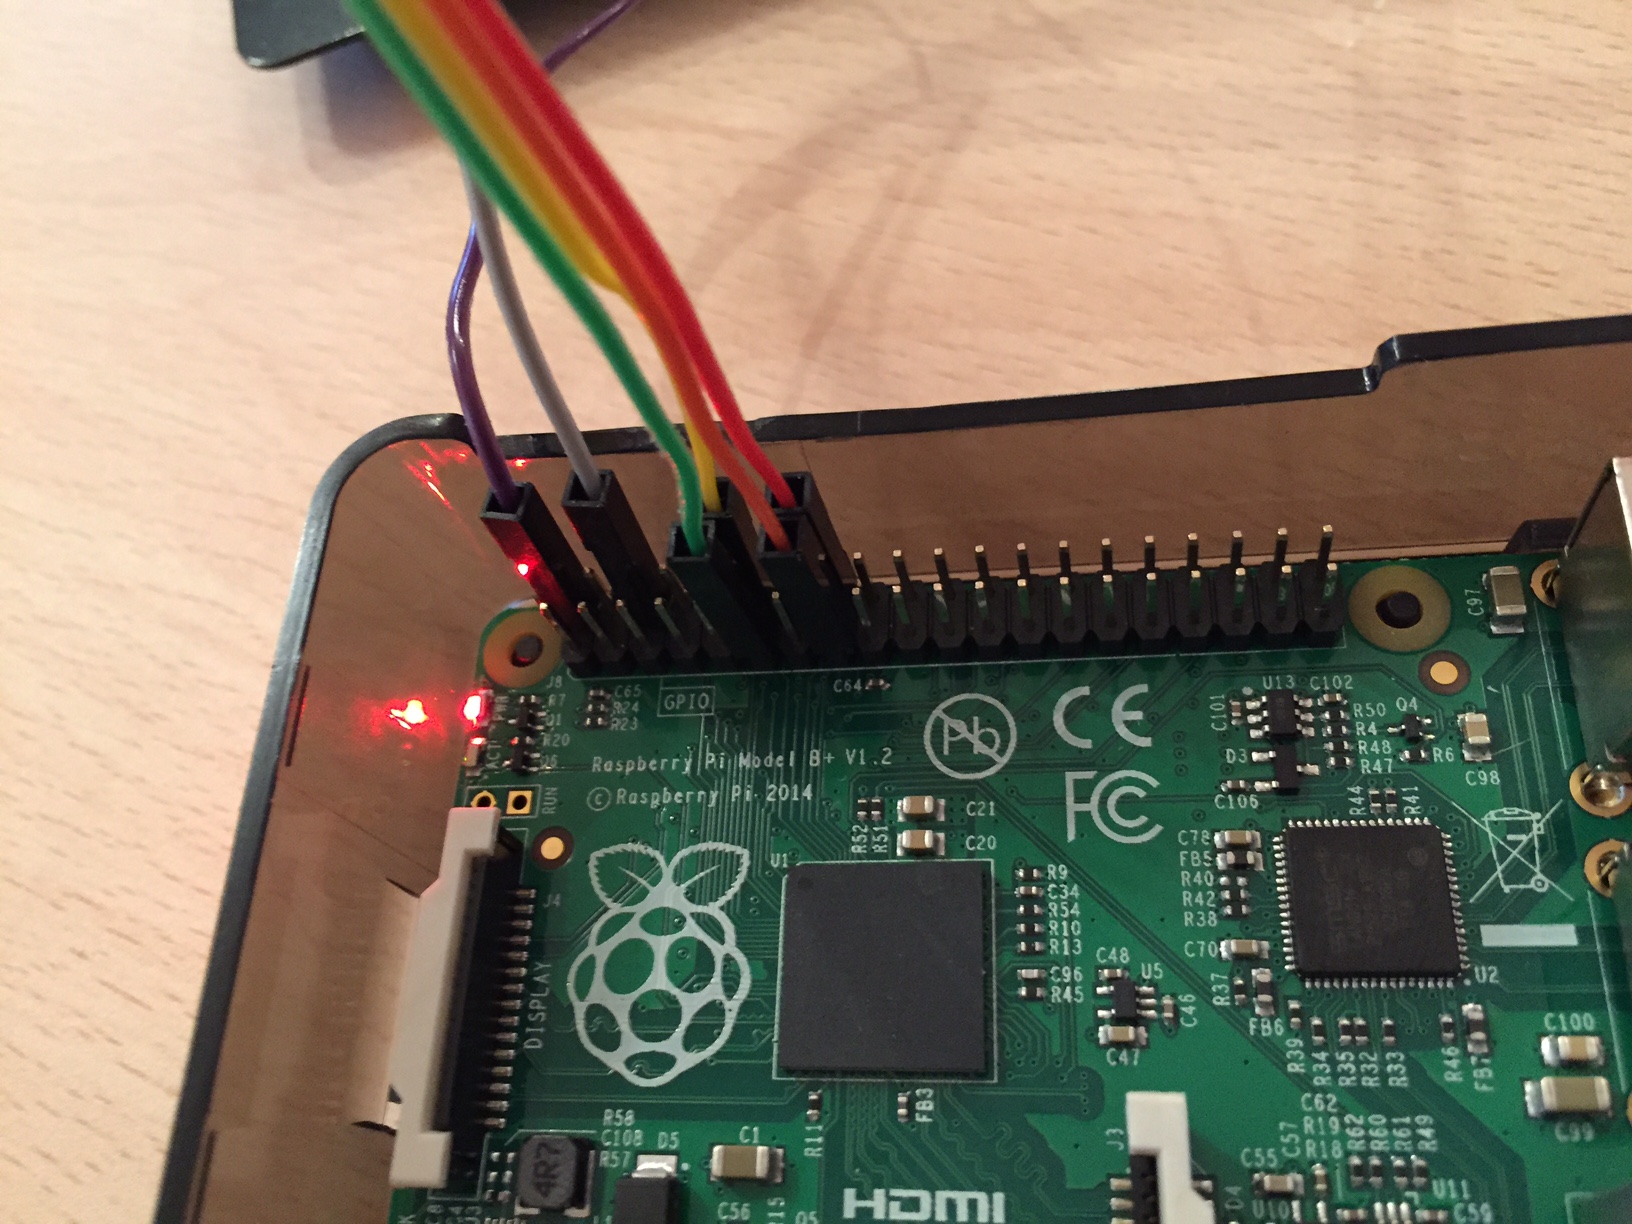
The control pin of the servos goes to the following respective GPIO pins (Reference here):
- Grip => GPIO 17 (Green)
- Elbow => GPIO 18 (Yellow)
- Shoulder => GPIO 22 (Orange)
- Hip => GPIO 23 (Red)
The Power (Purple) and Ground (Grey) pins from all motors can go onto a breadboard and then to the 5V pin and a Ground pin of the Raspberry. (To be validated) Alternatively, you can use a secondary power source to only power up the motors. Just make sure it's 5-6V at 2A.
Note: You can connect to your Hypriot powered Raspberry Pi using pi user instead of root.
Requirement: You will need your Pi to have an Internet connection to be able to pull the repository and images for docker.
Hypriot OS comes already with git installed, so just clone this repository in your home folder:
git clone https://github.com/Ra1phM/MeArmWebControl.git
Then, change directory and build the image (It will take a few minutes, relax and stretch your legs):
cd MeArmWebControl
docker build -t rpi-mearm-wb .
To start the container:
docker run --device /dev/mem:/dev/mem --privileged -p 80:5000 -ti rpi-mearm-wb /bin/bash
We launched a docker container from the image we create previously. The port 5000 from the Flask app is forwarded to port 80. -ti sends us directly in an interactive terminal inside the running container. It is very important to map /dev/mem to the container with privileged access, otherwise the container won't be able to control the pins.
Now you are in the container, to run the python app type:
python app.py
And you are done! You can access the web interface at http://<IP OF RASPBERRY PI>
StartContainer.shruns the abovedocker run...command.- In the container call
KillServoBlaster.shin order to switch off the MeArm. This is important since, there are sometime a bug, where the servos are somehow buzzing constantly.
Have Fun


