RoomTime is a bundle of tools developed in my app RoomTime Lite. (😊 RoomTime Lite is still in development)
- iOS 15 or newer
- In Xcode project, navigate to File -> Swift Packages -> Add Package Dependency... .
- Paste
https://github.com/RainbowTalaxy/RoomTimeand click Next.
TextArea uses like SwiftUI's TextEditor, but not supports internal modifiers such as .font(_).
import RoomTime

struct TextAreaDemo: View {
    @State private var text = ""

    var body: some View {
        // 'extraHeight' is default by 0
        TextArea(text: $text, extraHeight: 100)
    }
}
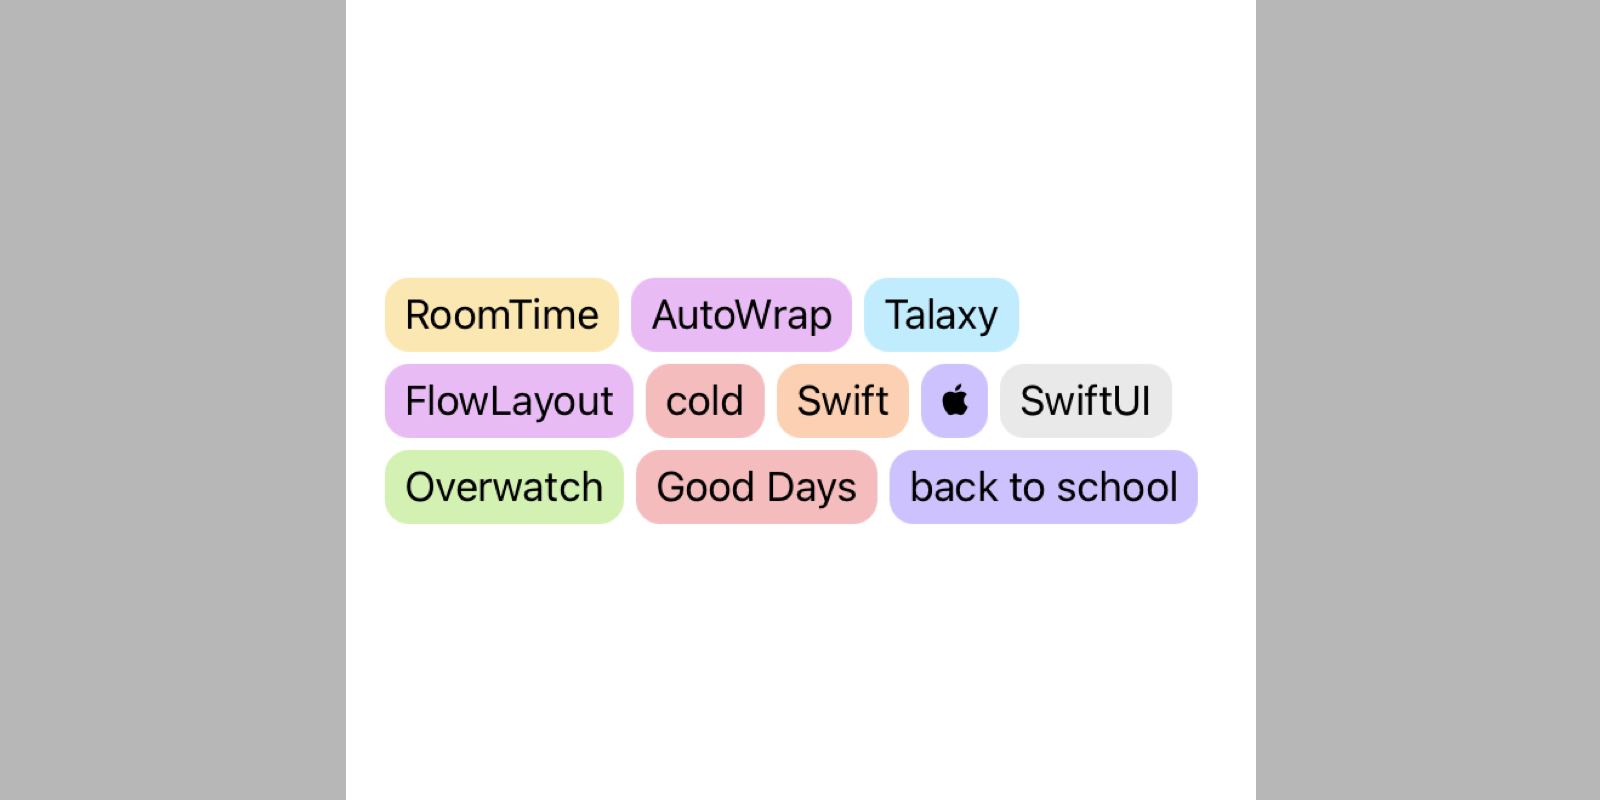
AutoWrap can let views wrap automaticly:
import RoomTime
struct AutoWrapDemo: View {
let data = [
"RoomTime", "AutoWrap", "Talaxy", "FlowLayout", "cold",
"Swift", "", "SwiftUI", "Overwatch", "Good Days", "back to school"
]
var body: some View {
// 'vSpacing' and 'hSpacing' are both default by 0
AutoWrap(data, id: \.self, vSpacing: 5, hSpacing: 5) { text in
Tag(text, bgcolor: RTColor.Tag.random())
}
.padding()
}
}Markdown is a separate module, so you just need to import Markdown.
Here is a brief usage:
import Markdown

struct MarkdownDemo: View {
    let text: String

    var body: some View {
        ScrollView {
            MarkdownView(text: text) { element in
                ElementView(element: element)
            }
            .padding()
        }
    }
}- header 1-6
- quote
- order or unorder list
- indent or block code
- border
- table
- front matter
- more in development ...
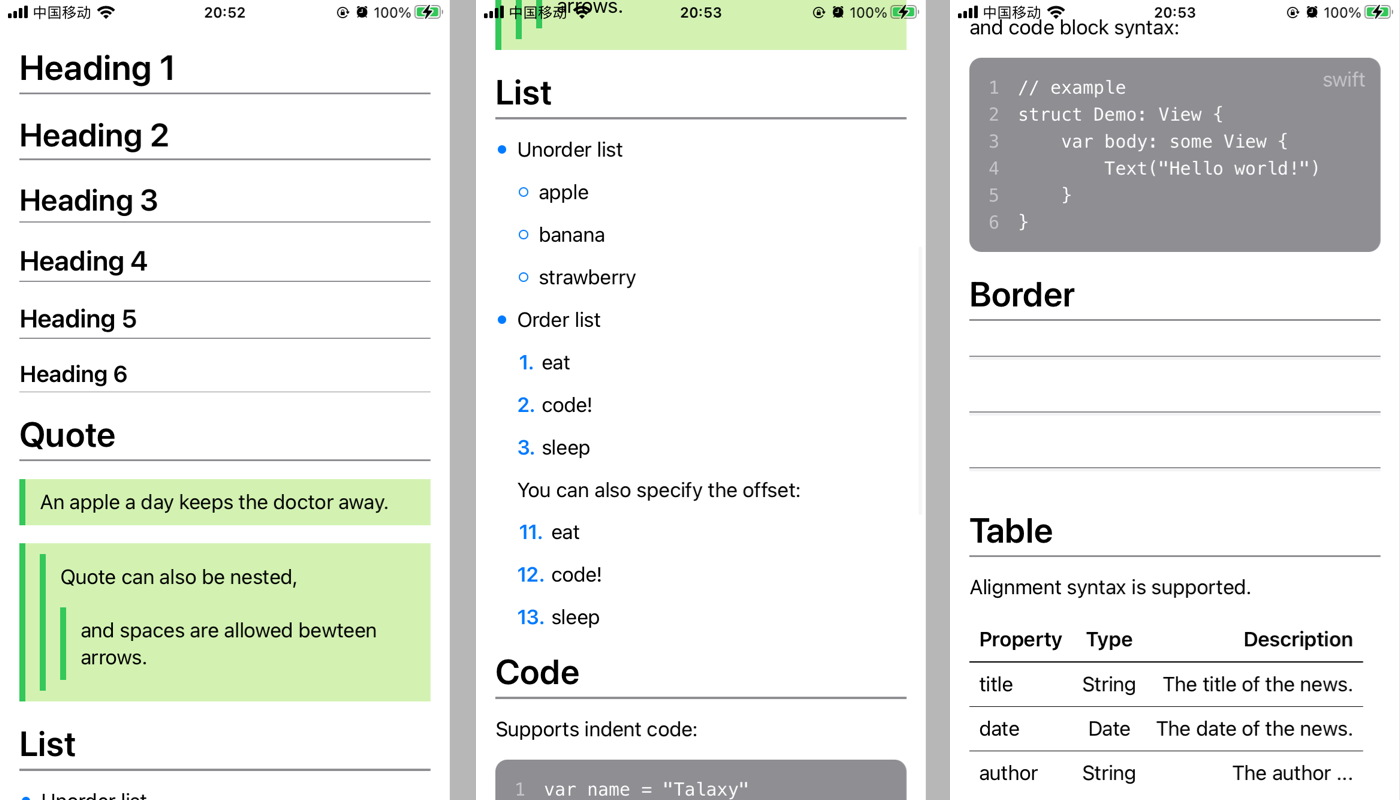
Here gives a text which shows what Markdown supports:
# Heading 1
## Heading 2
### Heading 3
#### Heading 4
##### Heading 5
###### Heading 6

# Quote

> An apple a day keeps the doctor away.

>> Quote can also be nested,
> > > and spaces are allowed bewteen arrows.

# List

* Unorder list

  - apple
  + banana
  * strawberry

* Order list

  1. eat
  2. code!
  3. sleep

  You can also specify the offset:

  11. eat
  2. code!
  3. sleep

# Code

Supports indent code:

    var name = "Talaxy"

and code block syntax:

```swift
// example
struct Demo: View {
    var body: some View {
        Text("Hello world!")
    }
}
```

# Border

---
* * *
__ ___ ____

# Table

Alignment syntax is supported.

| Property | Type   | Description            |
|:-------- |:------:| ----------------------:|
| title    | String | The title of the news. |
| date     | Date   | The date of the news.  |
| author   | String | The author ...         |
Markdown uses Resolver to convert text into markdown elements.
Resolver has two rendering stages: "Spliting" and "Mapping" :
In "Spliting" stage, Resolver splits text into Raws by SplitRule instances orderly.
Here is the definetion of the Raw:
public struct Raw: Hashable {
    public let lock: Bool
    public let text: String
    public let type: String?
}locktells theResolverwhether wants to be splited by further split rules.textcontains the text itself.typeis for "Mapping" stage.
In "Mapping" stage, Resolver converts Raws into Element objects.
With Markdown rendering mechanism, you can customize your rendering rule.
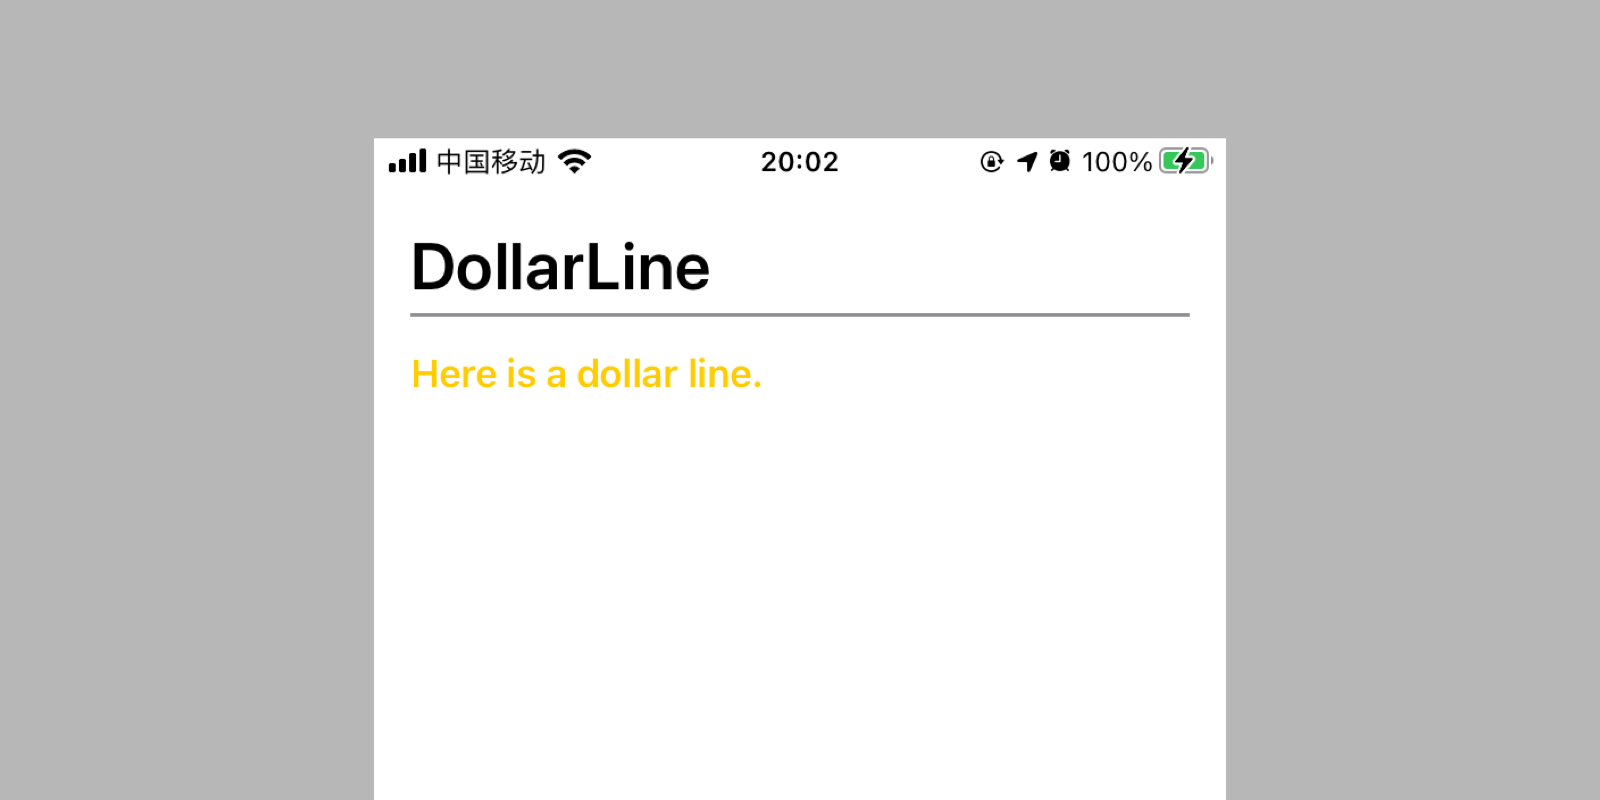
For Example, if you want to highlight lines which starts with $ sign, you can implement by steps below:
First, create render rule:
import Markdown

class DollarLineElement: Element {
    let text: String

    init(text: String) {
        self.text = text
    }
}

fileprivate let dollerLineType = "doller"
fileprivate let dollerLineRegex = #"^\$ +.*$"#
fileprivate let dollerSignRegex = #"^\$ +(?=.*$)"#

class DollarSplitRule: SplitRule {
    override func split(from text: String) -> [Raw] {
        // You can use the inherited method `split(by:text:type:)`
        // to easily split text by Regex.
        return split(by: dollerLineRegex, text: text, type: dollerLineType)
    }
}

class DollarMapRule: MapRule {
    override func map(from raw: Raw, resolver: Resolver?) -> Element? {
        if raw.type == dollerLineType {
            // `replace(by:with:)` is a method nested in Markdown.
            // It helps you replace text by Regex easily.
            let line = raw.text.replace(by: dollerSignRegex, with: "")
            return DollarLineElement(text: line)
        } else {
            return nil
        }
    }
}
Second, define DollarLine view:
import SwiftUI

struct DollarLine: View {
    let element: DollarLineElement

    var body: some View {
        Text(element.text)
            .bold()
            .foregroundColor(Color.yellow)
    }
}
Third, configure the Resolver:
let splitRules: [SplitRule] = defaultSplitRules + [
    DollarSplitRule(priority: 4.5)
]

let mapRules: [MapRule] = defaultMapRules + [
    DollarMapRule(priority: 4.5)
]

let resolver = Resolver(splitRules: splitRules, mapRules: mapRules)
Finally, use Markdown and extend element view:
struct MarkdownDemo: View {
    let text: String = """
        # DollarLine
        $ Here is a dollar line.
        """

    var body: some View {
        ScrollView {
            Markdown(text: text, resolver: resolver) { element in
                // default view mapping
                ElementView(element: element)

                switch element {
                case let dollarLine as DollarLineElement:
                    DollarLine(element: dollarLine)
                default:
                    EmptyView()
                }
            }
            .padding()
        }
    }
}
Here is the output:


