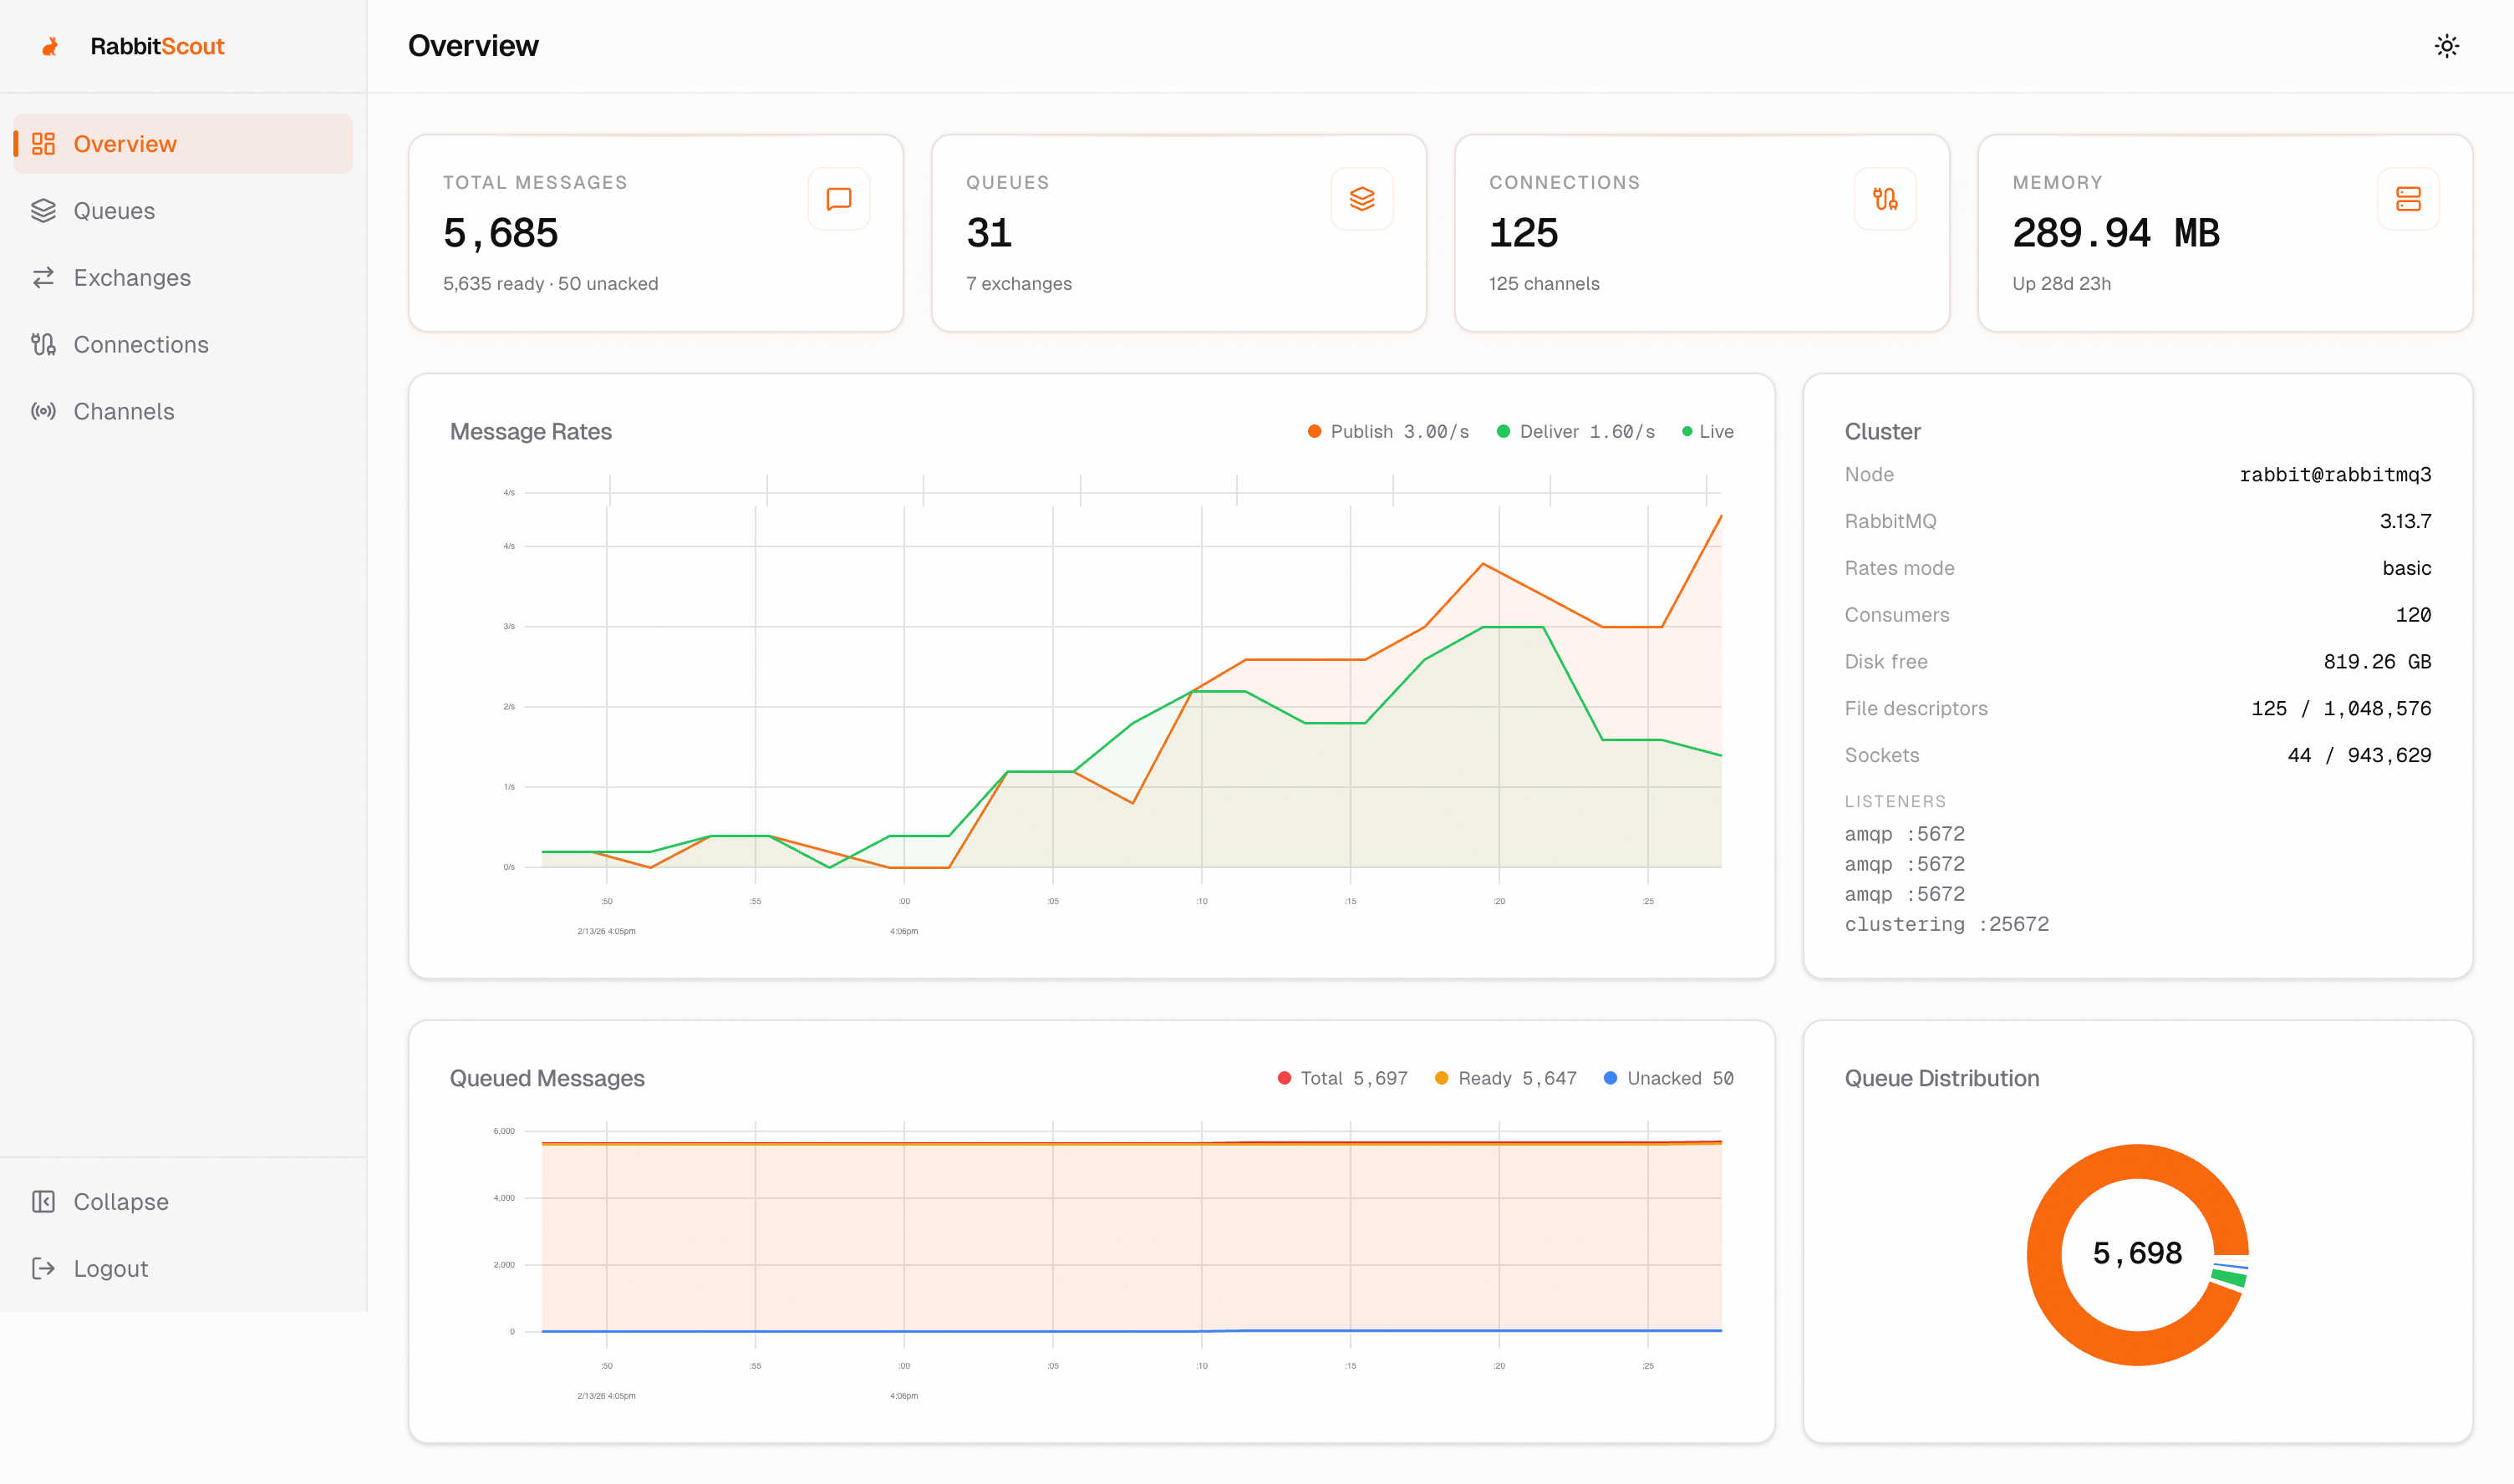
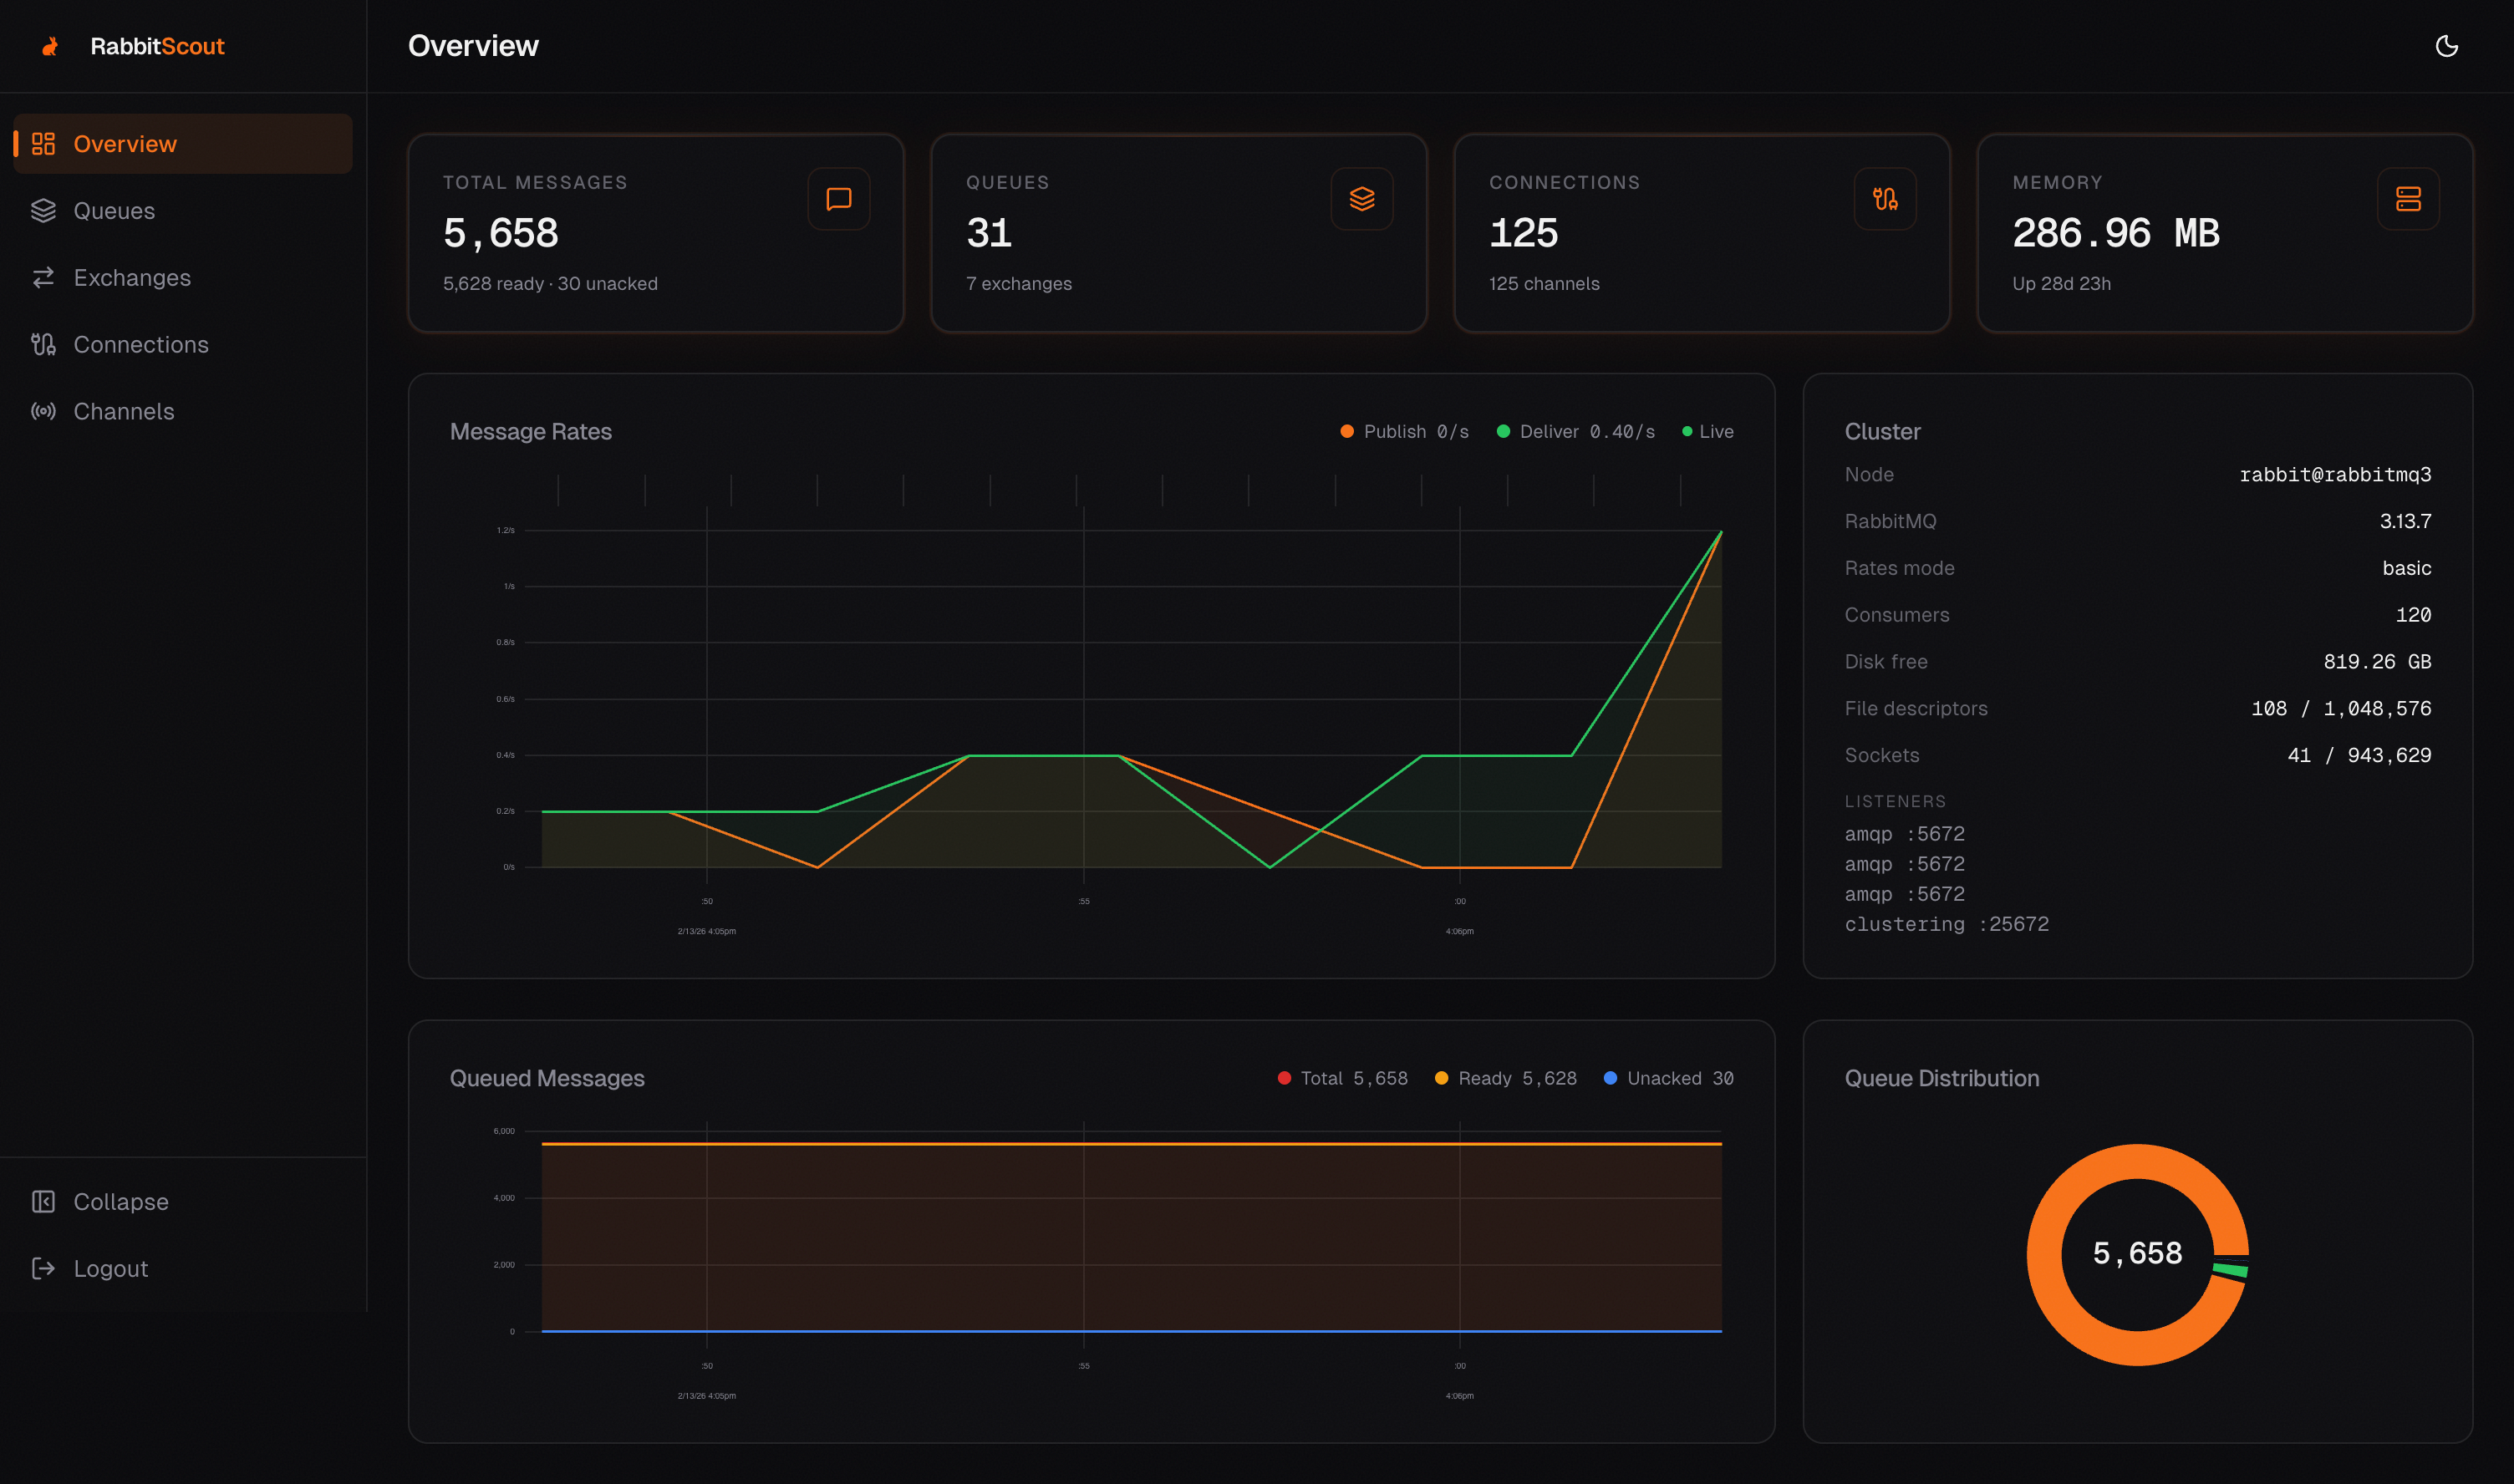
Modern, intuitive dashboard for RabbitMQ management - A powerful alternative to the default RabbitMQ Management UI.
RabbitScout provides a comprehensive suite of features for managing your RabbitMQ instance:
- Real-time overview of system metrics
- Total message count monitoring
- Queue statistics and distribution
- Active connections tracking
- Memory usage visualization
- Live message rate graphs
- Queue-specific message rate tracking
-
Queue Management
- 📋 Detailed queue listings with search and filter
- 🔍 Message inspection capabilities
- ⚡ Real-time queue metrics
- 🗑️ Queue operations (purge, delete)
- 📥 Message publishing interface
-
Exchange & Binding Viewing
- 🔄 Exchange configuration viewing
- 👁️ View-only binding information
-
Connection & Channel Monitoring
- 👥 View active connections
- 📡 Basic channel status viewing
- 📉 Connection metrics viewing
-
Binding Management
- Binding creation and modification
- Advanced binding configuration
-
Connection & Channel Management
- Advanced connection controls
- Channel management actions
- Detailed channel metrics
- Connection force-close capabilities
- 🔐 Secure authentication system
- 🍪 Cookie-based session management
- ⚙️ Environment variable configuration
- 🔒 Secure credential handling
- 🌓 Dark/Light mode support
- 📱 Responsive design for all devices
- ⚡ Real-time updates
- 🎨 Modern, clean interface
- Node.js 18.17 or later
- RabbitMQ Server 3.x or later
- Modern web browser
Before you begin, ensure you have:
- 🔧 Access to a RabbitMQ instance
- 📝 RabbitMQ management credentials
- 💻 Node.js installed locally
-
Clone the repository
git clone https://github.com/Ralve-org/RabbitScout.git cd RabbitScout -
Install dependencies
npm install # or yarn install -
Configure environment variables
- Copy the example environment file
cp .env.example .env
- Update the .env file with your RabbitMQ credentials:
# Required Configuration
NEXT_PUBLIC_RABBITMQ_HOST=your-rabbitmq-host    # RabbitMQ server hostname
NEXT_PUBLIC_RABBITMQ_PORT=15672                 # RabbitMQ management port
NEXT_PUBLIC_RABBITMQ_VHOST=/                    # Virtual host

# Authentication
RABBITMQ_USERNAME=your-username                 # RabbitMQ admin username
RABBITMQ_PASSWORD=your-password                 # RabbitMQ admin password

# Application Settings
NEXT_PUBLIC_API_URL=http://localhost:3000       # Application URL
- Copy the example environment file
-
Access the Login Page
- Navigate to
http://localhost:3000/login - You'll be presented with a clean, modern login interface
- Navigate to
-
Enter Credentials
- Username: Your RabbitMQ username (default: guest)
- Password: Your RabbitMQ password (default: guest)
-
Important Notes
- Default credentials (guest/guest) only work for localhost
- For remote servers, use your RabbitMQ server credentials
- Ensure your RabbitMQ user has management permissions
-
Session Management
- Login sessions are secured with HTTP-only cookies
- Sessions expire after period of inactivity
- Use the logout button to end your session manually
Run the development server:
npm run dev
# or
yarn dev
Access the dashboard at http://localhost:3000
Build for production:
npm run build
# or
yarn build
Start the production server:
npm start
# or
yarn startYou can run RabbitScout using Docker in two ways:
services:
  rabbitscout:
    image: ghcr.io/ralve-org/rabbitscout:latest
    ports:
      - "3000:3000"
    environment:
      - NEXT_PUBLIC_RABBITMQ_HOST=your-rabbitmq-host
      - NEXT_PUBLIC_RABBITMQ_PORT=15672
      - NEXT_PUBLIC_RABBITMQ_VHOST=/
      - RABBITMQ_USERNAME=your-username
      - RABBITMQ_PASSWORD=your-password
- NEXT_PUBLIC_API_URL=http://localhost:3000docker run -p 3000:3000 \
-e NEXT_PUBLIC_RABBITMQ_HOST=your-rabbitmq-host \
-e NEXT_PUBLIC_RABBITMQ_PORT=15672 \
-e NEXT_PUBLIC_RABBITMQ_VHOST=/ \
-e RABBITMQ_USERNAME=your-username \
-e RABBITMQ_PASSWORD=your-password \
-e NEXT_PUBLIC_API_URL=http://localhost:3000 \
ghcr.io/ralve-org/rabbitscout:latest- Framework: Next.js 14
- UI Components: shadcn/ui
- Styling: Tailwind CSS
- Language: TypeScript
- State Management: React Hooks
- Data Fetching: Next.js App Router & Server Components
rabbitscout/
├── app/                          # Next.js app directory
│   ├── api/                      # API routes
│   │   ├── auth/                # Authentication endpoints
│   │   ├── queues/              # Queue management endpoints
│   │   └── stats/               # Statistics and metrics endpoints
│   ├── dashboard/               # Dashboard pages
│   │   ├── connections/         # Connection management
│   │   ├── exchanges/           # Exchange management
│   │   ├── queues/             # Queue management
│   │   └── page.tsx            # Main dashboard
│   └── login/                   # Authentication pages
├── components/                   # React components
│   ├── auth/                    # Authentication components
│   ├── dashboard/               # Dashboard components
│   │   ├── message-rate-chart   # Message rate visualization
│   │   ├── overview-stats       # System statistics
│   │   ├── queue-distribution   # Queue metrics
│   │   └── queued-messages      # Queue message charts
│   ├── ui/                      # Reusable UI components
│   └── shared/                  # Shared components
├── docs/                        # Documentation
│   └── assets/                  # Documentation assets
├── hooks/                       # Custom React hooks
│   ├── use-toast.ts            # Toast notifications
│   └── use-websocket.ts        # WebSocket connections
├── lib/                         # Utility functions
│   ├── api/                    # API client functions
│   ├── auth/                   # Authentication utilities
│   ├── constants/              # Constants and configs
│   ├── types/                  # TypeScript types
│   └── utils/                  # Helper functions
├── public/                      # Static assets
│   └── images/                 # Image assets
├── .env.example                 # Example environment variables
├── .eslintrc.json              # ESLint configuration
├── .gitignore                  # Git ignore rules
├── components.json             # UI components config
├── middleware.ts               # Next.js middleware
├── next.config.js             # Next.js configuration
├── package.json               # Project dependencies
├── postcss.config.mjs         # PostCSS configuration
├── tailwind.config.ts        # Tailwind CSS configuration
└── tsconfig.json             # TypeScript configuration
These screenshots showcase the dashboard overview tab in both light and dark modes, featuring:
- Real-time message rate graphs
- Queue distribution charts
- System overview statistics
- Memory usage metrics
- 🔗 Complete binding management system
- 🎮 Advanced connection & channel controls
- 📊 Enhanced channel metrics
- 🔄 Connection management actions
- 📊 Enhanced visualization options
- 🔔 Real-time notifications
- 🔍 Advanced search capabilities
- 📈 Extended metrics and analytics
- Binding management functionality is currently disabled
- Channel and connection management actions are in development
- Some advanced features are view-only at this time
We welcome contributions! Here's how you can help:
- 🐛 Report bugs and issues
- 💡 Suggest new features
- 📝 Improve documentation
- 🔧 Submit pull requests
- Fork the repository
- Create your feature branch (
git checkout -b feature/AmazingFeature) - Commit your changes (
git commit -m 'Add some AmazingFeature') - Push to the branch (
git push origin feature/AmazingFeature) - Open a Pull Request
This project is licensed under the MIT License - see the LICENSE file for details.
- Built with Next.js 🚀
- UI components from shadcn/ui 🎨
- Powered by TypeScript 💪
- Styled with Tailwind CSS 🎯


