- First add .env file with fields
- PORT=8302 -> "port number you want your application to run at"
- MONDAY_SIGNING_SECRET= "signing secret key of app created in Monday.com"
- TUNNEL_SUBDOMAIN= -> "tunnel url for remote access"
- MONGO_URI= mongodb://mongodb:27017 -> "Mongo db url"
- MONGO_DB_NAME = "mongo DB database name"
- Run command 'docker-compose up --build' in your command line
- First add .env file with fields
- PORT=8302 -> "port number you want your application to run at"
- MONDAY_SIGNING_SECRET= "signing secret key of app created in Monday.com"
- TUNNEL_SUBDOMAIN= -> "tunnel url for remote access"
- MONGO_URI= mongodb://localhost:27017 -> "Mongo db url"
- MONGO_DB_NAME = "mongo DB database name"
- Run command
npm install - Run
npm start
This is the "Quickstart Integration" example Monday app.
It can be used as a board recipe, which listens for any data change in board and saves the item details that has been changed in MongoDB.
This app demonstrates how to use the:
- integration recipe
- custom action
- remote options for custom fields
You can find more info in our QuickStart guide here
-
Make sure you have Node (v16.16+) and npm installed
-
Run node modules install:
$ npm install
- Open monday.com, login to your account and go to a "Developers" section.
- Create new "Integration Example App"
- Open "Features" section and create new "Integration" feature
- Choose the "Quickstart Integration - NodeJS" template to start. Add in the missing scopes, run the command scaffold in your command line, and paste the resulting URL into the URL box.
In the feature editor, open the "Feature Details" tab. This tab allows you to add a title and description to your custom integration recipe. The user will see the title and description when they see your recipe in the Integrations Center.
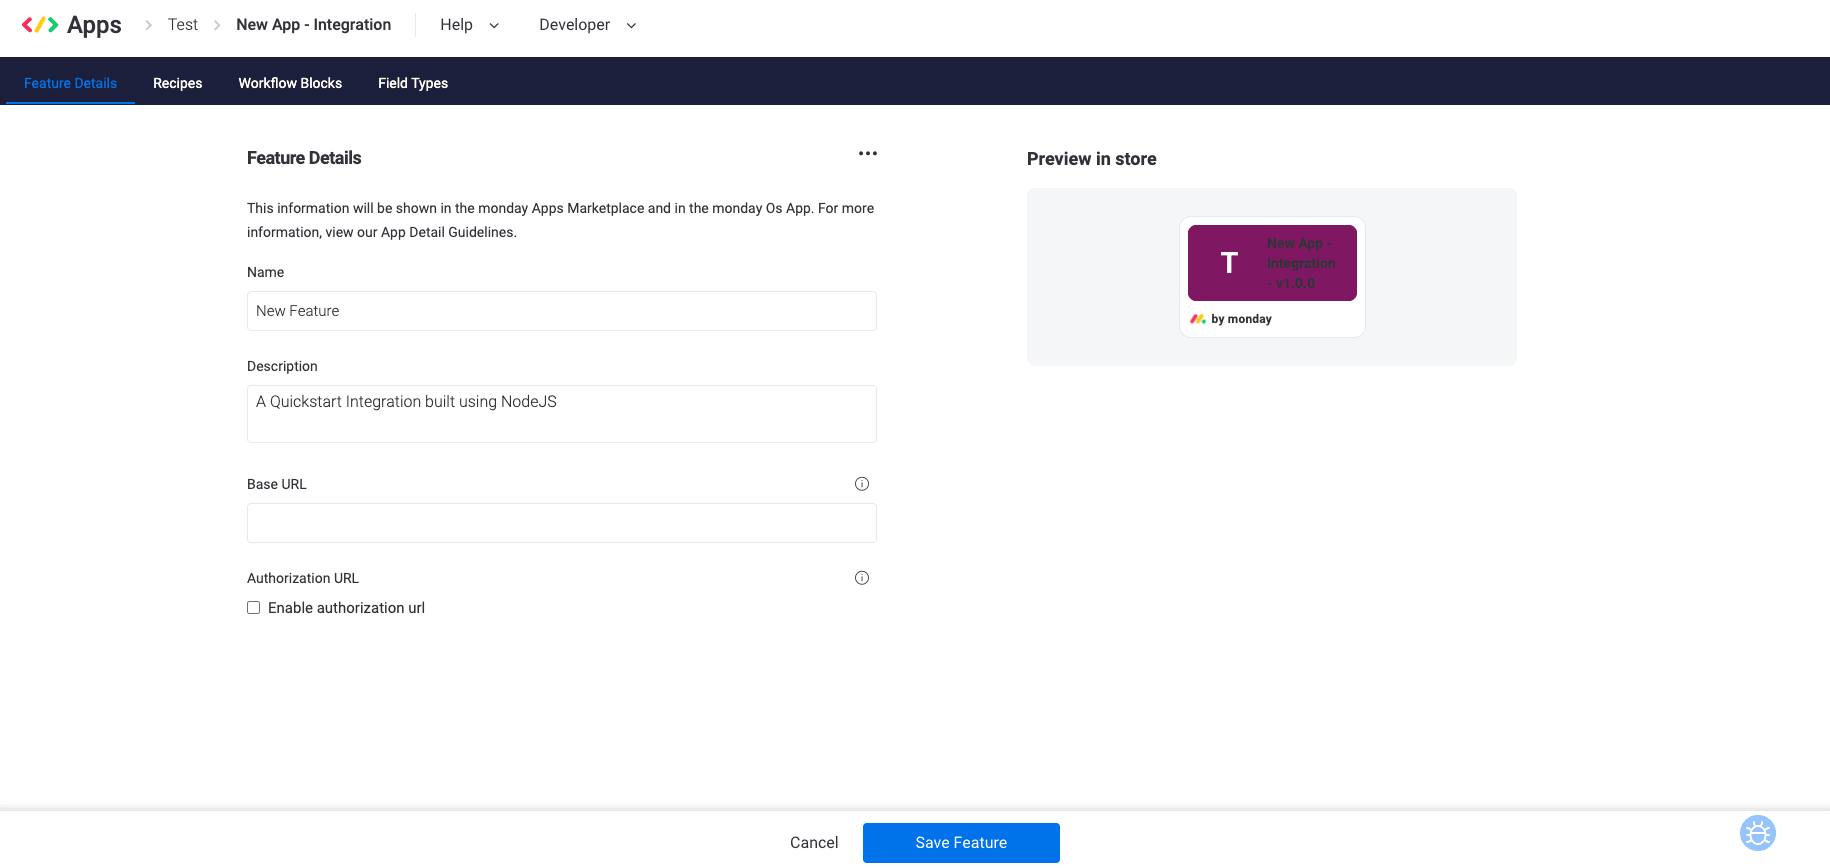
Our new feature templates provide the integration recipe for you, so it is ready to go.
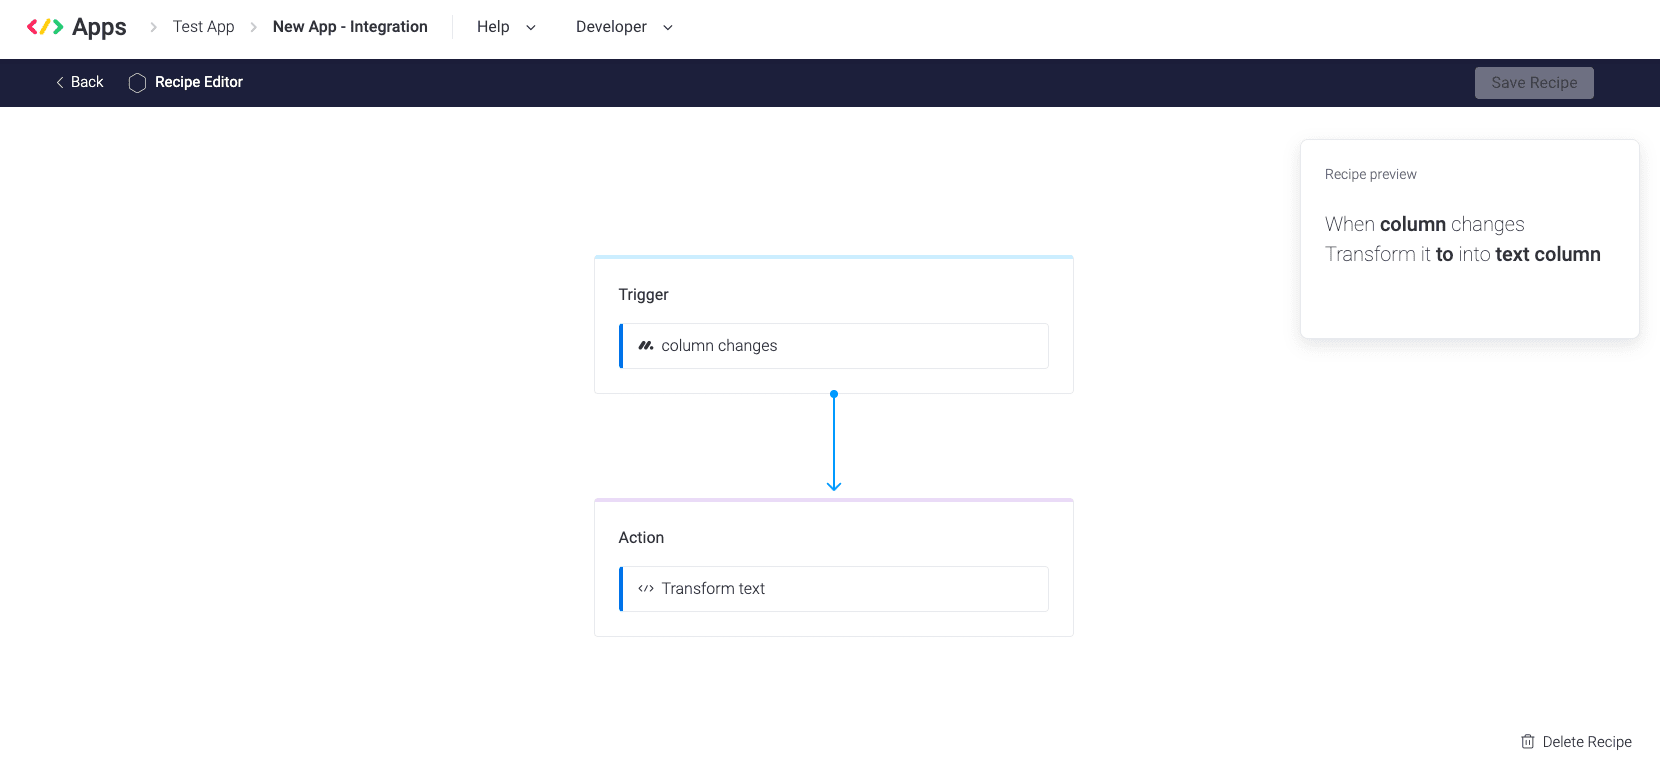
This integration utilizes a custom action that calls our API to update a second text column. If you want to see the code behind this recipe, navigate into the "quickstart-integrations" folder downloaded onto your computer after you ran the command line prompt in Part 1.
In short, integrations run off of triggers that invoke certain actions. These triggers are the conditions that must be met before an action can take place.
- Add your MONDAY_SIGNING_SECRET to .env file
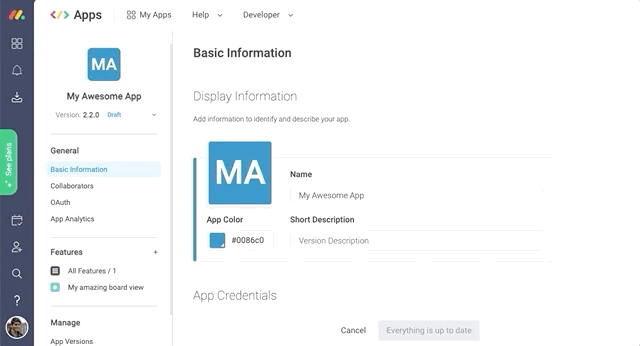
** To get your MONDAY_SIGNING_SECRET go to monday.com, open Developers section, open your app and find the Signing Secret in "Basic Information" section
- Run the server with ngrok tunnel with the command:
$ npm start
- Open http://localhost:4040/status to get your ngrok public url
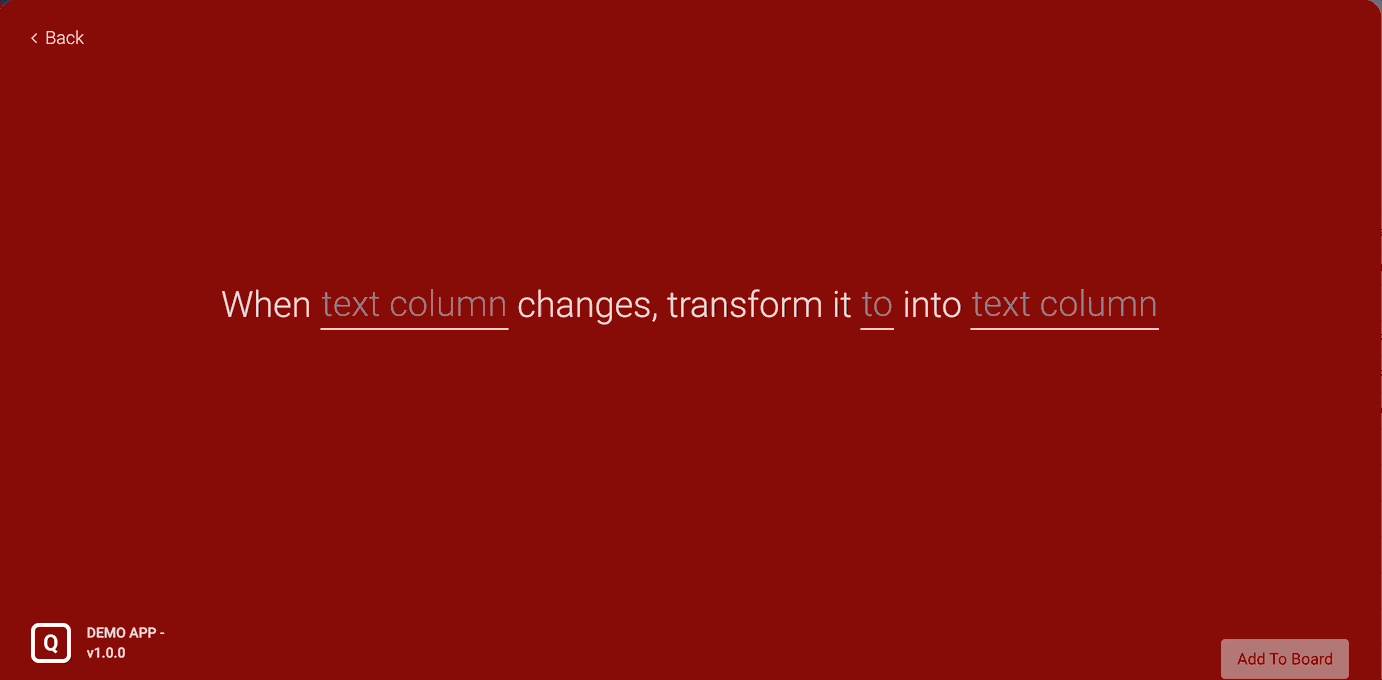
You're done! Head to any of your boards to add the integration recipe by searching for its name (in this example the integration name is "New Feature").
Follow the integration recipe prompts as normal (selecting which Text columns you want) and watch the magic unfold!