
This repository contains bot the starter and completed versions of the project featured in the Auth0 video Integrating Auth0 within a SwiftUI App. The video walks the viewer through the process of adding Auth0 authentication to an iOS app based on the SwiftUI framework.
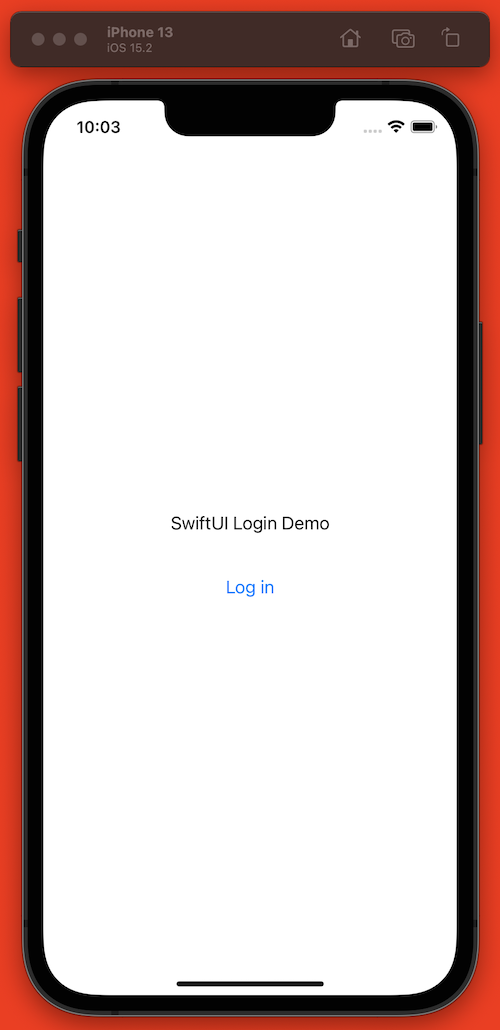
The resulting app is simple, with two screens. The first is the “Logged out” screen, which appears when the app is launched:
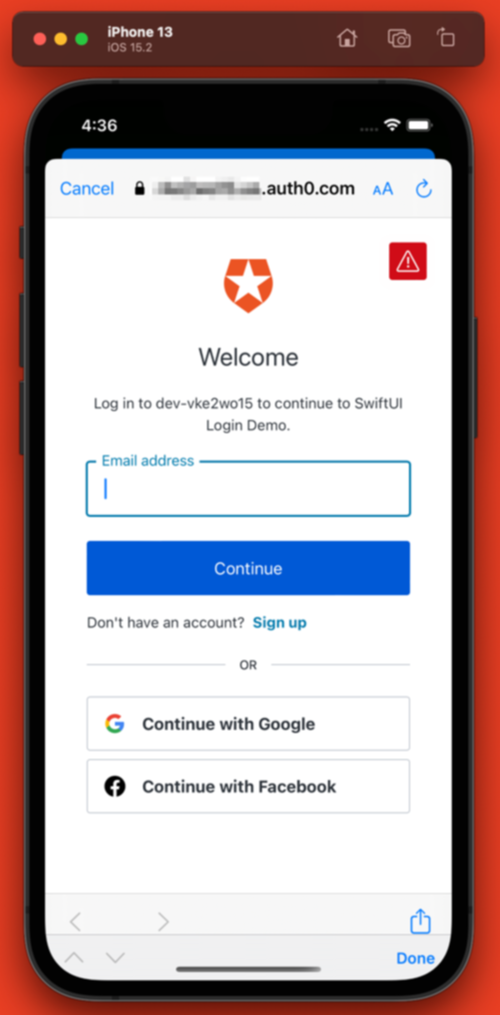
Tapping the Log in button starts the login process, which is handled by Auth0. The app delegates login to Auth0, which opens its web-based Universal Login page, shown below:
If the user provides valid login credentials, they are taken to the app’s “Logged in” screen:
This screen displays the following information gathered from the user’s profile:
- The user’s photo
- The user’s name
- The user’s email address
Tapping the Log out button logs the user out and returns them to the initial “Logged out” screen.
- As an iOS project, it needs to be built on a computer running macOS, preferably macOS 11.6, a.k.a. “Big Sur” or later.
- The project is built using Apple’s official IDE, Xcode (preferably version 12 or later), which is available for download via the macOS App Store or from the Apple Developer site.
- You’ll need an iOS device, either real or virtual:
- If you want to deploy the app to a real iOS device, you’ll need a free Apple Developer account, which requires an Apple ID with two-factor authentication enabled.
- If you want to deploy the app to a virtual iOS device, you just need Xcode, which includes the Simulator (which simulates current iOS devices and operating systems), as well as a facility for downloading simulators for older iOS devices and operating systems.
-
If you don’t already have an Auth0 account, sign up for a free one.
-
Clone the repo:
git clone https://github.com/auth0-blog/get-started-ios-authentication-swiftui.git -
Install the Auth0.swift package using Xcode:
- In Xcode, select File → Add Packages.... The Add Packages window will appear.
- In Add Packages window, enter this URL into the search field:
https://github.com/auth0/Auth0.swift.git. - Select the Auth0.swift package that appears in the list of packages and in the Dependency Rule menu, select Up to Next Major Version.
- Click Add Package.
-
Log into the Auth0 dashboard, select Applications → Applications, and register the app. The article covers this step in detail.
-
Once you have registered the app, copy these values from the app’s Settings page in the Auth0 dashboard:
DomainClient ID
-
In Xcode, open the
Auth0property list and paste theDomain IDandClient IDinto the appropriate fields. -
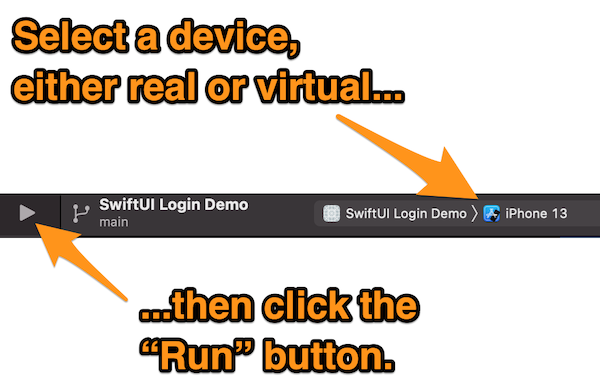
Select a device from Xcode’s device menu (near the center top of its window) and click the Run button:
- Auth0’s iOS/macOS Quickstart page: Provides you with a “starter” project with basic authentication built in.
The code in this repository is licensed under the Apache 2.0 License.