Letter Images
Professional letters are sometimes saved as images. This repo extracts information from the image of a business letter such as: sender, recipient, date, signator, enclosures, and letter body. It also extracts and saves layout and content information of all images in a given dataset. The saved information can then be exported into a Pandas dataframe for further search on the contents of those letters.
Examples of how we can use the repo are given in the two iPython notebooks: explore_letter_image_dataset.ipynb and letter_image_examples.ipynb.
Table of Contents
Usage Examples
Extract information from a single letter image
The letter_image class in the letter_image.py script is the main class that handles images of letters. Functions in this class identify blocks of text in the image, extract text within each block, identify different parts of the letter as sender/header, recipient, date, subject, letter body, signature, and notes/enclosures. There are also functions to display the position of each part in the letter, display the letter image, and display the text within each identified part.
Example
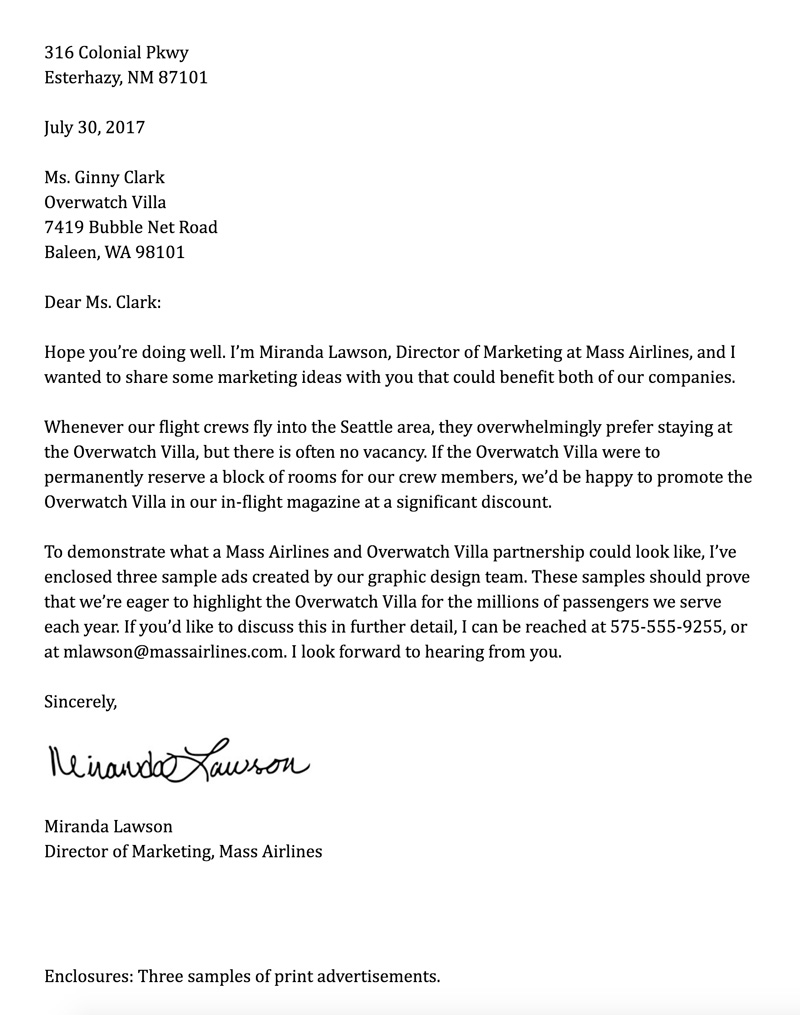
For example, given the letter image
we can identify the different letter parts such as the sender, date, recipient, and letter body. These parts can then be displayed in an image using the letter_image.display_contours() function:
The text content in each part can also be retrieved. Currently, letter_image uses the Tesseract OCR tool to extract text content. With additional manipulation on the text and layout information, we can extract more data from the letter such as the name of the signator, the names of the sender and recipient and the purpose of the letter. We can also summarize the letter content using tools like gensim or using word or sentence embeddings.
You can find more details and examples of how these functions can be accomplished in the letter_image_examples.ipynb notebook.
Extract and Query information from a collection of letter images
We can also extract information from each image in a collection of letter images and save it in a csv file. Extracted information include: the location of each part in a letter, the part type (e.g. sender, signature, body, etc.), the text within that part, as well as the image name and full path. This information allows us to query our database for a variety of purposes. Examples include:
- retrieving all the letters that were signed by a given name
- retrieving letters that were written on the same day
- finding letters which discuss similar topics.
- finding letters with a similar layout.
We can also query the database against a sample letter not in our collection. For example, we can retrieve letters in our collection that were sent to the same person as the sample letter, or letters that were signed by the same signator, or even to find letters with a similar layout as the sample letter.
More detailed examples can be found in the explore_letter_image_dataset.ipynb
Technologies
This project was developed using:
- python=3.5
- beautifulsoup4==4.7.1
- matplotlib==2.2.3
- nltk==3.4
- numpy==1.14.5
- pandas==0.23.4
- parso==0.3.1
- Pillow==5.2.0
- pyparsing==2.2.0
- pytesseract==0.2.6
- regex==2019.1.24
- scikit-image==0.14.0
- scipy==1.1.0
- astor==0.7.1
Project Status
This project is a work in progress. I would like to:
- Use fuzzy matching ti identify dates. I am currently using the dateutil package to identify dates. This causes dates to be missed if any characters were miss-recognized in the date (e.g. 201a instead of 2018). Fuzzy matching proved useful elsewhere in the code when finding greeting and signature segments.
- Seperate headings and sender information: as I show in the example notebooks, we can identify names within any given part. This should allow us to better locate the end of a heading and beginning of the sender information.
- use hough transforms to identify text lines in addition to contours: this handles cases where two different contours fall on the same line and end up being incorrectly detected as two different letter parts.

