Library of Infineon's 3D magnetic sensor TLE493D family (currently supporting W2B6, A2B6 and P2B6) for Arduino. Notice that it is enough to use the class Tle493d if you want to use the basic setup. Classes Tle493d-w2b6, Tle493d-a2b6 and Tle493d-p2b6 offers additional device-specific features.
The 3D Magnetic Sensor 2GO is a budget-priced evaluation board equipped with the magnetic sensor TLE493D for three dimensional measurement combined with an ARM® Cortex™-M0 CPU. The 3D Magnetic Sensor 2GO has a complete set of on-board devices, including an on-board debugger. Build your own application and gadget with the 3D Magnetic Sensor 2GO.
Please follow the example sketches in the /examples directory in this library to learn more about the usage of the library.
Currently you have to make sure which sensor type you are using. The default type is A0:
Tle493d(AccessMode_e mode = MASTERCONTROLLEDMODE, TypeAddress_e productType = TLE493D_A0);
- Reset sequence not working for TLE493d-W2B6. (Requires further testing)
mInterface.bus->begin();
mInterface.bus->write(0xFF);
mInterface.bus->end();

mInterface.bus->begin();
mInterface.bus->write(0xFF);
mInterface.bus->end();

mInterface.bus->begin();
mInterface.bus->write(0x00);
mInterface.bus->end();

mInterface.bus->begin();
mInterface.bus->write(0x00);
mInterface.bus->end();
-
TLE493D-A2B6 does not work with low power mode.
-
Sensor does not respond after being reconnected. As mentioned in this issue, the sensor works after being flashed, but not after being powered off and powered on again. This is temporarily solved by twice writing out the configuration registers, in order to avoid unexpected INT pulse.
- TLE493D-A2B6 and TLE493D-W2B6 (three dimensional magnetic sensor)
- XMC1100 (ARM® Cortex™-M0 based)
- On-board J-Link Lite Debugger (Realized with XMC4200 Microcontroller)
- Power over USB (Micro USB), ESD and reverse current protection
Please note that base of the Sensors 2GO is the XMC 2Go from Infineon. Therefore, please install (if not already done) also the XMC-for-Arduino implementation and choose afterwards XMC2Go from the Tools>Board menu in the Arduino IDE if working with this evaluation board.
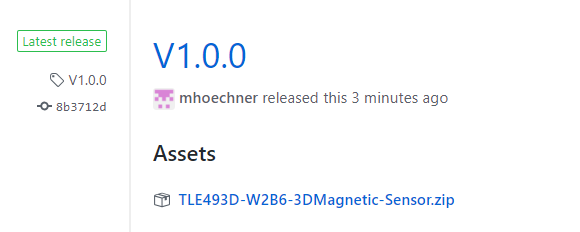
Please download this repository from GitHub by clicking on the following field in the releases of this repository or directly here:
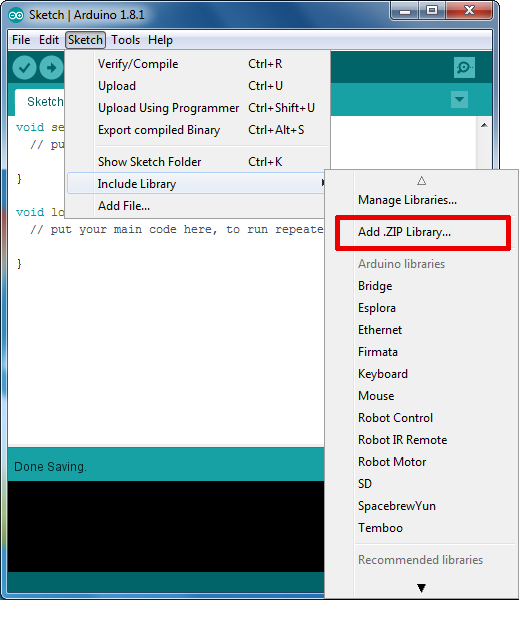
To install the 3D magnetic sensor 2GO library in the Arduino IDE, please go now to Sketch > Include Library > Add .ZIP Library... in the Arduino IDE and navigate to the downloaded .ZIP file of this repository. The library will be installed in your Arduino sketch folder in libraries and you can select as well as include this one to your project under Sketch > Include Library > MagneticSensor3D.
This library supports the open-source software Processing for creating GUIs. It allows you to connect your evaluation board to a PC over serial communication and visualisation of the embedded system. Find out more on the Arduino homepage here. The respective files are stored in the /processing folder of this repository.
The TLx493D eval kit can be combined with several 3D printed mechanical add-ons. Designed to fit the 2Go form factor for quick and easy evaluation of common magnetic mechanical applications. Find out all the available 3D Printed add-ons here.
Download here the 3D printing files for the mechanical add-ons. You can also find a GUI there for a first evaluation of those add-ons.
The Mini Control 2Go 3D printer add-ons extends the TLE493D functionalities with several python scripts support. Check out the code in the following repository.
A PDF summarizing the features and layout of the 3D magnetic sensor 2GO board is stored on the Infineon homepage here. The datasheet for the TLE493D-W2B6 can be found here TLE493D-W2B6 Datasheet while respective application notes are located here Application Notes.


