stable-diffusion-workshop-in-China-region
Note: 此 Guide 为**区目前部署 stable diffusion quick kit 的部署文档,如需要部署在海外region,请参考此链接
1. 前提条件
- **区账号
- 准备一个ICP 备案后的二级或者多级域名,以供**区 Cloudfront CNAME使用,否则Cloudfront会自动被disable掉, 进一步说明可参考此链接
2. 部署
2.1 部署 Stable diffusion 模型
-
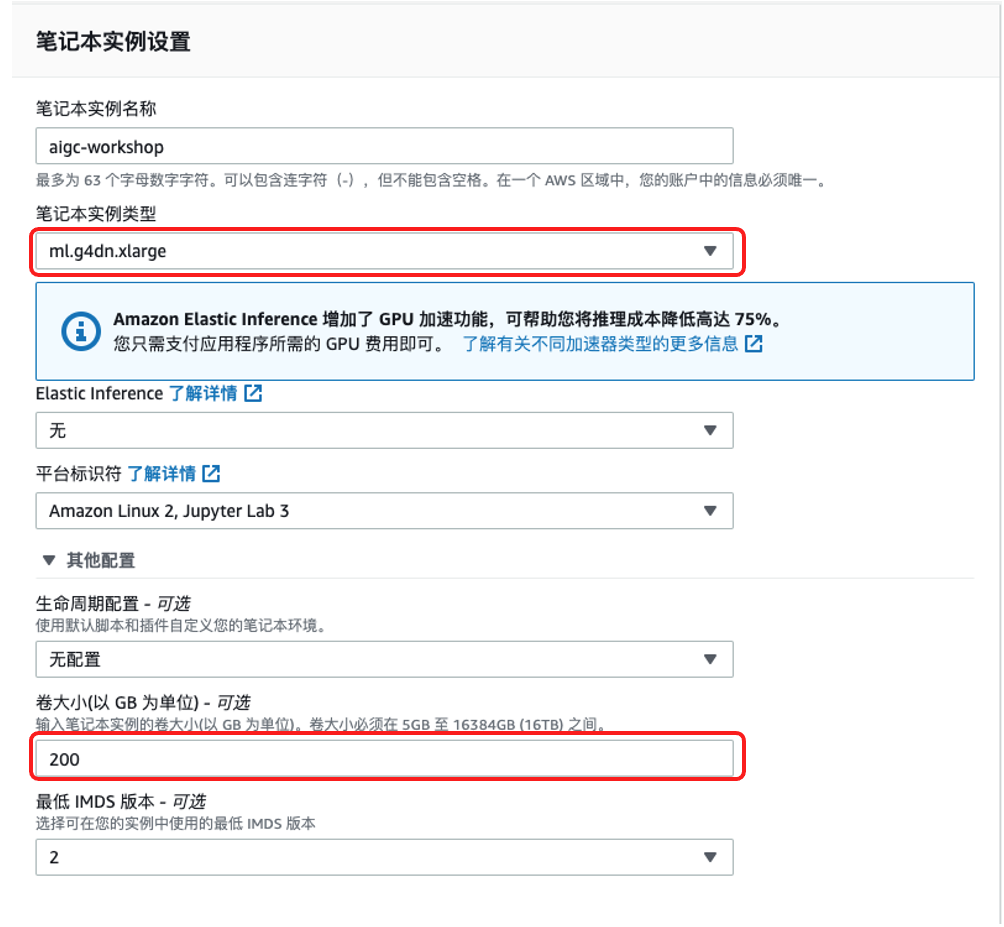
创建 sagemaker jupyter notebook
-
在jupyter中新建一个terminal,里面输入
cd SageMaker/ https://github.com/salander0411/stable-diffusion-workshop-in-china-region -
在sagemaker里
cd inference/sagemaker/byos/,选择stablediffusion_sagemaker_byos.zh.ipynb
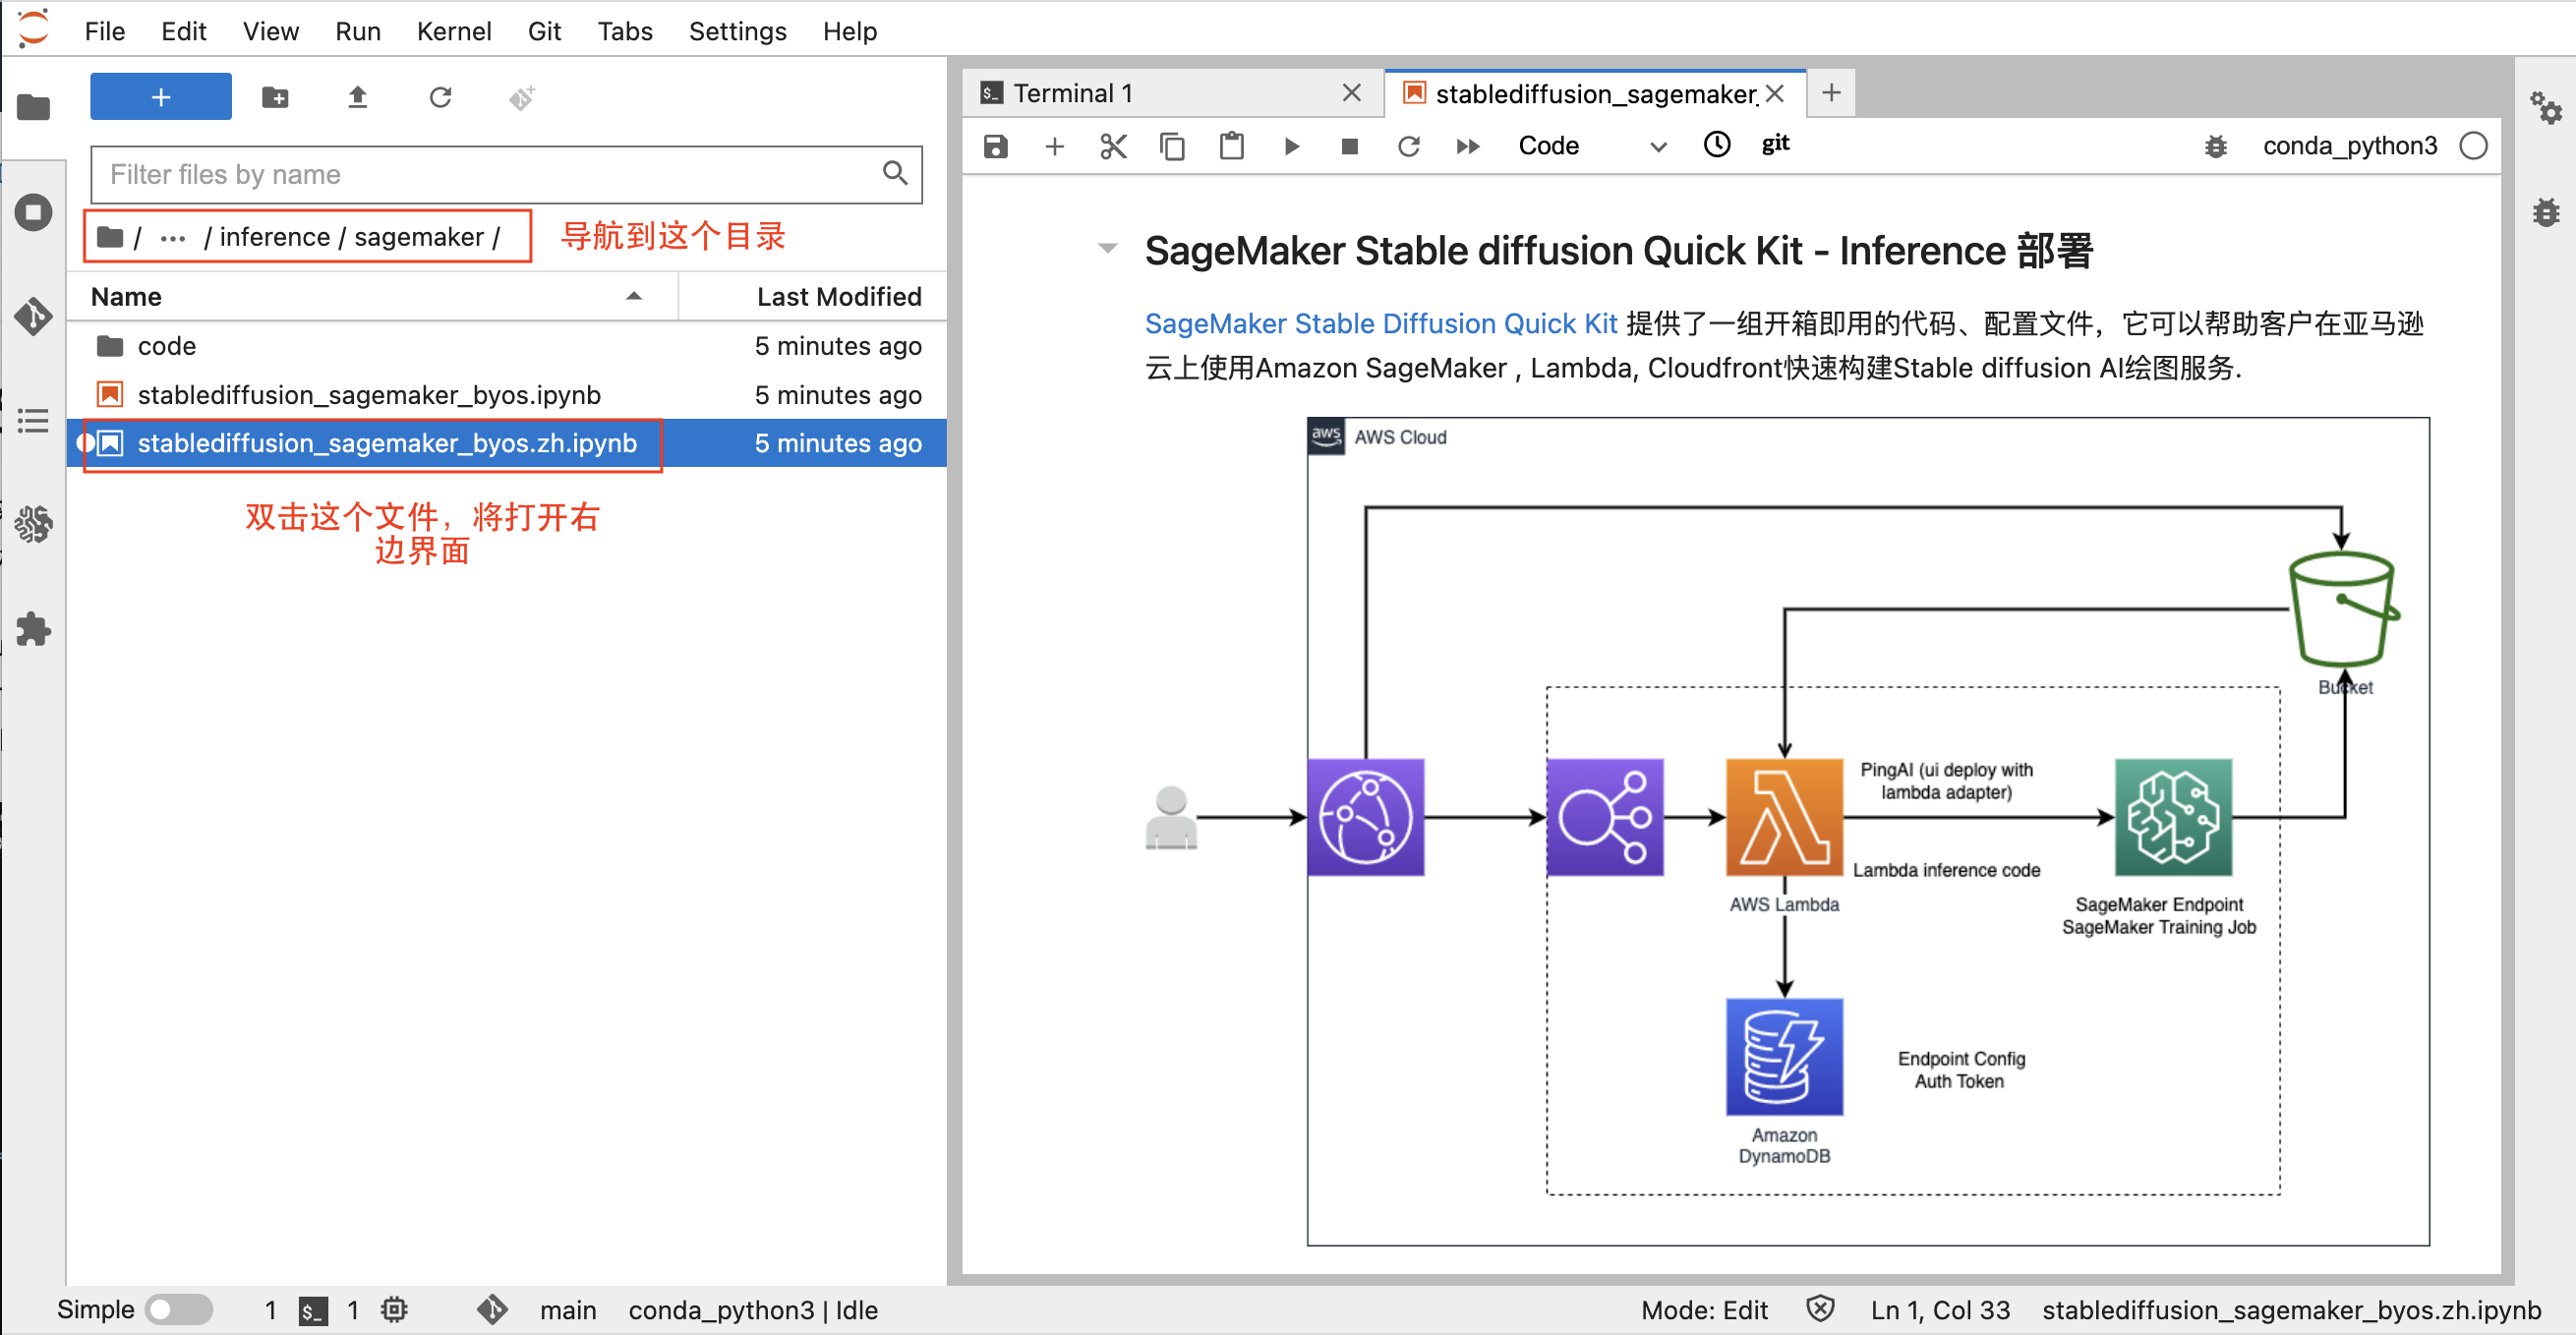
-
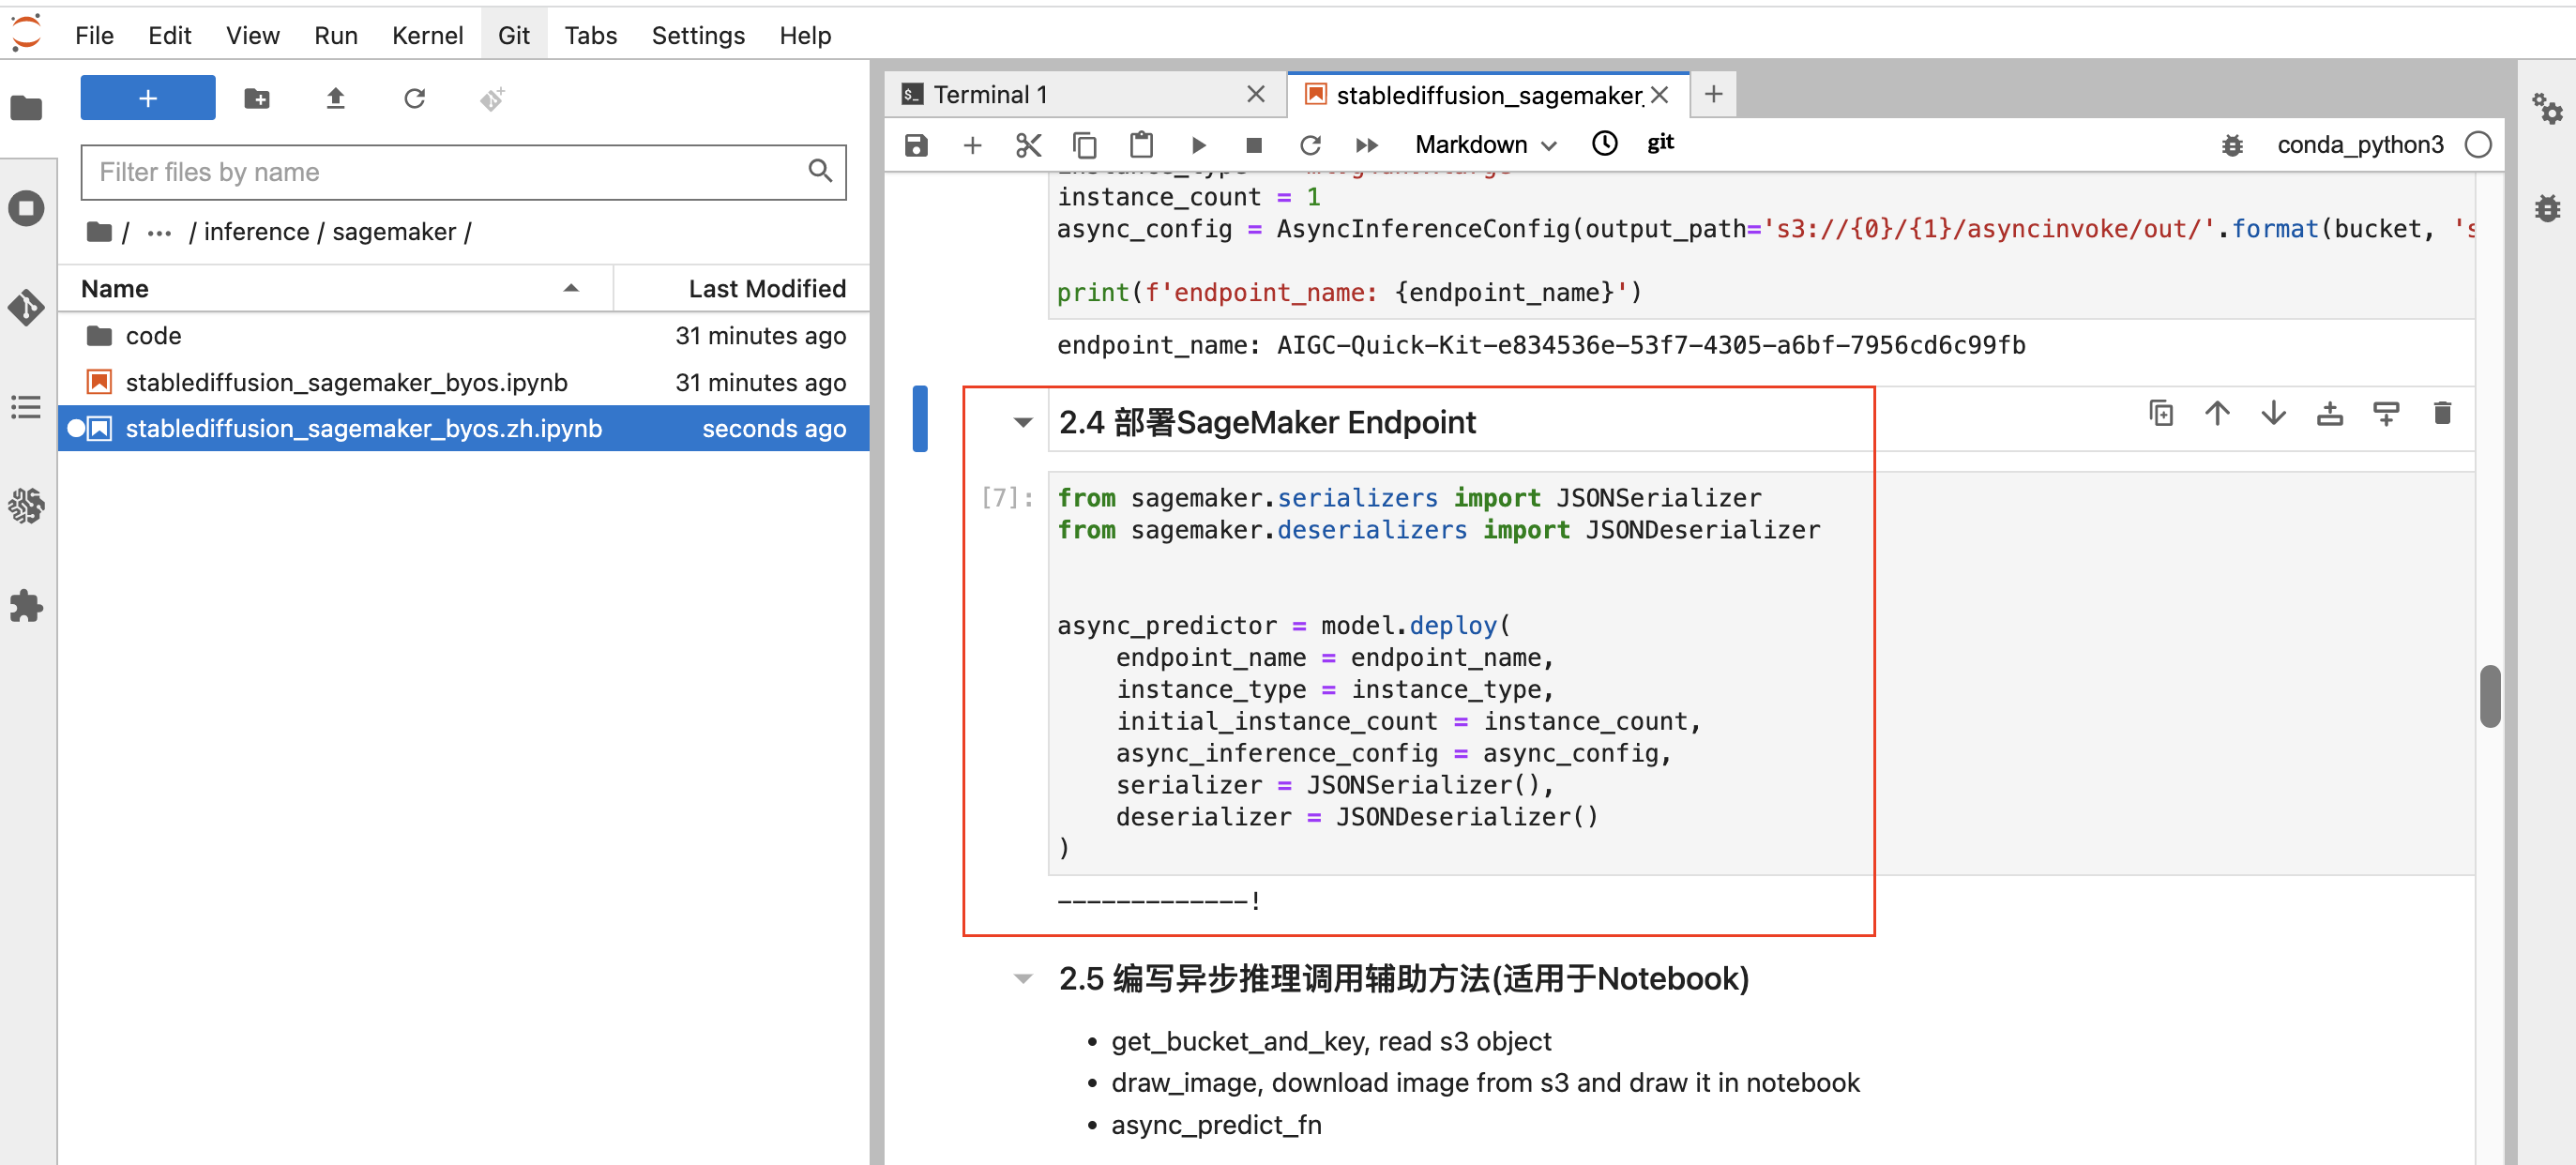
启动 notebook 之后, 将 Kernel设置为
conda_python3, 根据提示执行 stablediffusion_sagemaker_byos.zh.ipynb 中的代码,直到 2.4 部署 endpoint 为止。( 执行代码时,需要先点击代码框使代码框获得焦点,然后点击顶部菜单栏的运行按钮即可,执行后会自动打印输出。)
-
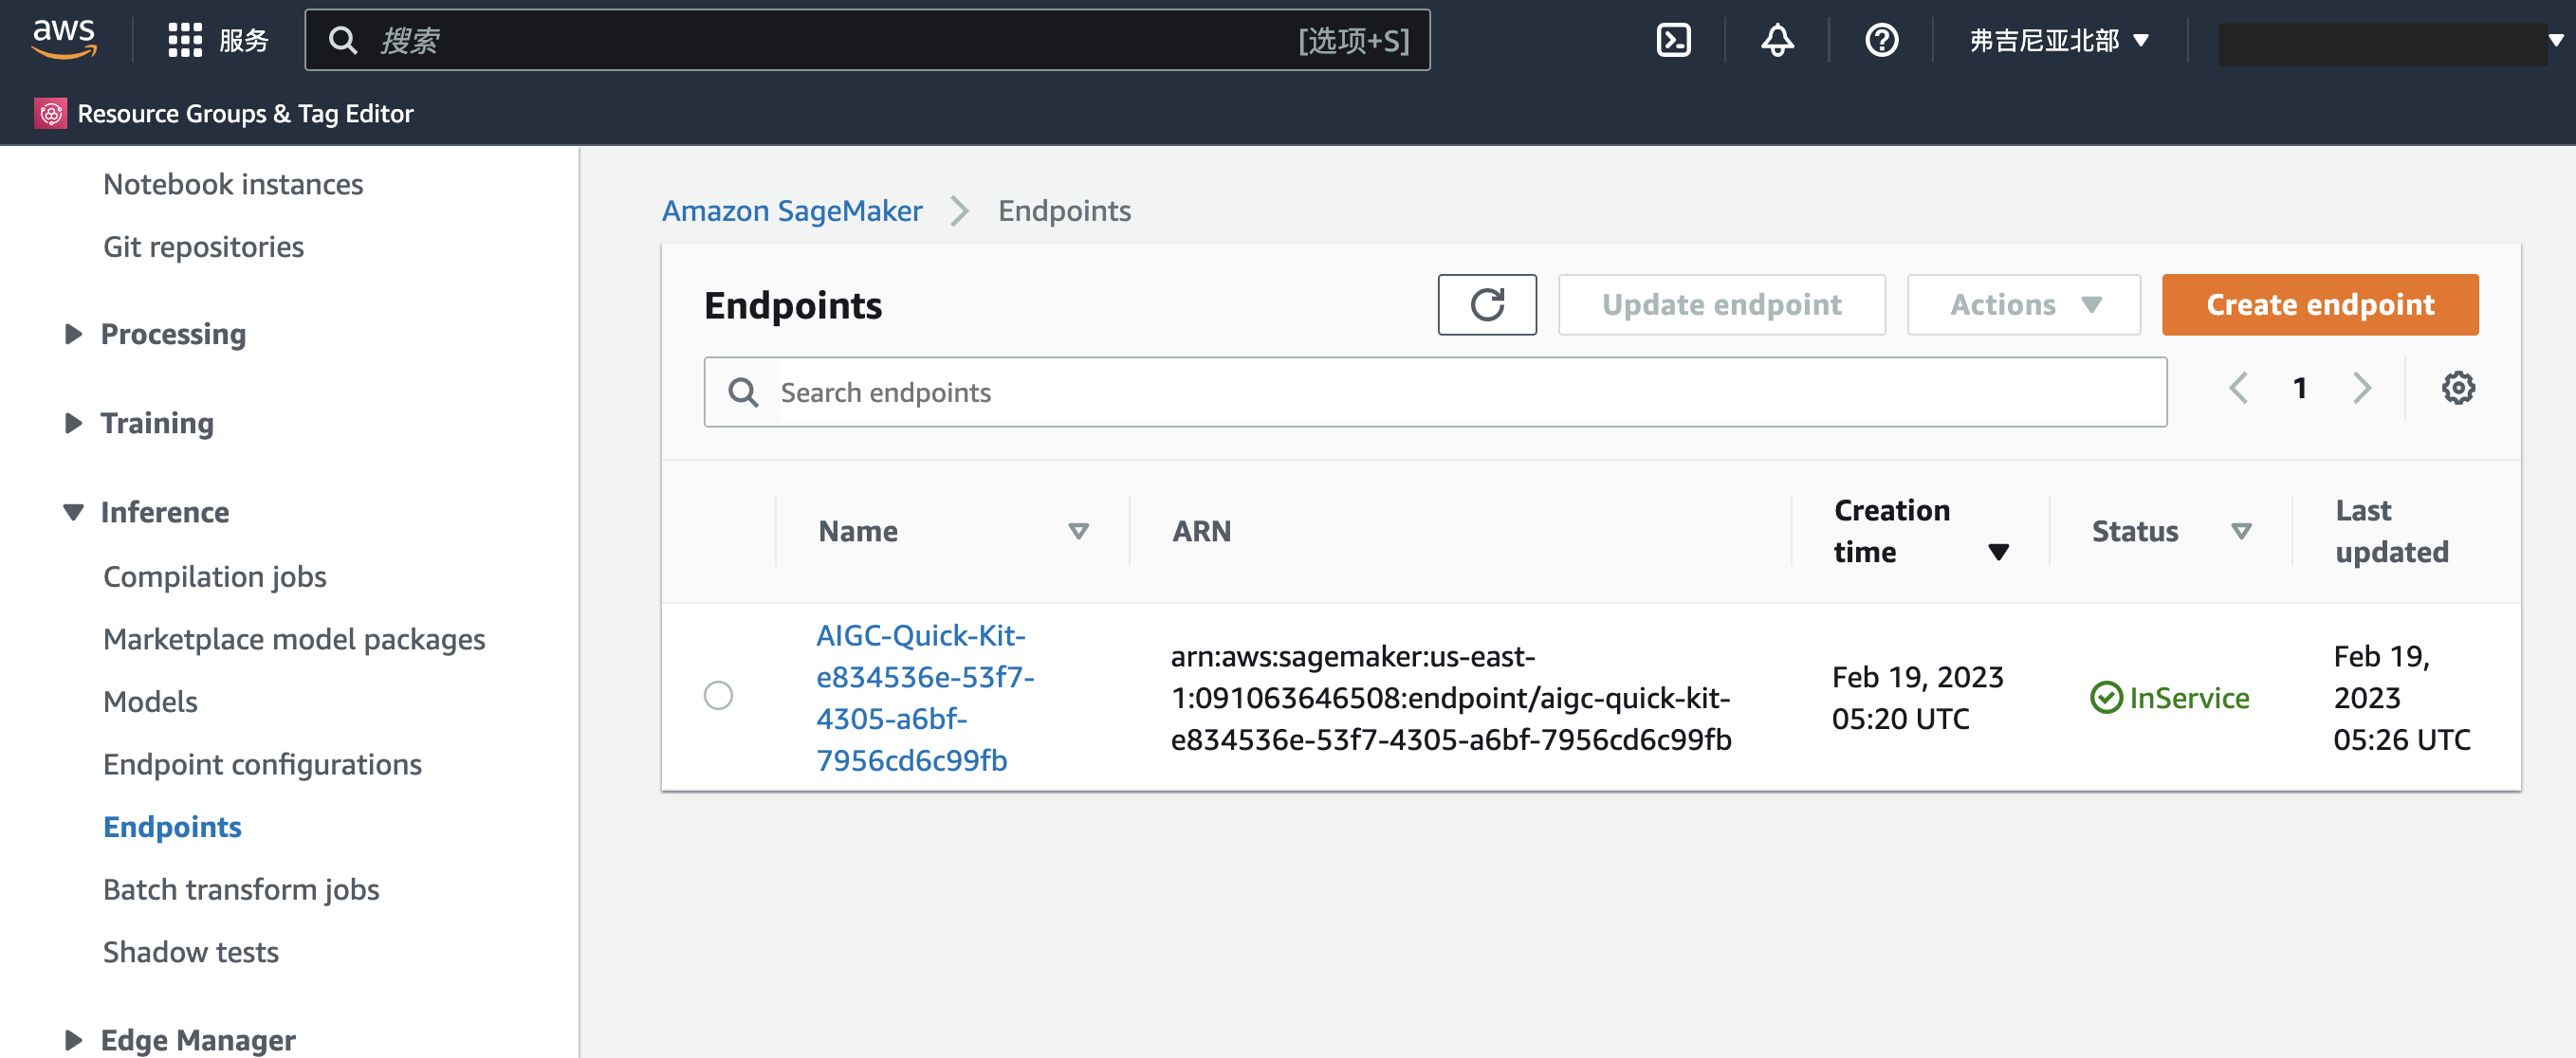
检查 sagemaker 中 endpoint 的生成


2.2 部署 SAM 应用
Note: SAM框架会使用 sagemaker-<region-code>-xxx 的桶,并生成 bucket policy,此policy会覆盖原有的。如果bucket原本就有bucket policy,请先复制出来,之后再append过去
- 安装部署,请参考此链接
- 到 lambda 指定目录下 ,执行 sam 命令 (需要在lambda 这个路径下执行, lambda代码来自 lambda-stable-diffusion/,container/ 这个folder 暂时没有用到)
cd inference/lambda
sam build
sam deploy --guided
- 在交互式会话中,输入cloudfront CNAME(必需步骤),其他参考值如下, 如接受默认值直接回车即可
	Stack Name [stable-diffusion]:
	AWS Region [cn-north-1]:
	Parameter DDBTableName [AIGC_CONFIG]:
	Parameter S3PREFIX [stablediffusion/asyncinvoke]:
	Parameter CloudfrontCNAME []: <这里需要填写备案过后的一个二级域名>
	#Shows you resources changes to be deployed and require a 'Y' to initiate deploy
	Confirm changes before deploy [Y/n]: Y
	#SAM needs permission to be able to create roles to connect to the resources in your template
	Allow SAM CLI IAM role creation [Y/n]: Y
	#Preserves the state of previously provisioned resources when an operation fails
	Disable rollback [y/N]: y
	InvokeFunction has no authentication. Is this okay? [y/N]: y
	Save arguments to configuration file [Y/n]:
	SAM configuration file [samconfig.toml]:
	SAM configuration environment [default]:
- 等待部署完毕。在 Route53 中配置添加 record, 将填入的CNAME 指向 Cloudfront 生成的 xxx.cloudfront.cn 地址
2.3 前端部署
- 准备前端文件并上传至 S3 bucket
cd /home/ec2-user/SageMaker/sagemaker-stablediffusion-quick-kit#获取default region
default_region=$(aws configure list | grep region | awk '{print $2}')
default_bucket=$(aws s3 ls | grep sagemaker | grep $default_region | awk '{print $3}')
aws s3 sync inference/front-ui/build s3://${default_bucket}/aigc/
- 配置 sagemaker endpoint。添加SageMaker Endpoint到API_Config, 在jupyter terminal中 将以下命令中的YourSagemakerEndpointName替换成自己环境中的endpoint name
cd inference/lambda
python ddb_util.py --action add --label anything-v4 --sm_endpoint <YourSagemakerEndpointName>
返回如下信息说明添加成功

3. 测试
在浏览器中输入 {CloudFront_CNAME_URL}/aigc/index.html 即可访问 stable diffusion UI
4. 改动
如果需要改动前端 JS 和 CSS 文件,请在 front-ui/src 中完成修改。
最后可运行下面语句,使用 react-scripts 来压缩 JS /css, source
npm build run
5. 已知限制
- 同步推理需要等待response,而API Gateway 30s timeout, 因此取决于最大生成image数, Lambda 和 Sagemaker inference instance type 的大小需要做相应调整,否则会引起API接口 timeout无法显示的情况
- 目前所有的请求是直接传到 Lambda和sagemaker endpoint 做处理的,如果用户大量并行执行,可能会存在并发问题。
- sagemaker 底层模型是支持 ControlNet 以图生图的, 但由于license限制,目前 UI 暂不支持 controlNet。