TouchOSC for Pianoteq
This is a TouchOSC layout to control Pianoteq.
Screenshots
Controls page:

Acoustic page:

Setup
TouchOSC
-
Install TouchOSC app:
https://hexler.net/products/touchosc#get -
Sync Pianoteq layout to your mobile device:
Note: This step is only required as long as the Pianoteq layout is not shipped directly with the TouchOSC app.
-
Install TouchOSC editor:
https://hexler.net/products/touchosc#resources -
Download TouchOSC layout:
Pianoteq.touchosc -
Open TouchOSC layout
Pianoteq.touchoscwith TouchOSC editor and sync it to your mobile device as described here:
https://hexler.net/docs/touchosc-editor-sync
-
-
Setup TouchOSC connection as described here:
https://hexler.net/docs/touchosc-configuration-connectionsNote: I recommend to use TouchOSC Bridge, because it was the easiest way for me to get a connection running. Use CoreMIDI on macOS if you do not want to install any additional software.
Pianoteq
-
Activate the TouchOSC midi input (as configured above):
- Open the
Devicespage in the Pianoteq options. - Activate the TouchOSC MIDI input next to
Active MIDI inputs.
- Open the
-
Install MIDI mapping:
Note: This step is only required as long as the MIDI mapping is not shipped directly with Pianoteq.
-
Download MIDI mapping:
TouchOSC.ptm -
Copy MIDI mapping
TouchOSC.ptmto theMidiMappingsfolder.To find the
MidiMappingsfolder:- Open the
MIDIpage in the Pianoteq options. - Open the
Global MIDI Mappingdropdown. - Click on
Browse...(see screenshot below).
- Open the
-
Load the Pianoteq MIDI mapping
TouchOSC(see screenshot below).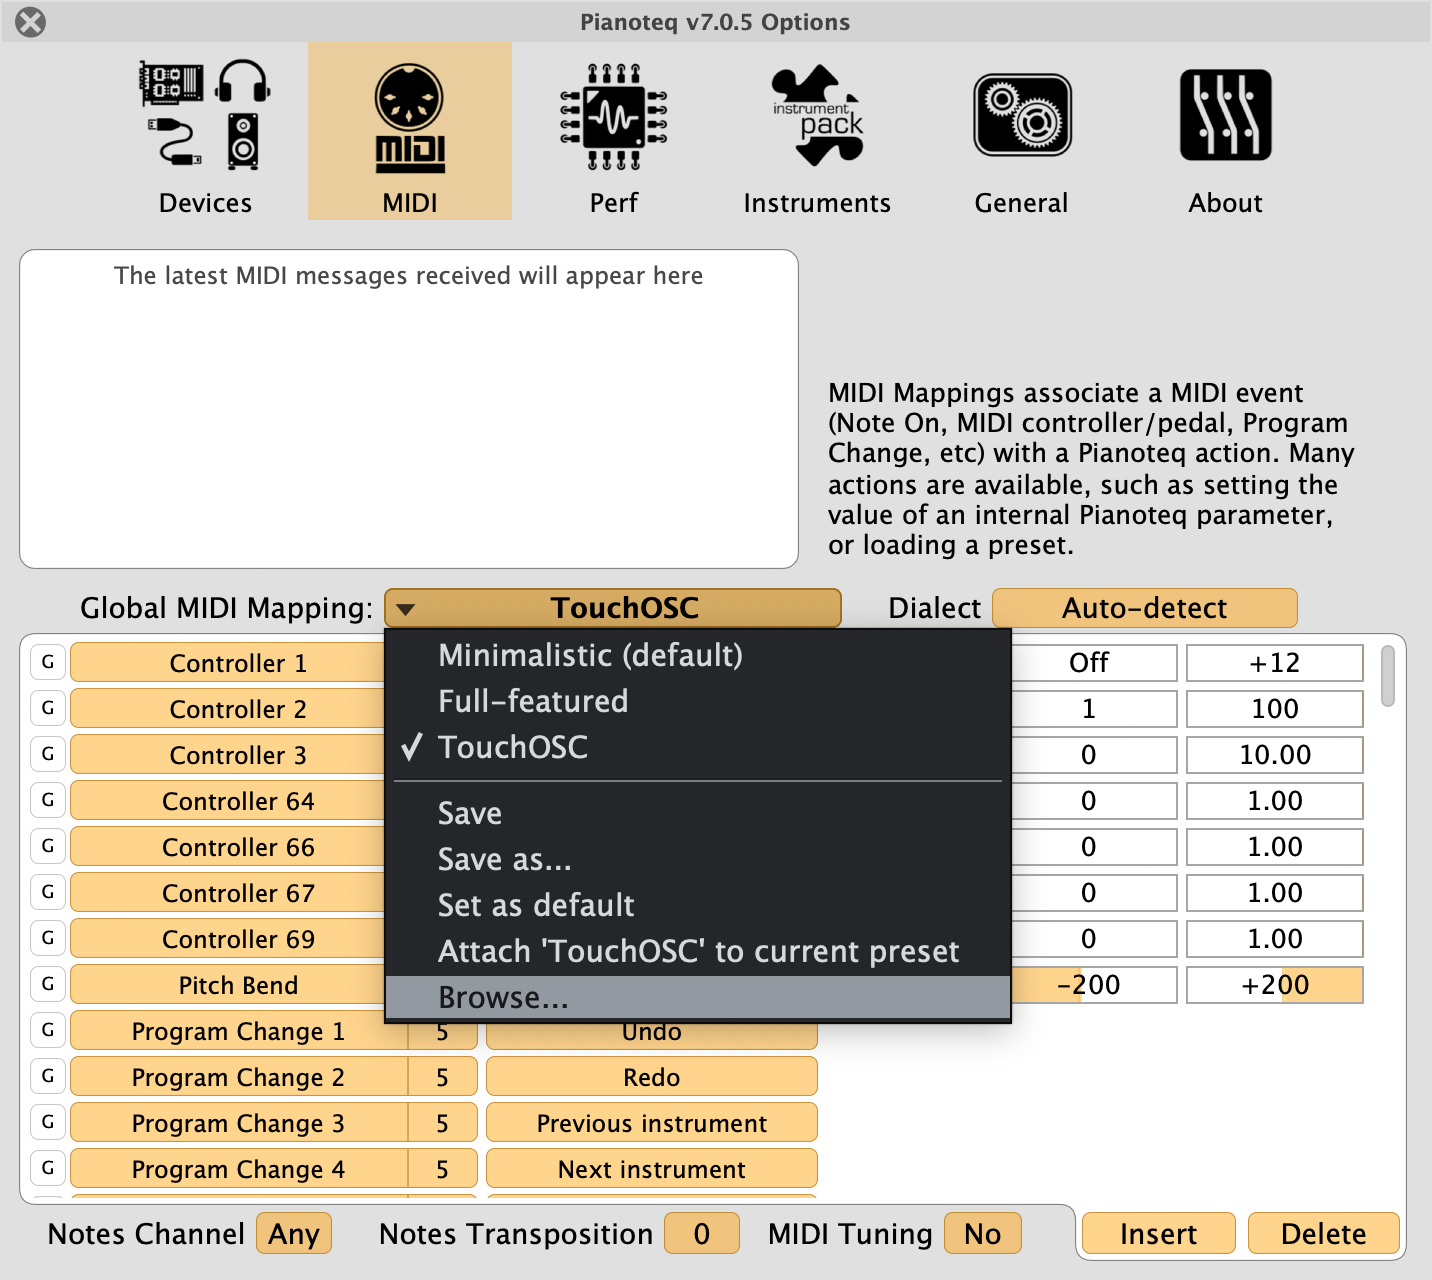
-
